
- Getting started
- Requirements
- Install Cordova and Ionic CLI tools
- Create a “Hello World” Cordova app with Ionic support
- Enable AndroidX
- Add the Scanbot Barcode SDK plugin
- Android settings
- It’s coding time
- Import the Scanbot SDK
- Initialize the Scanbot SDK
- Integrate the barcode scanner UI
- Display the scanned image and the barcodes
- Complete example projects
- Scanbot SDK (trial) license key
Getting started
We will use the Ionic framework with Cordova for this tutorial. Ionic is an open-source mobile toolkit for building high-quality, cross-platform mobile apps and web apps.
Requirements
- Node.js, npm
- Cordova CLI 9.x+
- Cordova Platforms:
- cordova-android 8.1+
- cordova-ios 5.1+
- For Android apps:
- Android SDK (API Level 21+), Platforms and Developer Tools
- Java JDK 8
- Make sure your environment variables ANDROID_HOME and ANDROID_SDK_ROOT are set according to this guide
- An Android phone for testing
- For iOS apps:
- macOS with latest Xcode and Command Line Tools
- iOS device running iOS 11 or later
Install Cordova and Ionic CLI tools
Install the Ionic and Cordova CLIs:
$ npm install -g ionic cordovaCreate a “Hello World” Cordova app with Ionic support
The following command will create a blank Cordova app with Ionic support:
$ ionic start my_awesome_cordova_barcode_scanner_app blank --type=ionic-angularIf you are asked to integrate the app with Capacitor, please refuse. We are going to use Cordova instead of Capacitor. If you are interested in the Capacitor framework, please check out this tutorial.
Next, let’s add iOS and Android as platforms to our app. First, let’s go into the folder Ionic just created for us:
$ cd my_awesome_cordova_barcode_scanner_app/iOS build and test run
Now run the following to add iOS as a platform:
$ ionic cordova platform add iosThis command will create the folder structure platforms/ios for iOS support. After this, we need to configure the signing settings. To do so, open platforms/ios/MyApp.xcworkspace in Xcode and adjust the Signing & Capabilities settings in the IDE by selecting your Apple developer account.
Then build and run the app in Xcode, or by using the following commands:
$ ionic cordova build ios$ ionic cordova run iosAfter the successful build, you will see the blank Cordova app running on your iPhone.
Android build and test run
Let’s do the same to add Android:
$ ionic cordova platform add androidThis command will create the folder structure platforms/android for Android support. Once the build is done, you can run your blank app on an Android device by using the following command:
$ ionic cordova run androidEnable AndroidX
By default, Cordova does not enable AndroidX in a new project. The AndroidX libraries – also called Android Jetpack libraries – replace the old Android Support Library. They are required by most modern plugins, including the Scanbot Barcode SDK plugin. To enable AndroidX, we have to add the following preference entry in the config.xml file of our project:
<platform name="android">
  <preference name="AndroidXEnabled" value="true" />
  ...
</platform>
Add the Scanbot Barcode SDK plugin
Let’s now add the Scanbot Barcode SDK Cordova Plugin to our project. The plugin is available as the NPM package cordova-plugin-scanbot-barcode-scanner. Use the following command to install it:
$ ionic cordova plugin add cordova-plugin-scanbot-barcode-scannerAndroid settings
Tuning AndroidManifest.xml
Since our application will work with high-resolution images, it’s best to add the attribute android:largeHeap="true" in the config.xml file of our project:
<platform name="android">
…
    <edit-config file="app/src/main/AndroidManifest.xml" mode="merge" target="/manifest/application" xmlns:android="http://schemas.android.com/apk/res/android">
        <application android:largeHeap="true" />p
    </edit-config>
</platform>
It’s coding time
Now, let’s write some TypeScript and HTML code! We are going to adjust the src/app/app.components.ts file, which is the entry point of our Cordova app.
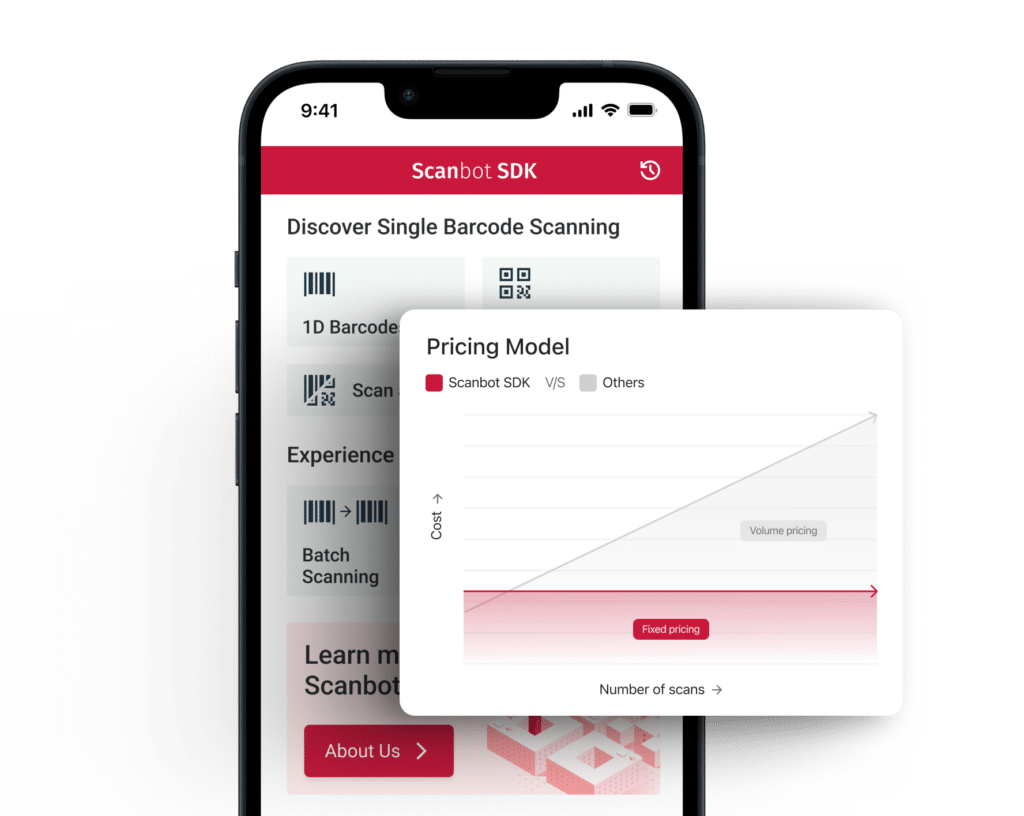
Scanbot SDK:
Unlimited scanning at a fixed price
Your reliable data capture solution for mobile and web app integration.
Supports all common platforms and frameworks.
Import the Scanbot SDK
First, we will import the Scanbot SDK into our app. Add the following to app.components.ts: import ScanbotBarcodeSDK, { ScanbotBarcodeSDKConfiguration } from 'cordova-plugin-scanbot-barcode-scanner';
Initialize the Scanbot SDK
The Scanbot SDK for Cordova must be initialized before usage. Make sure to call the initialization after the Cordova event deviceready has fired, which we check for with platform.ready().
export class MyApp {
  ...
  private barcodeSDK = ScanbotBarcodeSDK.promisify();
  constructor(platform: Platform, ...) {
    platform.ready().then(() => {
      ...
      this.initializeScanbotBarcodeSdk();
    });
  }

  async initializeScanbotBarcodeSdk(){
    try {
      const config: ScanbotBarcodeSDKConfiguration = {
        licenseKey: '',
      };
      await this.barcodeSDK.initializeSdk(config);
    } catch (e) {
      alert(JSON.stringify(e));
    }
  }
  ...
}
For the full API reference of the Cordova Scanbot Barcode SDK, please check out the documentation.
Integrate the barcode scanner UI
The Scanbot Barcode Scanner SDK for Cordova provides a scanner UI for barcode scanning. The Barcode Scanner is a complete and ready-to-use screen component. It can be easily integrated with just a few lines of code using the API method barcodeSDK.startBarcodeScanner(configs: BarcodeScannerConfiguration).
Let’s put the SDK call in a simple function named scanBarcode() so that we can bind it to a clickable UI item later. Add the following code in src/app/pages/home/home.ts:
import { Component } from '@angular/core';
import { NavController } from 'ionic-angular';

import ScanbotBarcodeSDK, { BarcodeResult, BarcodeScannerConfiguration } from 'cordova-plugin-scanbot-barcode-scanner';
import { DomSanitizer } from '@angular/platform-browser';

@Component({
  selector: 'page-home',
  templateUrl: 'home.html'
})
export class HomePage {
  private barcodeSdk = ScanbotBarcodeSDK.promisify();
  public imageFileUri: String = '';
  public barcodes: any;
  constructor(public navCtrl: NavController, public sanitizer: DomSanitizer) {
  }

  async scanBarcode(){
    const config: BarcodeScannerConfiguration = {
      barcodeImageGenerationType: ('FROM_VIDEO_FRAME'), // Quickly generate a barcode picture from the last video frame. Default is 'NONE'.
      barcodeFormats: (['ALL_FORMATS']),
    };

    try {
      const result = await this.barcodeSdk.startBarcodeScanner(config);
      if (result.status === 'OK') {
        this.showBarcodeResults(result);
      }
    } catch (e) {
      alert(JSON.stringify(e));
    }
  }

  async showBarcodeResults(result: BarcodeResult) {
    console.log(result);
    const fileUri = result.imageFileUri;
    // see https://ionicframework.com/docs/building/webview/#file-protocol
    const convertedUri = (window as any).Ionic.WebView.convertFileSrc(fileUri);
    // see https://angular.io/guide/security#bypass-security-apis
    this.imageFileUri = this.sanitizer.bypassSecurityTrustUrl(convertedUri) as string;
    this.barcodes = result.barcodes;
  }
}
With the BarcodeScannerConfiguration, you can pass further config parameters to customize colors, text resources, and the behavior of some features of the Barcode Scanner. See the API docs for more details.
The function sanitizeFileUri(fileUri) allows us to display an image file by converting its file URI (file://) into a URL compatible with Ionic WebView.
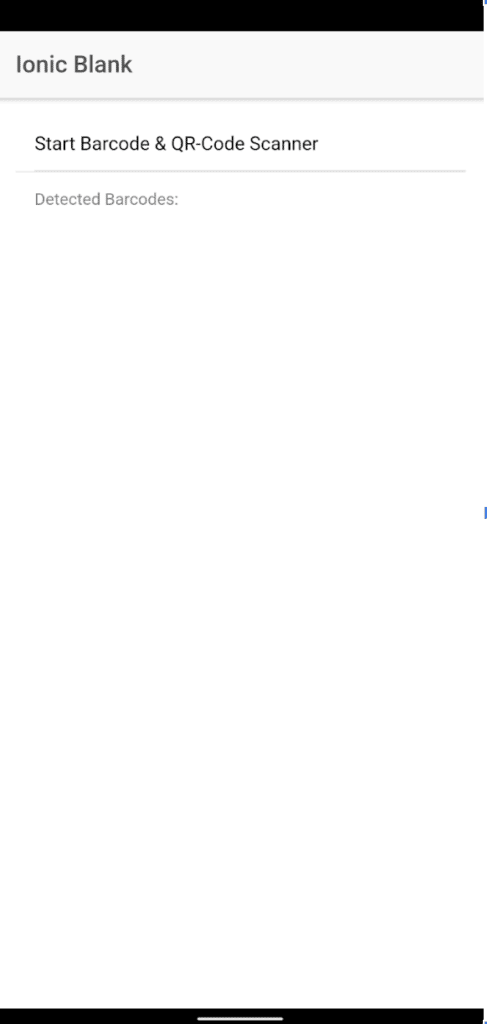
Now add a clickable UI item <ion-item> in src/app/pages/home/home.html and bind our scanBarcode() method to a click event:
<ion-content padding>
   <ion-item (click)="scanBarcode()">
    <ion-label>Start Barcode & QR-Code Scanner</ion-label>
  </ion-item>
</ion-content>
Display the scanned image and the barcodes
Finally, let’s show a preview image, which we can do using the JPG file URI of a BarcodeResult object. For that, we will use an image UI element <img> with imageFileUri as the image source. We will also print the barcode contents in an Ionic list using the barcodes variable, which contains barcodes in the scanning result.
Add the <img> element and the barcode list in src/app/pages/home/home.html:
<ion-content padding>
  <ion-item (click)="scanBarcode()">
    <ion-label>Start Barcode & QR-Code Scanner</ion-label>
  </ion-item>
  ...
  <div *ngIf="imageFileUri">
    <p>Snapped Image:</p>
    <img [src]="imageFileUri" style="width: 60%" />
  </div>
<ion-list-header>
    Detected Barcodes:
  </ion-list-header>
  <ion-item *ngFor="let barcode of barcodes">
    <ion-label>
      <h3>Type: {{ barcode.type }}</h3>
      <p>Value: {{ barcode.text }}</p>
    </ion-label>
  </ion-item>
</ion-content>
That’s it! Now run the complete project:
Android
$ ionic cordova run androidiOS
$ ionic cordova build iosThen, run the app in Xcode.
The app should be now able to scan barcodes and display both an image and the extracted data:

Complete example projects
To get off to a flying start, check out the following example projects on GitHub:
- Small example project for this tutorial: https://github.com/doo/
- Full example project: https://github.com/doo/scanbot-barcode-scanner-sdk-example-cordova-ionic
It demonstrates the integration of all API methods of the Scanbot Barcode SDK Cordova Plugin, Barcode Reader/QR Scanner Ready-to-Use UI components, and barcode detection on still images.
Scanbot SDK (trial) license key
Please note: The Scanbot SDK will run without a license key for one minute per session! After the trial period has expired, all Scanbot Barcode SDK functions, as well as the UI components, will stop working or may be terminated.
You can get an unrestricted, no-strings-attached 7-day trial license for free.
As the Scanbot SDK license key is bound to an app identifier (i.e., Application ID on Android and Bundle Identifier on iOS), you will have to use the app identifier you set. For this project, the app identifier is io.ionic.starter, because that is the default configuration of Cordova with Ionic. Of course, you can also use the ID of your app to get a trial license. Please also note that app IDs are case-sensitive!
Where to find the app identifier:
- For Android, see
applicationIdin theplatforms/android/app/src/main/build.gradlefile. - For iOS, see
Bundle Identifierin the General settings tab in the Xcode IDE.
Happy coding! 👩💻👨💻
💡 Did you have trouble with this tutorial?
We offer free integration support for the implementation and testing of the Scanbot SDK. If you encounter technical issues or need advice on choosing the appropriate framework or features, join our Slack or MS Teams or send us an email to receive your free support.