Document edge detection is a computer vision technique used to identify and extract the boundaries of a document (such as a paper, receipt, or ID card) in an image. It’s commonly used in document scanning applications to isolate the document Document edge detection is a computer vision technique to identify the boundaries of a document (such as a sheet of paper, receipt, or ID card) in an image. It’s commonly used in document scanning applications to isolate the document from the background. This is the basis for further processing like perspective correction, image enhancement, and accurate text extraction (OCR).
Here is how it works:
- The image is converted to grayscale and often blurred to reduce noise.
- Algorithms try to detect all edges in the image.
- They then try to identify the largest (or most document-shaped) contour.
If the document’s edges have been successfully detected, additional steps like perspective transformation, image cropping, and contrast or brightness adjustments can be used to prepare the image for further processing.
Document edge detection has several practical advantages, especially in applications like document scanning and automated processing:
- Isolating the document area reduces noise, improving OCR performance.
- It eliminates the need for manual cropping and alignment.
- It reduces file size by discarding non-document areas.
- Applying edge detection to every frame of a live camera stream enables real-time document recognition.
- Drawing document contours on-screen improves the user experience.
Let’s take a closer look at how you can take an input image and automatically detect a document’s edges on it.
We’ll use OpenCV and the Canny edge detection algorithm to draw document borders on an image and on a live camera stream. After that, we’ll discuss some shortcomings – and why modern mobile solutions use machine learning instead.
How to detect document edges in OpenCV – step-by-step instructions
The computer vision library OpenCV is a popular choice for detecting edges in an image. We’ll show you which operations you need to apply and what the Python code for them looks like.
Before we begin, we need to load the input image – like the one above – and make a copy on which we’ll later draw the document edges.
image = cv2.imread(image_path)
original = image.copy()
Step 1: Convert the image to grayscale
Edge detection relies on identifying changes in intensity rather than color, so the algorithms are designed to work on single-channel (grayscale) images instead of multi-channel (red, green, blue) ones.
Therefore, the first step is to convert our input image to grayscale.
grayscale = cv2.cvtColor(image, cv2.COLOR_BGR2GRAY)
Step 2: Remove image noise through blurring
Although it might sound unintuitive, making the image slightly blurry can help with edge detection. That’s because this removes grainy image noise – like that resulting from taking a photo in poor light, among other things.
So let’s apply a slight Gaussian blur to our image to remove image noise.
blurred = cv2.GaussianBlur(grayscale, (5, 5), 0)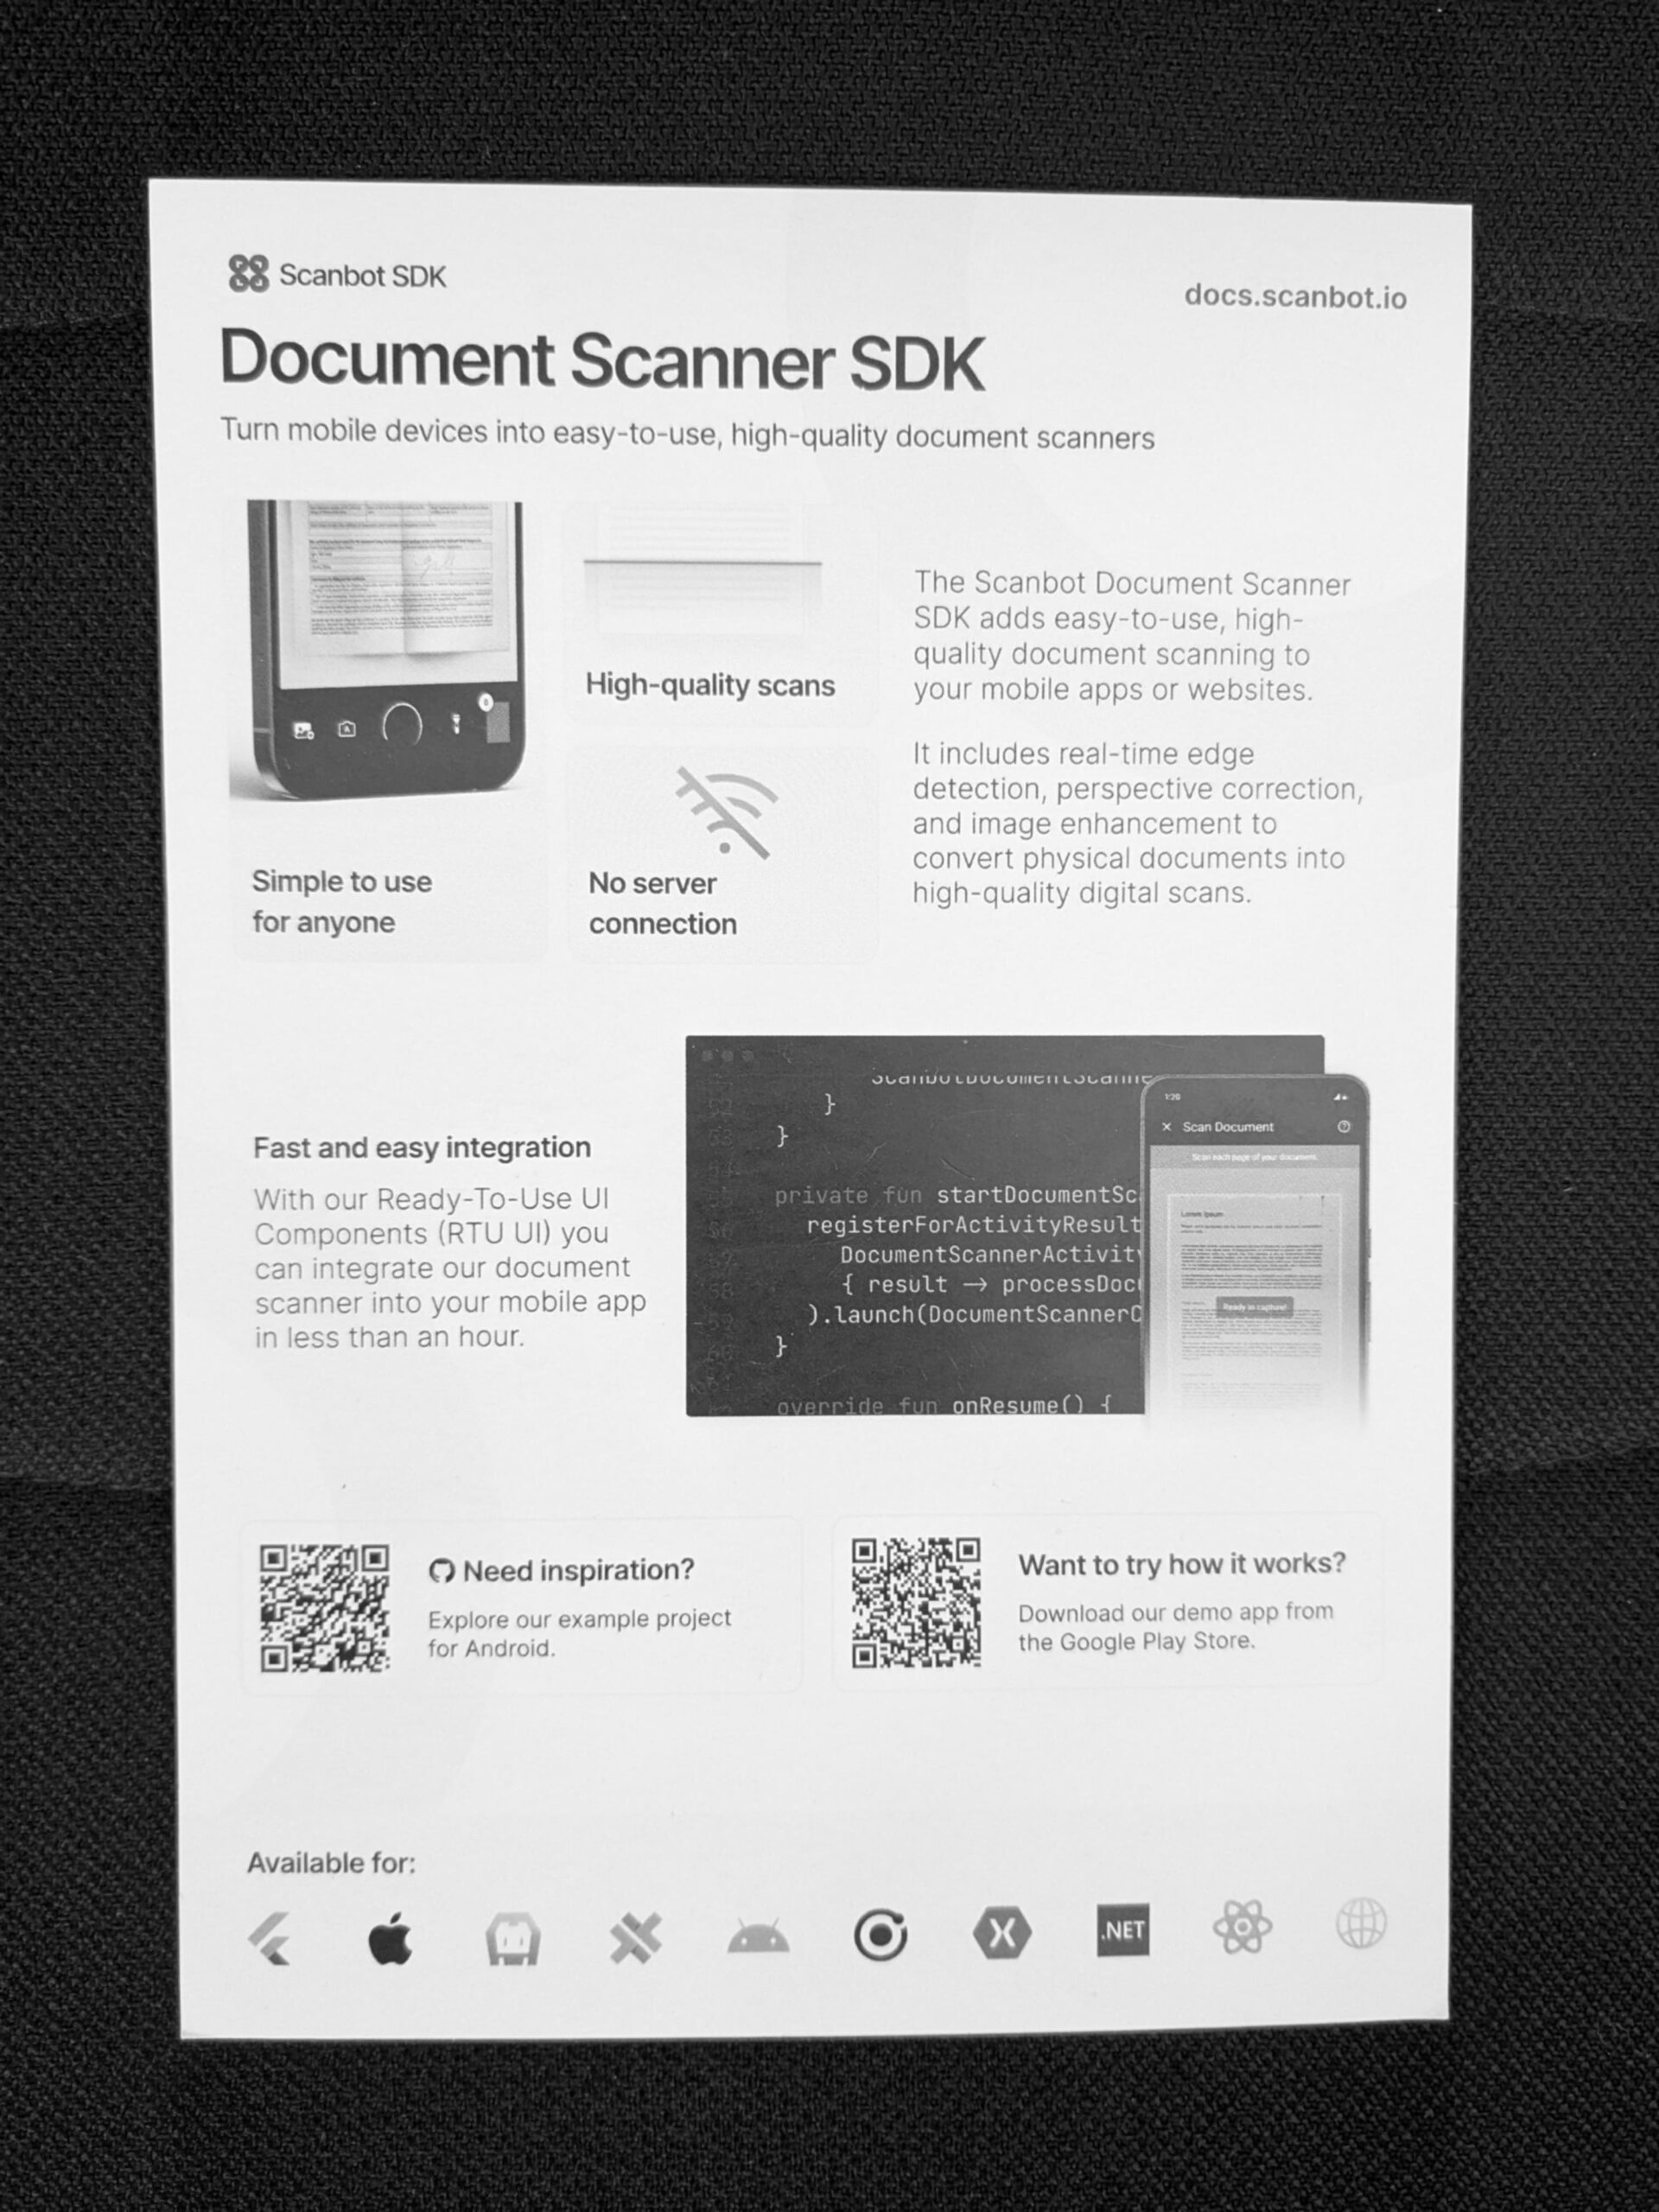
Step 3: Binarize the image
This step isn’t always necessary, but it can help further distinguish the white document from the image background. Binarizing the image means turning all pixels to either black or white, with no increments in between.
We’re going to binarize our image using Otsu’s method, which automatically picks brightness threshold values.
_, binary = cv2.threshold(blurred, 0, 255, cv2.THRESH_BINARY + cv2.THRESH_OTSU)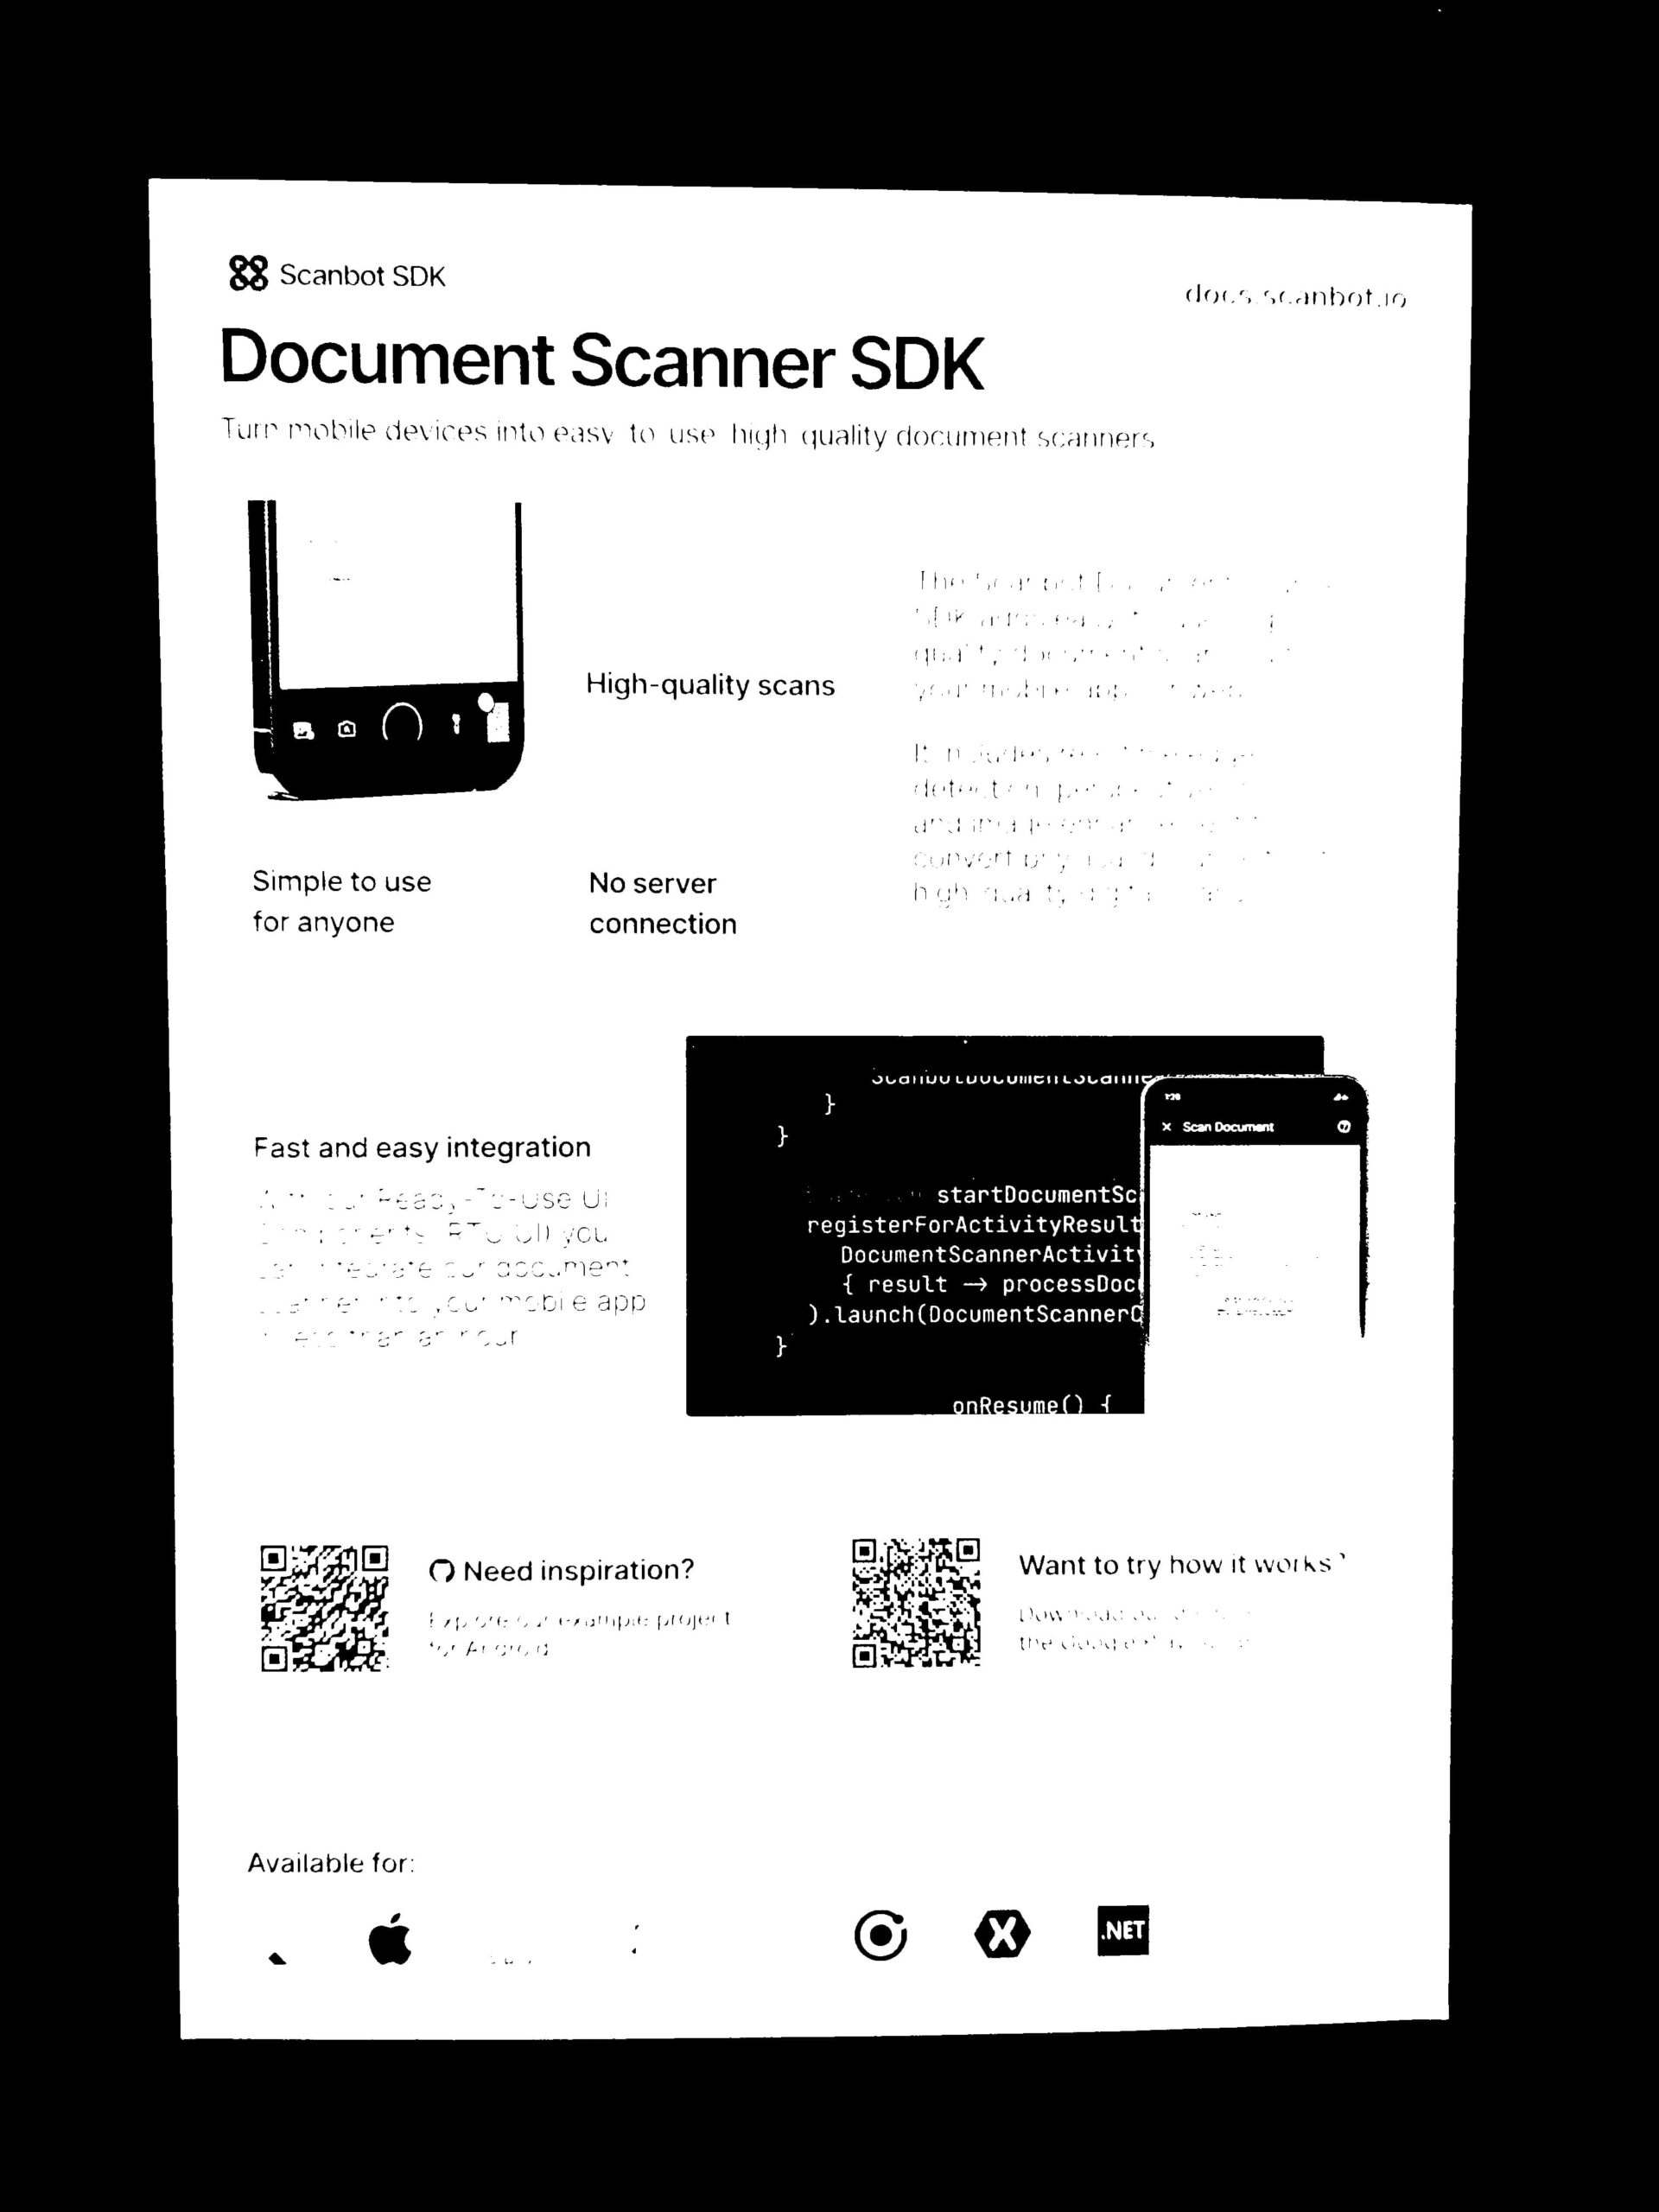
Step 4: Perform Canny edge detection
Now we’re getting to the actual edge detection part. The Canny edge detector works by identifying areas with strong intensity changes and then thinning them into edges by suppressing pixels that are not considered part of an edge.
Canny uses two thresholds for the change intensity: It ignores very weak edges and accepts strong edges. In between these values, weak edges are connected to strong edges if they are adjacent, and suppressed if not. This improves continuous edge detection and reduces false positives.
canny = cv2.Canny(binary, 50, 150)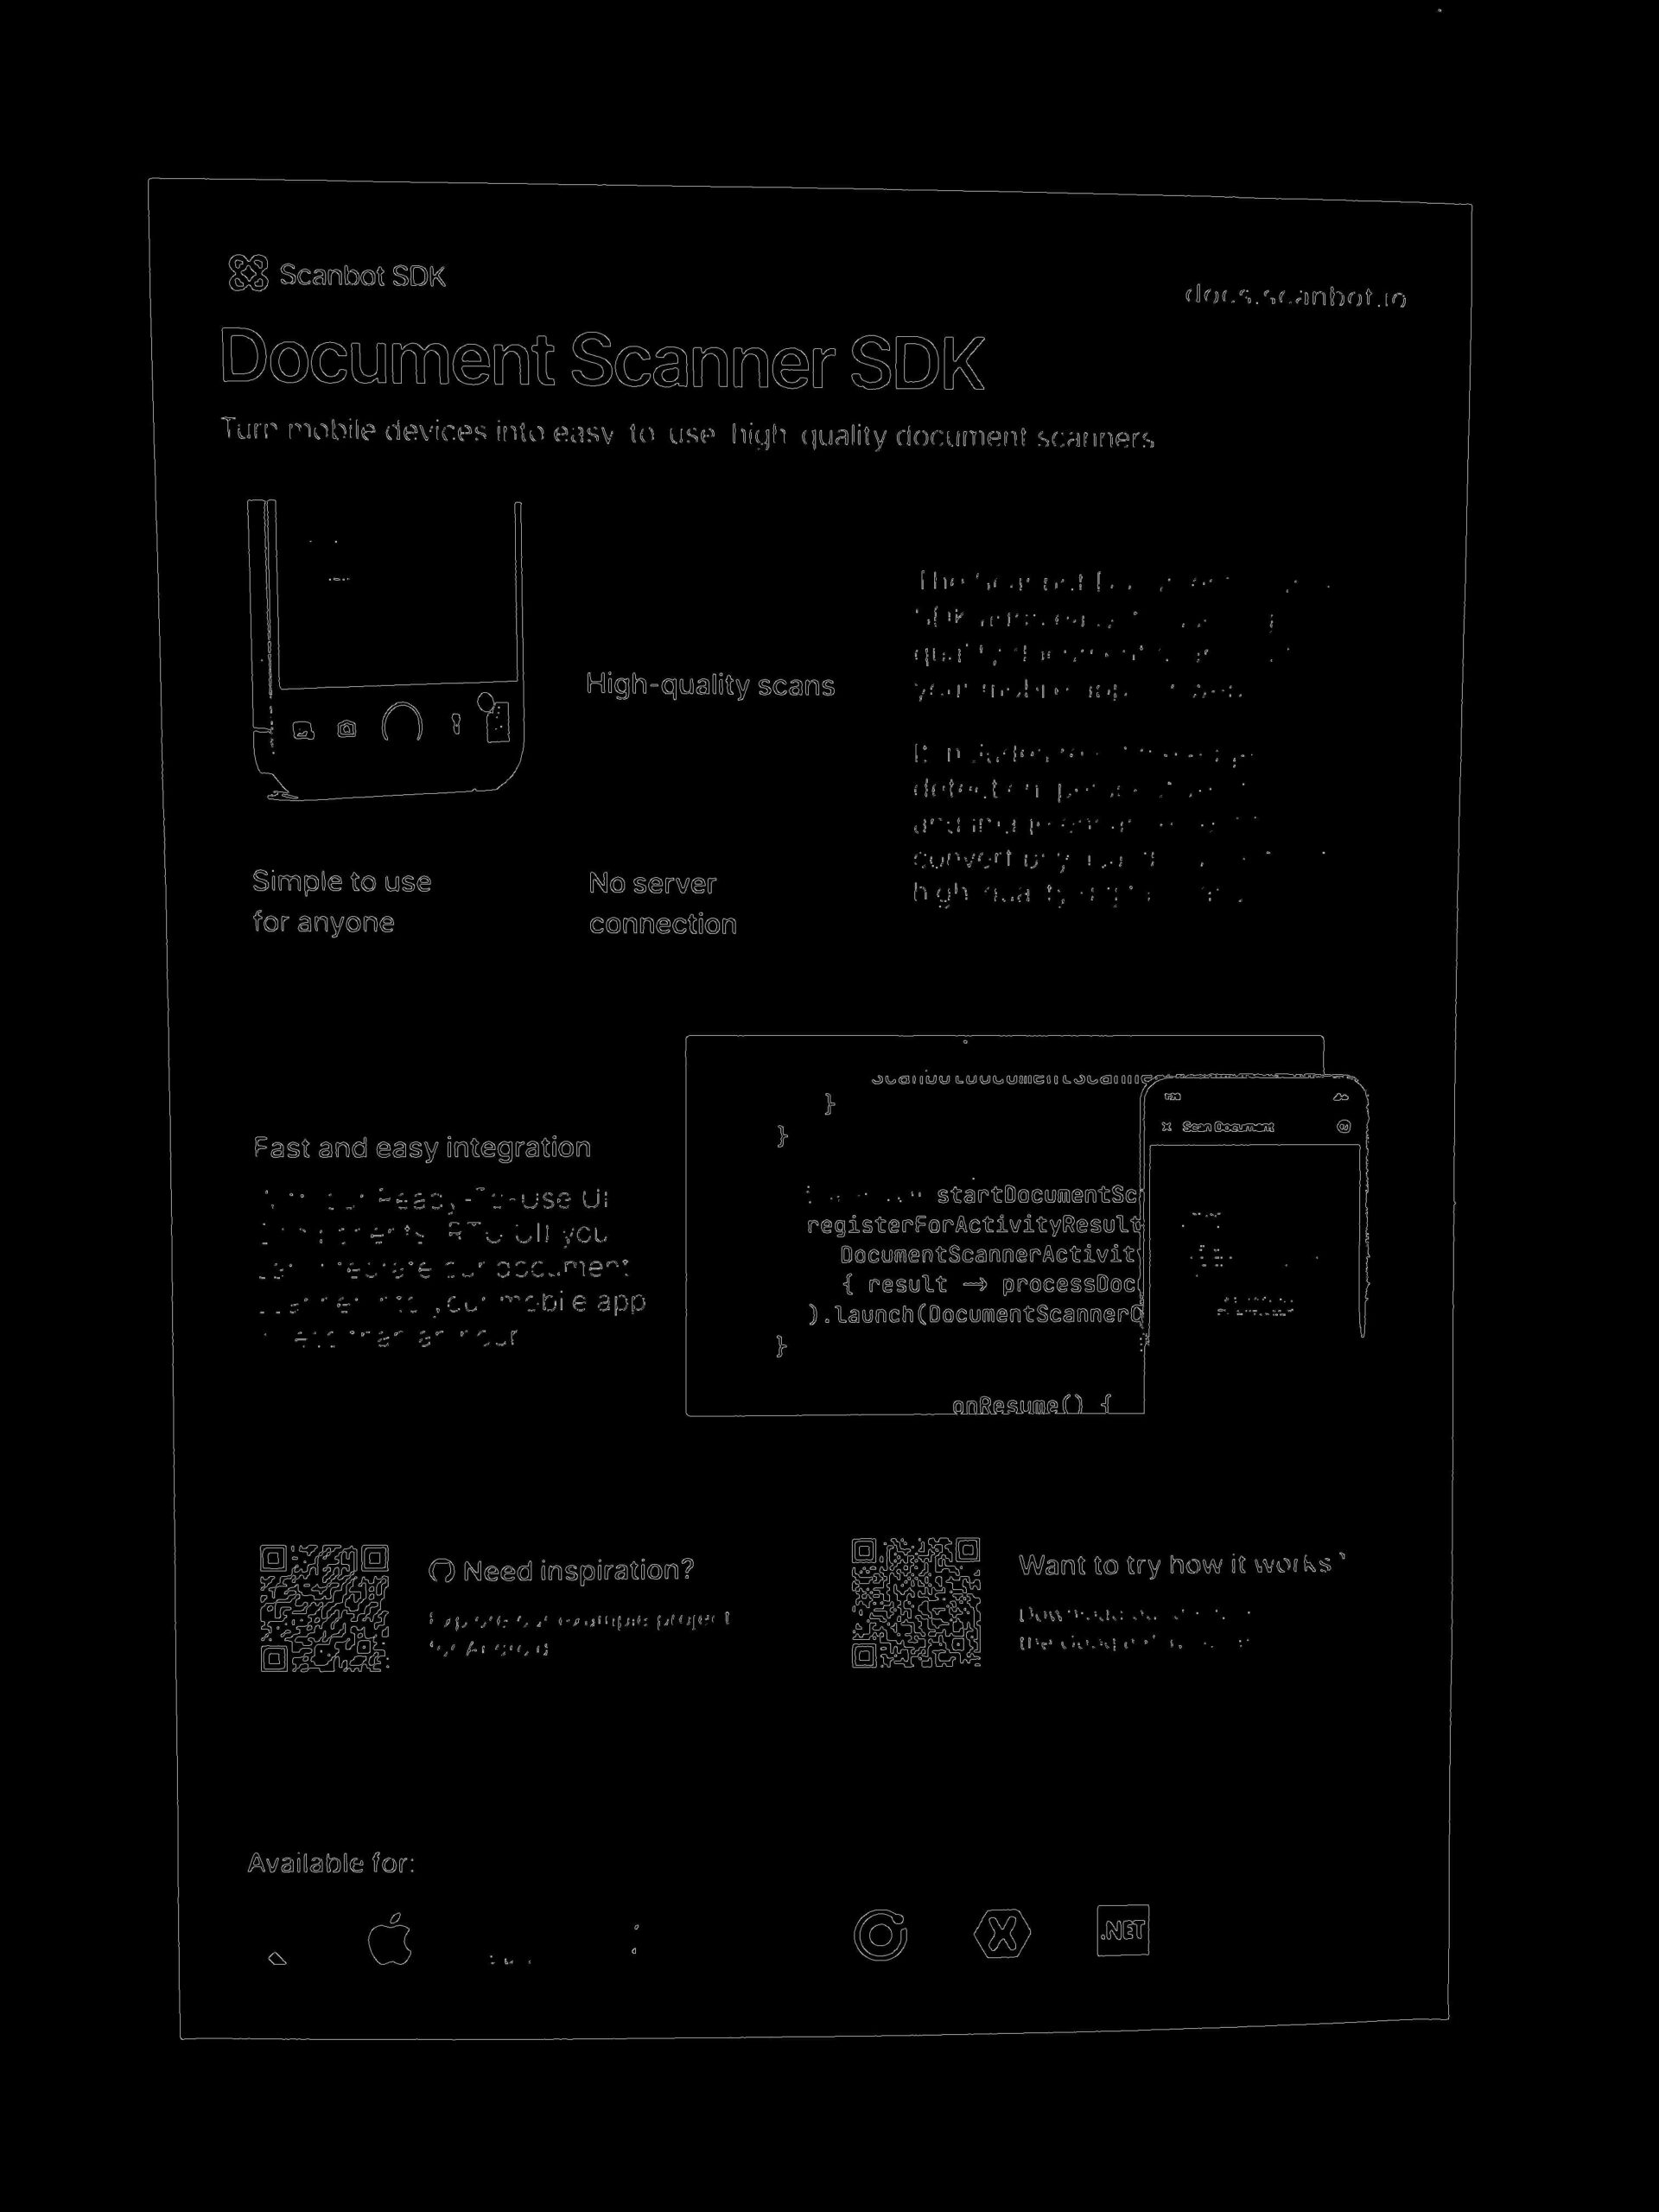
Step 5: Find the contours and sort them by area
You might wonder why we’re now looking for contours when we’ve already detected the document’s edges. That’s because in OpenCV, “edge” and “contour” are different concepts.
Edges represent points in an image with a significant change in intensity – such as those output by the Canny algorithm. Edges don’t necessarily need to form closed shapes.
Conversely, contours refer to continuous, closed curves that outline the boundaries of objects in an image. Contours are often derived from edges, which requires additional processing to ensure they form closed loops.
Therefore, detecting edges and finding contours complement each other. Edge detection highlights the sharp intensity changes to locate potential boundaries, while contour detection organizes these boundaries into meaningful shapes. These shapes, finally, enable the accurate identification of the document’s outer borders.
With this in mind, let’s look for object contours in our image and sort them by area, since the document is likely one of the biggest objects in the image.
contours, _ = cv2.findContours(canny, cv2.RETR_EXTERNAL, cv2.CHAIN_APPROX_SIMPLE)
contours = sorted(contours, key=cv2.contourArea, reverse=True)[:5]
Step 6: Find the contour matching a document shape
Now we’re at the point where we can calculate the outer border of our document. We’ll iterate through the five largest contours, calculating their perimeter length and approximating them to a shape with fewer points. If this results in a shape with exactly four points, we assume that we’ve found the document.
for contour in contours:
    peri = cv2.arcLength(contour, True)
    approx = cv2.approxPolyDP(contour, 0.02 * peri, True)

    if len(approx) == 4:
        doc_contour = approx
        break
else:
    print("No document detected.")
    return None
Step 7: Draw the document’s contours onto the image
Finally, let’s draw the document’s shape onto the copy of our original image that we created in the beginning.
cv2.drawContours(original, [doc_contour], -1, (0, 255, 0), 10)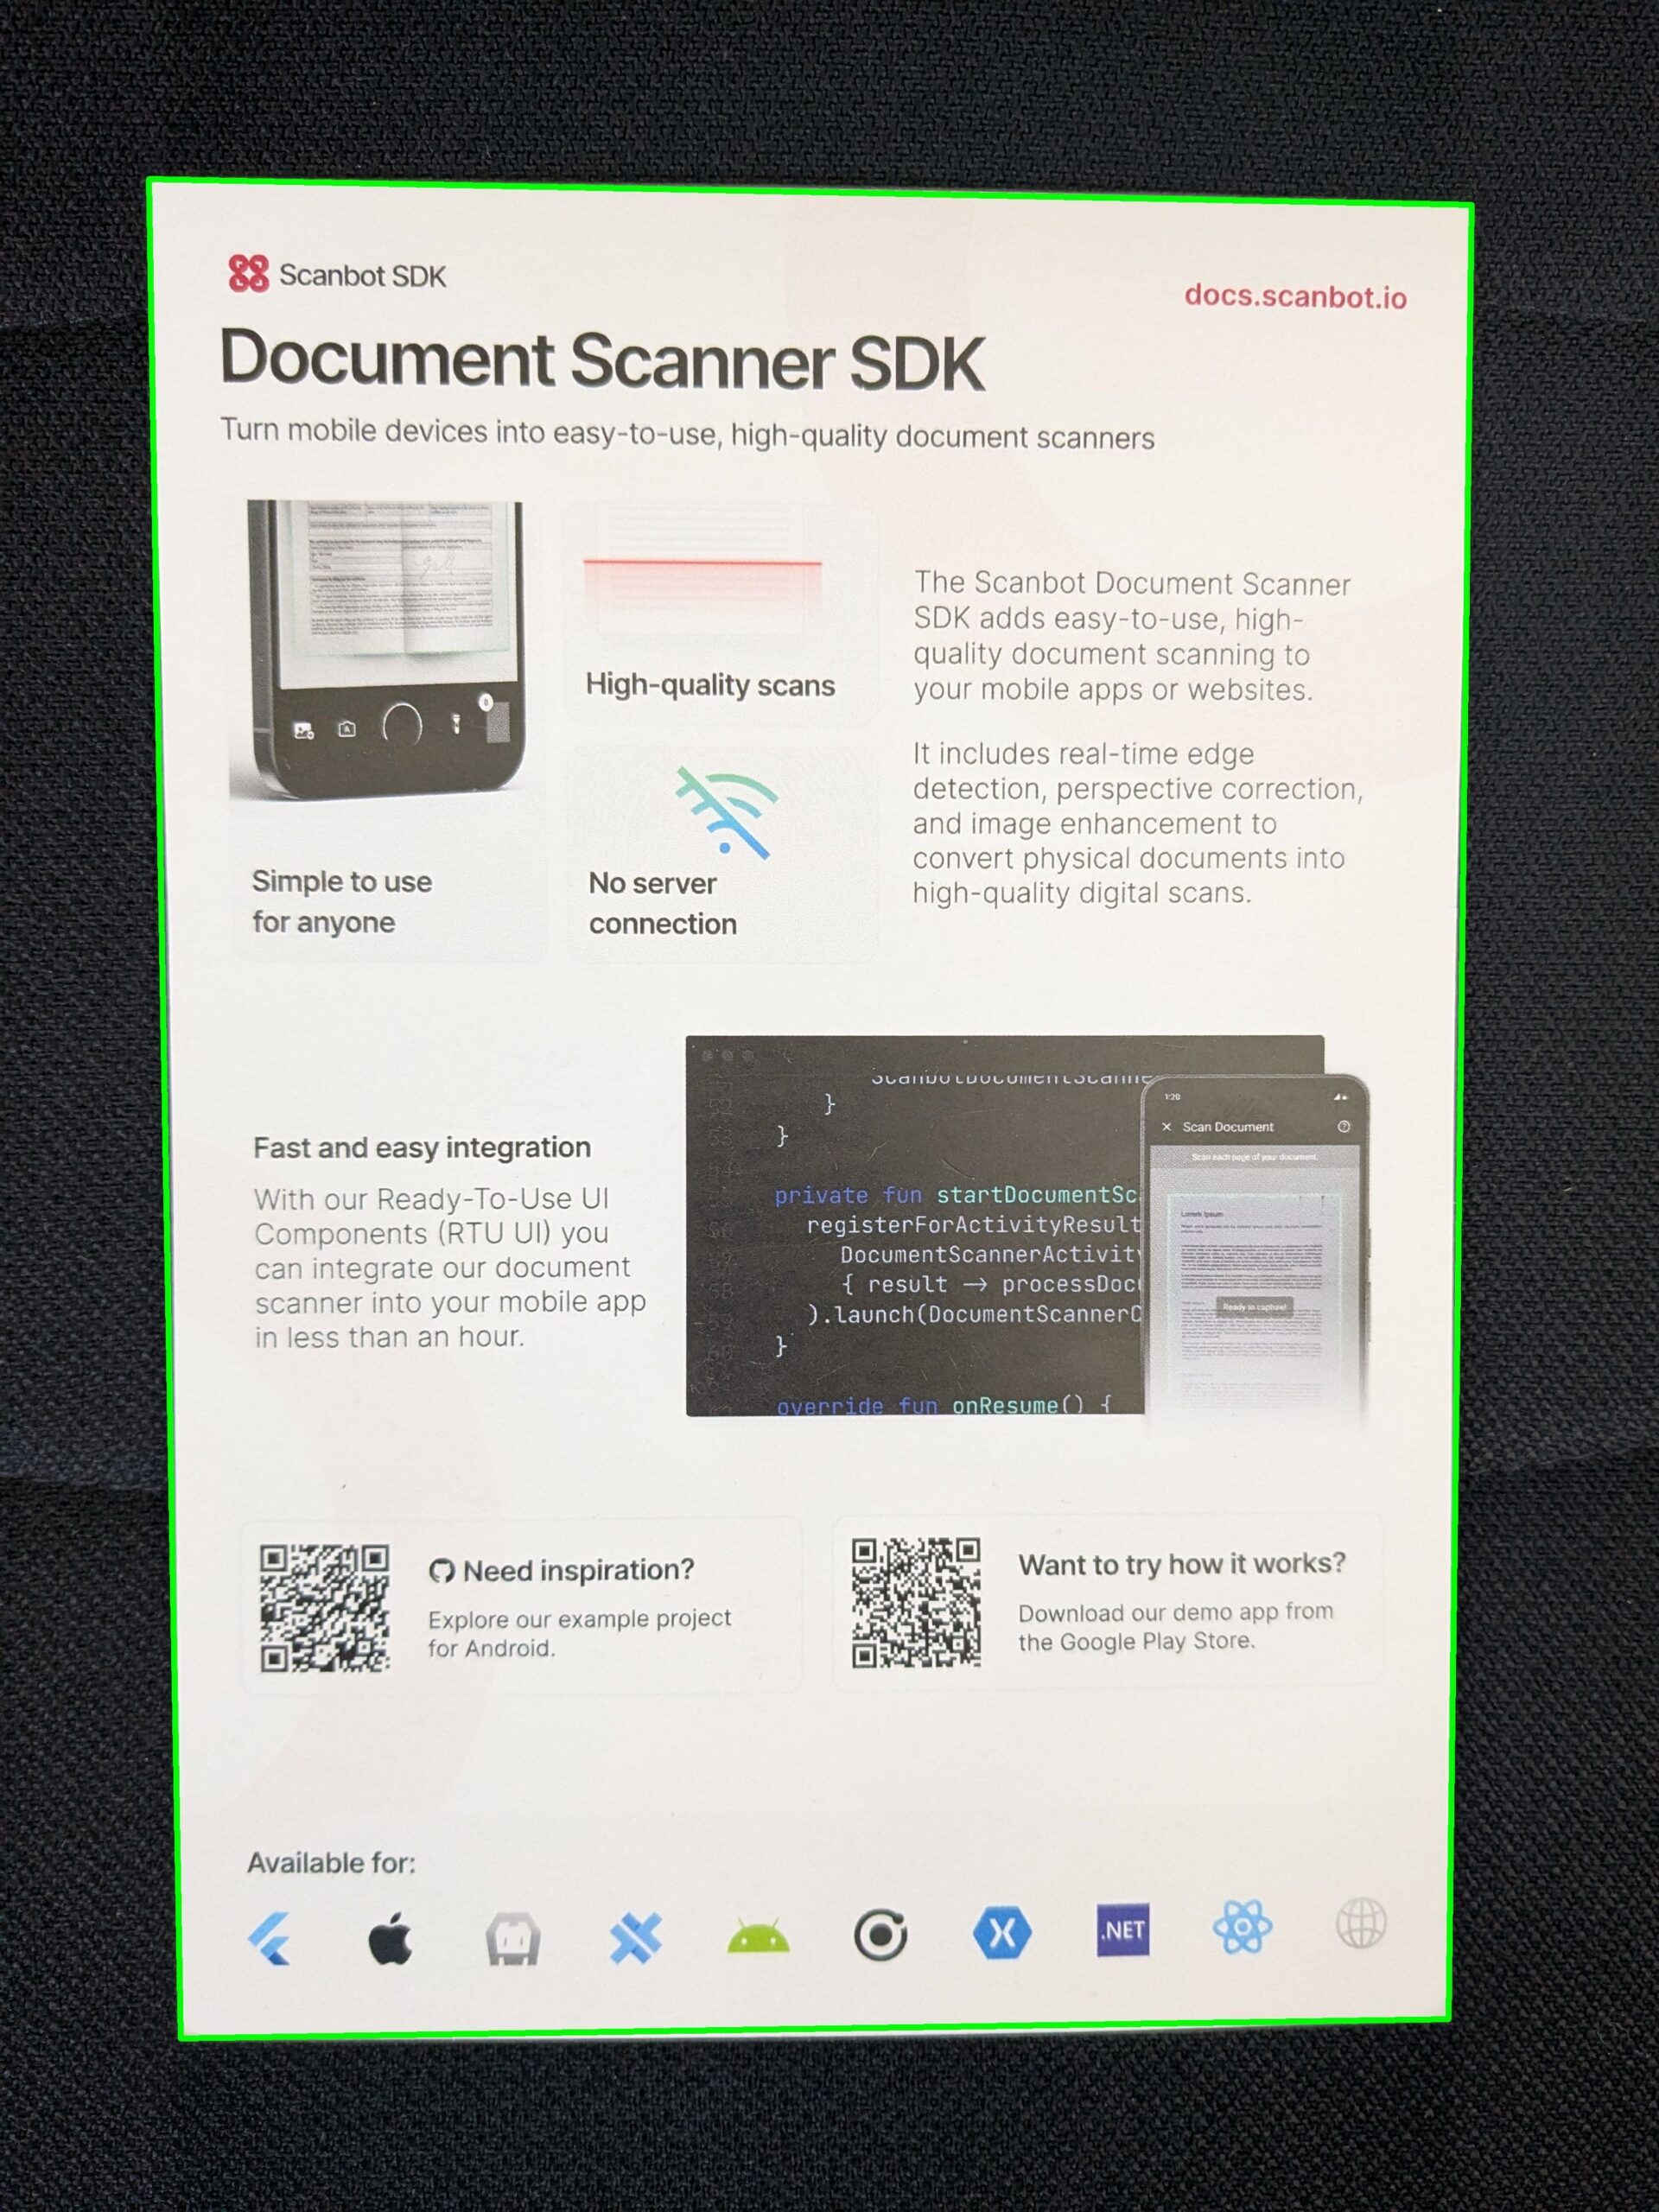
🎉 Congratulations, you performed document edge detection on an image!
To turn these steps into a Python script, let’s just wrap everything into a function and call it with the path to the input image:
import cv2

def detect_document_edges(image_path):
    image = cv2.imread(image_path)
    original = image.copy()

    grayscale = cv2.cvtColor(image, cv2.COLOR_BGR2GRAY)
    cv2.imshow('Grayscale', grayscale)

    blurred = cv2.GaussianBlur(grayscale, (5, 5), 0)
    cv2.imshow('Blurred', blurred)

    _, binary = cv2.threshold(blurred, 0, 255, cv2.THRESH_BINARY + cv2.THRESH_OTSU)
    cv2.imshow('Binary', binary)

    canny = cv2.Canny(binary, 50, 150)
    cv2.imshow('Canny edge detection', canny)

    contours, _ = cv2.findContours(canny, cv2.RETR_EXTERNAL, cv2.CHAIN_APPROX_SIMPLE)
    contours = sorted(contours, key=cv2.contourArea, reverse=True)[:5]

    for contour in contours:
        peri = cv2.arcLength(contour, True)
        approx = cv2.approxPolyDP(contour, 0.02 * peri, True)

        if len(approx) == 4:
            doc_contour = approx
            break
    else:
        print("No document detected.")
        return None

    cv2.drawContours(original, [doc_contour], -1, (0, 255, 0), 10)
    cv2.imshow("Detected document contour", original)

    cv2.waitKey(0)
    cv2.destroyAllWindows()

detect_document_edges('input-image.jpg')
Bonus: Detecting document edges on a live camera stream
It’s fairly easy to modify the script so it performs document edge detection in real time. All we need to do is capture frames from the camera stream and process each frame in a loop.
In the code below, the first four windows with the intermediate results are commented out to save on processing power, but feel free to enable them if your machine is up to the task.
import cv2

def detect_document_edges_from_camera():
    cap = cv2.VideoCapture(0)

    if not cap.isOpened():
        print("Error: Could not open camera.")
        return

    while True:
        ret, frame = cap.read()
        if not ret:
            print("Error: Failed to capture image.")
            break

        original = frame.copy()

        grayscale = cv2.cvtColor(frame, cv2.COLOR_BGR2GRAY)
        # cv2.imshow('Grayscale', grayscale)

        blurred = cv2.GaussianBlur(grayscale, (5, 5), 0)
        # cv2.imshow('Blurred', blurred)

        _, binary = cv2.threshold(blurred, 0, 255, cv2.THRESH_BINARY + cv2.THRESH_OTSU)
        # cv2.imshow('Binary', binary)

        canny = cv2.Canny(binary, 50, 150)
        # cv2.imshow('Canny edge detection', canny)

        contours, _ = cv2.findContours(canny, cv2.RETR_EXTERNAL, cv2.CHAIN_APPROX_SIMPLE)
        contours = sorted(contours, key=cv2.contourArea, reverse=True)[:5]

        for contour in contours:
            peri = cv2.arcLength(contour, True)
            approx = cv2.approxPolyDP(contour, 0.02 * peri, True)

            if len(approx) == 4:
                doc_contour = approx
                break
        else:
            print("No document detected.")
            doc_contour = None

        if doc_contour is not None:
            cv2.drawContours(original, [doc_contour], -1, (0, 255, 0), 10)
            cv2.imshow("Detected document contour", original)

        if cv2.waitKey(1) & 0xFF == ord('q'):
            break

    cap.release()
    cv2.destroyAllWindows()

detect_document_edges_from_camera()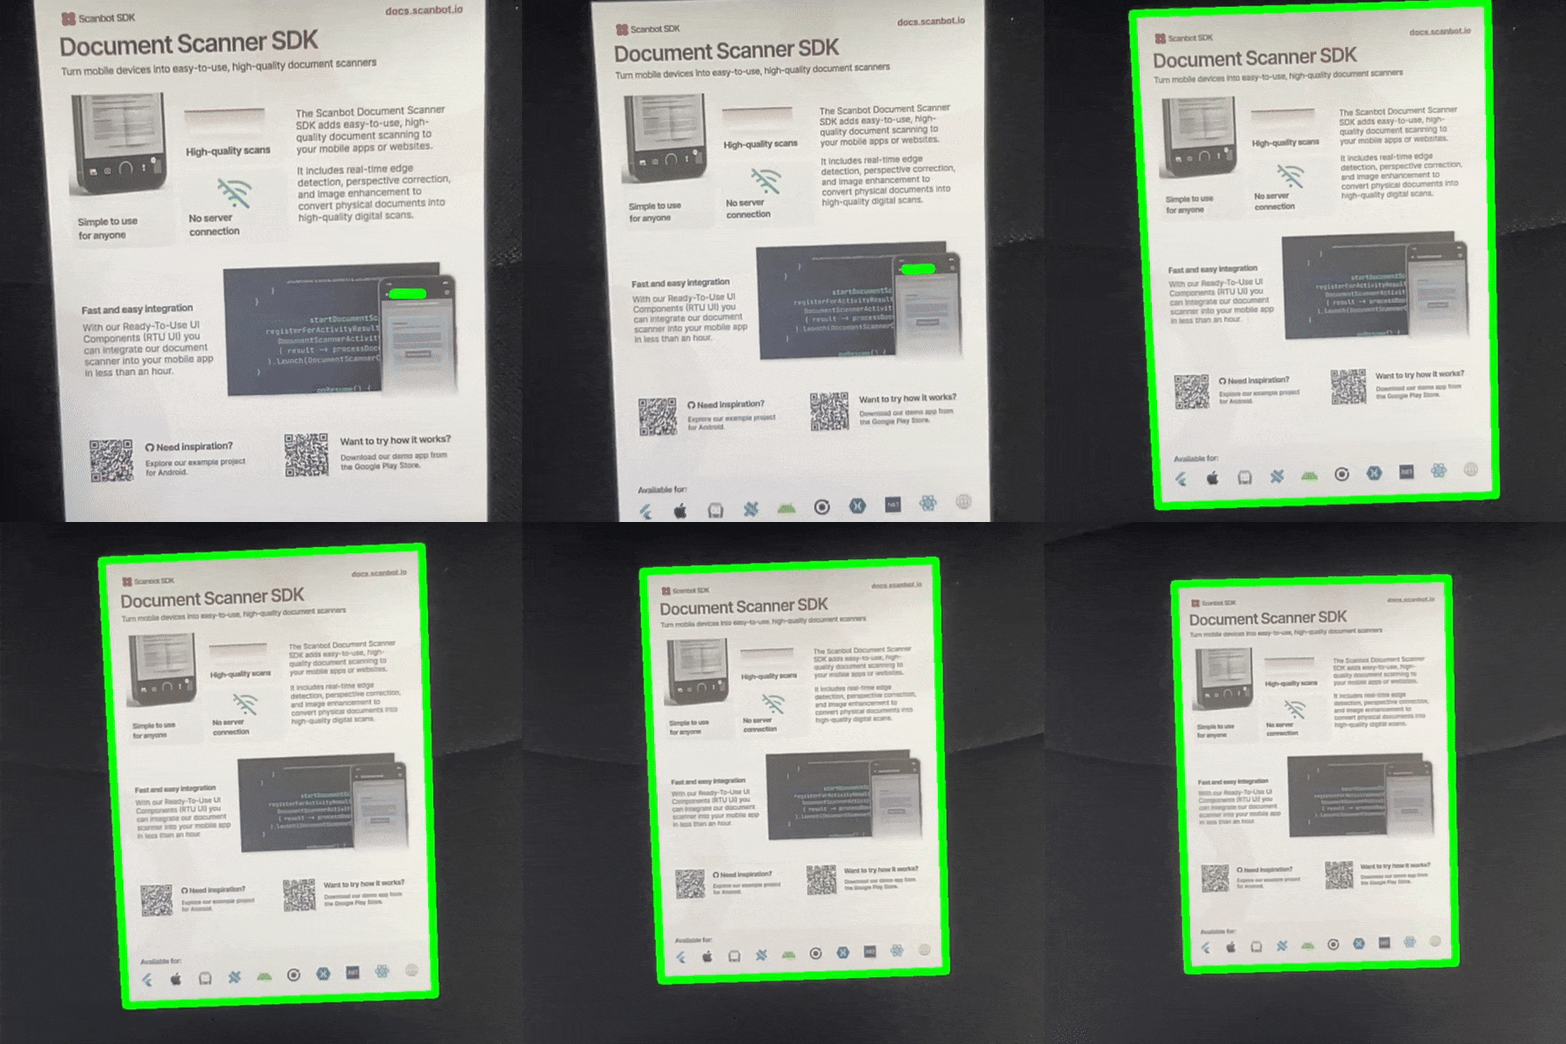
How to use document edge detection in your mobile app
Above, we’ve implemented a basic algorithm for detecting document edges. It has some limitations: For example, it doesn’t work well on bright surfaces.
For a more robust solution, you should look for an approach that involves machine learning.
Whereas traditional algorithms often struggle with image noise, low contrast, or complex backgrounds, machine learning models are trained on diverse datasets. They can detect document edges reliably even in challenging conditions, such as on pictures with dark shadows, overlapping objects, or low background contrast. In addition, they can adapt to new document formats, lighting conditions, and variable image quality without requiring manual adjustments.
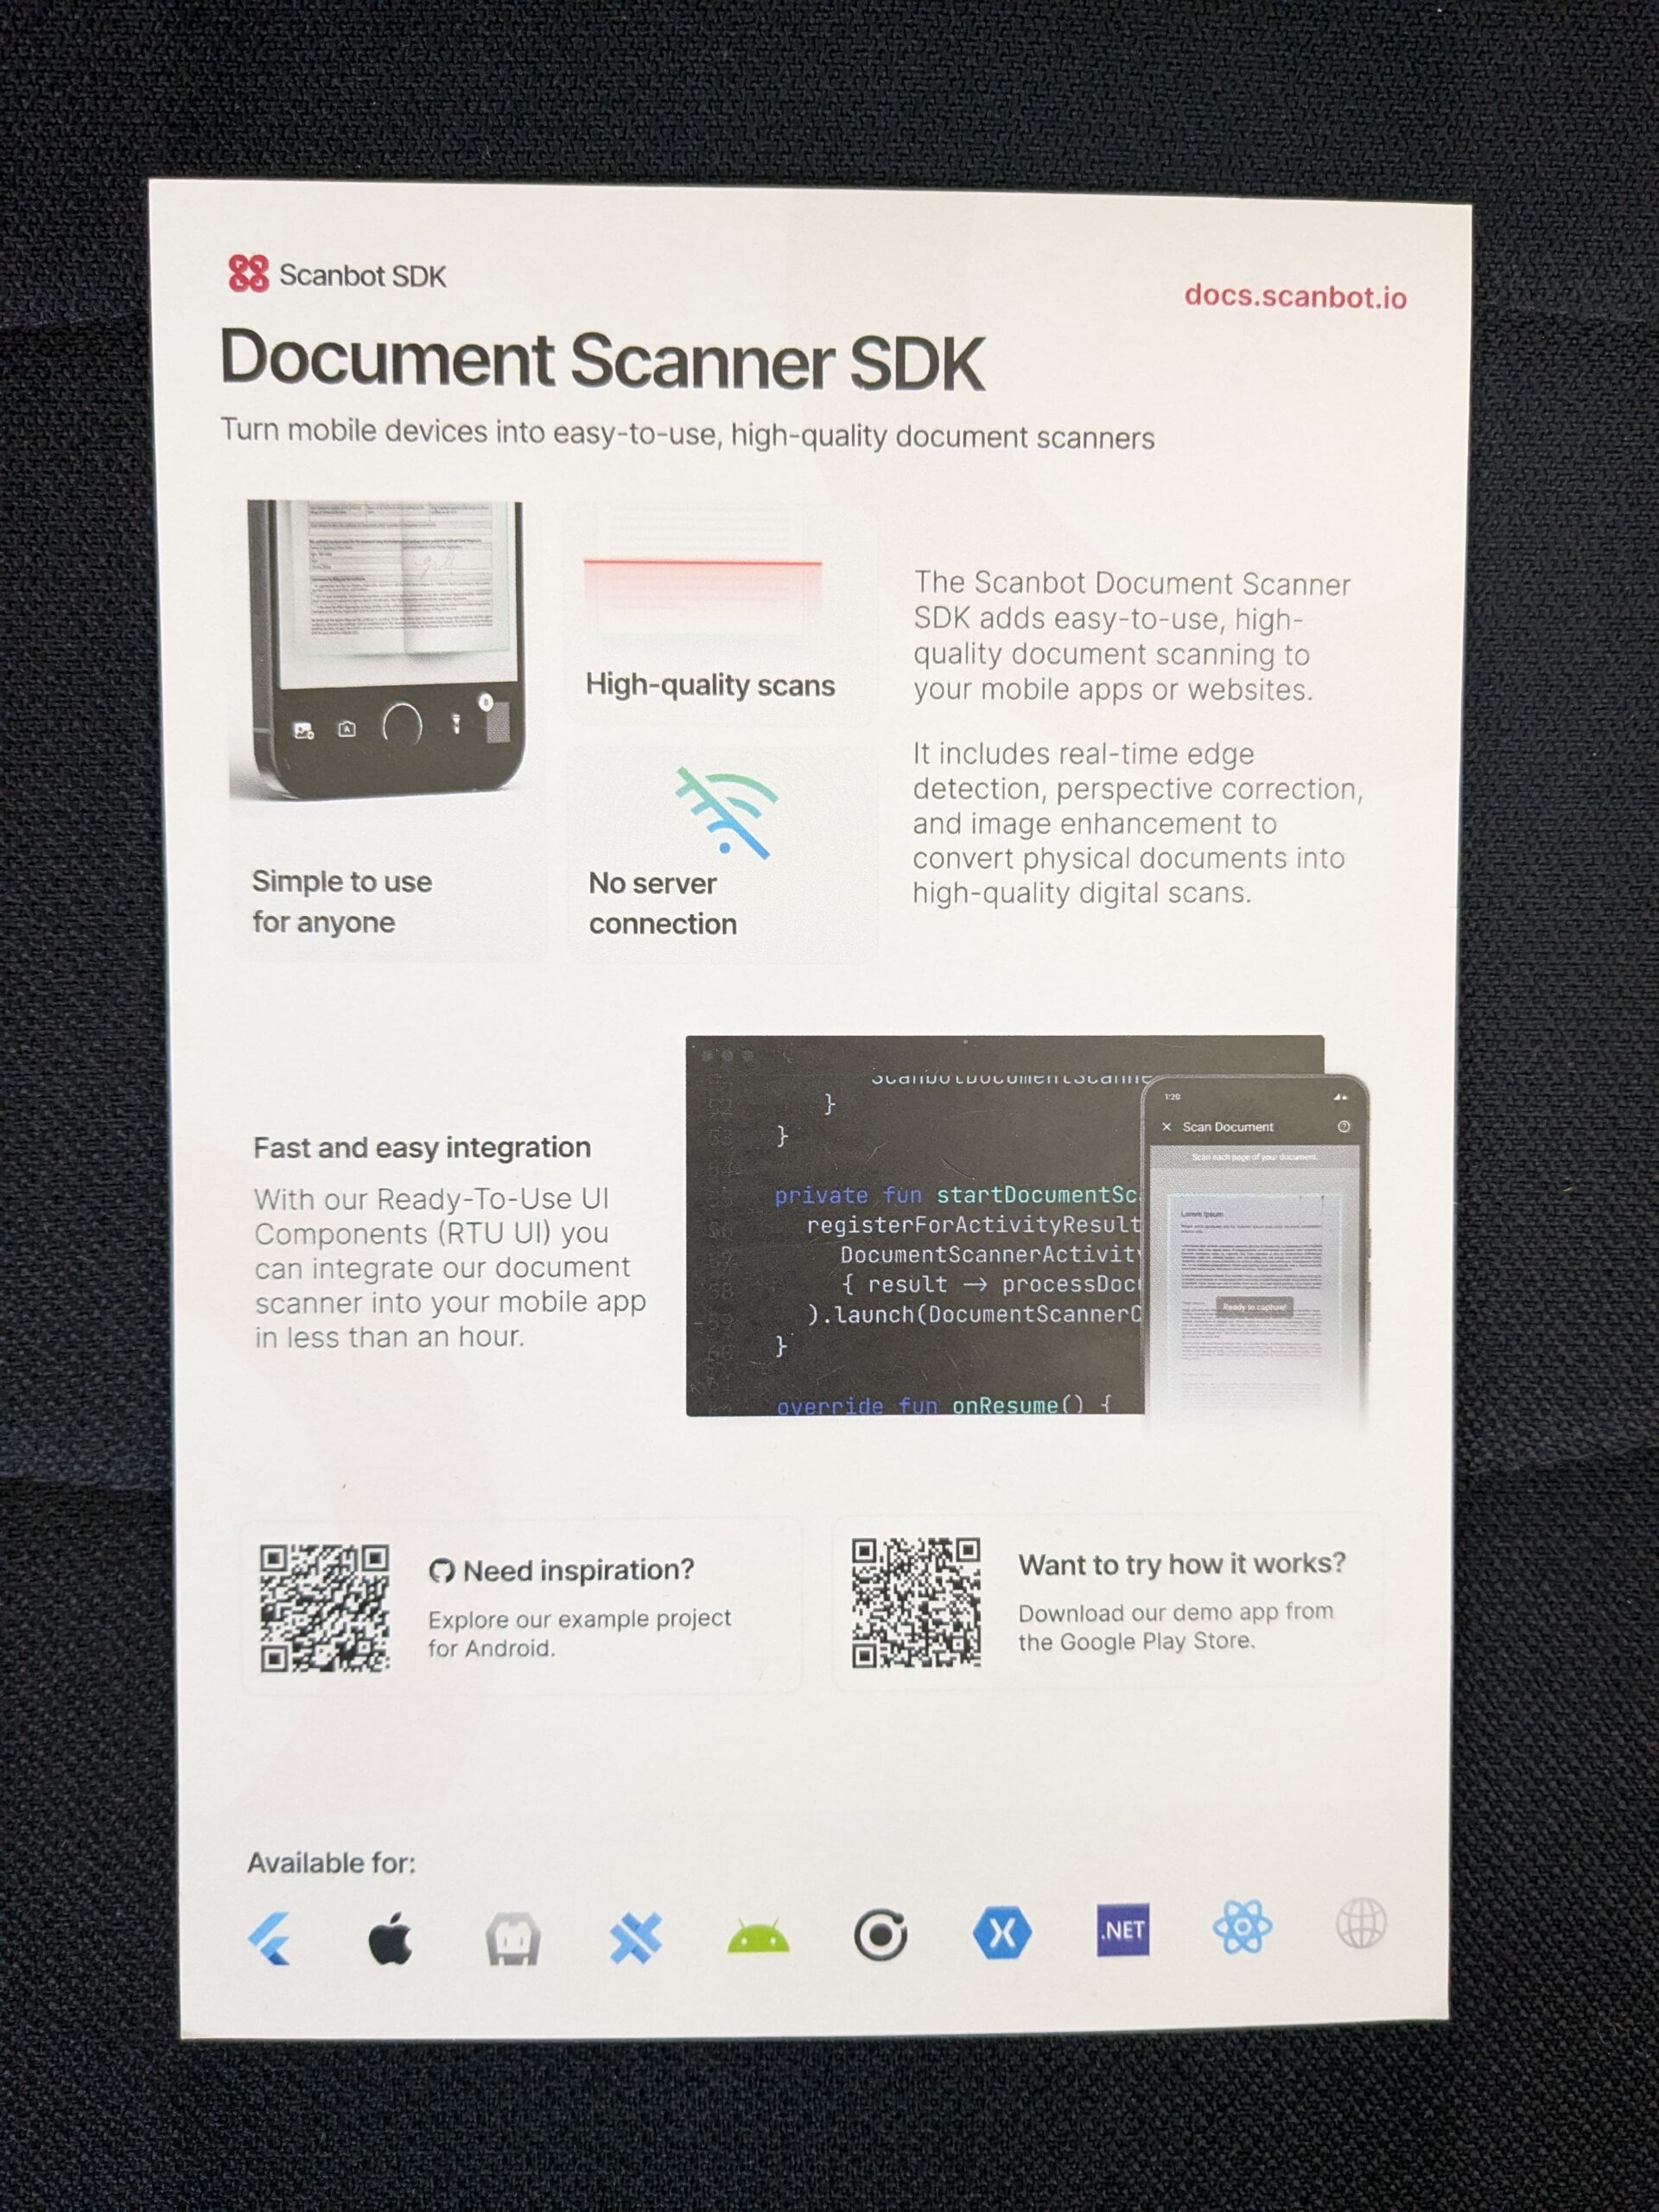
For an example of machine learning-powered document edge detection, look no further than our Document Scanner SDK. It automatically detects documents in the viewfinder, captures them when the conditions are ideal, and then straightens and crops them to make them fit for further processing. The contours are also used for intuitive user guidance.
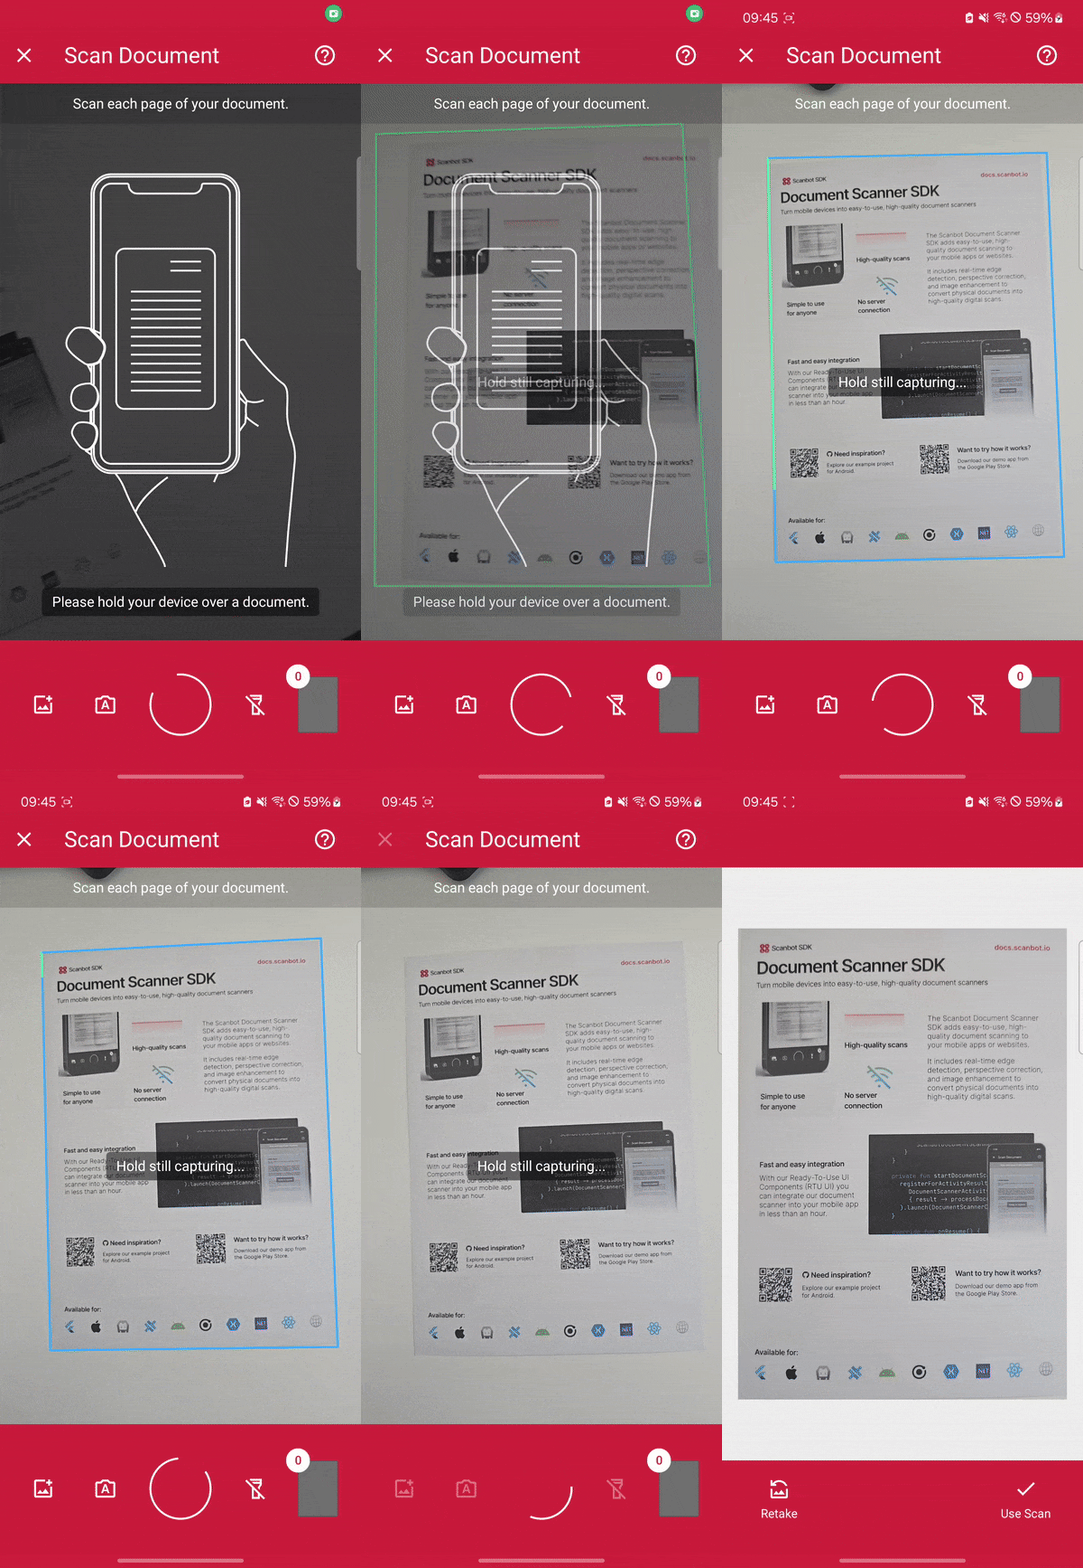
Companies can integrate the Scanbot Document Scanner SDK into their mobile apps or websites to put powerful scanning into customers’ or employees’ hands. The SDK comes with a built-in Document Quality Analyzer and several advanced image filters to optimize scan quality.
Thanks to the SDK’s ready-to-use UI components, you can set up a document scanning interface in minutes while having complete control over its look and feel. Its in-depth documentation and free integration support cater to the needs of developers and ensure a short time to roll-out.
The Scanbot Document Scanner SDK is available for Android, iOS, and Web and supports various cross-platform frameworks, including React Native, Flutter, and .NET MAUI.
Experience the Scanbot Document Scanner SDK yourself by trying the free demo app or running one of the example apps available for various platforms and frameworks. If you’d like to test the SDK in your app, generate a free 7-day trial license to start integration immediately.
