This tutorial demonstrates how to use Xcode and the Scanbot iOS Document Scanner SDK to create a powerful document scanning app that can export documents as PDFs.
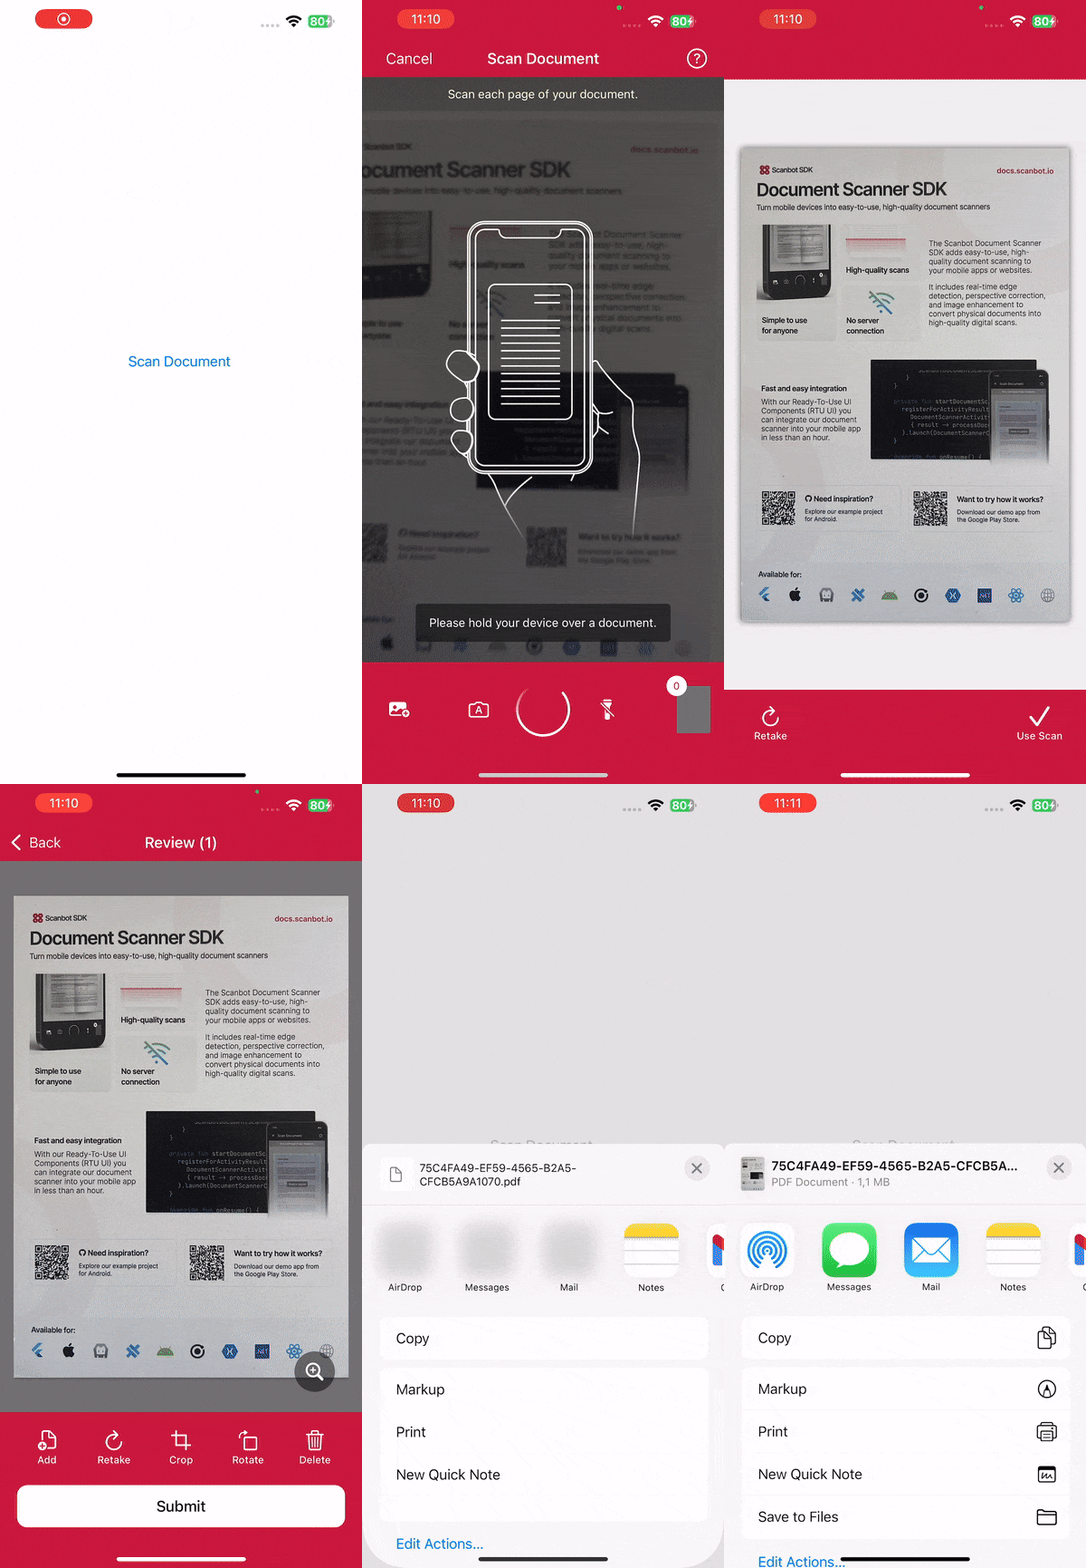
We’ll achieve this in four steps:
- Preparing the project
- Setting up the main screen
- Implementing the scanning feature
- Implementing the PDF export feature
All you need is a Mac with the latest version of Xcode and a test device, since we’ll need to use the camera.
Want to see the final code right away? Click here.
ViewController.swift:
import UIKit
import ScanbotSDK

class ViewController: UIViewController {

    override func viewDidLoad() {
        super.viewDidLoad()
        // Do any additional setup after loading the view.
    }

    @IBAction func scanDocumentButtonTapped(_ sender: Any) {
        let configuration = SBSDKUI2DocumentScanningFlow()
        SBSDKUI2DocumentScannerController.present(on: self,
                                                  configuration: configuration) { documentResult in
            guard let documentResult = documentResult else { return }
            let configuration = SBSDKPDFConfiguration()
            let generator = SBSDKPDFGenerator(configuration: configuration)
            Task {
                guard let url = try? await generator.generate(from: documentResult) else { return }
                self.share(url: url)
            }
        }
    }

    func share(url: URL) {
        let activityViewController = UIActivityViewController(activityItems: [url],
                                                              applicationActivities: nil)
        if let popoverPresentationController = activityViewController.popoverPresentationController {
            popoverPresentationController.sourceView = view
        }
        present(activityViewController, animated: true)
    }
}
Step 1: Prepare the project
Open Xcode and create a new iOS App project. Name the project (e.g., “iOS Document Scanner”), choose Storyboard as the interface, and Swift as the language.
After opening your project, go to File > Add Package Dependencies… and add the Scanbot SDK package for the Swift Package Manager.
Open your Main App Target’s Info tab and add a Privacy – Camera Usage Description key with a value such as “Grant camera access to scan documents”.
In AppDelegate.swift, add a line for setting the license key to the application(_:didFinishLaunchingWithOptions:) method. We don’t need one for this tutorial, but if you have a license key you’d like to use, uncomment the code below and replace <YOUR_LICENSE_KEY> with your actual key.
func application(_ application: UIApplication, didFinishLaunchingWithOptions launchOptions: [UIApplication.LaunchOptionsKey: Any]?) -> Bool {
    // Uncomment the following line and replace <YOUR_LICENSE_KEY> with your actual key
    // Scanbot.setLicense("<YOUR_LICENSE_KEY>")

    return true
}
Without a license key, the SDK will run in trial mode for 60 seconds per session. If you need more than that, you can generate a free trial license.
Step 2: Set up the main screen
We’ll now create a simple UI for starting our document scanner.
First, open Main.storyboard and add a UIButton with a meaningful label (e.g., “Scan Document”) to the main view.
After that, create an IBAction for the button in ViewController.swift and implement the button action to present the scanner view controller.
@IBAction func scanDocumentButtonTapped(_ sender: UIButton) {
    // Code to present the scanner view controller will go here
}
We’ll also need to add the following import to ViewController.swift:
import ScanbotSDKStep 3: Implement the scanning feature
This step involves presenting the Document Scanner view controller. The Scanbot SDK provides a pre-built UI for the scanning process. You’ll need to instantiate the scanner, present it modally, and handle the scanned document. Note that we’ll implement the share(url:) function in the next step.
Inside scanDocumentButtonTapped() in ViewController.swift, add the following code:
let configuration = SBSDKUI2DocumentScanningFlow()
SBSDKUI2DocumentScannerController.present(on: self,
                                          configuration: configuration) { documentResult in
    guard let documentResult = documentResult else { return }
    let configuration = SBSDKPDFConfiguration()
    let generator = SBSDKPDFGenerator(configuration: configuration)
    Task {
        guard let url = try? await generator.generate(from: documentResult) else { return }
        self.share(url: url)
    }
}
Step 4: Implement the PDF export feature
In its current state, our app can scan documents, but there’s no way to export them. Let’s implement the following function in ViewController.swift so that after a user has scanned a document and taps the “Submit” button, a PDF will automatically be generated, ready to be shared.
func share(url: URL) {
    let activityViewController = UIActivityViewController(activityItems: [url],
                                                          applicationActivities: nil)
    if let popoverPresentationController = activityViewController.popoverPresentationController {
        popoverPresentationController.sourceView = view
    }
    present(activityViewController, animated: true)
}
Your final ViewController.swift will look like this:
import UIKit
import ScanbotSDK

class ViewController: UIViewController {

    override func viewDidLoad() {
        super.viewDidLoad()
        // Do any additional setup after loading the view.
    }

    @IBAction func scanDocumentButtonTapped(_ sender: Any) {
        let configuration = SBSDKUI2DocumentScanningFlow()
        SBSDKUI2DocumentScannerController.present(on: self,
                                                  configuration: configuration) { documentResult in
            guard let documentResult = documentResult else { return }
            let configuration = SBSDKPDFConfiguration()
            let generator = SBSDKPDFGenerator(configuration: configuration)
            Task {
                guard let url = try? await generator.generate(from: documentResult) else { return }
                self.share(url: url)
            }
        }
    }

    func share(url: URL) {
        let activityViewController = UIActivityViewController(activityItems: [url],
                                                              applicationActivities: nil)
        if let popoverPresentationController = activityViewController.popoverPresentationController {
            popoverPresentationController.sourceView = view
        }
        present(activityViewController, animated: true)
    }
}
Now our iOS Document Scanner app is ready. Build and run the app and give it a try!

Conclusion
This completes the basic implementation of an iOS Document Scanner using the Scanbot SDK. We used the SDK’s Ready-to-Use UI Components with their default values for this tutorial, but you can customize each screen in the document scanning workflow to fit your needs.
The available screens are:
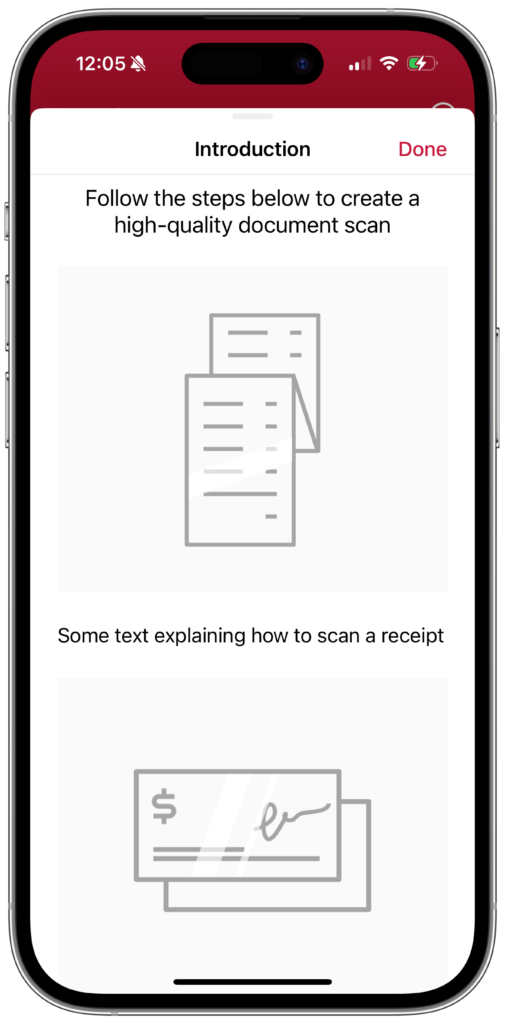
The Introduction Screen gives users a step-by-step guide for how to use the scanner effectively. You can configure each step with your custom text.
The introduction can be used to highlight key features and outline the specific scanning workflow of your use case.
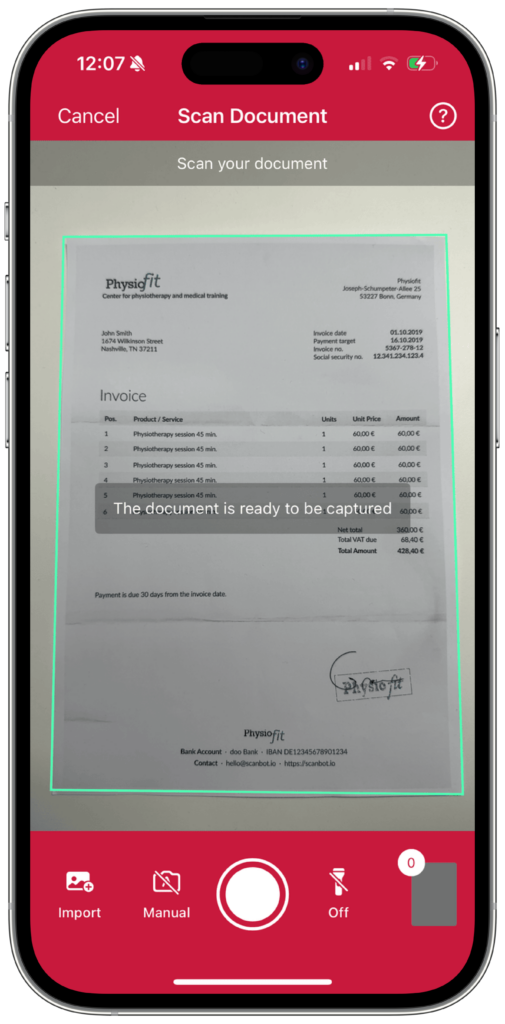
The Scanning Screen provides a seamless and efficient document capture experience. Here are some key features:
- Import from gallery: Users can import images from their device’s gallery. This lets you use existing photos in your document scanning workflow.
- Page limit configuration: You can limit the number of pages that can be scanned in a single session. This helps manage document size and user expectations.
- Capture feedback animation: Choose between a checkmark animation or the document genie/funnel animation to enhance user interaction and provide visual confirmation of successful captures.
- User guidance: Overlay dynamic text instructions to guide the user through the scanning process. This guidance adapts to the current state, such as suggesting adjustments if the document is at a poor angle or if the lighting is insufficient. You can set custom text for each state.
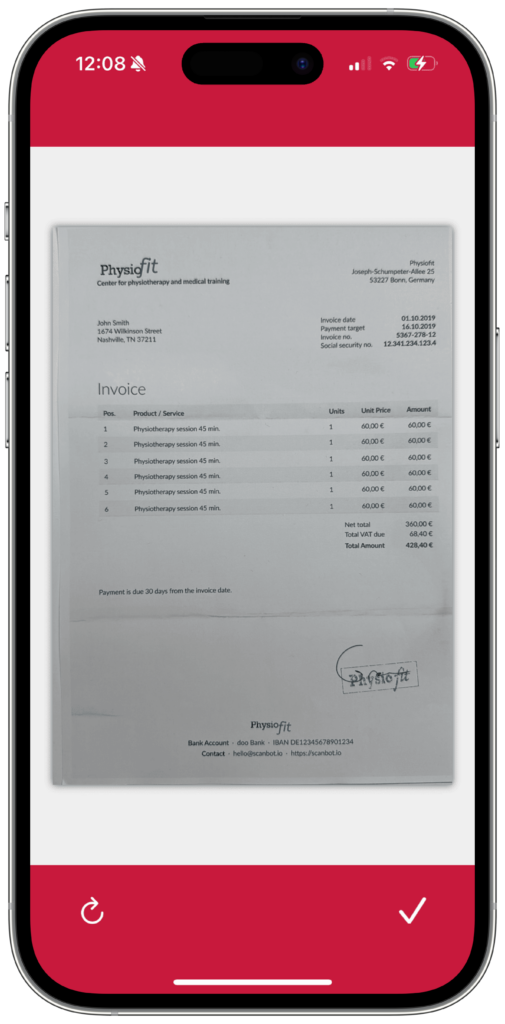
The Acknowledge Screen helps ensure the quality of the scanned documents. To determine suitability, the captured image is thoroughly analyzed. You can set the minimum quality required using the following enums:
noDocumentveryPoorpoorreasonablegoodexcellent
You can also configure whether the Acknowledge Screen itself is shown by using the following modes:
badQuality: The screen is shown only if the minimum quality is not met.always: The screen is shown after every capture, regardless of image quality.none: The screen is never shown, even if the quality threshold is not met.
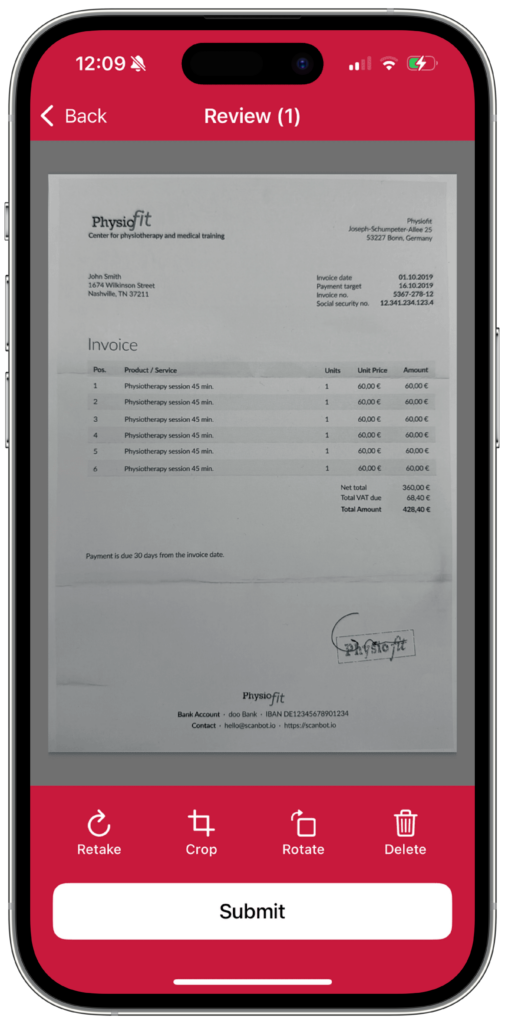
The Review Screen allows users to manage and review their scanned documents before finalizing them. This screen provides several tools to ensure that all pages are in the correct order and meet the requirements:
- Rotate: For changing a page’s orientation
- Crop: Takes users to the Crop Screen (see below)
- Reorder: Takes users to the Reorder Screen (see below)
- Retake: For scanning a page once more
- Add Page: For adding pages at any position within a multi-page document
- Delete: For deleting one or more pages
- Zoom: For zooming in on the document
- Submit: For completing the scanning flow
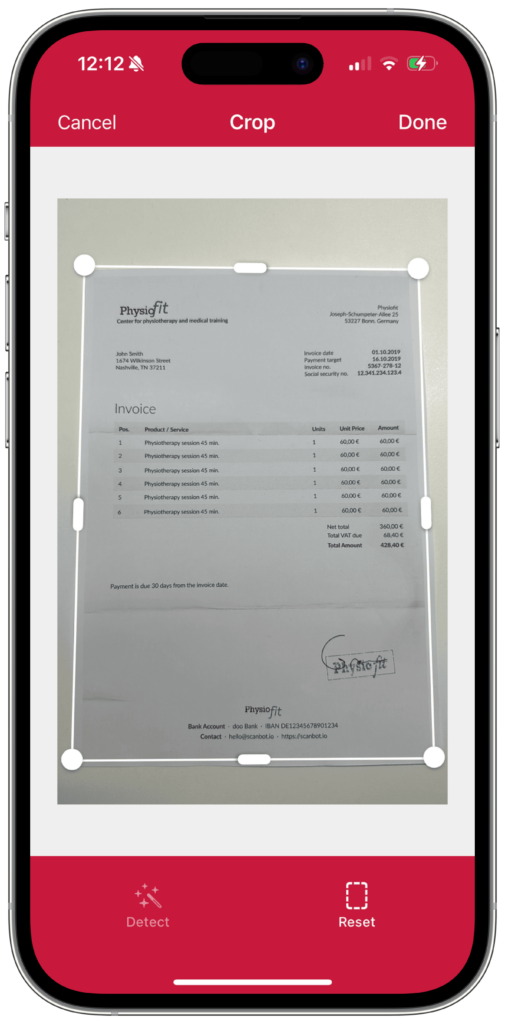
The Crop Screen enables a cropping tool for precise adjustments to document images. It can also be initialized as a standalone screen.
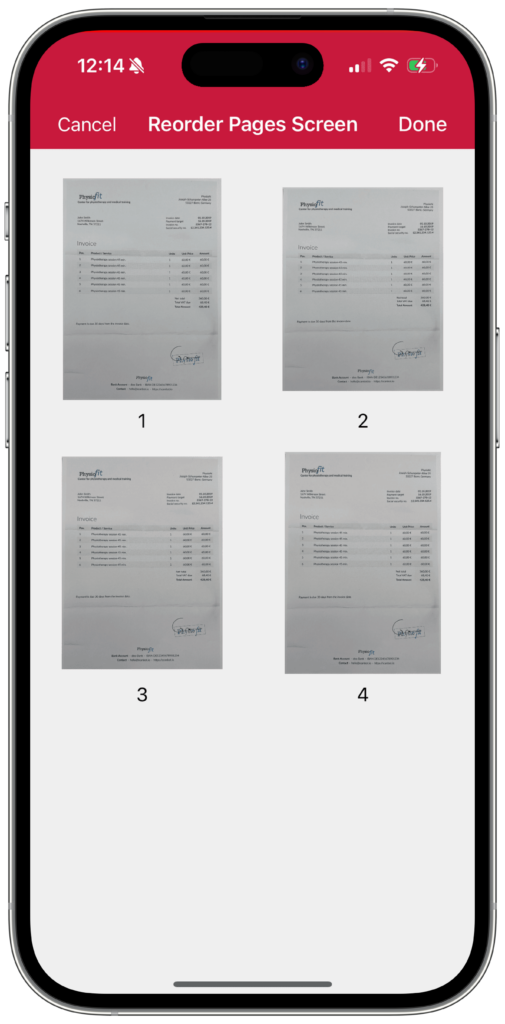
The Reorder Screen allows users to easily change the order of the scanned pages in an intuitive drag-and-drop interface.
At the end of the scanning workflow, users can export the document file, as shown in this tutorial. In addition to PDF, the SDK also supports TIFF, JPEG, and PNG.
For more information on how to configure and implement each screen in your app, head over to our RTU UI documentation.
Should you have questions or run into any issues, we’re happy to help! Just shoot us an email via tutorial-support@scanbot.io.
Happy scanning! 🤳
