In this tutorial, you’ll learn how to create a single-page web app in JavaScript that reads barcodes from image files and outputs their values. The result will be a stand-alone HTML file you can run on your server.
To achieve this, we’ll use the Scanbot Web Barcode Scanner SDK. We’re going to follow these steps:
- Setting up the HTML page and including the Web SDK
- Implementing barcode scanning from an image
- Testing your web app by uploading a barcode
Let’s get started!
Want to see the final code right away? Click here.
index.html:
<!DOCTYPE html>
<html lang="en">

<head>
    <meta charset="UTF-8" />
    <meta name="viewport" content="width=device-width, initial-scale=1.0, maximum-scale=1.0, user-scalable=0" />
    <title>Scan barcodes from an image</title>
</head>

<body style="margin: 0">
    <input class="file-picker" type="file" accept="image/jpeg,image/png" />
    <p id="result"></p>
    <script type="module">
        import "https://cdn.jsdelivr.net/npm/scanbot-web-sdk@7.0.0/bundle/ScanbotSDK.ui2.min.js";

        const sdk = await ScanbotSDK.initialize({
            enginePath:
                "https://cdn.jsdelivr.net/npm/scanbot-web-sdk@7.0.0/bundle/bin/barcode-scanner/",
        });

        document.querySelector(".file-picker").addEventListener("change", async (e) => {
            e.preventDefault();
            const file = e.target.files[0];
            if (!file) return;

            const reader = new FileReader();
            reader.readAsDataURL(file);

            reader.onload = async () => {
                try {
                    const result = await sdk.detectBarcodes(reader.result);
                    const resultContainer = document.getElementById("result");

                    if (result?.barcodes?.length > 0) {
                        // Clear previous results
                        resultContainer.innerHTML = "";

                        // Display all detected barcodes
                        result.barcodes.forEach((barcode, index) => {
                            const barcodeElement = document.createElement("p");
                            barcodeElement.innerText =
                                `Barcode ${index + 1}:\n` +
                                `Type: ${barcode.format}\n` +
                                `Content: "${barcode.text}"\n\n`;
                            resultContainer.appendChild(barcodeElement);
                        });
                    } else {
                        resultContainer.innerText = "No barcodes detected.";
                    }
                } catch (error) {
                    console.error("Error detecting barcodes:", error);
                    document.getElementById("result").innerText = "Error detecting barcodes.";
                }
            };
        });
    </script>
</body>

</html>
Step 1: Set up the HTML page and include the Web SDK
In your project folder, create an index.html with some boilerplate code.
<!DOCTYPE html>
<html lang="en">

<head>
    <meta charset="UTF-8" />
    <meta name="viewport" content="width=device-width, initial-scale=1.0, maximum-scale=1.0, user-scalable=0" />
    <title>Scan barcodes from an image</title>
</head>

<body>
</body>

</html>
Next, to set up our barcode scanner, we’ll have to do the following:
- Implement a file picker so users can upload an image file to scan barcodes from.
- Include a
<p>element on the page for displaying the scanning result. - Import the Scanbot Web SDK using a CDN.
- Initializing the SDK and specifying the path to the engine files.
⚠️ In this tutorial, we’re importing the SDK via jsDelivr. However, you should only do this for quick prototyping. In your production environment, please download the Web SDK directly (or install it via npm) and include its files in your project.
Afterward, our index.html will look something like this:
<!DOCTYPE html>
<html lang="en">

<head>
    <meta charset="UTF-8" />
    <meta name="viewport" content="width=device-width, initial-scale=1.0, maximum-scale=1.0, user-scalable=0" />
    <title>Scan barcodes from an image</title>
</head>

<body style="margin: 0">
    <input class="file-picker" type="file" accept="image/jpeg,image/png" />
    <p id="result"></p>
    <script type="module">
        import "https://cdn.jsdelivr.net/npm/scanbot-web-sdk@7.0.0/bundle/ScanbotSDK.ui2.min.js";

        const sdk = await ScanbotSDK.initialize({
            enginePath:
                "https://cdn.jsdelivr.net/npm/scanbot-web-sdk@7.0.0/bundle/bin/barcode-scanner/",
        });
    </script>
</body>

</html>
In this example, we’re asking the user for a JPEG or PNG file. But feel free to replace this with other image file formats like GIF or WebP.
💡 We use Web Barcode Scanner SDK version 7.0.0 in this tutorial. You can find the latest version in the changelog.
Now that the barcode scanner is set up, we need to put it to work on the user-uploaded files. This only requires a few more lines of code.
Step 2: Implement barcode scanning from an image
To make the barcode scanner read the input image, we need to do the following:
- Attach an event listener to the file input element to handle the
changeevent, which is triggered when a user selects a file. - Make the script read the selected file as a Base64-encoded data URL using the
FileReaderAPI. Once the file is successfully read, the SDK’sdetectBarcodesmethod should called with the image data to detect barcodes. - Ensure that the script dynamically creates and appends
<p>elements to theresultcontainer when barcodes are detected, which should display the type and content of each barcode. If no barcodes are found, a message stating something like “No barcodes detected.” should be displayed. In case something goes wrong during barcode detection, an error message should logged to the console and the user should be informed via theresultcontainer.
Our final index.html will look like this:
<!DOCTYPE html>
<html lang="en">

<head>
    <meta charset="UTF-8" />
    <meta name="viewport" content="width=device-width, initial-scale=1.0, maximum-scale=1.0, user-scalable=0" />
    <title>Scan barcodes from an image</title>
</head>

<body style="margin: 0">
    <input class="file-picker" type="file" accept="image/jpeg,image/png" />
    <p id="result"></p>
    <script type="module">
        import "https://cdn.jsdelivr.net/npm/scanbot-web-sdk@7.0.0/bundle/ScanbotSDK.ui2.min.js";

        const sdk = await ScanbotSDK.initialize({
            enginePath:
                "https://cdn.jsdelivr.net/npm/scanbot-web-sdk@7.0.0/bundle/bin/barcode-scanner/",
        });

        document.querySelector(".file-picker").addEventListener("change", async (e) => {
            e.preventDefault();
            const file = e.target.files[0];
            if (!file) return;

            const reader = new FileReader();
            reader.readAsDataURL(file);

            reader.onload = async () => {
                try {
                    const result = await sdk.detectBarcodes(reader.result);
                    const resultContainer = document.getElementById("result");

                    if (result?.barcodes?.length > 0) {
                        // Clear previous results
                        resultContainer.innerHTML = "";

                        // Display all detected barcodes
                        result.barcodes.forEach((barcode, index) => {
                            const barcodeElement = document.createElement("p");
                            barcodeElement.innerText =
                                `Barcode ${index + 1}:\n` +
                                `Type: ${barcode.format}\n` +
                                `Content: "${barcode.text}"\n\n`;
                            resultContainer.appendChild(barcodeElement);
                        });
                    } else {
                        resultContainer.innerText = "No barcodes detected.";
                    }
                } catch (error) {
                    console.error("Error detecting barcodes:", error);
                    document.getElementById("result").innerText = "Error detecting barcodes.";
                }
            };
        });
    </script>
</body>

</html>
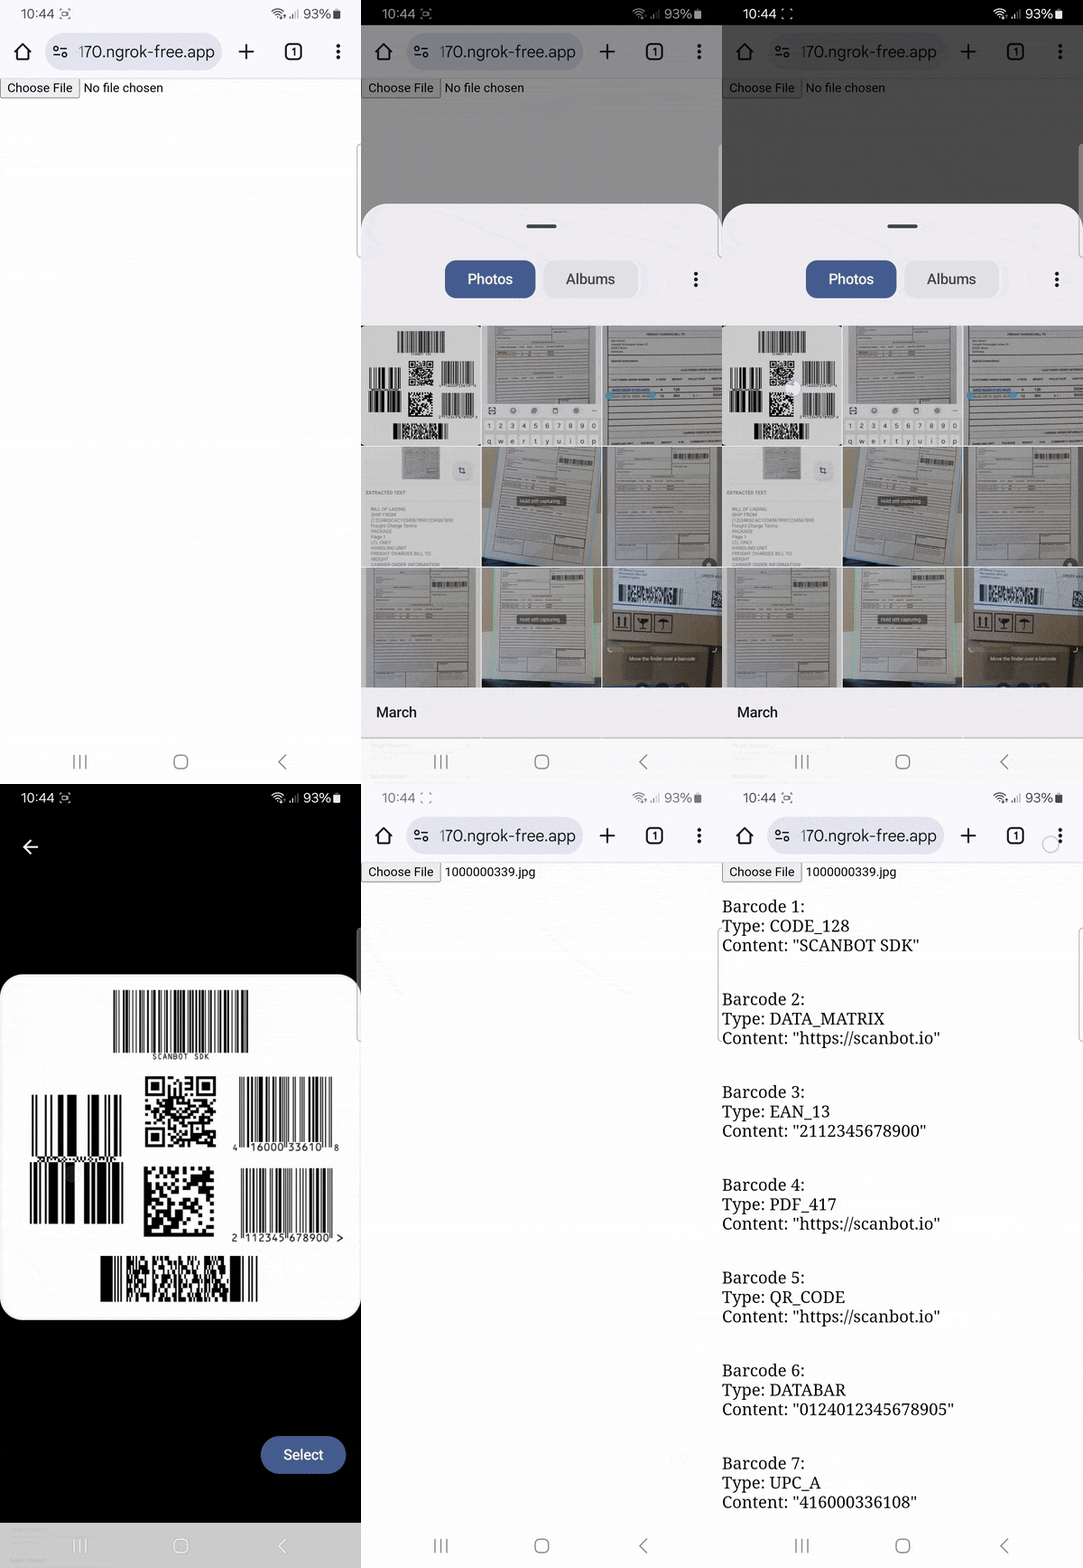
Step 3: Test your web app by uploading a barcode
Now that our app is finished, go ahead and upload an image containing one or more barcodes …
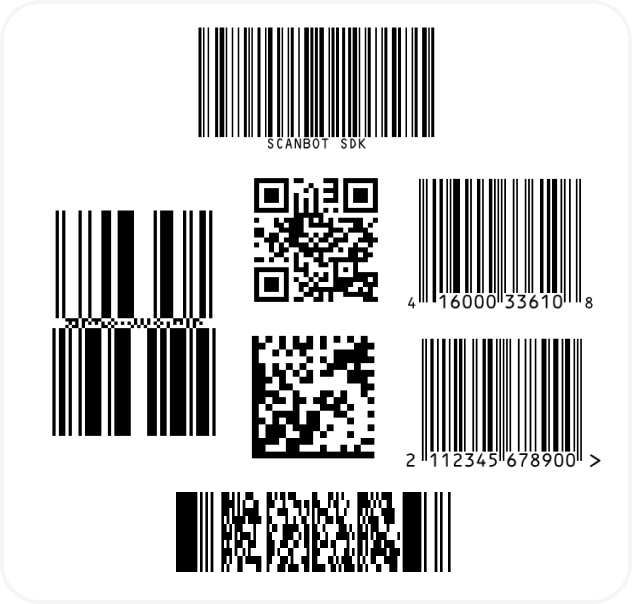
… to test if everything is working correctly.

💡 To test your web app on your phone, you have a few options. One option is to use a service like ngrok, which creates a tunnel to one of their SSL-certified domains. Their Quick Start guide will help you get up and running quickly.
Conclusion
🎉 Congratulations! You can now scan barcodes from image files in your browser!
Would you also like to know how you can scan barcodes from a live camera stream? Then take a look at our other tutorials for various web development frameworks:
Also check out the SDK’s other neat features in the documentation – or run our example project for a more hands-on experience.
Should you have questions about this tutorial or run into any issues, we’re happy to help! Just shoot us an email via tutorial-support@scanbot.io.
