QuaggaJS is a popular open-source barcode scanning library written in JavaScript that locates and decodes various 1D barcode symbologies in the user’s camera stream.
While the original project is no longer maintained, it lives on as Quagga2, which is what we’ll be using in our tutorial.
Since Quagga is a JavaScript-only library, it is easy to integrate into any website or web app. In this tutorial, we’ll show you how to set up the barcode scanner in a single HTML file.
📺 You can also watch this tutorial on YouTube.
Step 1: Setting up the HTML file
Let’s start by creating the basic structure of the HTML document:
<!DOCTYPE html>
<html lang="en">
<head>
    <meta charset="utf-8"/>
    <title>QuaggaJS</title>
    <meta name="viewport" content="width=device-width, initial-scale=1.0, user-scalable=no"/>
</head>

<body>
</body>
</html>
💡 The line <meta name="viewport" content="width=device-width, initial-scale=1.0, user-scalable=no"/> ensures that the page fits the device’s resolution and that users cannot zoom into it.
The first thing we’ll put into the body is a div into which we’ll later render the camera stream:
<body>
    <div id="camera"></div>
</body>
Step 2: Configuring Quagga
Next, we’ll add Quagga itself. We’re including the quagga.min.js script from jsDelivr, but you can of course also host the script on your own web server.
<body>
    <div id="camera"></div>
    // new
    <script src="https://cdn.jsdelivr.net/npm/@ericblade/quagga2/dist/quagga.min.js"></script>
</body>
Now, we need to configure QuaggaJS. First, we have to specify the DOM element where the video stream will be displayed. Next, we also need to specify the barcode decoders we want to use.
To accomplish the first part, we create a config object, which we will call quaggaConf. We use document.querySelector to select the div we created above as the target where the video stream will be displayed.
<script>
    const quaggaConf = {
        inputStream: {
            target: document.querySelector("#camera")
        }
    }
</script>
Now we specify which barcode symbologies our QuaggaJS app will read (to optimize performance, it’s recommended to only include those you expect to scan). In this tutorial, we’ll be sticking to the common barcode type Code 128. You can find a list of all supported symbologies in the Quagga2 GitHub repository.
<script>
    const quaggaConf = {
        inputStream: {
            target: document.querySelector("#camera"),
        },
        // new
        decoder: {
            readers: ['code_128_reader']
        },
    }
</script>
💡 QuaggaJS cannot read QR codes or other 2D barcode symbologies. To enable QR code scanning, Quagga2’s README recommends using external reader modules.
The next step is to prepare the initialization function. We provide our Quagga configuration and an error handler. If the initialization is successful, Quagga.start() will begin the barcode scanning process.
We have also added a function to display an alert with the barcode result when a barcode is detected and read.
<script>
    const quaggaConf = {
        inputStream: {
            target: document.querySelector("#camera"),
        },
        decoder: {
            readers: ['code_128_reader']
        },
    }

    // new
    Quagga.init(quaggaConf, function (err) {
        if (err) {
            return console.log(err);
        }
        Quagga.start();
    });

    Quagga.onDetected(function (result) {
        alert("Detected barcode: " + result.codeResult.code);
    });
</script>
Step 3: Configuring the video stream
Now we’ll add LiveStream as the input stream type, since we want to process and display the live video as captured by the user’s camera. Other possible values for the stream type are described in the Quagga docs.
We’ll also have to define the constraints for the video stream. To do that, we need to specify the width, height, aspect ratio, and camera for the input stream.
💡 A lower resolution will result in faster scanning speeds at the cost of accuracy.
<script>
    const quaggaConf = {
        inputStream: {
            target: document.querySelector("#camera"),
            // new
            type: "LiveStream",
            constraints: {
                width: { min: 640 },
                height: { min: 480 },
                facingMode: "environment",
                aspectRatio: { min: 1, max: 2 }
            }
        },
        decoder: {
            readers: ['code_128_reader']
        },
    }

    Quagga.init(quaggaConf, function (err) {
        if (err) {
            return console.log(err);
        }
        Quagga.start();
    });

    Quagga.onDetected(function (result) {
        alert("Detected barcode: " + result.codeResult.code);
    });
</script>
Next, we add some styling to display the video in the resolution we requested from the camera to ensure it fits the screen.
<head>
    <meta charset="utf-8"/>
    <title>QuaggaJS</title>
    <meta name="viewport" content="width=device-width, initial-scale=1.0, user-scalable=no"/>
    // new
    <style>
        #camera video{
            width:100%;
            max-width: 640px;
        }
    </style>
</head>
Lastly, we’re going to apply a style attribute to our camera div to make it take up the entire width of the body.
<body>
    <div id="camera" style="width:100%"></div>
</body>
And we’re done! 🎉
The final result looks like this:
<!DOCTYPE html>
<html lang="en">
<head>
    <meta charset="utf-8"/>
    <title>QuaggaJS</title>
    <meta name="viewport" content="width=device-width, initial-scale=1.0, user-scalable=no"/>
    <style>
        #camera video{
            width:100%;
            max-width: 640px;
        }
    </style>
</head>

<body>
<div id="camera" style="width:100%"></div>
<script src="https://cdn.jsdelivr.net/npm/@ericblade/quagga2/dist/quagga.min.js"></script>
<script>
    const quaggaConf = {
        inputStream: {
            target: document.querySelector("#camera"),
            type: "LiveStream",
            constraints: {
                width: { min: 640 },
                height: { min: 480 },
                facingMode: "environment",
                aspectRatio: { min: 1, max: 2 }
            }
        },
        decoder: {
            readers: ['code_128_reader']
        },
    }

    Quagga.init(quaggaConf, function (err) {
        if (err) {
            return console.log(err);
        }
        Quagga.start();
    });

    Quagga.onDetected(function (result) {
        alert("Detected barcode: " + result.codeResult.code);
    });
</script>
</body>
</html>
Try scanning a Code 128 to see if everything works as intended.

Drawbacks of using QuaggaJS
As impressive as this JavaScript-based barcode scanner implementation is, QuaggaJS does have its disadvantages.
The biggest drawback is that it only supports 1D barcodes. Two-dimensional symbologies like QR Code, Data Matrix, and Aztec encode much more data while taking up less space, which makes them a valuable alternative to their one-dimensional counterparts.
As useful as it is to have a barcode scanner written in JavaScript, the performance of the detection algorithm would also benefit from an implementation in WebAssembly. Especially on low-end devices, this could result in increased scanning speeds.
Quagga’s feature set is also not on par with that of professional solutions. Enterprise-grade barcode scanner software often includes dedicated modules for scanning many barcodes simultaneously or in rapid succession, as well as UI elements, all of which this open-source solution lacks.
If you plan to use Quagga in production, you should also keep in mind that you will depend entirely on the open-source community for its maintenance and for support. If you run into a problem, you might have to find a solution on your own.
For companies that heavily rely on barcode scanning in their business processes, we recommend using an enterprise-grade solution instead.
Building a JavaScript Barcode Scanner with the Scanbot SDK
We developed the Scanbot Barcode Scanner SDK to help enterprises overcome the hurdles presented by free barcode scanning software. Our goal was to have a developer-friendly solution available for a wide range of platforms that consistently delivers high-quality results – even in challenging circumstances.
Scan the QR code or follow this link to try the Web Barcode Scanner Demo!
In the following section, we’ll show you how easy it is to integrate our Web Barcode Scanner SDK into your JavaScript app. Thanks to our SDK’s Ready-to-Use UI Components, you can even use an AR overlay to display multiple barcodes’ contents right in the viewfinder.
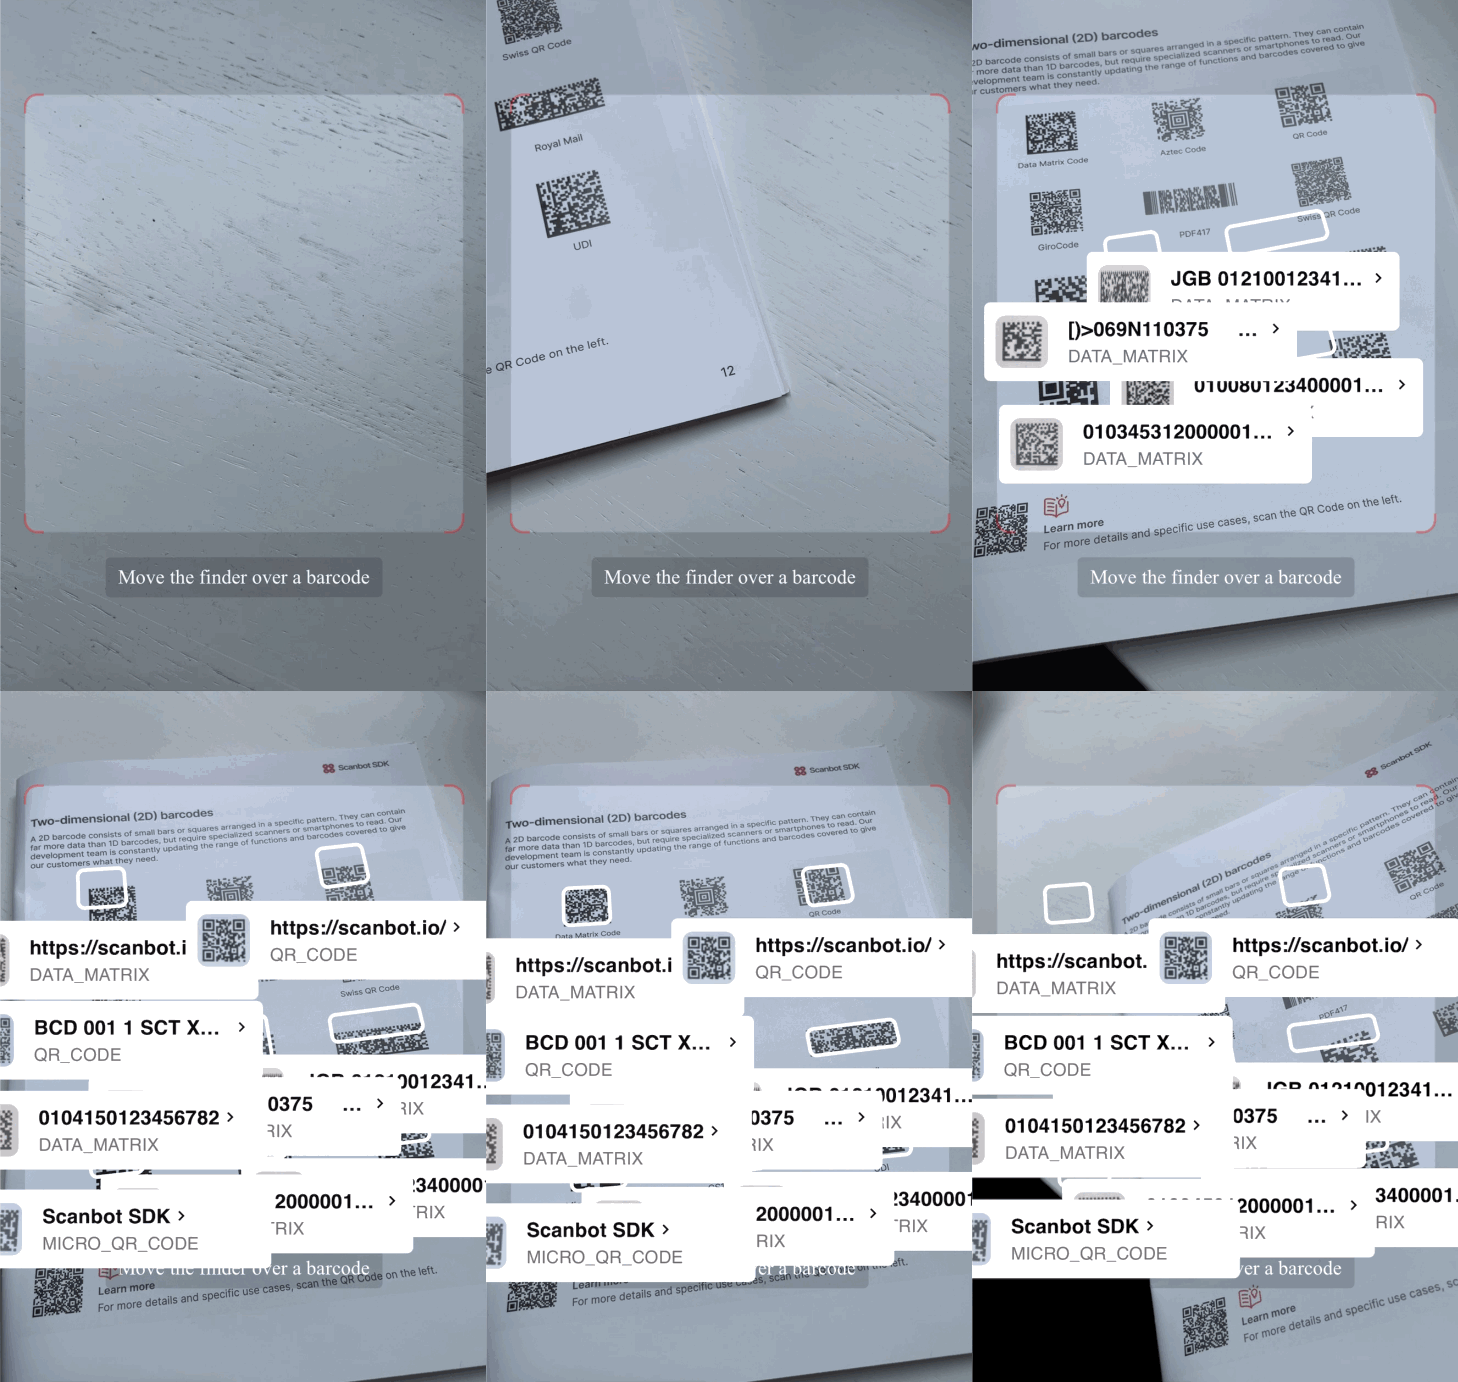
To accomplish that, we’ll need to follow the steps below:
- Download the SDK files
- Create the HTML page and configure the Web SDK
- Start a local HTTP server
- Start scanning
- Configure styling and scanning behavior
- Deploy to a server (optional)
Let’s dive into more details for each step.
Step 1: Download the SDK
First, create a new empty directory for your app and name it my-scanner-app.
Then, download the Scanbot SDK npm package directly from here.
💡 As specified in our documentation, you can also use npm install to download and install the package, but for this tutorial, we suggest manually downloading it and installing it from the link provided.
Unzip the downloaded files into my-scanner-app. Your folder structure should look like this:
my-scanner-app/
  |- scanbot-web-sdk/
    |- webpack/
    |- bundle/
    |- @types/
    |- index.js
    |- ui.js
    ... (and some other files)
⚠️ Make sure the folder containing the package files is called scanbot-web-sdk, not “package” or similar.
Step 2: Create the HTML page and configure the Web SDK
To create the HTML with the Scanbot SDK, first create an index.html file in the my-scanner-app/ folder. Then, add the following code to the file.
<!DOCTYPE html>
<html lang="en">
<head>
    <meta charset="UTF-8">
    <!-- We prevent the user from zooming on mobile device -->
    <meta name="viewport" content="width=device-width, initial-scale=1.0, maximum-scale=1.0, user-scalable=0" />
    <title>My Scanner App</title>
</head>
<body style="margin: 0">
<button id="start-scanning">Start scanning</button>
<pre id="result"></pre>
<script type="module">
    // We import the necessary ScanbotSDK module
    import "./scanbot-web-sdk/bundle/ScanbotSDK.ui2.min.js";
    // When initializing the SDK, we specify the path to the barcode scanner engine
    const sdk = await ScanbotSDK.initialize({
        engine: "scanbot-web-sdk/bundle/bin/barcode-scanner/"
    });
    document.getElementById("start-scanning").addEventListener("click", async () => {
        // We create a new default configuration for the barcode scanner
        const config = new ScanbotSDK.UI.Config.BarcodeScannerConfiguration();
        // We create a barcode scanner UI component
        const scanResult = await ScanbotSDK.UI.createBarcodeScanner(config);
        // Once the scanning is done, we display the result
        if (scanResult?.items?.length > 0) {
            document.getElementById("result").innerText =
                `Barcode type: ${scanResult.items[0].type} \n` +
                `Barcode content: "${scanResult.items[0].text}" \n`;
        } else {
            document.getElementById("result").innerText = "Scanning aborted by the user";
        }
    });
</script>
</body>
</html>
The code block above:
- Adds the “Start scanning” button.
- Imports and initializes the Scanbot SDK.
- Executes the user interface from the Scanbot SDK when the user clicks the “Start scanning” button.
- If a barcode is identified, it will present the barcode type and its content to the user.
Step 3: Start local HTTP server
The Scanbot SDK uses advanced browser features that are unavailable when opening our site via a file URL. Therefore, a local HTTP server is required to view the site.
There are two main ways to run the index.js file in a localhost server: using Python or Node.js.
Python
If you have Python installed, you can use it to start a local HTTP server. To do so, follow the steps below:
- Open a terminal in the my-scanner-app/ folder.
- Use the command
python3 -m http.serverto start a local test server. - Now, you can access it on your browser at
http://localhost:8000.
To stop running the localhost server, press Ctrl+C on the terminal.
Node.js
If Node.js is installed, you can use the npm serve package to start a local HTTP server. To do so, follow the steps below:
- Open a terminal in the my-scanner-app/ folder.
- Run the command
npx serve. - Once it finishes loading, you can access the page using the URL provided in your terminal, which usually is
http://localhost:3000.
To stop running the localhost server, press Ctrl+C on the terminal.
Step 4: Start scanning
Once you access the site on your browser, follow the steps below to test the Scanbot SDK:
Click the “Start scanning” button.

The scanning UI will open, allowing you to scan a barcode using your camera. Point your camera to a barcode, as in the example below.
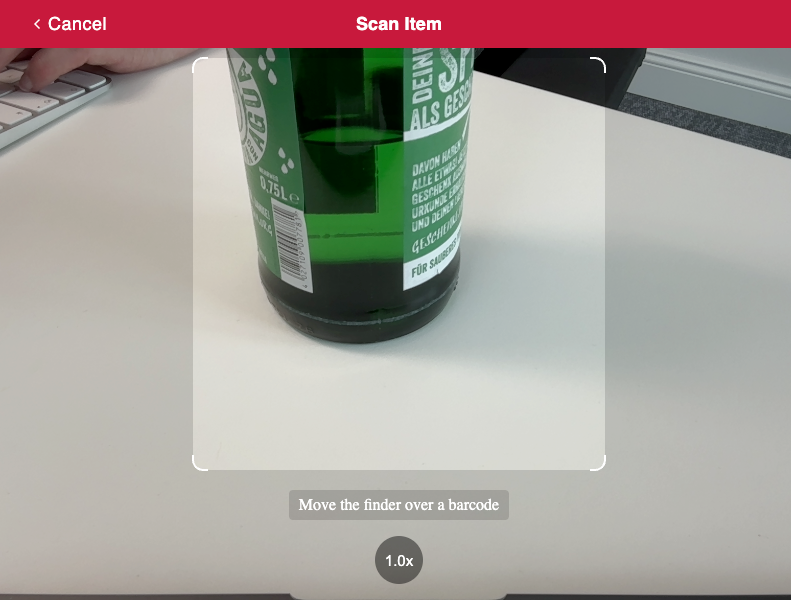
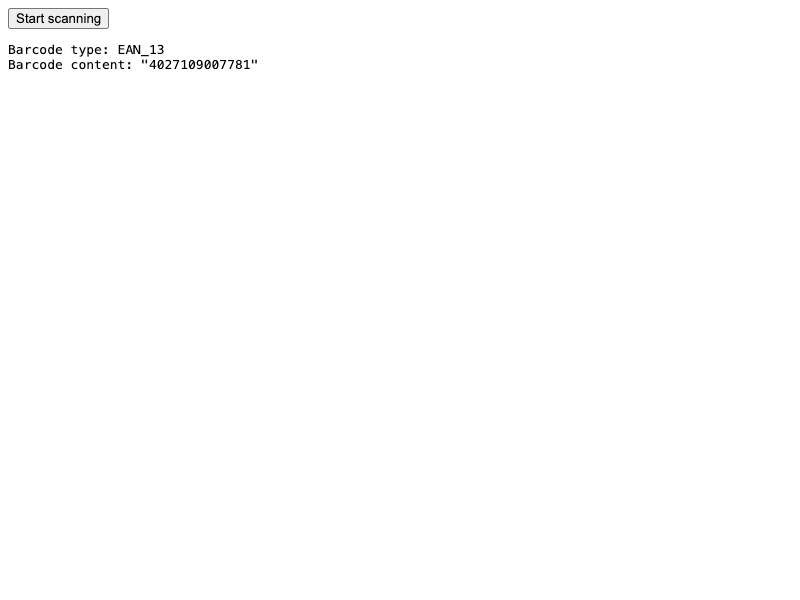
After scanning, the UI closes, displaying the scanned code and its type right below the “Start scanning” button.
Step 5: Configure the style and scanning behavior
The app code provided in Step 2 has the UI fully configured. To change the app’s appearance, you can customize the config object. You can, for example, change the viewfinder size and color.
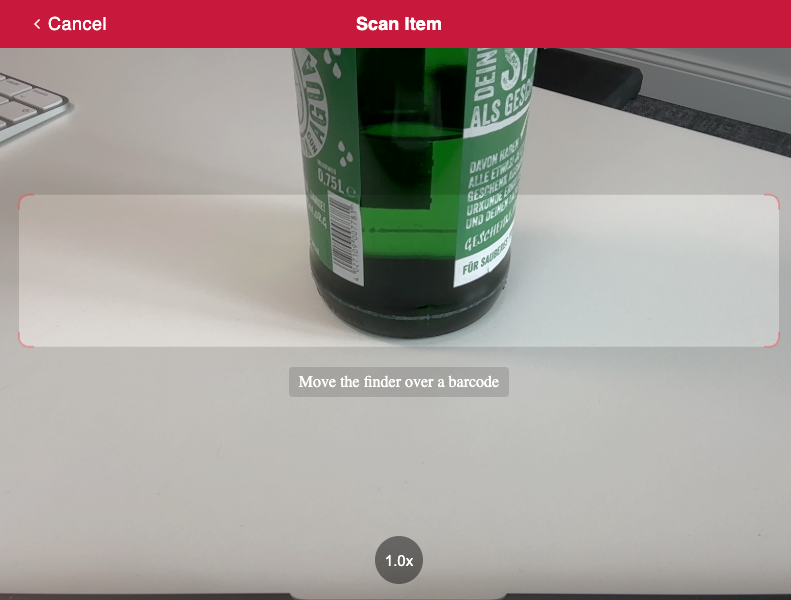
To do so, you can change the aspectRatio and strokeColor after defining the config object, as displayed in the following code block:
const config = new ScanbotSDK.UI.Config.BarcodeScannerConfiguration();
config.viewFinder.aspectRatio.height = 1;
config.viewFinder.aspectRatio.width = 5;
config.viewFinder.style.strokeColor = "#FF000050";
The above configurations will result in the following styling:
You can find more configuration options by accessing the SDK or API documentation.
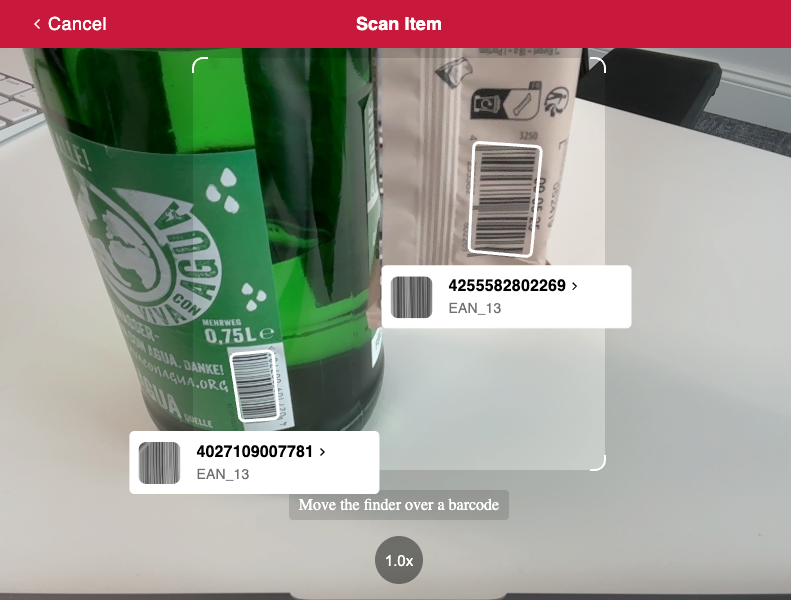
As another configuration example, you can display an AR overlay and let the user pick a specific barcode when the app identifies multiple barcodes on the camera. To add this feature, add the following code after defining the config object:
config.useCase.arOverlay.visible = true;
config.useCase.arOverlay.automaticSelectionEnabled = false;
If you open your app again, it will look like this:
💡 The AR labels can also be fully configured.
Step 6: Deploy to a server (optional)
To test your new app on your phone, you need to deploy it to a server. If you don’t have a web server ready, you can prototype your site using services like Static.app by executing the following steps:
- Zip the content from my-scanner-app.
- Access Static.app and click Upload for free.
- Find and select the my-scanner-app.zip file.
- After the upload, your site will run within minutes. You will then be presented with a URL. Use it to access the app from any device, including your mobile phone.
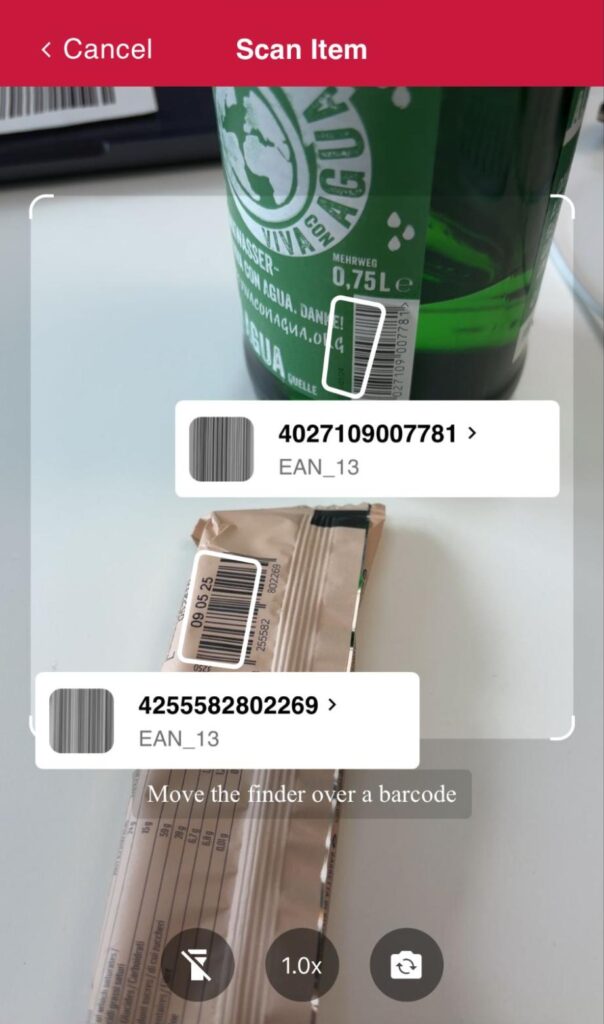
The Scanbot SDK UI is optimized for mobile devices. It allows users to choose the camera and toggle the flashlight by default. Use the URL to test the app interface on your mobile device, as displayed below.
Conclusion
That’s it! You now have a fully functional barcode-scanning web app using the Scanbot SDK’s RTU UI.
You can also take a look at our integration guides for React and Vue.js for implementations similar to this one. Should you have any questions, feel free to send us an email via sdksupport@scanbot.io.
How to improve barcode scanning performance in real-world conditions
Now that you’ve developed a working barcode scanner app, it’s time to consider how your app performs in real-world conditions—where lighting varies, barcode quality isn’t guaranteed, and users might be scanning everything from glossy product labels to crumpled shipping labels. In this section, we’ll dive deeper into advanced optimization strategies and the challenges your app might encounter. Mastering these techniques not only strengthens your app’s robustness but also prepares it for deployment in production environments.
Scanning in low-light environments
One of the most common issues users face is scanning barcodes in poorly lit environments. Whether it’s a dimly lit stockroom, a late-night delivery, or simply indoor lighting that’s not quite sufficient, low light can drastically affect image clarity and contrast, making it harder for algorithms to detect and decode barcodes. One effective way to mitigate this is to programmatically enable the device’s flashlight when low light is detected. Many mobile platforms provide APIs for controlling the torch feature, and using it intelligently—such as activating it only when ambient light falls below a certain threshold—can significantly improve scan success rates.
In addition to enabling the flash, consider applying image preprocessing techniques like brightness normalization or histogram equalization. These approaches enhance visibility by boosting contrast and clarity before the barcode is passed to the decoder.
Scanning damaged or worn-out barcodes
Barcodes in the wild are rarely perfect, so being able to read damaged or blurry barcodes is essential. They may be scratched, faded, crumpled, partially torn, or covered in dust. In such cases, conventional decoding methods may fail to read them accurately. The key to handling this challenge lies in preprocessing the image to repair or reconstruct the barcode as much as possible.
Basic image enhancement algorithms like Gaussian blur, morphological closing, and thresholding can help clean up the barcode region by eliminating noise or filling in broken bars. For more advanced applications, you might consider using machine learning-based restoration models trained to “fill in the blanks” of damaged codes. Additionally, some libraries offer confidence scoring on barcode reads—if the confidence is low, your app could attempt to reprocess the image using a different set of filters or prompt the user to try scanning again at a different angle or distance.
Scanning multiple barcodes in one image
In warehouse or retail environments, it’s not uncommon for a single frame to contain several barcodes—think of a shipping label with a QR code, a UPC, and maybe even a custom format code all printed together. To deal with this, your app should be capable of detecting and decoding multiple barcodes in a single frame.
This requires more than just running a barcode detector on the full image. You’ll want to implement barcode localization algorithms that scan the image for rectangular or barcode-like patterns, isolate each candidate region, and run individual decoding passes. Modern approaches include using deep learning models to first detect the barcodes’ bounding boxes before passing them off to traditional decoders. This separation of detection and decoding not only improves accuracy but also allows you to prioritize certain barcode types if your app is domain-specific.
Scanning barcodes at different orientations
Barcodes aren’t always perfectly aligned. Users might scan at an angle, or the barcode might be printed sideways, upside-down, or rotated at an arbitrary degree. If your app can only decode horizontally aligned codes, you’re limiting its real-world utility. To address this, your scanning logic should incorporate rotation-invariant algorithms.
Many modern barcode libraries already support this feature by internally rotating the image during processing, but it’s worth verifying how well your chosen library performs with rotated inputs. You can also pre-process the image using computer vision techniques to estimate and normalize the orientation of the barcode before attempting a decode. For 2D barcodes like QR or Data Matrix codes, rotation doesn’t typically affect readability, but with 1D barcodes, alignment matters a lot more, so orientation handling becomes crucial.
A related challenge is scanning inverted barcodes, which requires different approaches depending on whether a barcode is one- or two-dimensional. Some scanning software offers an “inverted mode” to speed up scans of inverted barcodes, which simply inverts the camera input, creating a non-inverted version of the barcode for the software to process. However, this approach depends on users selecting the correct mode, who may not even be aware that they are scanning an inverted barcode. Having the software automatically detect inversion is usually better.
Scanning barcodes of different sizes
Barcodes come in a wide range of sizes—from tiny stickers on product packaging to large labels on warehouse pallets. Your scanner needs to gracefully handle both extremes. If a barcode is too small in the frame, it may not be resolvable; if it’s too large, the scanner might only capture part of it, leading to failed reads.
To adapt dynamically, consider implementing a system that uses autofocus and auto-zoom features provided by the device’s camera API. On mobile devices, you can measure the size of the detected barcode in the frame and adjust the zoom accordingly, ensuring that the code fills the optimal portion of the screen. Also, make sure your app supports a sufficiently high resolution for scanning small codes—downscaling might save processing time but at the cost of scan accuracy.
Supporting multiple barcode types
Real-world applications often require scanning a variety of barcode formats. These may include linear (1D) codes like UPC-A or Code 128, and matrix (2D) codes like QR, PDF417, or Data Matrix – some of them using international standards like GS1, which require specific data parsers. Not every library supports every type, and some libraries perform better with specific formats.
If your app serves a general-purpose audience or multiple industries, it’s worth supporting as many formats as feasible. Some barcode scanning frameworks allow you to specify which formats to scan for, improving performance by skipping irrelevant types. You can also add custom logic to prioritize or validate certain barcode types based on context—like expecting a QR code for login, but a UPC code in a grocery store. Consider offering visual cues or configuration settings for users to choose their expected format.
Optimizing for different devices
Performance and accuracy can vary widely depending on the device used. On mobile phones, leveraging native camera features such as tap-to-focus, manual exposure adjustment, or even real-time edge enhancement filters can significantly improve the user experience. If you’re targeting lower-end phones, be sure to optimize your processing pipeline to run efficiently without lag.
For desktop environments using webcams, there’s less flexibility with camera control, but you can still improve performance by accessing resolution settings via browser APIs or device drivers. Encouraging users to use external cameras with better focus capabilities can also help when scanning detailed or small codes.
Leveraging machine learning for accuracy
One of the most significant performance boosters is applying deep learning algorithms to barcode scanning. Whereas traditional methods rely on strict image patterns and simple heuristics, machine learning models can adapt to far more variability in lighting, orientation, damage, and noise.
You can train custom object detection models to locate barcodes in complex scenes, or even use CNNs to directly interpret damaged barcodes that would otherwise be unreadable. Some open-source models already exist for this purpose, and integrating them with your app’s scanning logic can lead to a dramatic improvement in robustness. However, keep in mind that ML models often require more computational power, so consider providing a fallback to traditional decoding methods for low-power devices.

