With the Scanbot Web Barcode Scanner SDK, you can add barcode scanning functionalities to your website or web app in a matter of minutes and also make it downloadable by turning it into a Progressive Web App.
In this tutorial, we’ll show you how to build the app from scratch using React and Vite and make it fulfill all requirements of a PWA.
The only thing you need is to have Node.js version 18 or higher installed on your machine.
Project setup
Open a terminal and create a new Vite project with the following command:
npm create vite@latestYou will be asked to name your project. For this tutorial, let’s go with “scanbot-tut”.
Then, when prompted to select a framework, choose React and select Typescript as the variant.
Now run:
cd scanbot-tut
npm install
npm run dev
Open the App.tsx file (located in the src directory) and replace the file’s contents with the following:
const App = () => {

  return <></>;
};

export default App;
Initializing the SDK
Open another terminal, navigate to your project folder, and install the scanbot-web-sdk package with the following command:
npm i scanbot-web-sdkThe SDK contains WebAssembly binaries that should be hosted on your server. We ship these binaries with the npm package. Since Node.js doesn’t copy the binaries to the target automatically, you need to manually copy them to the desired destination (we recommend the public asset directory).
You can quickly copy them from node_modules to a folder called wasm in the public asset directory using the following command:
mkdir -p public/wasm && cp -r node_modules/scanbot-web-sdk/bundle/bin/barcode-scanner/* public/wasm💡 To ensure these files are always copied to the same directory for all users and updated when the SDK itself is updated, you can add the command as a post-installation script to your package.json:
"postinstall": "mkdir -p public/wasm && cp -r node_modules/scanbot-web-sdk/bundle/bin/barcode-scanner/* public/wasm"Back in App.tsx, add the code to import ScanbotSDK at the top of the file:
import ScanbotSDK from 'scanbot-web-sdk/ui';We need to initialize ScanbotSDK within App.tsx. You have the option of leaving the licenseKey empty to use a trial mode that works for 60 seconds per session or getting a free 7-day trial by submitting the trial license form on our website.
Your App.tsx should now look like this:
import { useEffect } from "react";
import ScanbotSDK from 'scanbot-web-sdk/ui';

const App = () => {
  useEffect(() => {
    const init = async () => {
      await ScanbotSDK.initialize({
        licenseKey: "",
        enginePath: '/wasm/'
      });
    };

    init();
  }, []);

  return <></>;
}
Creating our barcode scanner
First, we’ll need to create the configuration that we’ll use for the barcode scanner in App.tsx.
To create the configuration, we can call a method that returns an instance of the configuration object, which we can then modify as needed:
const config = new ScanbotSDK.UI.Config.BarcodeScannerScreenConfiguration();This config object will be what we use to make changes to the RTU UI. However, for now, let’s just use it to create our barcode scanner:
await ScanbotSDK.UI.createBarcodeScanner(config);Now, let’s assign the scanner to a variable and wrap it within an asynchronous function so we can easily assign it to a button within our App. This allows us to easily trigger the scanner with a button press in our application.
Let’s name the variable “result”, since it will store the outcome returned by createBarcodeScanner.
const startScanner = async () => {
  const config = new ScanbotSDK.UI.Config.BarcodeScannerScreenConfiguration();

  const result = await ScanbotSDK.UI.createBarcodeScanner(config);

  return result;
}
To trigger the scanner with a button press, we add a button to our React component and assign the startScanner function to its onClick event:
return (
  <div>
    <button onClick={startScanner}>Start Scanner</button>
  </div>
);
Next, let’s create a scanResult state at the top of our App component.
We can then set the value of scanResult within our startScanner function when the scanning results are returned. Finally we can display those results below our button.
Our App.tsx should now look like this:
import { useEffect, useState } from "react";
import ScanbotSDK from "scanbot-web-sdk/ui";

const App = () => {
  const [scanResult, setScanResult] = useState<string>("");

  useEffect(() => {
    const init = async () => {
      await ScanbotSDK.initialize({
        licenseKey: "",
        enginePath: "/wasm/"
      });
    };

    init();
  }, []);

  const startScanner = async () => {
    const config = new ScanbotSDK.UI.Config.BarcodeScannerScreenConfiguration();

    const result = await ScanbotSDK.UI.createBarcodeScanner(config);

    if (result && result.items.length > 0) {
      setScanResult(result.items[0].barcode.text);
    }

    return result;
  }

  return (
    <div>
      <button onClick={startScanner}>Start Scanner</button>
      {scanResult && <div>{scanResult}</div>}
    </div>
  );
};

export default App;
With this setup, we now have a fully functional barcode scanner!
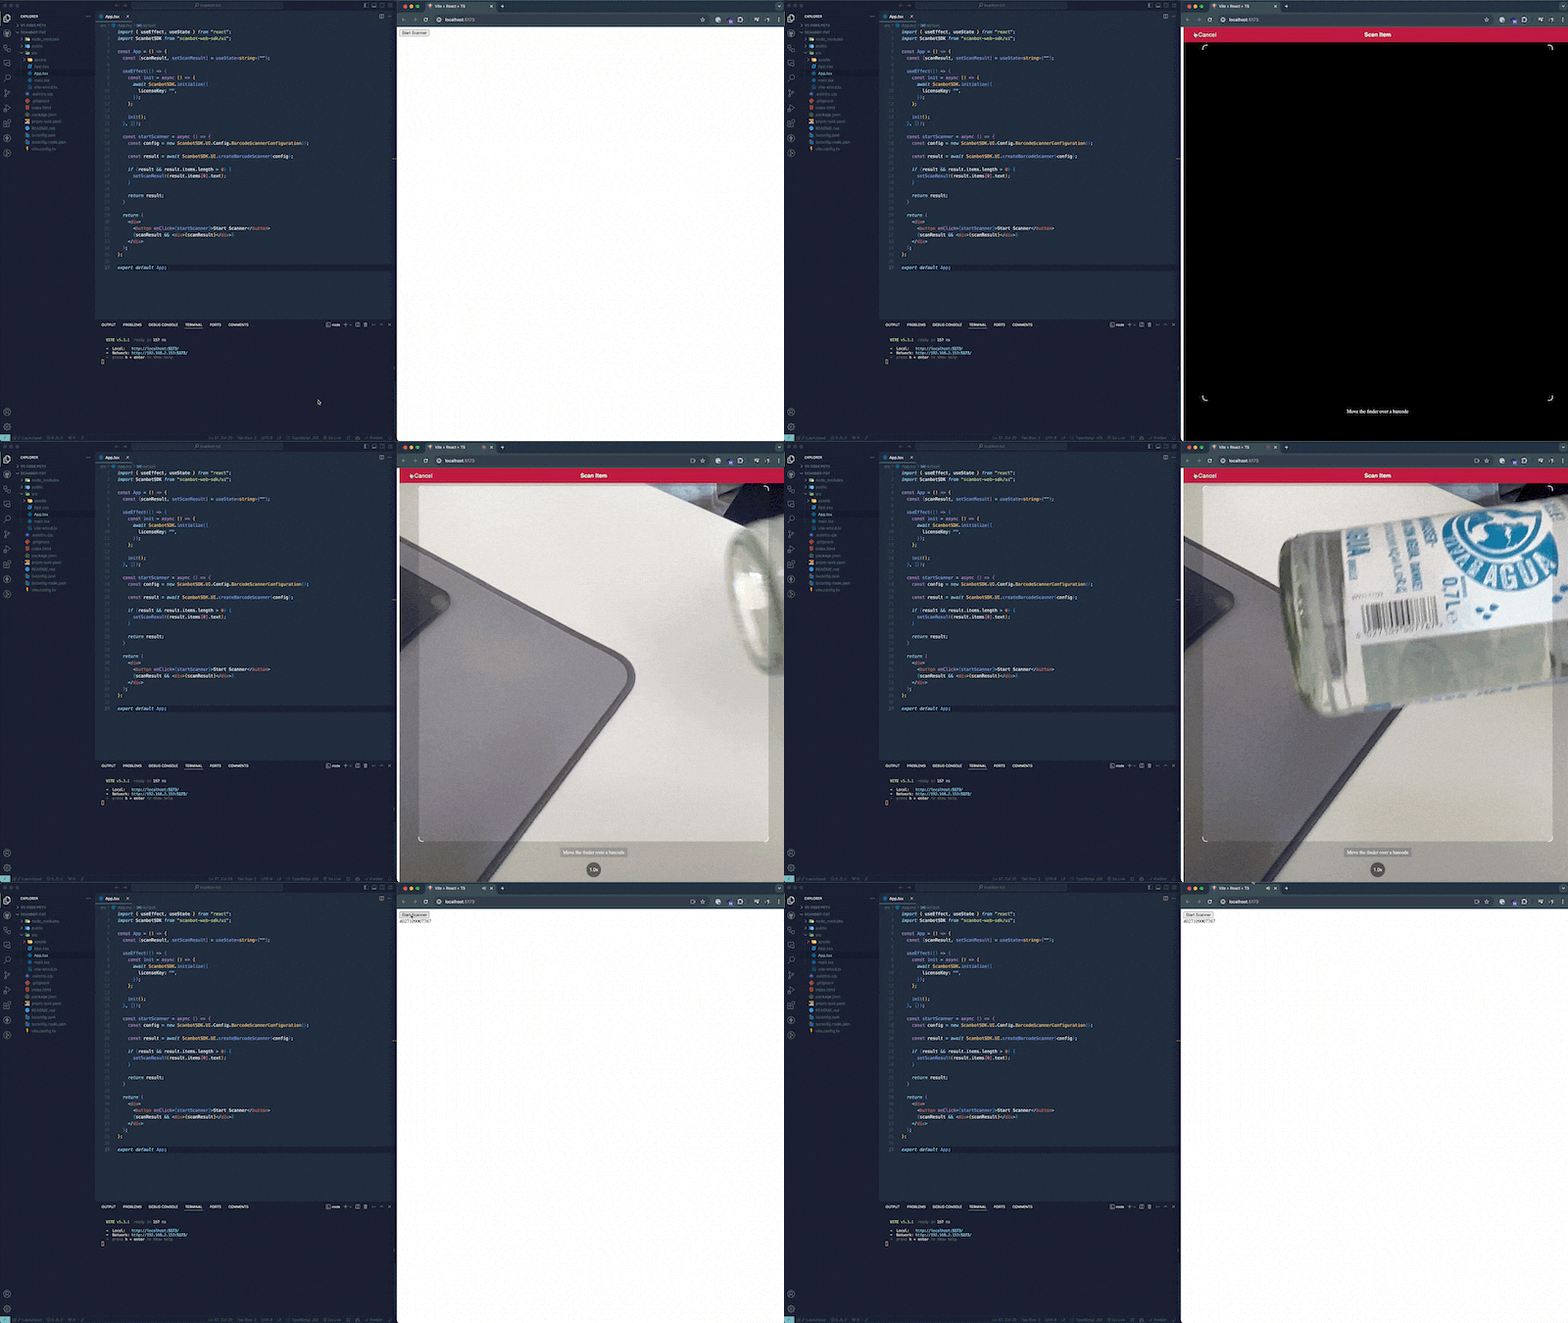
If you haven’t already, go to the local server running your app and click the “Start Scanner” button to open the scanner and scan a barcode. After scanning a barcode, the scanner will automatically close and the result variable in the startScanner function will now contain the scan result, which will be displayed under the button.
Implementing more scanning modes
The Scanbot Web Barcode Scanner SDK’s RTU UI also lets us modify the behavior of the scanner itself. So, rather than immediately closing the scanner after scanning a barcode, we can visualize the results in a variety of ways.
Let’s try out multi-barcode scanning combined with an AR overlay.
Multi-barcode scanning
Let’s create our useCase object to pass to our config.
const useCase = new ScanbotSDK.UI.Config.MultipleScanningMode();
config.useCase = useCase;
Now our scanner will have a collapsed list containing all scanned barcodes.
AR overlay
To enable the AR overlay, all we need to do is set the visibility to true within our use case configuration.
Let’s also disable the automatic selection, so we can manually select individual barcodes and add them to our list.
useCase.arOverlay.visible = true;
useCase.arOverlay.automaticSelectionEnabled = false;
Our startScanner function should now look something like this:
const startScanner = async () => {
  const config = new ScanbotSDK.UI.Config.BarcodeScannerScreenConfiguration();

  // Customize the look of the barcode scanner
  config.palette.sbColorPrimary = "#1E90FF";
  config.palette.sbColorSecondary = "#87CEEB";

  config.userGuidance.title.text = "Place the finder over the barcode";

  config.topBar.mode = "GRADIENT";

  config.actionBar.zoomButton.backgroundColor = "#1E90FF";

  // Customize the barcode scanner's use case
  const useCase = new ScanbotSDK.UI.Config.MultipleScanningMode();

  useCase.arOverlay.visible = true;
  useCase.arOverlay.automaticSelectionEnabled = false;

  config.useCase = useCase;

  const result = await ScanbotSDK.UI.createBarcodeScanner(config);

  if (result && result.items.length > 0) {
    setScanResult(result.items[0].barcode.text);
  }

  return result;
};
Now that all scanning modes are configured, we can move on to configuring our React app so it performs as a Progressive Web App. If you want to try out the barcode scanning functionalities beforehand, just run npm run build and then npx serve dist.
Turning our React app into a PWA
Making sure your web app fulfills all requirements of a Progressive Web App can be a bit of pain. Fortunately for us, Vite has a plugin called vite-plugin-pwa that will streamline the process. For further details, take a look at the Vite PWA guide.
Step 1: Install the plugin
Run the following command:
npm install -D vite-plugin-pwaThis will install the package as a development dependency.
Step 2: Adjust the Vite configuration
Open vite.config.ts and add the minimal configuration for vite-plugin-pwa.
import { defineConfig } from 'vite'
import react from '@vitejs/plugin-react'
import { VitePWA } from 'vite-plugin-pwa'

export default defineConfig({
  plugins: [
	  react(),
	  VitePWA({ registerType: 'autoUpdate' })
  ],
})
Step 3: Configure your entry point
Open index.html and configure it so it fulfills the minimal PWA requirements.
<!doctype html>
<html lang="en">
  <head>
    <meta charset="UTF-8" />
    <link rel="icon" type="image/svg+xml" href="/vite.svg" />
	<link rel="apple-touch-icon" href="/apple-touch-icon.png">
	<link rel="mask-icon" href="/mask-icon.svg" color="#FFFFFF">
    <meta name="viewport" content="width=device-width, initial-scale=1.0" />
    <meta name="theme-color" content="#ffffff" />
    <meta name="description" content="My Awesome App description" />
    <title>Barcode Scanner App</title>
  </head>
  <body>
    <div id="root"></div>
    <script type="module" src="/src/main.tsx"></script>
  </body>
</html>
Step 4: Configure the Web App Manifest
Go back to vite.config.ts and add the minimal Web App Manifest configuration.
import { defineConfig } from "vite";
import react from "@vitejs/plugin-react";
import { VitePWA } from "vite-plugin-pwa";

export default defineConfig({
  plugins: [
    react(),
    VitePWA({
      registerType: "autoUpdate",
      manifest: {
        name: "Barcode Scanner PWA",
        short_name: "PWA App",
        description: "Simple barcode scanner",
        theme_color: "#ffffff", // must match color set in index.html
        icons: [
          {
            src: "icon-192x192.png",
            sizes: "192x192",
            type: "image/png",
          },
          {
            src: "icon-512x512.png",
            sizes: "512x512",
            type: "image/png",
          },
        ],
      },
    }),
  ],
});
Step 5: Add the app icons to your project
If you haven’t done so already, create the necessary icon variations according to the PWA requirements and add them to your folder public. You can use a favicon generator to make things easier for you.
Make sure the generated icons are correctly referenced in your manifest configuration in vite.config.ts to ensure they are used properly across different devices.
Step 6: Build and run your Progressive Web App
Now build your app with npm run build and run it via npx serve dist.
Open the app in your browser and you should see the installation icon pop up on the right side of your URL bar.

Conclusion
🎉 Congratulations! You can now scan barcodes from your browser and install the web app on your device.
Should you have questions about this tutorial or ran into any issues, we’re happy to help! Just shoot us an email via tutorial-support@scanbot.io.
Happy scanning!
