In this tutorial, you will learn how to build a web app for scanning barcodes and QR codes using JavaScript, HTML, and the Scanbot Web Barcode Scanner SDK.
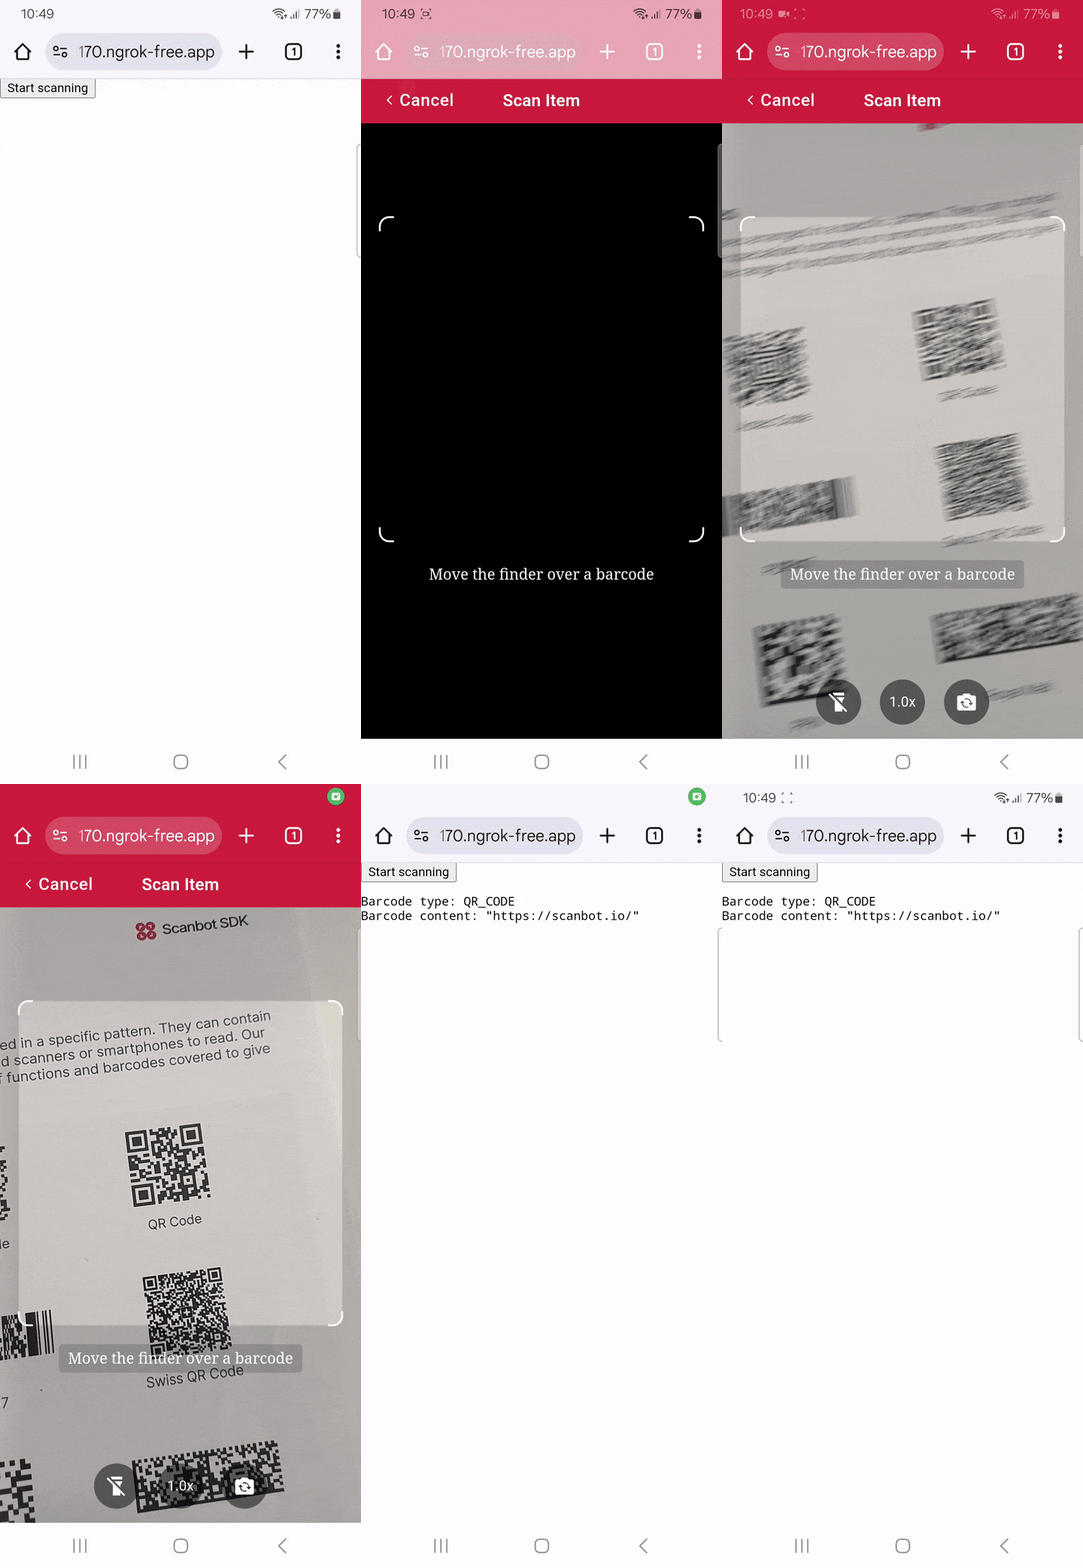
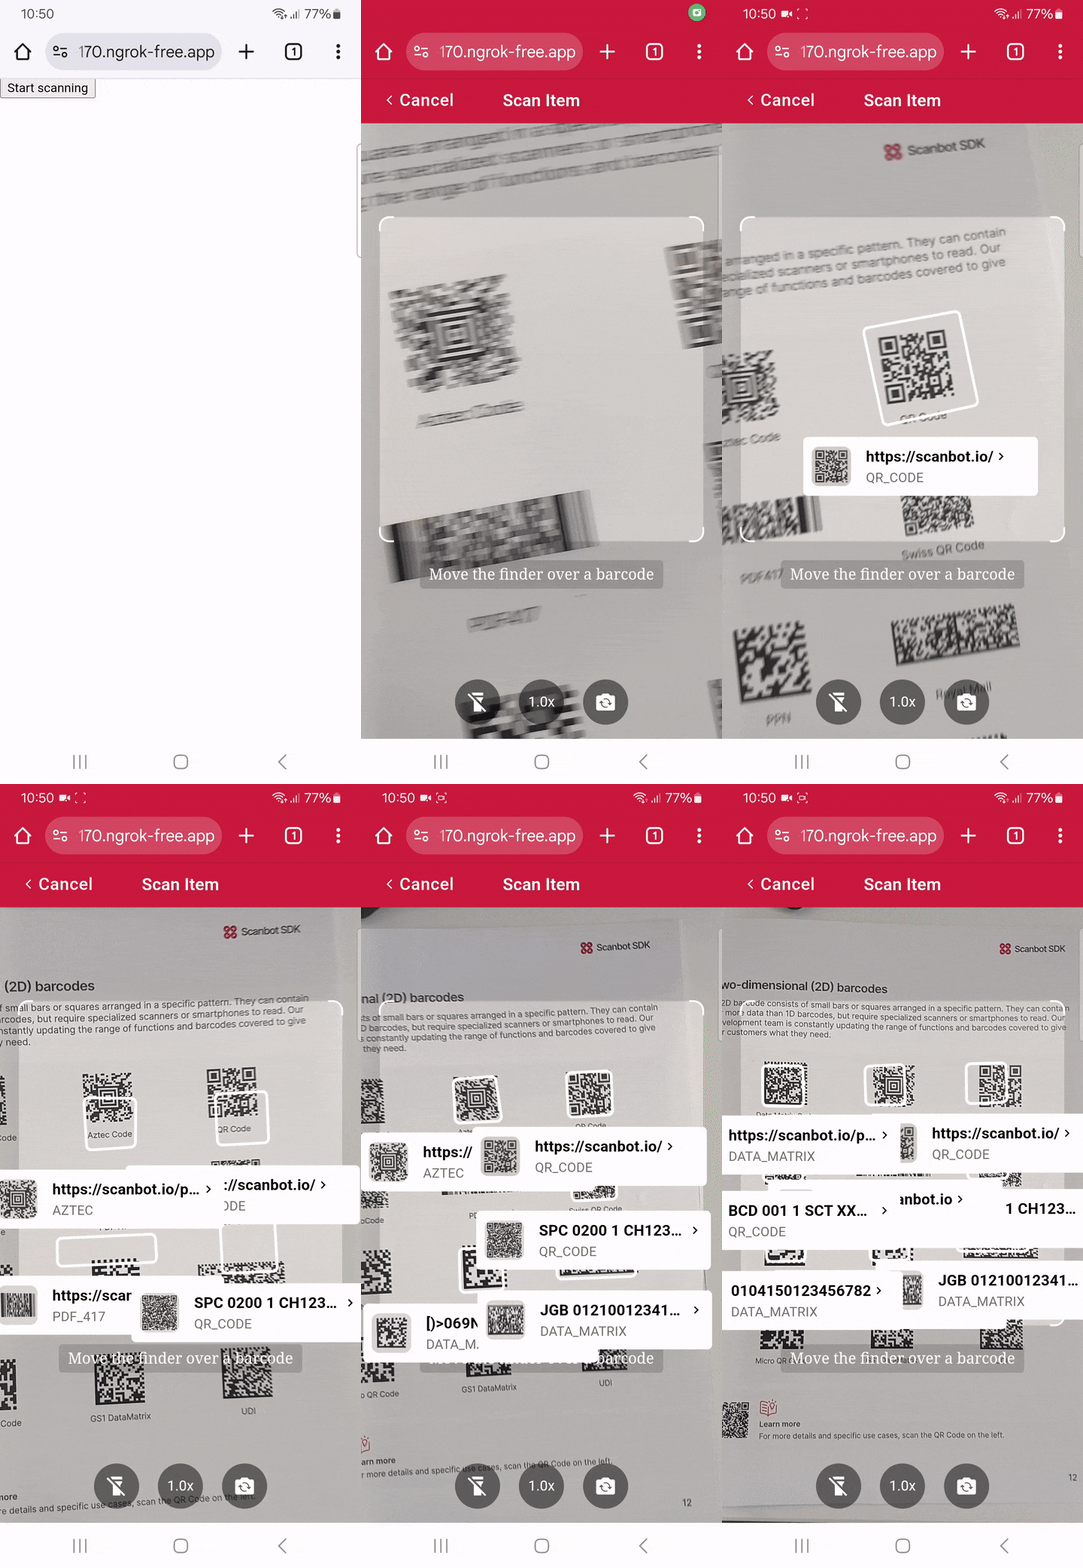
The app will initially display a single “Start scanning” button for the user. When clicked, the scanner will open, enabling the user to scan a barcode. After scanning, the scanner will close, and the scanned code will be displayed on the app screen.
Thanks to the Scanbot SDK’s Ready-to-Use UI Components, you can even use an AR overlay to display multiple barcodes’ contents right in the viewfinder.
To accomplish that, you will need to follow the steps below:
- Download the SDK files
- Create the HTML page and configure the Web SDK
- Start a local HTTP server
- Start scanning
- Configure styling and scanning behavior
- Deploy to a server (optional)
Let’s dive into more details for each step.
Step 1: Download the Web SDK
First, create a new empty directory for your app and name it my-scanner-app.
Then, download the Scanbot SDK npm package directly from here.
💡 As specified in our documentation, you can also use npm install to download and install the package, but for this tutorial, we suggest manually downloading it and installing it from the link provided.
Unzip the downloaded files into my-scanner-app. Your folder structure should look like this:
my-scanner-app/
  |- scanbot-web-sdk/
    |- webpack/
    |- bundle/
    |- @types/
    |- index.js
    |- ui.js
    ... (and some other files)
⚠️ Make sure the folder containing the package files is called scanbot-web-sdk, not “package” or similar.
Step 2: Create the HTML page and configure the Web SDK
To create the HTML with the Scanbot SDK, first create an index.html file in the my-scanner-app/ folder. Then, add the following code to the file.
<!DOCTYPE html>
<html lang="en">
<head>
    <meta charset="UTF-8">
    <!-- We prevent the user from zooming on mobile device -->
    <meta name="viewport" content="width=device-width, initial-scale=1.0, maximum-scale=1.0, user-scalable=0" />
    <title>My Scanner App</title>
</head>
<body style="margin: 0">
<button id="start-scanning">Start scanning</button>
<pre id="result"></pre>
<script type="module">
    // We import the necessary ScanbotSDK module
    import "./scanbot-web-sdk/bundle/ScanbotSDK.ui2.min.js";
    // When initializing the SDK, we specify the path to the barcode scanner engine
    const sdk = await ScanbotSDK.initialize({
        enginePath: "scanbot-web-sdk/bundle/bin/barcode-scanner/"
    });
    document.getElementById("start-scanning").addEventListener("click", async () => {
        // We create a new default configuration for the barcode scanner
        const config = new ScanbotSDK.UI.Config.BarcodeScannerScreenConfiguration();
        // We create a barcode scanner UI component
        const scanResult = await ScanbotSDK.UI.createBarcodeScanner(config);
        // Once the scanning is done, we display the result
        if (scanResult?.items?.length > 0) {
            document.getElementById("result").innerText =
                `Barcode type: ${scanResult.items[0].barcode.format} \n` +
                `Barcode content: "${scanResult.items[0].barcode.text}" \n`;
        } else {
            document.getElementById("result").innerText = "Scanning aborted by the user";
        }
    });
</script>
</body>
</html>
The code block above:
- Adds the “Start scanning” button.
- Imports and initializes the Scanbot SDK.
- Executes the user interface from the Scanbot SDK when the user clicks the “Start scanning” button.
- If a barcode is identified, it will present the barcode type and its content to the user.
Step 3: Start local HTTP server
The Scanbot SDK uses advanced browser features that are unavailable when opening our site via a file URL. Therefore, a local HTTP server is required to view the site.
There are two main ways to run the index.js file in a localhost server: using Python or Node.js.
Python
If you have Python installed, you can use it to start a local HTTP server. To do so, follow the steps below:
- Open a terminal in the my-scanner-app/ folder.
- Use the command
python3 -m http.serverto start a local test server. - Now, you can access it on your browser at
http://localhost:8000.
To stop running the localhost server, press Ctrl+C on the terminal.
Node.js
If Node.js is installed, you can use the npm serve package to start a local HTTP server. To do so, follow the steps below:
- Open a terminal in the my-scanner-app/ folder.
- Run the command
npx serve. - Once it finishes loading, you can access the page using the URL provided in your terminal, which usually is
http://localhost:3000.
To stop running the localhost server, press Ctrl+C on the terminal.
Step 4: Start scanning
Once you access the site on your browser, follow the steps below to test the Scanbot SDK:
Click the “Start scanning” button.

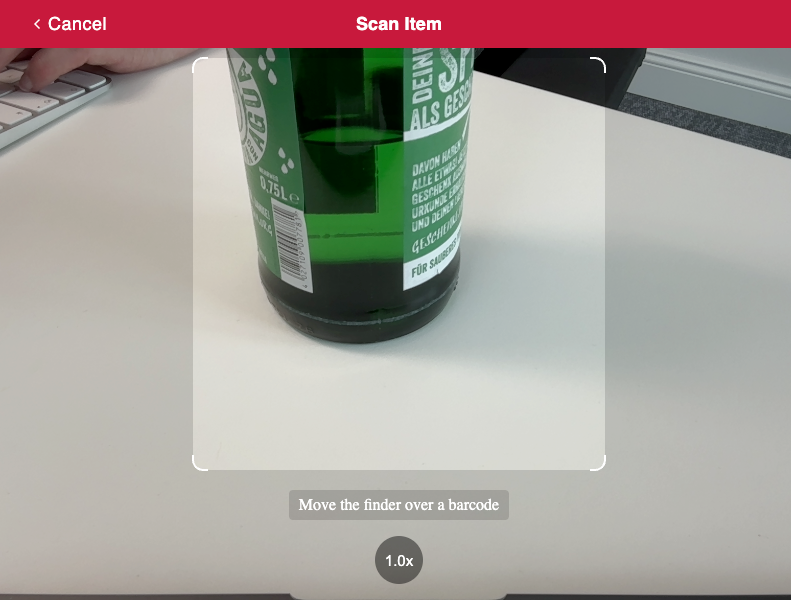
The scanning UI will open, allowing you to scan a barcode using your camera. Point your camera to a barcode, as in the example below.
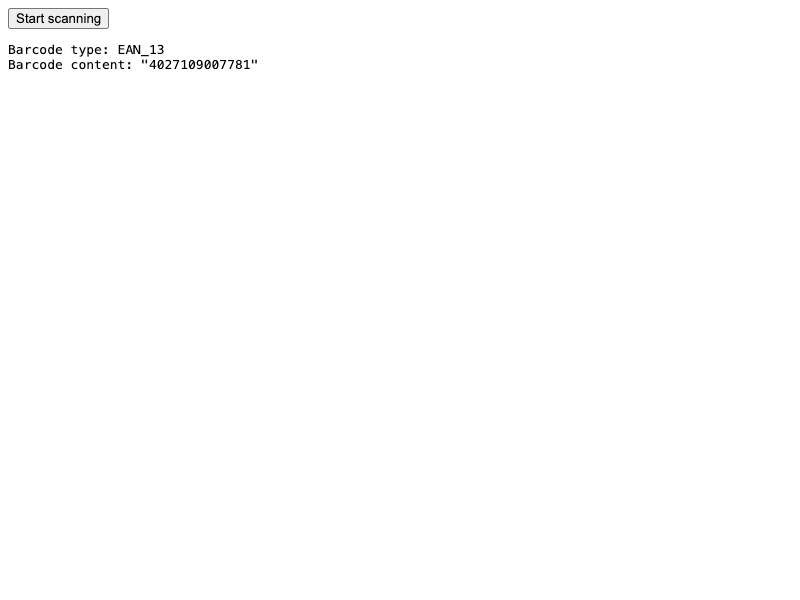
After scanning, the UI closes, displaying the scanned code and its type right below the “Start scanning” button.
Step 5: Configure the style and scanning behavior
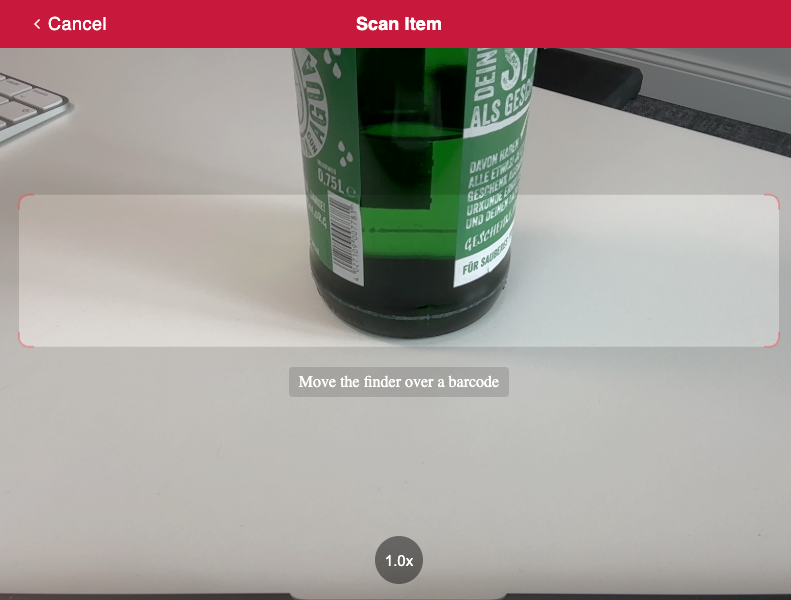
The app code provided in Step 2 has the UI fully configured. To change the app’s appearance, you can customize the config object. You can, for example, change the viewfinder size and color.
To do so, you can change the aspectRatio and strokeColor after defining the config object, as displayed in the following code block:
const config = new ScanbotSDK.UI.Config.BarcodeScannerConfiguration();
config.viewFinder.aspectRatio.height = 1;
config.viewFinder.aspectRatio.width = 5;
config.viewFinder.style.strokeColor = "#FF000050";
The above configurations will result in the following styling:
You can find more configuration options by accessing the SDK or API documentation.
As another configuration example, you can display an AR overlay and let the user pick a specific barcode when the app identifies multiple barcodes on the camera. To add this feature, add the following code after defining the config object:
config.useCase.arOverlay.visible = true;
config.useCase.arOverlay.automaticSelectionEnabled = false;
If you open your app again, it will look like this:
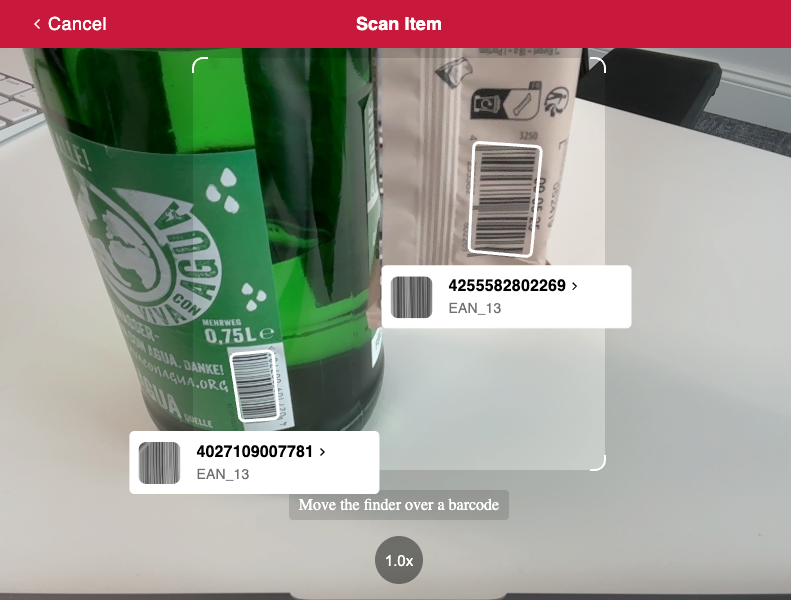
💡 The AR labels can also be fully configured.
Step 6: Deploy to a server (optional)
To test your new app on your phone, you need to deploy it to a server. If you don’t have a web server ready, you can prototype your site using services like Static.app by executing the following steps:
- Zip the content from my-scanner-app.
- Access Static.app and click Upload for free.
- Find and select the my-scanner-app.zip file.
- After the upload, your site will run within minutes. You will then be presented with a URL. Use it to access the app from any device, including your mobile phone.
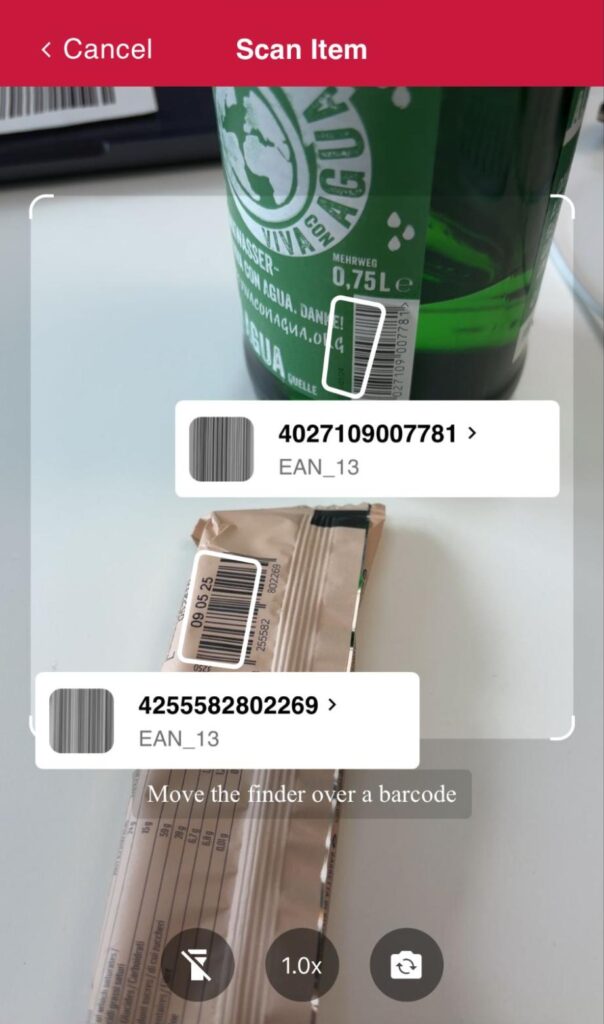
The Scanbot SDK UI is optimized for mobile devices. It allows users to choose the camera and toggle the flashlight by default. Use the URL to test the app interface on your mobile device, as displayed below.
Conclusion
That’s it! You now have a fully functional barcode-scanning web app using the Scanbot SDK’s RTU UI.
Integration guides are also available for the following Web frameworks:
Happy scanning! 🤳
