Flutter ZXing is a plugin for scanning and generating barcodes using the ZXing barcode scanning library. The plugin is implemented using the Dart FFI (Foreign Function Interface) and the zxing-cpp library and allows you to integrate barcode scanning and generation functionalities into your Flutter apps.
In this tutorial, we’ll walk you through the process of setting up a Flutter project and implementing an Android barcode scanner using flutter_zxing.
Prerequisites
Before you begin, ensure you have the following tools and components installed:
- Android Studio or Visual Studio Code: You need an Integrated Development Environment (IDE) to write and run your Flutter code. Android Studio is recommended for its support for Android development.
- Android device or emulator: You will need a physical Android device or an Android emulator set up in your IDE to test your application.
Setting up the Flutter environment
To start, you have to install the Flutter SDK:
- Visit the Flutter installation guide.
- Select your operating system from the available options.
- Choose Android as your development platform.
- Follow the instructions under Download and Install to download and unzip the Flutter SDK. When unzipping the file, pay attention to any path restrictions mentioned in the guide.
- If you’re a Windows user, after unzipping the SDK, make sure to update your Windows Path Variable as detailed in the guide.
Next, you’ll need to set up your Android development environment:
- Visit the Flutter guide for Android setup.
- Follow the instructions specific to your situation—whether you’re a new or existing Android Studio user. Choose the guide that best suits you.
- Agree to the Flutter Android licenses by following the license agreement instructions.
- Finally, verify your development setup to ensure everything is configured correctly.
Creating the app
The following steps cover all the steps to create the Flutter barcode scanner app.
Step 1: Create the project
Before diving into the barcode scanner functionality, let’s start by setting up a basic Flutter project. This will lay the groundwork for all the features we’ll add later on. Follow these steps to get your project up and running:
- Open your terminal and access the directory where you want to create the app.
- Create a new Flutter project by running the following command:
flutter create barcode_scannercd barcode_scannerflutter run
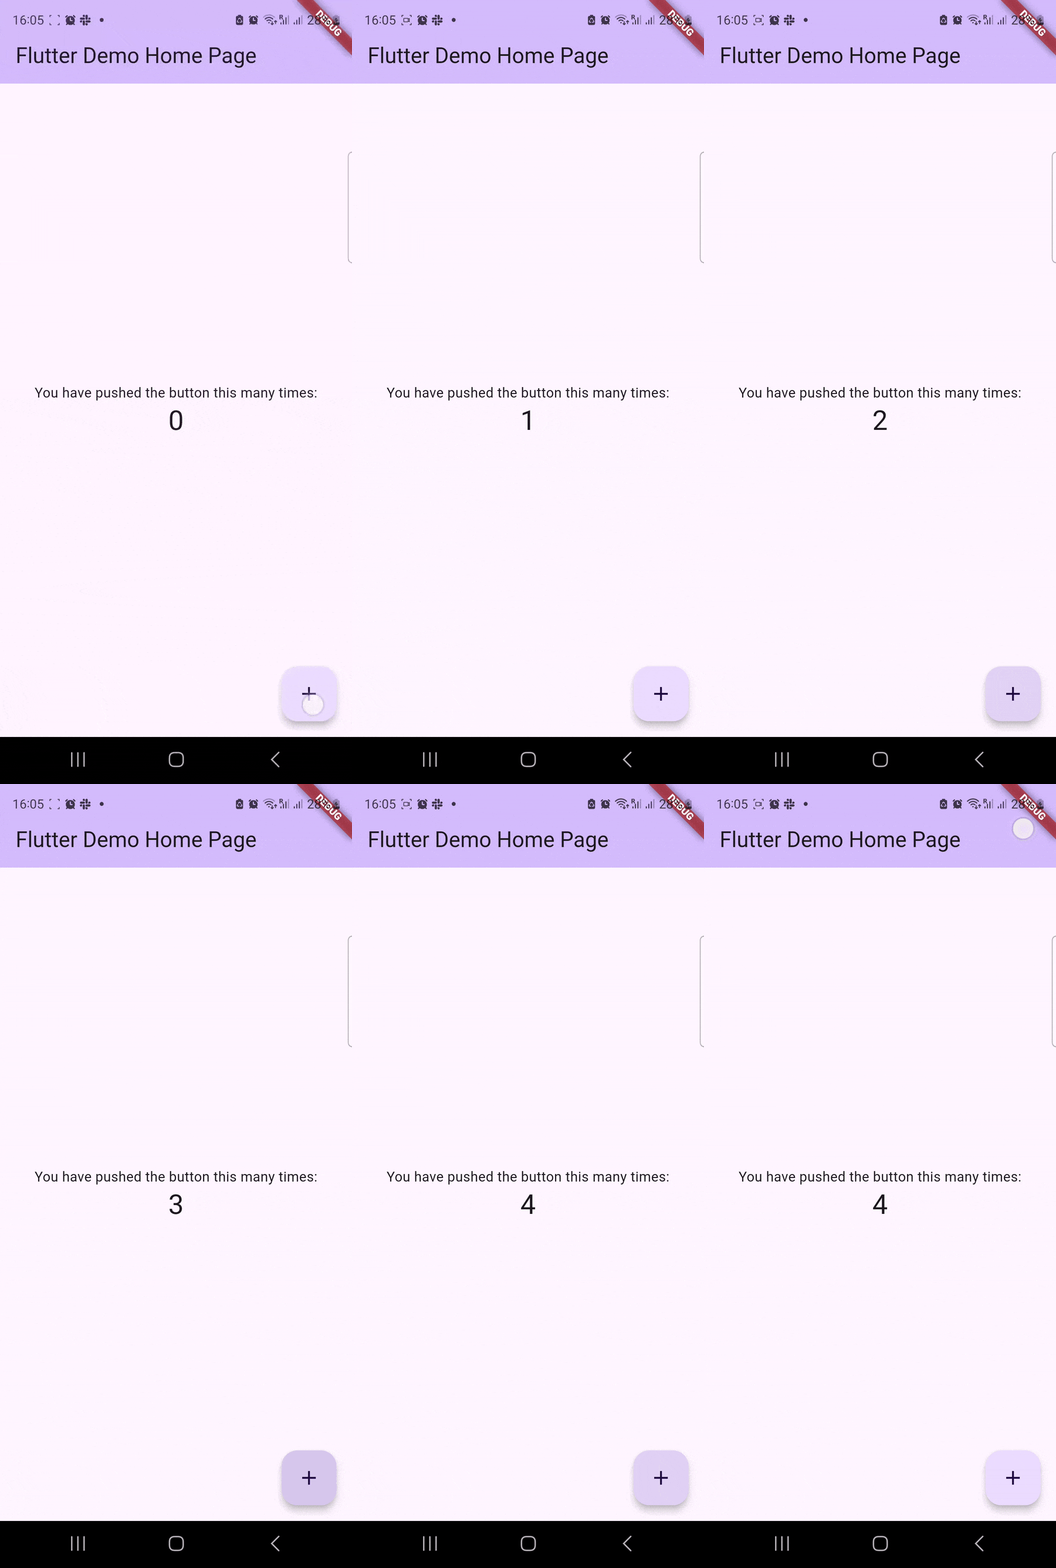
Step 2: Install the Flutter ZXing plugin
With your basic Flutter app up and running, it’s time to start building the barcode scanner functionality. To do this, you’ll use the Flutter ZXing plugin. Follow these steps to install the plugin and configure your app:
- Open your project in Android Studio. Once it is open, switch to the Project Files view to locate the necessary folders and files easily.
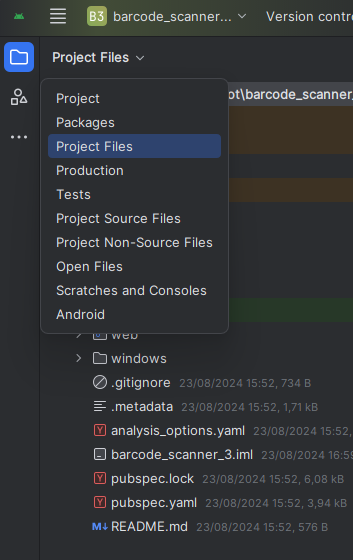
dependencies:
  flutter:
    sdk: flutter
  cupertino_icons: ^1.0.8
  flutter_zxing: ^1.7.0
flutter pub getStep 3: Configure the app
Now that the basics are set up, it’s time to configure the app as a barcode scanner. Start by opening the main.dart file in the lib folder. Delete the default Flutter code to begin building your barcode scanner app from scratch.
3.1: Import the packages and create the main function
The first step in configuring your app is to import the required packages and set up the main() function:
import 'package:flutter/foundation.dart';
import 'package:flutter/material.dart';
import 'package:flutter_zxing/flutter_zxing.dart';

void main() {
  runApp(const MyApp());
}
3.2: Create the MyApp class
Next, you’ll create the MyApp class, which is a stateless widget that serves as the root of your application. This class returns a MaterialApp widget, providing the basic structure and theme for your app.
MaterialApp: A wrapper that includes apptitle,debugShowCheckedModeBanner,andhomesettings.home: Points to theDemoPagewidget, which will be the main screen of the app.
Below is the code to set up the MyApp class:
class MyApp extends StatelessWidget {
  const MyApp({super.key});

  @override
  Widget build(BuildContext context) {
    return const MaterialApp(
      title: 'Flutter ZXing Barcode Scanner',
      home: DemoPage(),
    );
  }
}
3.3. Create the DemoPage widget
The DemoPage widget is the core of the barcode scanner app, handling its main functionality. In Flutter, when a widget needs to manage a mutable state, you use a StatefulWidget along with its corresponding State class. In this case, the mutable state is necessary to track the scanned barcode, which determines whether to display the barcode scan result.
The DemoPage setup consists of:
DemoPage StatefulWidget: Manages the state of the app’s main screen._DemoPageState: Contains the logic and functions behind the main screen, including tracking the barcode scan result. Theresultis stored as a nullableCodeobject.
The following table lists the methods within the _DemoPageState class:
| Method | Description | Functionality |
|---|---|---|
build(BuildContext) | The primary method for building the widget tree. It checks the platform support and either shows the scanner interface or an unsupported platform message. | The build method is called whenever setState is invoked, triggering a rebuild of the widget tree. It constructs the UI based on the current state. If the platform supports the camera, it displays either the ScanResultWidget (if a valid scan result exists) or the scanner interface (by calling _buildScanner). If not, it displays the UnsupportedPlatformWidget. ScanResult and UnsupportedPlatform are external widgets which you’ll create in the following tutorial sections. |
_isCameraSupported() | Helper method to check if the current platform supports the camera. | Returns a boolean value indicating whether the current platform supports camera functionality. It specifically checks for iOS and Android platforms, which are supported by the flutter_zxing library. |
_buildScanner() | Helper method that returns the ReaderWidget, which is used to scan barcodes. | Constructs the scanner interface using the ReaderWidget. It configures the scanner with parameters such as resolution, lens direction, and scan format. It also provides callback methods (onScan, onScanFailure, onControllerCreated) to handle scan results and errors. The ReaderWidget is provided by the flutter_zxing library. For a list of all configurations available, access the GitHub repository. |
_onControllerCreated(_, Exception? error) | Callback method triggered when the scanner controller is created. Handles any errors that occur during the controller’s creation. | Called when the ReaderWidget‘s controller is created. If an error occurs during creation, such as permission issues, it calls _showMessage to display an error message to the user. |
_onScanSuccess(Code? code) | Callback method that is called when a barcode is successfully scanned. It updates the result state and triggers a UI rebuild. | Triggered when a barcode is successfully scanned. It updates the result variable with the scanned code data and calls setState to rebuild the widget tree. The UI is then updated to display the scan result using ScanResultWidget. |
_onScanFailure(Code? code) | Callback method that handles scan failures. It updates the result state and displays an error message if available. | Triggered when a scan attempt fails. It updates the result variable with the failed code data and calls setState to rebuild the widget tree. If the failed code contains an error message, it is displayed to the user via _showMessage. |
_showMessage(BuildContext, String message) | Helper method that displays a SnackBar with a provided message. | Displays a message to the user related to errors or important information. It first hides any currently visible SnackBar and then shows a new SnackBar with the specified message. This ensures that the user is notified of any issues or updates during scanning. |
The following code block presents the code for DemoPage and _DemoPageState:
class MyApp extends StatelessWidget {
 const MyApp({super.key});

 @override
 Widget build(BuildContext context) {
   return const MaterialApp(
     title: 'Flutter ZXing Barcode Scanner',
     debugShowCheckedModeBanner: false,
     home: DemoPage(),
   );
 }
}

class DemoPage extends StatefulWidget {
 const DemoPage({super.key});

 @override
 State<DemoPage> createState() => _DemoPageState();
}

class _DemoPageState extends State<DemoPage> {
 Code? result;

 @override
 Widget build(BuildContext context) {
   if (kIsWeb || !_isCameraSupported()) {
     return const UnsupportedPlatformWidget();
   }

   return Scaffold(
     appBar: AppBar(title: const Text('Scan Code')),
     body: result != null && result?.isValid == true
         ? ScanResultWidget(
       result: result,
       onScanAgain: () => setState(() => result = null),
     )
         : _buildScanner(),
   );
 }

 bool _isCameraSupported() {
   return defaultTargetPlatform == TargetPlatform.iOS ||
       defaultTargetPlatform == TargetPlatform.android;
 }

 Widget _buildScanner() {
   return ReaderWidget(
     onScan: _onScanSuccess,
     onScanFailure: _onScanFailure,
     onControllerCreated: _onControllerCreated,
     resolution: ResolutionPreset.high,
     lensDirection: CameraLensDirection.back,
     codeFormat: Format.*any*,
     showGallery: false,
     cropPercent: 0.7,
     toggleCameraIcon: const Icon(Icons.*switch\_camera*),
     actionButtonsBackgroundBorderRadius: BorderRadius.circular(10),
   );
 }

 void _onControllerCreated(_, Exception? error) {
   if (error != null) {
     _showMessage(context, 'Error: $error');
   }
 }

 void _onScanSuccess(Code? code) {
   setState(() {
     result = code;
   });
 }

 void _onScanFailure(Code? code) {
   setState(() {
     result = code;
   });
   if (code?.error?.isNotEmpty == true) {
     _showMessage(context, 'Error: ${code?.error}');
   }
 }

 void _showMessage(BuildContext context, String message) {
   ScaffoldMessenger.*of*(context).hideCurrentSnackBar();
   ScaffoldMessenger.*of*(context).showSnackBar(
     SnackBar(content: Text(message)),
   );
 }
}
For this tutorial, the following configurations are used to define the ReaderWidget behavior:
| Configuration | Description |
|---|---|
resolution: ResolutionPreset.high | Sets the camera resolution to high. |
lensDirection: CameraLensDirection.back | Configures the camera to use the back camera. |
codeFormat: Format.any | Allows the scanner to detect any barcode format. |
showGallery: false | Disables the option to select images from the gallery for scanning. It only allows scanning barcodes directly using the camera. |
cropPercent: 0.7 | Defines the percentage of the camera preview used for scanning. Increasing this value will increase the app screen area used to identify barcodes. |
toggleCameraIcon: const Icon(Icons.switch_camera) | Sets the icon used for toggling between front and back cameras |
actionButtonsBackgroundBorderRadius: BorderRadius.circular(10) | Applies a border radius of 10 pixels to the background of action buttons |
Access the GitHub repository for a list of all available ReaderWidget configurations.
3.4 Create the ScanResult widget
The _DemoPageState build method relies on the ScanResultWidget to display the scan result in the app. This widget also includes a Scan Again button to allow users to restart the scanning process.
To create the ScanResultWidget, start by creating a new folder named widget inside the lib directory. Inside this folder, add a new file named scan_result_widget.dart. This file will define how the scan result is presented to users. It’s important to note that since the ScanResultWidget is stateless, it doesn’t manage any internal state. Everything it displays is passed in through its properties.
After creating the file, define the ScanResultWidget class:
class ScanResultWidget extends StatelessWidget {
  const ScanResultWidget({
    super.key,
    this.result,
    this.onScanAgain,
  });

  final Code? result;
  final Function()? onScanAgain;
}
In the above code, the result is a final property of type Code? holding the scan result, and onScanAgain is a final property of type Function()?, which is a callback function triggered when the user presses the Scan Again button.
Next, add the components that will make up the UI. Below is the complete code for the ScanResultWidget, including its basic UI configuration:
import 'package:flutter/material.dart';
import 'package:flutter_zxing/flutter_zxing.dart';

class ScanResultWidget extends StatelessWidget {
  const ScanResultWidget({
    super.key,
    this.result,
    this.onScanAgain,
  });

  final Code? result;
  final Function()? onScanAgain;

  @override
  Widget build(BuildContext context) {
    return Center(
      child: Padding(
        padding: const EdgeInsets.all(20.0),
        child: Column(
          mainAxisAlignment: MainAxisAlignment.center,
          children: [
            Text(
              result?.format?.name ?? '',
              style: Theme.of(context).textTheme.headlineSmall,
            ),
            const SizedBox(height: 20),
            Text(
              result?.text ?? '',
              style: Theme.of(context).textTheme.titleLarge,
            ),
            const SizedBox(height: 20),
            Text(
              'Inverted: ${result?.isInverted}  Mirrored: ${result?.isMirrored}',
              style: Theme.of(context).textTheme.bodyMedium,
            ),
            const SizedBox(height: 40),
            ElevatedButton(
              onPressed: onScanAgain,
              child: const Text('Scan Again'),
            ),
          ],
        ),
      ),
    );
  }
}
There are two main elements in the above code:
Text: Display the barcode format, the scanned text, and additional information.ElevatedButton: This button allows users to scan again by triggering theonScanAgaincallback.
3.5 Create the Unsupported Platform widget
The _DemoPageState build method uses the UnsupportedPlatformWidget to inform the user if the current device and platform do not support camera usage. To create the UnsupportedPlatformWidget, create a new file named unsupported_platform_widget.dart.dart inside the widgets folder.
Here’s what your lib folder structure will look like after adding the file:
/lib
|--- main.dart
|--- /widgets
|------ scan\_result\_widget.dart
|------ unsupported\_platform\_widget.dat
To build the UnsupportedPlatformWidget, use the following code. This widget will display a message to users indicating that their platform isn’t supported, with the message centered on the screen and styled according to the app’s theme.
import 'package:flutter/material.dart';

class UnsupportedPlatformWidget extends StatelessWidget {
 const UnsupportedPlatformWidget({super.key});

 @override
 Widget build(BuildContext context) {
   return Center(
     child: Text(
       'This platform is not supported yet.',
       style: Theme.of(context).textTheme.titleLarge,
     ),
   );
 }
}
Step 4: Testing the app
With the main.dart file updated and the scan_result_widget.dart and unsupported_platform_widget.dart files created, you’re ready to test your barcode scanner app. Follow these steps to get started:
- Connect your Android device to your computer or configure an emulator.
- Select your device or emulator in Android Studio.
- In the Run/Debug selector, choose the main.dart file.

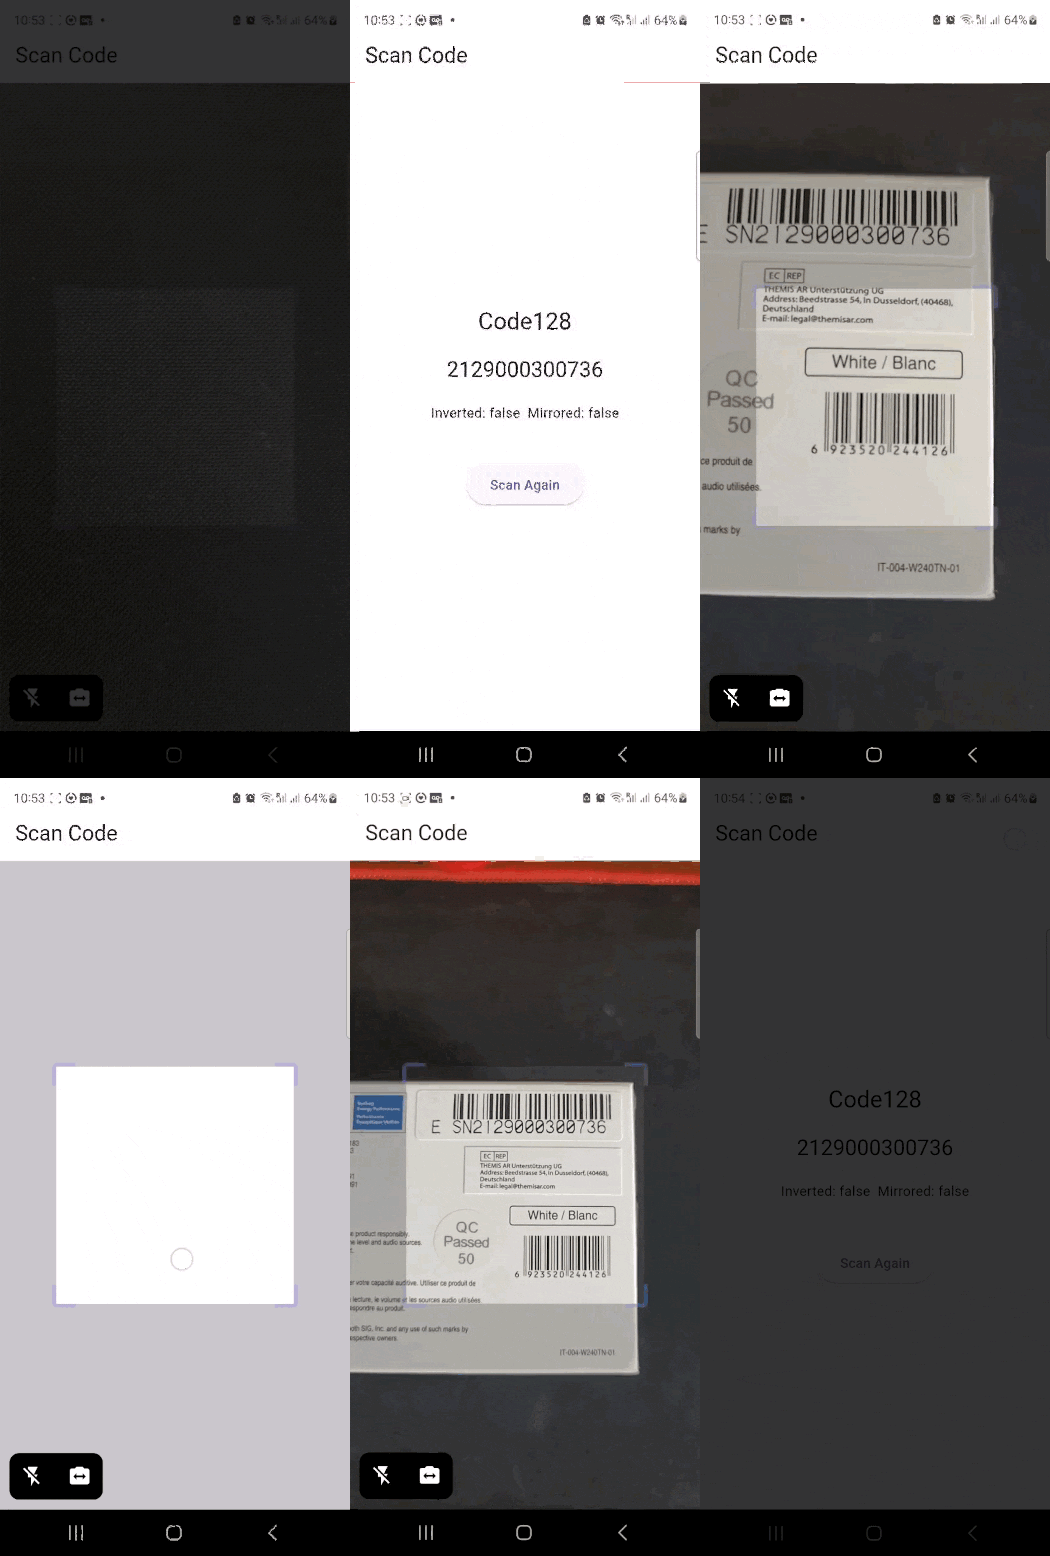
The GIF below demonstrates how the barcode scanner app works. Since the ReaderWidget is configured with Format.any, the app successfully identifies both Code 128 and EAN-13 barcode formats. The scanning area is set to 70% of the screen width, which restricts barcode detection to this area. You can adjust this setting through the ReaderWidget configurations. In addition, the GIF shows that the app will not provide a result if more than one barcode is within the scanning area. It only identifies a barcode when a single barcode is visible.
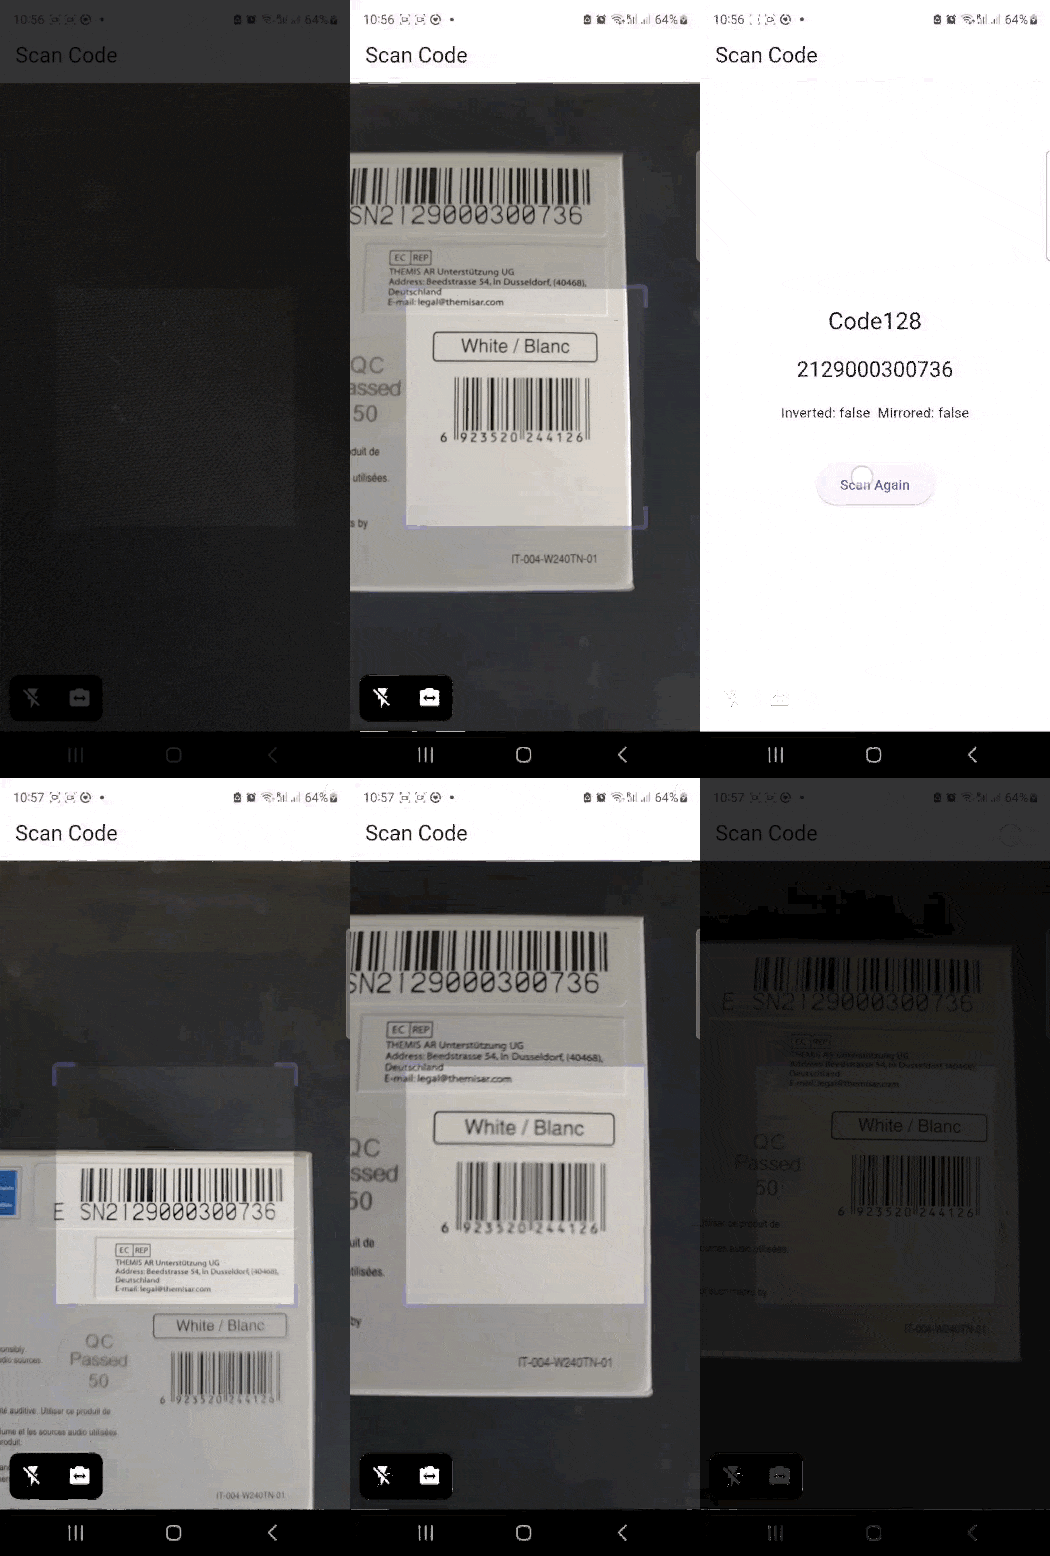
If you change Format.any to Format.code128, the app will exclusively identify Code 128 barcodes. The following GIF demonstrates this behavior. Notice how the app no longer reads EAN-13 barcodes and is quicker at detecting Code 128 barcodes.
🎉 And that’s it! You’ve successfully added barcode scanning functionalities to your Flutter app.
Disadvantages of using the ZXing barcode scanner library
ZXing provides decent performance for basic barcode scanning tasks but sometimes struggles with more challenging scenarios. Its most notable drawbacks as a barcode scanning solution include:
- Scanning accuracy and speed: ZXing struggles with scanning poorly lit or damaged barcodes. It often exhibits low recognition rates for smaller barcodes and can fail to decode them altogether.
- Compatibility issues: ZXing may not perform reliably across all devices, particularly newer models. This has led to frustration among developers who require consistent performance across different platforms.
- Lack of active development: As an open-source project, ZXing has seen limited updates and maintenance in recent years. This stagnation can lead to unresolved bugs and compatibility issues, making it less reliable for commercial applications.
- Integration complexity: Integrating ZXing into your app can be cumbersome, especially for developers who may not be familiar with its architecture. This can lead to longer development times and increased chances of bugs during implementation.
We developed the Scanbot Barcode Scanner SDK as a commercial solution to help enterprises overcome these hurdles presented by free barcode scanning software. Our goal was to have a developer-friendly solution available for a wide range of platforms that consistently delivers high-quality results – even in challenging circumstances.
Integrating the SDK into your Flutter app only takes a few minutes. Don’t believe us? Then give it a try yourself by heading over to our step-by-step tutorial! Or take a look at our Flutter example app for an implementation similar to this ZXing one.
Should you have any questions, feel free to reach out to us on Slack or MS Teams or send us an email via sdksupport@scanbot.io

