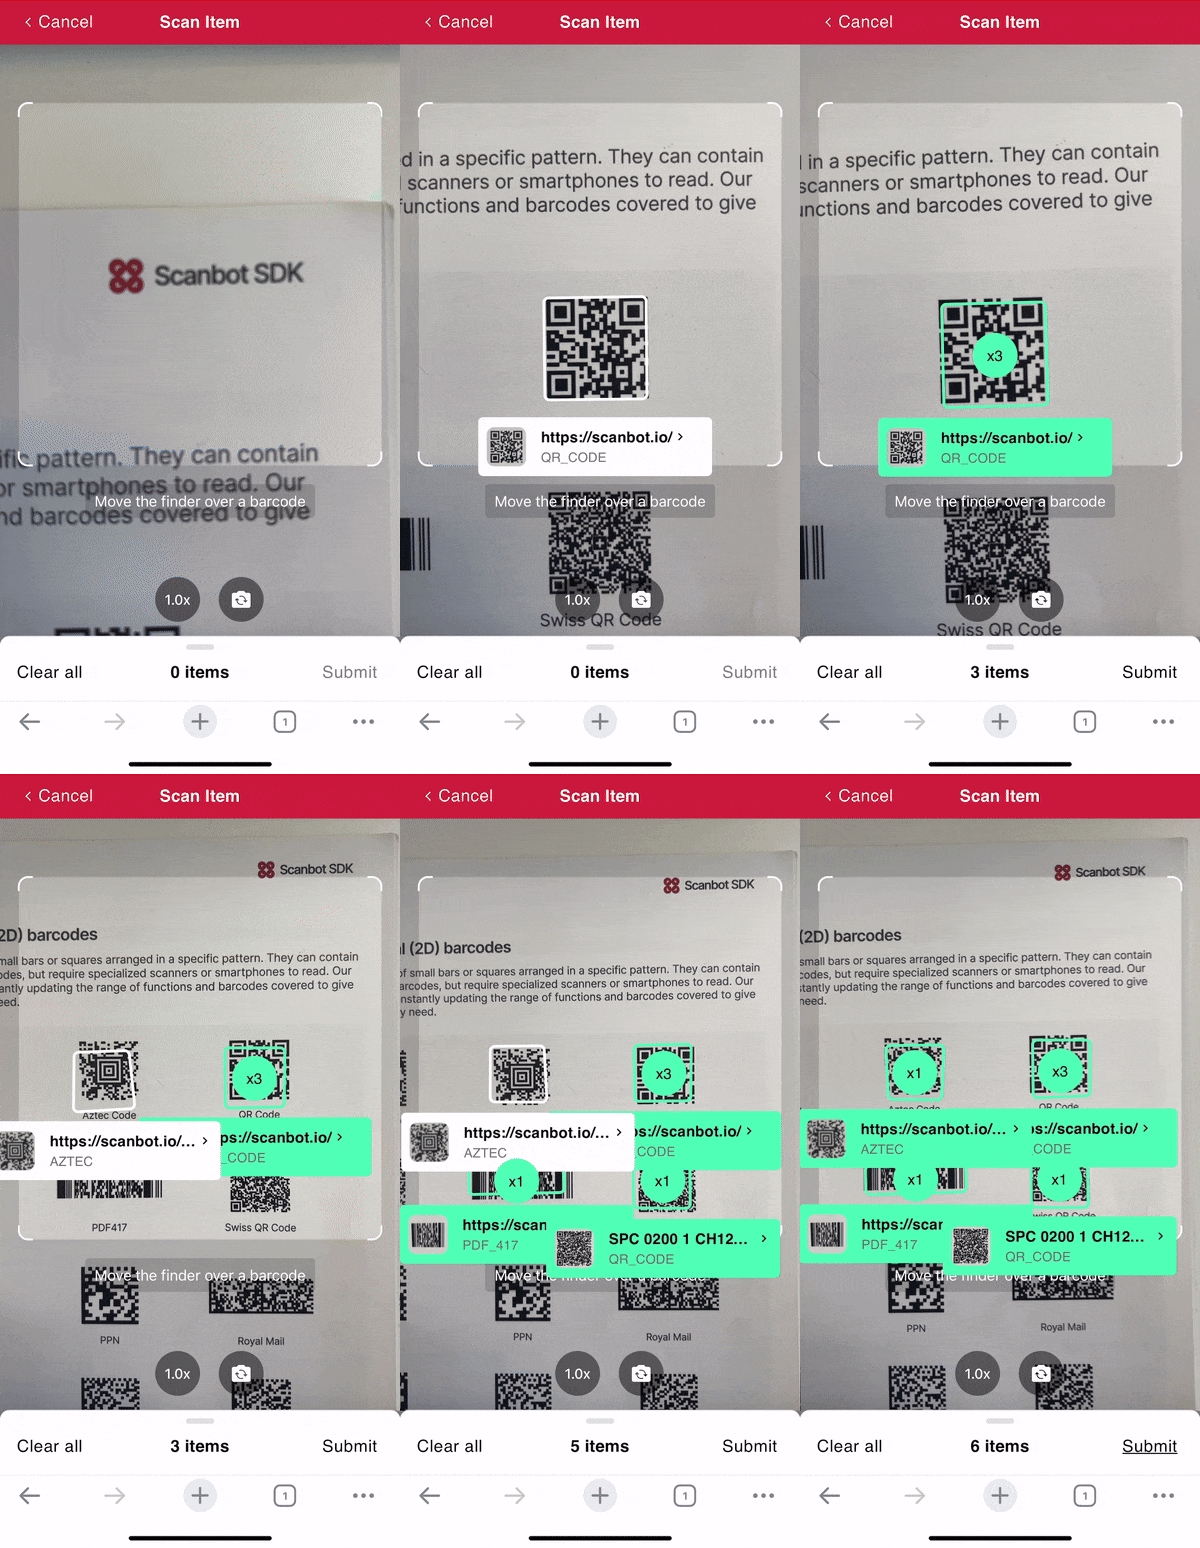
The Scanbot Barcode Scanner SDK’s Ready-to-Use UI Components give you easy access to its AR Overlay feature, which displays information about a barcode in real time directly in the camera view. This includes a bounding box, the barcode’s format and value, whether it has been selected by the user, and the number of times it has been scanned.
The AR Overlay is available for these scanning modes:
- Single Scanning
- Multi Scanning
- Find & Pick
To demonstrate, let’s take a closer look at how you can use the AR Overlay in Multi Scanning mode.
Activate the AR Overlay
Step 1
In your code, after importing the SDK, create the default configuration object.
iOS:
let config = SBSDKUI2BarcodeScannerConfiguration()Android:
val config = BarcodeScannerConfiguration().apply {}Web:
const config = new ScanbotSDK.UI.Config.BarcodeScannerScreenConfiguration();Step 2
Initialize the Multi Scanning mode.
iOS:
let useCase = SBSDKUI2MultipleScanningMode()Android:
this.useCase = MultipleScanningMode().apply {}Web:
const useCase = new ScanbotSDK.UI.Config.MultipleScanningMode();Step 3
Enable the AR Overlay by toggling its visibility via the arOverlay property.
iOS:
useCase.arOverlay.visible = trueAndroid:
this.arOverlay.visible = trueWeb:
useCase.arOverlay.visible = true;Step 4
For iOS and Web, you also need to assign the useCase object to the useCase property of the config object.
iOS:
config.useCase = useCaseWeb:
config.useCase = useCase;🚀 The AR Overlay is now ready to use in its default configuration.
Optional: Customize the AR Overlay
If you’d like to adapt the AR Overlay’s functionalities and looks to your specific use case, you have plenty of options. For a comprehensive overview, please refer to our SDK’s API references for iOS, Android, and Web (as well as the other platforms our SDK supports).
For now, let’s take a look at some straightforward customization options.
Enable automatic barcode selection
By default, the AR Overlay highlights a recognized barcode and waits for the user to tap on the info box it displays on the screen before returning the barcode’s value. But you also have the option to return the value as soon as the barcode is recognized. This makes the most sense for the Multi Scanning and Find & Pick modes.
.arOverlay.automaticSelectionEnabled = trueDisable the counter badge
When the user taps on a barcode’s info box, a circle appears on top of the barcode showing how many times the same barcode has already been scanned. If you don’t need to convey this information to the user, you can disable it.
.arOverlay.counterBadge.visible = trueChange the position of the barcode info box
The biggest advantage of using the AR Overlay is that users can see information about recognized barcodes without having to manually scan them first. This information is displayed in a box above, below, or on top of each barcode. You can change this using the values "ABOVE", "BELOW", and "STACKED". You can also disable the info box entirely using “DISABLED”.
.arOverlay.barcodeItemInfoPosition = "STACKED"Disable the barcode image
By default, each barcode info box also shows a snapshot of the scanned barcode. If you don’t need this, you can disable it.
.arOverlay.barcodeItemConfiguration.imageVisible = falseDisable the bounding box
The AR Overlay highlights each recognized barcode by drawing a bounding box around it in real time. This can also be disabled.
.arOverlay.polygon.visible = falseGet started with the Scanbot SDK AR Overlay
Activating the AR Overlay opens up several advanced use cases:
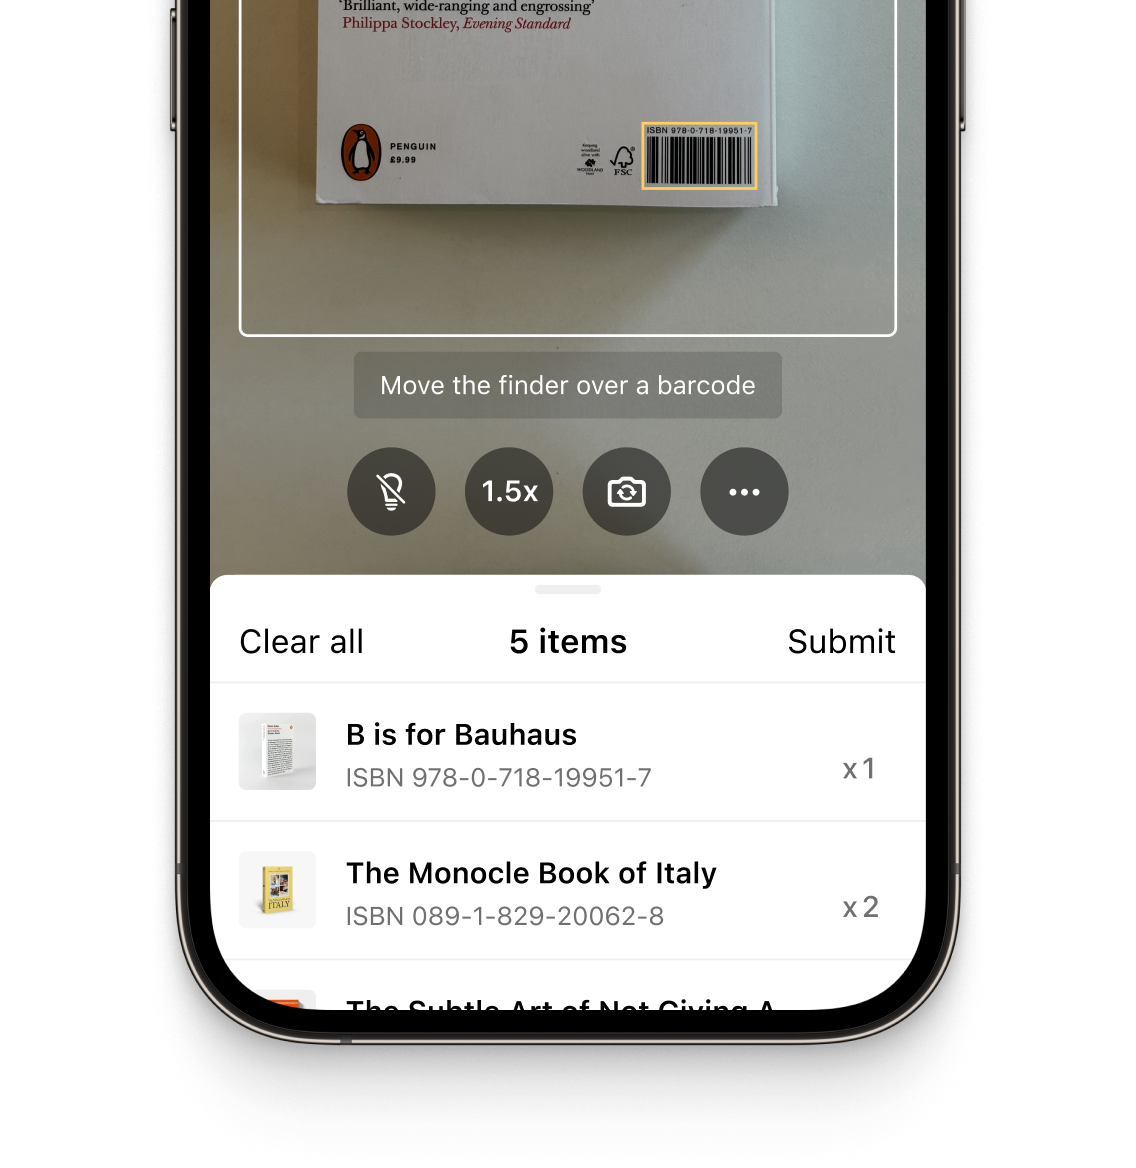
- Batch Scanning: Let users scan multiple codes in succession without closing the scanning screen. Each scanned barcode and its value are saved to a results list for easy review.
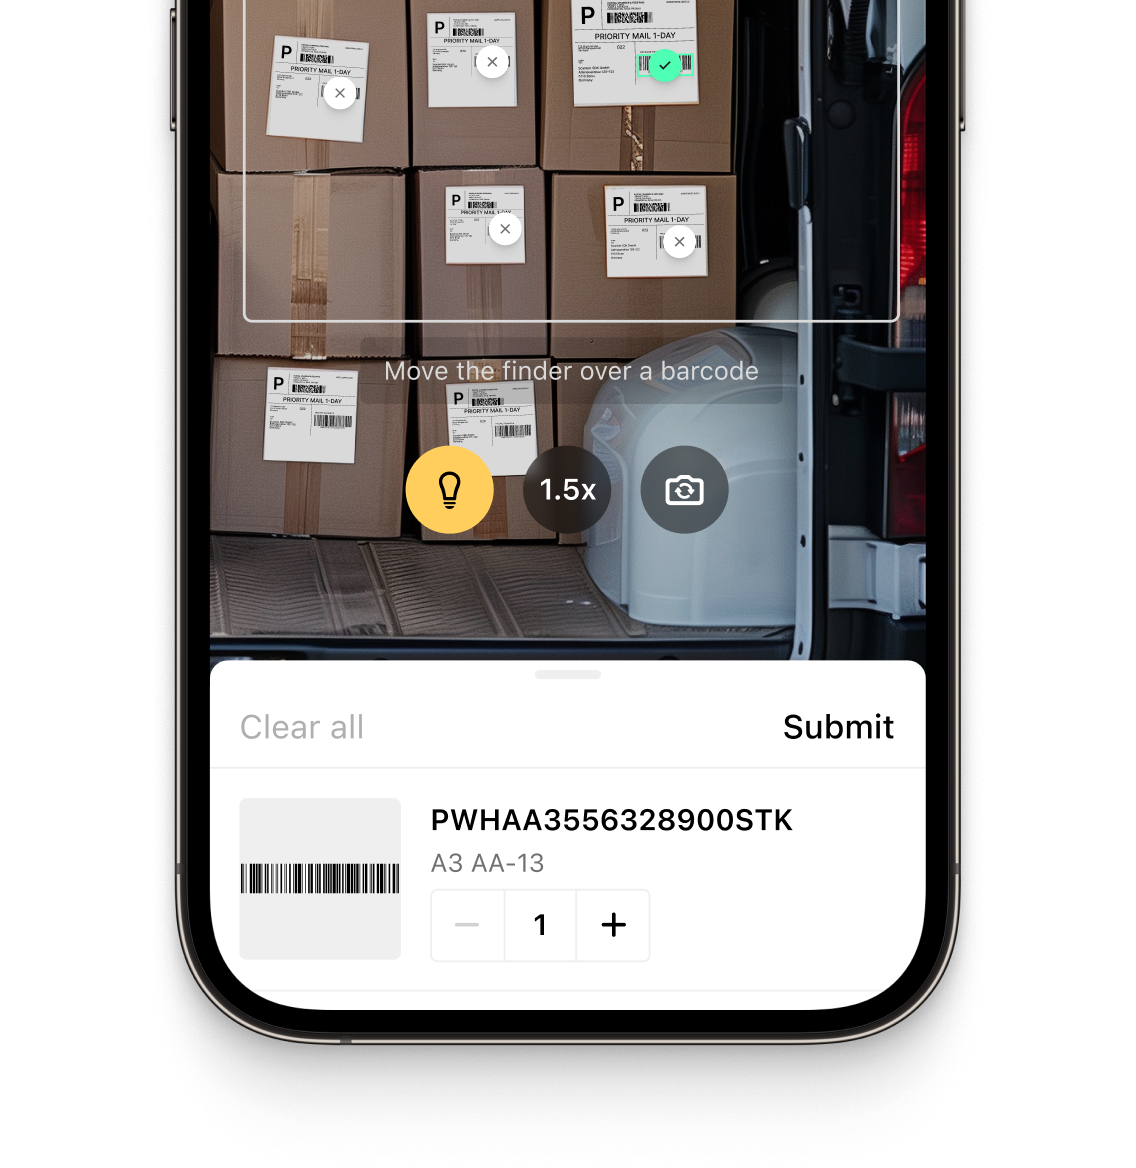
- Find & Pick: Given one or more barcode values, the SDK will visually highlight and scan the correct items for your users. Useful for finding a specific barcode among many.
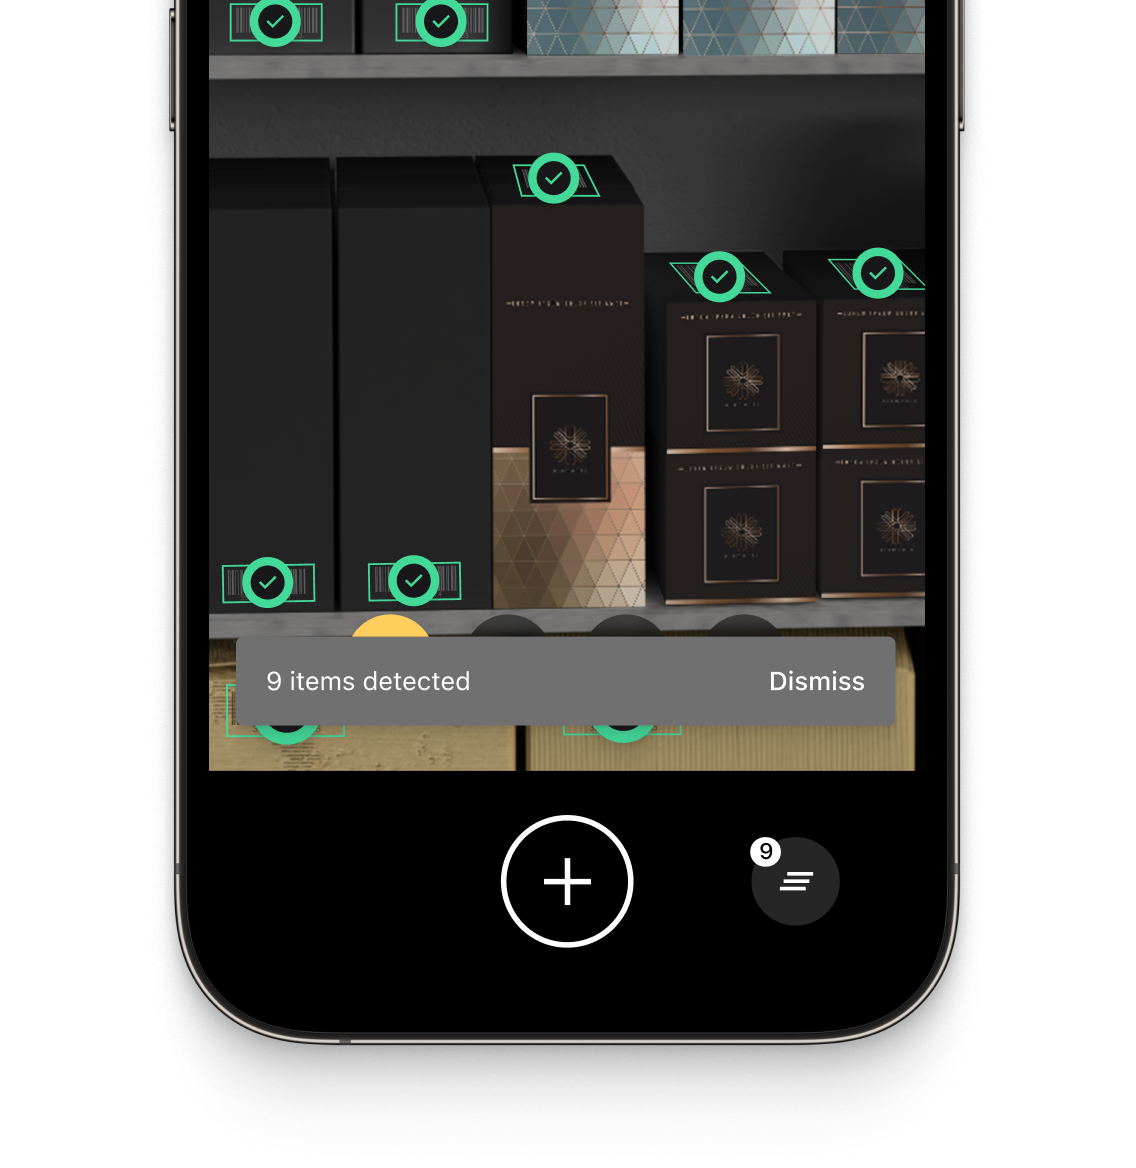
- Scan & Count: Count items by scanning their barcodes. Great for inventory management.
We hope this deep dive will help you get the most out of the Scanbot Barcode Scanner SDK. Be sure to keep an eye on our Guides & Tutorials section for more helpful tips.
If you have any further questions, please send us an email via: sdksupport@scanbot.io
