Did you know that the first-ever barcode appeared on a pack of chewing gum in 1974? In the half-century since, barcode technology has become an integral part of our daily lives. Today, barcode readers are a familiar sight in grocery stores, warehouses, airports, and hospitals.
However, just like every other technology, barcode readers come with their own set of pros and cons. Let’s now explore the advantages and disadvantages of barcode readers – and how the latter can be overcome.
Advantages of barcode readers
Companies typically use barcoding and barcode readers to save time, reduce cost, and minimize errors. Ultimately, this increases business efficiency. More recently, developers are including barcode features in customer-facing apps to add value and improve the customer experience.
Saves time
Barcode readers are a rapid and effective means of data extraction and entry, and so speed up a range of workflows. They deliver major time savings compared to human data entry, that is, typing or writing down data.
Because a barcode reader can instantly collect and decode data in just a simple scan, businesses can streamline operations like inventory management, product identification, and pricing lookup.
Increases accuracy
Scanning barcodes with a barcode reader is far more accurate than entering data manually.
On average, a human makes a mistake every 100 characters. In comparison, barcode readers only make one mistake in every 70 million scanned characters.
Companies can avoid manual input errors by integrating barcode scanners into their workflows.
Improves productivity
Keeping track of all the assets that move through your organization takes time and effort. Implementing a barcoding system is an excellent solution to the problem of tracking valuable items and goods. It removes a lot of administrative overhead – and allows businesses to react to changes and inquiries more quickly.
Companies also use barcode scanning to easily record order entry, shipping, and receiving, or a product passing quality control. Barcoding also sees use in access control, document handling, and project management. It provides a real-time company-wide connection that allows enterprises to increase their productivity and operational efficiency.
Reduces cost
By increasing productivity, accuracy, and efficiency across a variety of organizational activities, barcode scanners can reduce expenses considerably. Here are just some examples:
- Supply chain management: These tools increase overall efficiency while reducing errors to optimize the supply chain.
- Back-office: Barcode scanners simplify inventory barcode management and do away with the requirement for paper-based processes. Additionally, they eliminate the risk of manual data entry errors.
- Retail: They also speed up the checkout procedure, cutting down on wait time and improving client satisfaction.
Barcode scanners are an excellent investment for companies seeking to improve their bottom line: The higher operational efficiency and lower error rate can unlock large cost savings.
As technology advances, handheld scanners are increasingly replaced by software-based scanners. Software barcode scanners are often not only more convenient and less costly, but also provide advanced features, making them the tool of choice for many businesses.
Disadvantages of hardware-based barcode readers
Before we delve further into the merits of these cutting-edge software solutions, it is essential to consider some disadvantages of traditional handheld scanners.
Connectivity constraints
Even high-end handheld barcode scanners frequently have very limited connectivity options. Some devices only offer a wired connection, others need a dedicated base station. This constraint can affect the usability and integration of the barcode reader with other systems or devices.
Limited range
Handheld barcode readers typically have a very short scan range, meaning the user has to hold them very close to the barcode to read it correctly. This limitation poses a significant challenge when the barcode is located in an inaccessible or hard-to-reach spot.
Lack of support of different barcode types
While useful for some applications, hardware-based barcode scanners often do not cover a wide range of barcode symbologies. Unlike software-based scanners, they often struggle with decoding complex barcodes. Software-based scanners excel in versatility, accommodating various barcode types and meeting diverse scanning needs. Their flexibility enables them to decode a wide range of codes effectively. In terms of barcode compatibility, software scanners outperform handheld devices, since the number of supported barcode formats can be extended at any time via an update.
Limited feature set and lack of extensibility
As specialized devices, hardware-based barcode scanners usually come with a fixed range of functionalities. This lack of flexibility limits the number of potential use cases. While it is theoretically possible to update the software that runs on the barcode scanning hardware, in practice this often requires a connection to another device and special updating software to be run on that device. Feature updates for hardware-based barcode readers are therefore the exception rather than the norm.
How do smartphone-based barcode scanners solve these problems?
Smartphone-based scanning software is superior to hardware-based scanners in multiple areas.
Firstly, smartphones are portable and ubiquitous, ensuring easy access to barcode scanning either via a dedicated app or by integrating scanning features into an existing application.
Secondly, they are less expensive. By implementing a bring-your-own-device policy (BYOD), companies can eliminate the need to invest in hardware-based scanning solutions altogether – and simultaneously enable scanning on the go. For companies that decide against BYOD, smartphones are typically still a cheaper solution than hardware scanners.
Thirdly, these software solutions can scan various barcode types, including QR Codes and Data Matrix Codes – and more efficiently. They can, for instance, scan them in batches too, which saves additional time and effort.
Additionally, smartphone-based scanning applications often come with user-friendly interfaces. These not only make the scanning process easy for users of all levels of experience, but they also largely eliminate lengthy, costly training.
How to integrate a barcode scanner into a web app
We developed the Scanbot Barcode Scanner SDK as a powerful, easy-to-integrate barcode scanning solution for enterprise use. Our goal was to provide a developer-friendly option for a wide range of platforms that consistently delivers high-quality results – even in challenging circumstances.
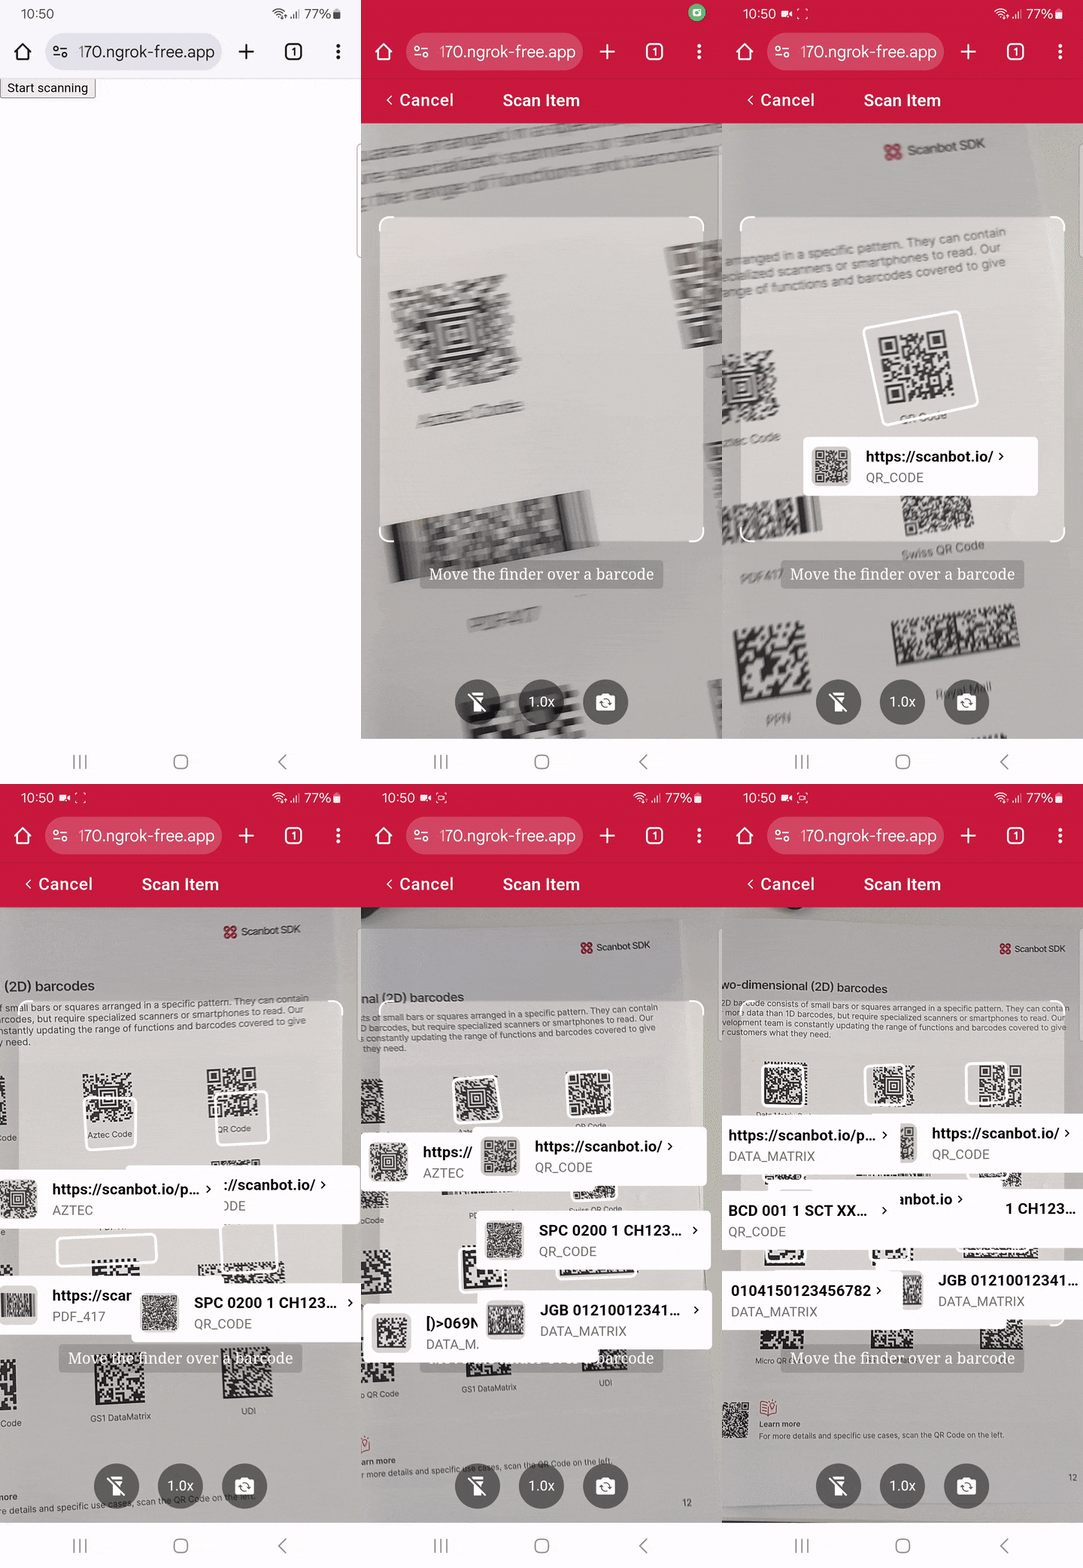
In the following section, we’ll show you how easy it is to integrate the Barcode Scanner SDK into your web app. Thanks to our SDK’s Ready-to-Use UI Components, you can even use an AR overlay to display multiple barcodes’ contents right in the viewfinder.
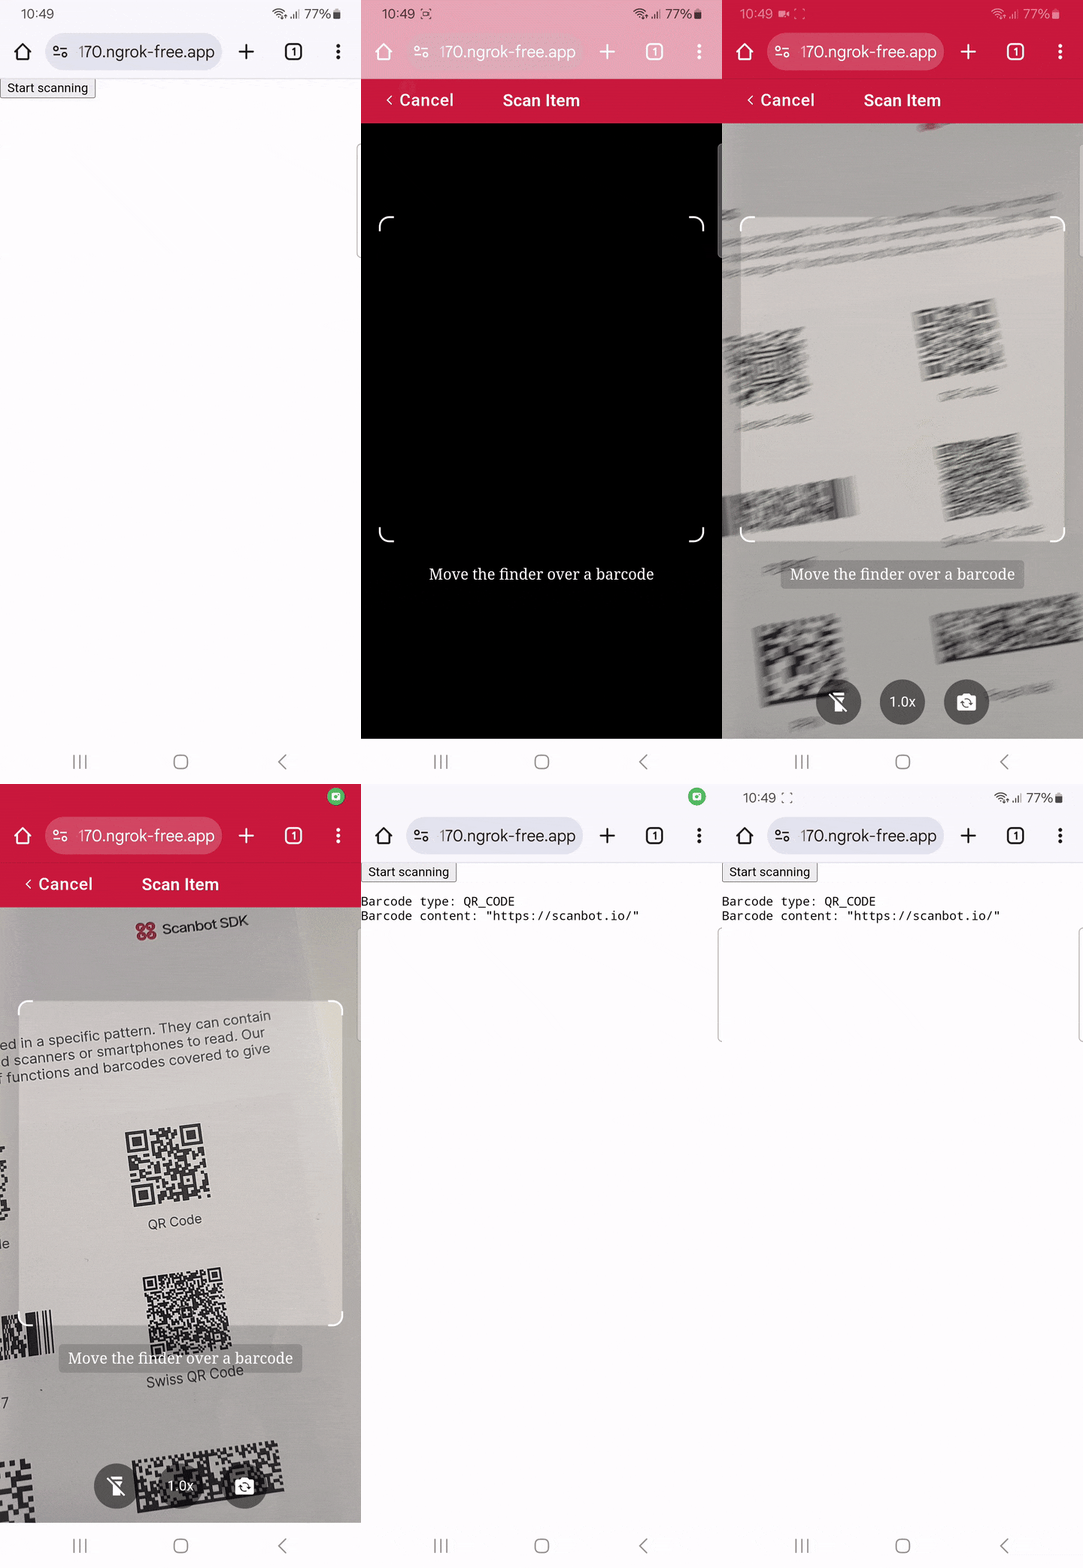
To accomplish that, you will need to follow the steps below:
- Download the SDK files
- Create the HTML page and configure the Web SDK
- Start a local HTTP server
- Start scanning
- Configure styling and scanning behavior
- Deploy to a server (optional)
Let’s dive into more details for each step.
Step 1: Download the SDK
First, create a new empty directory for your app and name it my-scanner-app.
Then, download the Scanbot SDK npm package directly from here.
💡 As specified in our documentation, you can also use npm install to download and install the package, but for this tutorial, we suggest manually downloading it and installing it from the link provided.
Unzip the downloaded files into my-scanner-app. Your folder structure should look like this:
my-scanner-app/
  |- scanbot-web-sdk/
    |- webpack/
    |- bundle/
    |- @types/
    |- index.js
    |- ui.js
    ... (and some other files)
⚠️ Make sure the folder containing the package files is called scanbot-web-sdk, not “package” or similar.
Step 2: Create the HTML page and configure the Web SDK
To create the HTML with the Scanbot SDK, first create an index.html file in the my-scanner-app/ folder. Then, add the following code to the file.
<!DOCTYPE html>
<html lang="en">
<head>
    <meta charset="UTF-8">
    <!-- We prevent the user from zooming on mobile device -->
    <meta name="viewport" content="width=device-width, initial-scale=1.0, maximum-scale=1.0, user-scalable=0" />
    <title>My Scanner App</title>
</head>
<body style="margin: 0">
<button id="start-scanning">Start scanning</button>
<pre id="result"></pre>
<script type="module">
    // We import the necessary ScanbotSDK module
    import "./scanbot-web-sdk/bundle/ScanbotSDK.ui2.min.js";
    // When initializing the SDK, we specify the path to the barcode scanner engine
    const sdk = await ScanbotSDK.initialize({
        engine: "scanbot-web-sdk/bundle/bin/barcode-scanner/"
    });
    document.getElementById("start-scanning").addEventListener("click", async () => {
        // We create a new default configuration for the barcode scanner
        const config = new ScanbotSDK.UI.Config.BarcodeScannerConfiguration();
        // We create a barcode scanner UI component
        const scanResult = await ScanbotSDK.UI.createBarcodeScanner(config);
        // Once the scanning is done, we display the result
        if (scanResult?.items?.length > 0) {
            document.getElementById("result").innerText =
                `Barcode type: ${scanResult.items[0].type} \n` +
                `Barcode content: "${scanResult.items[0].text}" \n`;
        } else {
            document.getElementById("result").innerText = "Scanning aborted by the user";
        }
    });
</script>
</body>
</html>
The code block above:
- Adds the “Start scanning” button.
- Imports and initializes the Scanbot SDK.
- Executes the user interface from the Scanbot SDK when the user clicks the “Start scanning” button.
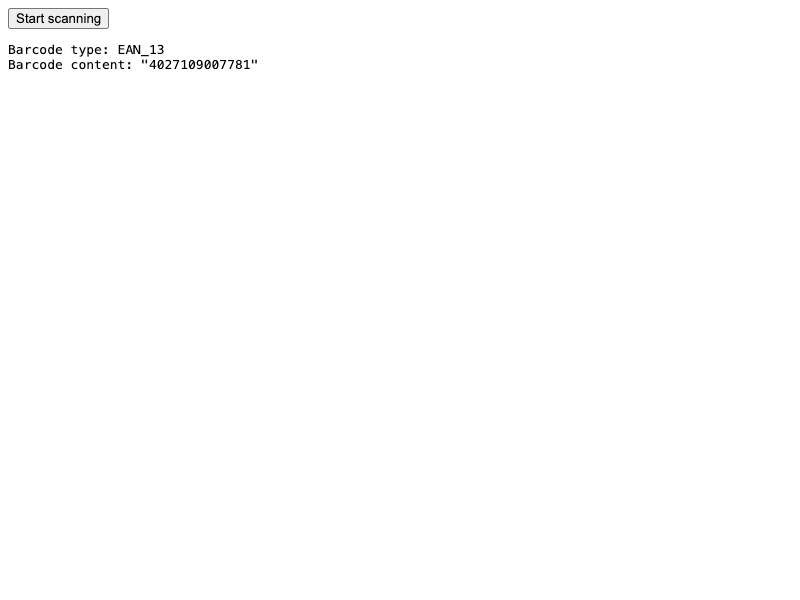
- If a barcode is identified, it will present the barcode type and its content to the user.
Step 3: Start local HTTP server
The Scanbot SDK uses advanced browser features that are unavailable when opening our site via a file URL. Therefore, a local HTTP server is required to view the site.
There are two main ways to run the index.js file in a localhost server: using Python or Node.js.
Python
If you have Python installed, you can use it to start a local HTTP server. To do so, follow the steps below:
- Open a terminal in the my-scanner-app/ folder.
- Use the command
python3 -m http.serverto start a local test server. - Now, you can access it on your browser at
http://localhost:8000.
To stop running the localhost server, press Ctrl+C on the terminal.
Node.js
If Node.js is installed, you can use the npm serve package to start a local HTTP server. To do so, follow the steps below:
- Open a terminal in the my-scanner-app/ folder.
- Run the command
npx serve. - Once it finishes loading, you can access the page using the URL provided in your terminal, which usually is
http://localhost:3000.
To stop running the localhost server, press Ctrl+C on the terminal.
Step 4: Start scanning
Once you access the site on your browser, follow the steps below to test the Scanbot SDK:
Click the “Start scanning” button.

The scanning UI will open, allowing you to scan a barcode using your camera. Point your camera to a barcode, as in the example below.
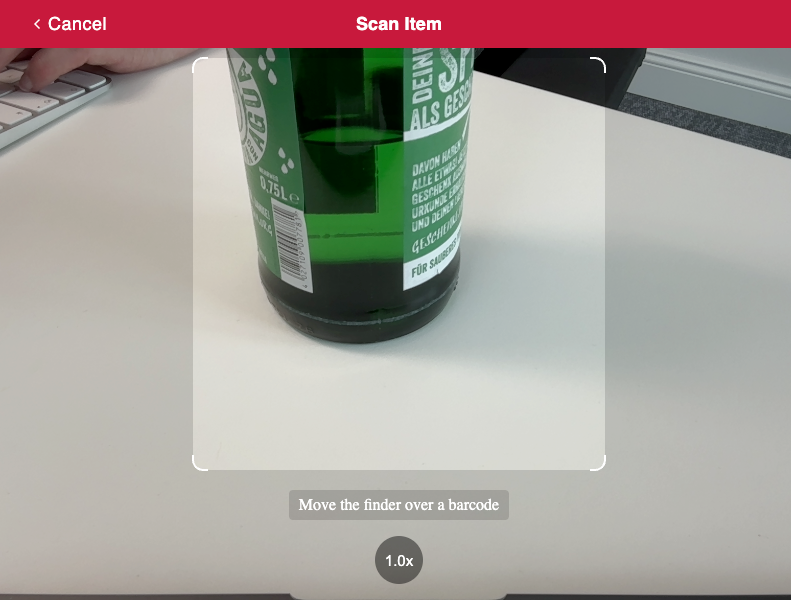
After scanning, the UI closes, displaying the scanned code and its type right below the “Start scanning” button.
Step 5: Configure the style and scanning behavior
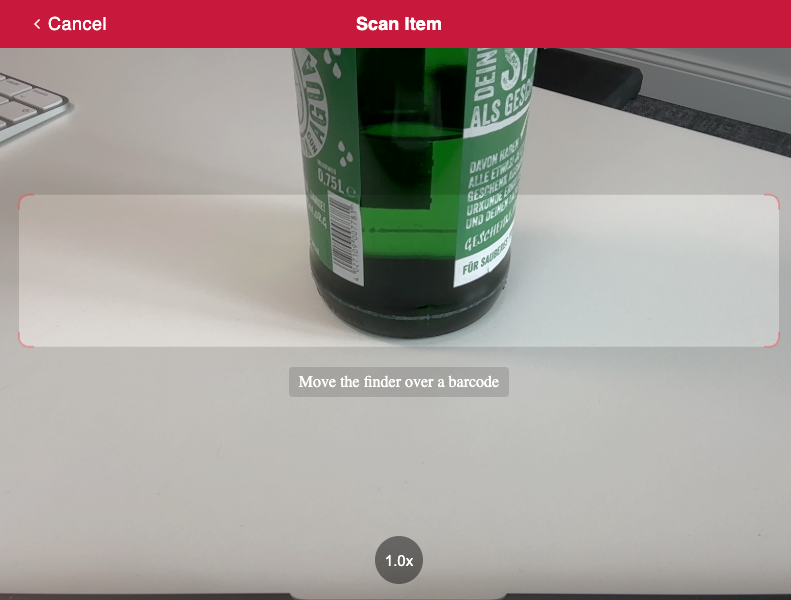
The app code provided in Step 2 has the UI fully configured. To change the app’s appearance, you can customize the config object. You can, for example, change the viewfinder size and color.
To do so, you can change the aspectRatio and strokeColor after defining the config object, as displayed in the following code block:
const config = new ScanbotSDK.UI.Config.BarcodeScannerConfiguration();
config.viewFinder.aspectRatio.height = 1;
config.viewFinder.aspectRatio.width = 5;
config.viewFinder.style.strokeColor = "#FF000050";
The above configurations will result in the following styling:
You can find more configuration options by accessing the SDK or API documentation.
As another configuration example, you can display an AR overlay and let the user pick a specific barcode when the app identifies multiple barcodes on the camera. To add this feature, add the following code after defining the config object:
config.useCase.arOverlay.visible = true;
config.useCase.arOverlay.automaticSelectionEnabled = false;
If you open your app again, it will look like this:
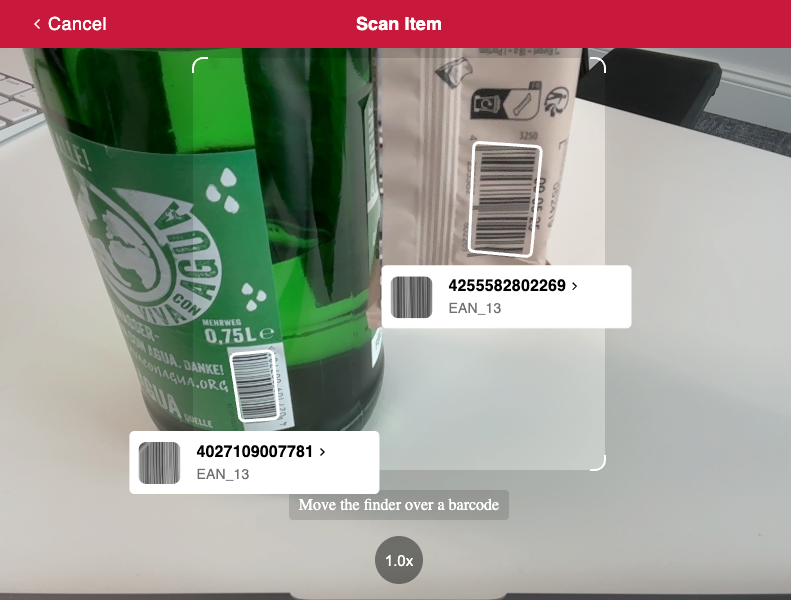
💡 The AR labels can also be fully configured.
Step 6: Deploy to a server (optional)
To test your new app on your phone, you need to deploy it to a server. If you don’t have a web server ready, you can prototype your site using services like Static.app by executing the following steps:
- Zip the content from my-scanner-app.
- Access Static.app and click Upload for free.
- Find and select the my-scanner-app.zip file.
- After the upload, your site will run within minutes. You will then be presented with a URL. Use it to access the app from any device, including your mobile phone.
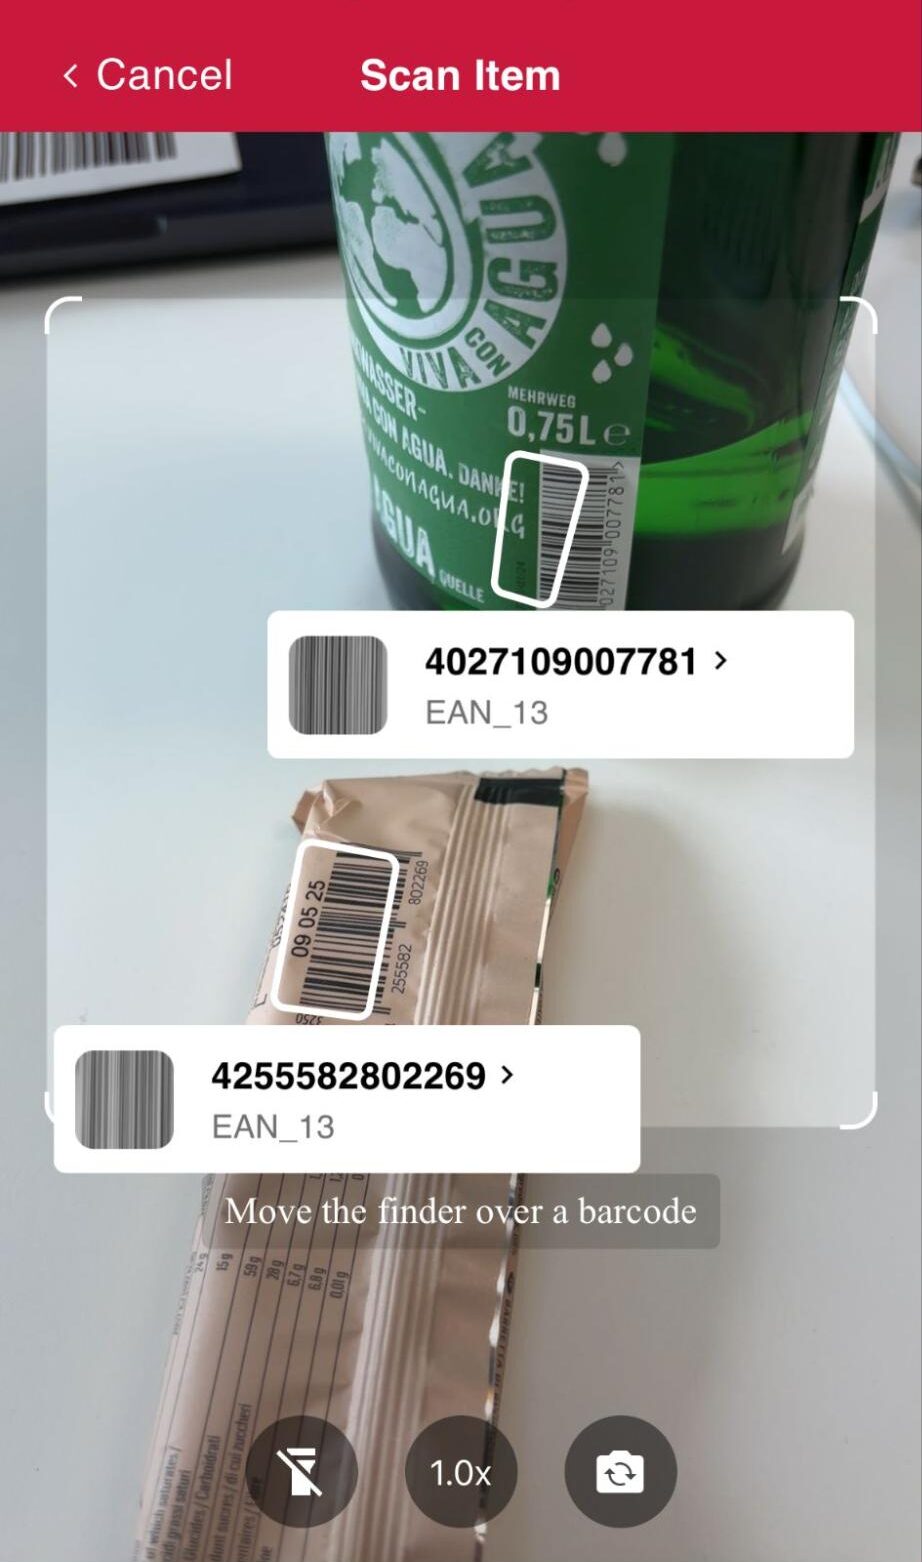
The Scanbot SDK UI is optimized for mobile devices. It allows users to choose the camera and toggle the flashlight by default. Use the URL to test the app interface on your mobile device, as displayed below.
Conclusion
That’s it! You now have a fully functional barcode-scanning web app using the Scanbot SDK’s RTU UI.
The SDK is also available for Native iOS and Native Android, as well as many cross-platform frameworks. You can find integration tutorials for all of them in our Guides & Tutorials section.
Should you have questions about this tutorial or ran into any issues, we’re happy to help! Just shoot us an email via tutorial-support@scanbot.io.
Happy coding!
FAQ
How does the use of smartphone-based barcode scanners impact employee training compared to traditional handheld scanners?
Smartphone-based barcode scanners reduce the need for extensive training, as employees are already familiar with smartphone usage, streamlining the adaptation process compared to learning to operate traditional scanners.
Can smartphone-based barcode scanning solutions be easily customized for specific industry needs, such as retail or healthcare?
Yes, smartphone-based scanning solutions offer customization flexibility, allowing them to be tailored to specific industry requirements, including retail and healthcare, through app development and integration.
What are the environmental implications of switching from hardware-based to software-based barcode scanning solutions?
Transitioning to software-based scanning reduces the environmental impact by minimizing the manufacturing, shipping, and disposal of physical hardware scanners, contributing to a more sustainable approach to barcode scanning.

