In this tutorial, you’ll learn how to build a web app for scanning barcodes and QR codes using JavaScript and the WebAssembly-based zbar-wasm library.
Built on the original C/C++ implementation of ZBar, zbar-wasm is itself a fork of the older zbar.wasm library. Its use of WebAssembly (WASM) under the hood leads to better performance and a smaller deployment size compared to barcode scanner libraries written in pure JavaScript.
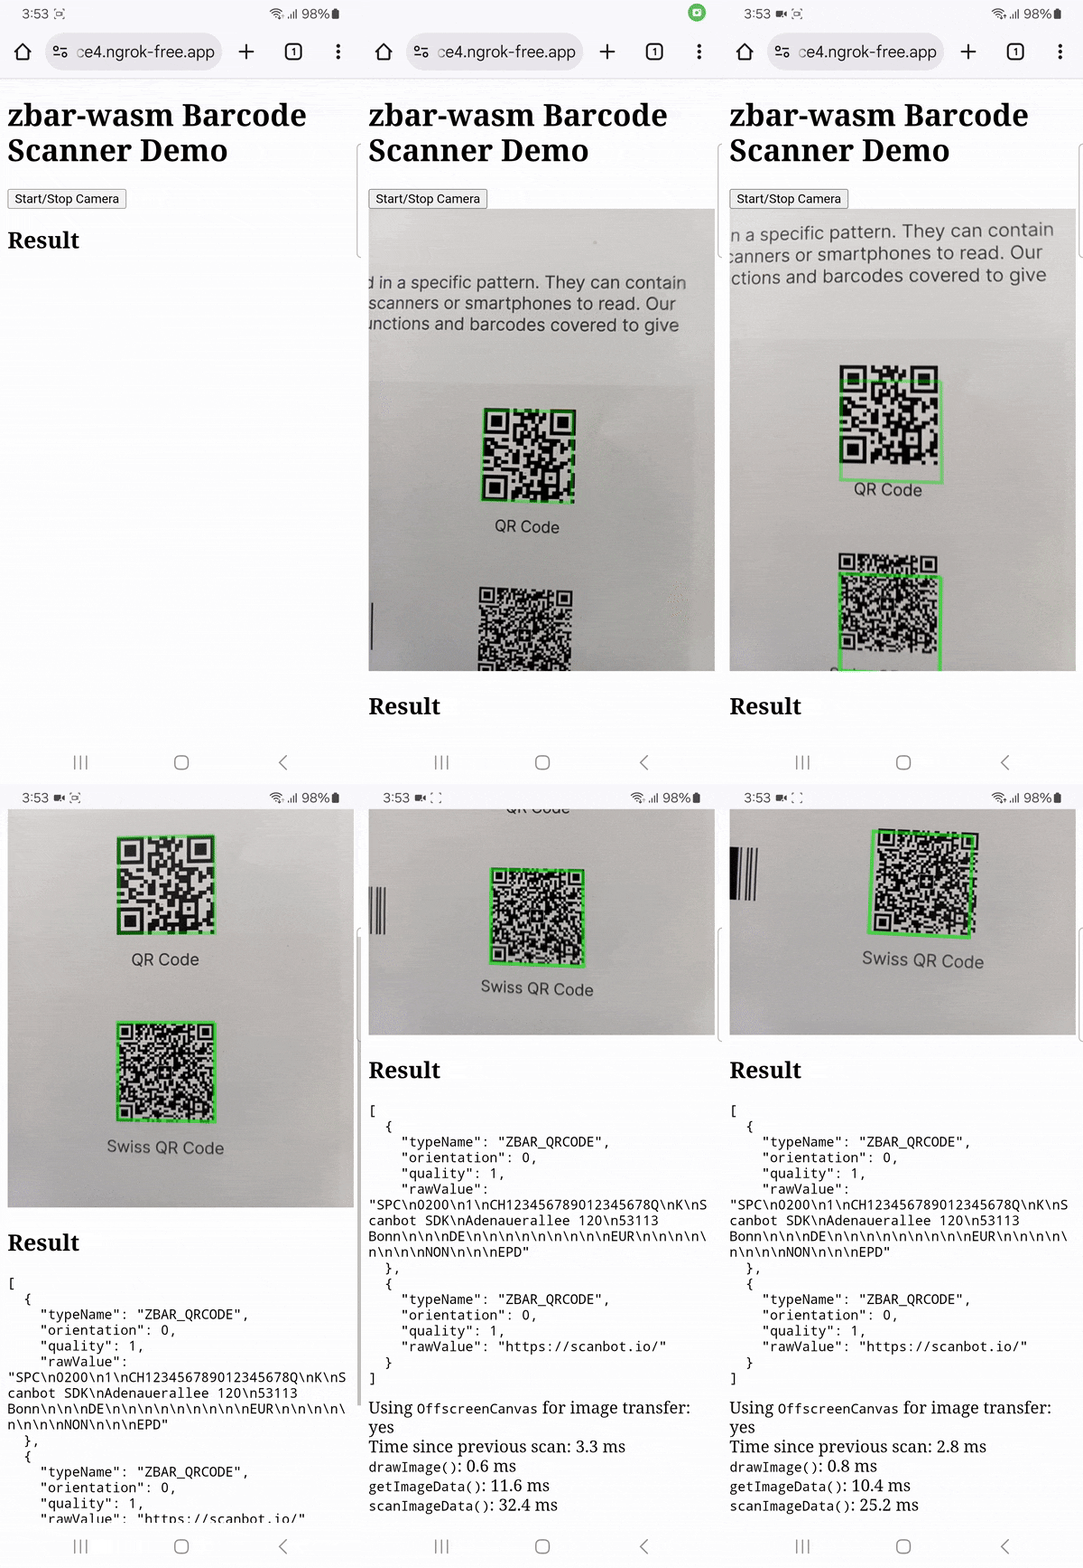
We’re going to set up a simple app for scanning barcodes from a live camera stream by following these steps:
- Defining the HTML structure
- Adding basic CSS styling
- Implementing the application logic in JavaScript
Let’s get started!
Step 1: Define the HTML structure
In your project folder, create your index.html file and paste the following code:
<!DOCTYPE html>
<html lang="en">
<head>
  <meta charset="utf-8">
  <meta name="viewport" content="width=device-width, initial-scale=1.0, maximum-scale=2.0, minimum-scale=0.9">

  <title>zbar-wasm Barcode Scanner Demo</title>

  <link rel="stylesheet" href="style.css">
</head>

<body>
<div class="container">
  <h1>zbar-wasm Barcode Scanner Demo</h1>

  <button id="videoBtn">Start/Stop Camera</button>

  <div class="viewport">
    <canvas id="canvas"></canvas>
    <video id="video" muted autoplay playsinline></video>
  </div>

  <h2>Result</h2>

  <div>
    <pre id="result"></pre>
    <div>
      <div id="timing">
        Using <code>OffscreenCanvas</code> for image transfer: <span id="usingOffscreenCanvas"></span><br>
        Time since previous scan: <span id="waitingTime"></span> ms<br>
        <code>drawImage()</code>: <span id="drawImageTime"></span> ms<br>
        <code>getImageData()</code>: <span id="getImageDataTime"></span> ms<br>
        <code>scanImageData()</code>: <span id="scanImageDataTime"></span> ms
      </div>
    </div>
  </div>
</div>

<script src="https://cdn.jsdelivr.net/npm/@undecaf/zbar-wasm@0.11.0/dist/index.js"></script>
<script src="script.js"></script>

</body>
</html>
Let’s take a closer look:
<canvas id="canvas"></canvas>is a drawing surface used by JavaScript to manipulate graphics. In this case, it’s used to display the video frames with overlays for the recognized barcodes.<video id="video" muted autoplay playsinline></video>is where the live video feed from the user’s camera will be displayed.mutedprevents the video from playing sound,autoplaystarts playing the video as soon as the page loads, andplaysinlineallows the video to play directly on the page on mobile devices, rather than in a full-screen player.<pre id="result"></pre>is the container where the text of the scanned barcode or QR code will be displayed. The<pre>tag preserves whitespace and line breaks, which is helpful for displaying the raw, unformatted text from a code.<div id="timing">contains a series of elements that display performance metrics for the scanning process.<script src="https://cdn.jsdelivr.net/npm/@undecaf/zbar-wasm@0.11.0/dist/index.js"></script>loads the core library of the scanner from a CDN.<script src="js/main.js"></script>loads the JavaScript containing our application logic, which we’ll create in step 3.
The file also references a CSS file, which we’ll set up now.
Step 2: Add basic CSS styling
Create your style.css with the following contents:
.container {
    margin-top: 1em;
}

label {
    display: inline-block;
}

.viewport {
    display: inline-block;
    position: relative;
}

img, video, #note, #timing {
    display: none;
    max-width: 100%;
}

#videoBtn.button-primary ~ .viewport > #video,
#timing.visible {
    display: block;
}

#canvas {
    position: absolute;
    left: 0;
    top: 0;
    width: 100%;
    height: 100%;
}

pre {
    white-space: pre-wrap;
    word-wrap: break-word;
    margin-top: 0;
}
This primarily controls the layout and visibility of the web page’s elements, positioning the canvas overlay on top of the video feed and dynamically showing or hiding them based on user interaction.
Step 3: Implement the application logic in JavaScript
Now we can integrate the barcode scanner feature into our app.
Create a script.js file and paste the following code:
const el = {},
  usingOffscreenCanvas = isOffscreenCanvasWorking();

document
  .querySelectorAll("[id]")
  .forEach((element) => (el[element.id] = element));

let offCanvas,
  afterPreviousCallFinished,
  requestId = null;

el.usingOffscreenCanvas.innerText = usingOffscreenCanvas ? "yes" : "no";

function isOffscreenCanvasWorking() {
  try {
    return Boolean(new OffscreenCanvas(1, 1).getContext("2d"));
  } catch {
    return false;
  }
}

function formatNumber(number, fractionDigits = 1) {
  return number.toLocaleString(undefined, {
    minimumFractionDigits: fractionDigits,
    maximumFractionDigits: fractionDigits,
  });
}

function detect(source) {
  const afterFunctionCalled = performance.now(),
    canvas = el.canvas,
    ctx = canvas.getContext("2d");

  function getOffCtx2d(width, height) {
    if (usingOffscreenCanvas) {
      if (
        !offCanvas ||
        offCanvas.width !== width ||
        offCanvas.height !== height
      ) {
        offCanvas = new OffscreenCanvas(width, height);
      }

      return offCanvas.getContext("2d");
    }
  }

  canvas.width = source.naturalWidth || source.videoWidth || source.width;
  canvas.height = source.naturalHeight || source.videoHeight || source.height;

  if (canvas.height && canvas.width) {
    const offCtx = getOffCtx2d(canvas.width, canvas.height) || ctx;

    offCtx.drawImage(source, 0, 0);

    const afterDrawImage = performance.now(),
      imageData = offCtx.getImageData(0, 0, canvas.width, canvas.height),
      afterGetImageData = performance.now();

    return zbarWasm.scanImageData(imageData).then((symbols) => {
      const afterScanImageData = performance.now();

      symbols.forEach((symbol) => {
        const lastPoint = symbol.points[symbol.points.length - 1];
        ctx.moveTo(lastPoint.x, lastPoint.y);
        symbol.points.forEach((point) => ctx.lineTo(point.x, point.y));

        ctx.lineWidth = Math.max(
          Math.min(canvas.height, canvas.width) / 100,
          1
        );
        ctx.strokeStyle = "#00e00060";
        ctx.stroke();
      });

      symbols.forEach((s) => (s.rawValue = s.decode("utf-8")));

      symbols.forEach((s) => {
        delete s.type;
        delete s.data;
        delete s.points;
        delete s.time;
        delete s.cacheCount;
      });

      el.result.innerText = JSON.stringify(symbols, null, 2);

      el.waitingTime.innerText = formatNumber(
        afterFunctionCalled - afterPreviousCallFinished
      );
      el.drawImageTime.innerText = formatNumber(
        afterDrawImage - afterFunctionCalled
      );
      el.getImageDataTime.innerText = formatNumber(
        afterGetImageData - afterDrawImage
      );
      el.scanImageDataTime.innerText = formatNumber(
        afterScanImageData - afterGetImageData
      );
      el.timing.className = "visible";

      afterPreviousCallFinished = performance.now();
    });
  } else {
    el.result.innerText = "Source not ready";
    el.timing.className = "";

    return Promise.resolve();
  }
}

function detectVideo(active) {
  if (active) {
    detect(el.video).then(
      () => (requestId = requestAnimationFrame(() => detectVideo(true)))
    );
  } else {
    cancelAnimationFrame(requestId);
    requestId = null;
  }
}

el.videoBtn.addEventListener("click", (event) => {
  if (!requestId) {
    navigator.mediaDevices
      .getUserMedia({ audio: false, video: { facingMode: "environment" } })
      .then((stream) => {
        el.videoBtn.className = "button-primary";

        el.video.srcObject = stream;
        detectVideo(true);
      })
      .catch((error) => {
        el.result.innerText = JSON.stringify(error);
        el.timing.className = "";
      });
  } else {
    el.videoBtn.className = "";

    detectVideo(false);
  }
});
Let’s take a deep dive into how our app works:
const el = {}is an empty object for storing references to all HTML elements with anid.document.querySelectorAll("[id]").forEach(...)iterates through every HTML element that has anidattribute and stores a reference to it in theelobject, using itsidas the key.usingOffscreenCanvas = isOffscreenCanvasWorking()is set totrueif the browser supportsOffscreenCanvas, a feature that allows canvas rendering to happen on a separate thread, improving performance. TheisOffscreenCanvasWorking()function attempts to create and get a 2D context from anOffscreenCanvasto check for support.- The variables
offCanvas,afterPreviousCallFinished, andrequestIdstore theOffscreenCanvasinstance, track the time of the previous scan, and hold therequestAnimationFrameID for the video loop. - The
detectfunction is the heart of the application. It captures an image from a source (like the video feed) and processes it. It usesoffCtx.drawImage(source, 0, 0)to draw a frame from the video onto the canvas. It then callsoffCtx.getImageData(...)to get the pixel data of the drawn image. - Calling
zbarWasm.scanImageData(imageData)lets thezbar-wasmlibrary process the pixel data to find and decode any barcodes or QR codes. This function returns a promise that resolves with an array of detected symbols. Once the promise resolves, the code iterates through the detectedsymbols. For each symbol, it draws a polygon on the canvas that outlines the barcode, providing visual feedback to the user. TherawValueof each symbol is decoded toutf-8and stored. Some less interesting properties (type,data,points, etc.) are removed from the symbol objects to simplify the final output and the cleanedsymbolsarray is then converted to a JSON string and displayed in theel.resultelement. - The function uses
performance.now()to measure the time taken for different steps of the process (drawImage,getImageData, andscanImageData) and updates the corresponding HTML elements to display these timings. detectVideo(active)controls the main scanning loop. Ifactiveistrue, it calls thedetectfunction to scan the current video frame and then schedules the next scan usingrequestAnimationFrame, which is an efficient way to run a loop tied to the browser’s refresh rate. Ifactiveisfalse, the loop is stopped by callingcancelAnimationFrame.el.videoBtn.addEventListener("click", ...)handles clicks on the “Start/Stop Camera” button. If the camera is not active (!requestId), it requests access to the user’s camera usingnavigator.mediaDevices.getUserMedia(). Upon success, it sets thesrcObjectof the video element to the camera stream, changes the button’s class to style it as “primary,” and starts the scanning loop by callingdetectVideo(true). If the camera is already active, it changes the button’s class back and stops the video scanning loop by callingdetectVideo(false).
💡 For an even more elaborate version of this app, check out the example in the library’s GitHub repository.
Now run the app and scan a barcode or QR code!

Conclusion
This concludes our tutorial on how to set up a simple barcode scanning app using zbar-wasm.
Using open-source libraries like these can be great for prototyping and personal projects. However, this approach is rarely viable for developing business solutions, since the work involved in maintaining an app without dedicated support is unpredictable.
We developed the Scanbot Web Barcode Scanner SDK to help enterprises overcome the hurdles presented by community-driven scanning software. Our goal was to provide a developer-friendly solution for a wide range of platforms that consistently delivers high-quality results – even in challenging circumstances. The SDK is based on WebAssembly and provides easy-to-integrate JavaScript and TypeScript APIs.
In the following tutorial, we’ll show you how to set up a fully functional barcode scanning web app in a single HTML file using the Scanbot SDK.
How to build a WASM-based barcode scanner app with the Scanbot SDK
In your project folder, create an index.html with some boilerplate code.
<!DOCTYPE html>
<html lang="en">
    <head>
        <meta charset="UTF-8" />
        <meta
            name="viewport"
            content="width=device-width, initial-scale=1.0, maximum-scale=1.0, user-scalable=0"
        />
        <title>Web Barcode Scanner</title>
    </head>
    <body>
    </body>
</html>
Now we’ll need to do the following:
- Create a button that calls up the scanning interface when clicked.
- Include a
<p>element on the page for displaying the scanning result. - Import the Scanbot Web SDK using a CDN.
- Process the scan result before displaying it on the page.
⚠️ In this tutorial, we’re importing the SDK via jsDelivr. However, you should only do this for quick prototyping. In your production environment, please download the Web SDK directly (or install it via npm) and include its files in your project.
Your index.html will look something like this:
<!DOCTYPE html>
<html lang="en">
    <head>
        <meta charset="UTF-8" />
        <meta
            name="viewport"
            content="width=device-width, initial-scale=1.0, maximum-scale=1.0, user-scalable=0"
        />
        <title>Web Barcode Scanner</title>
    </head>

    <body style="margin: 0">
        <button id="start-scanning">Start scanning</button>
        <p id="result"></p>
        <script type="module">
            import "https://cdn.jsdelivr.net/npm/scanbot-web-sdk@7.0.0/bundle/ScanbotSDK.ui2.min.js";
            const sdk = await ScanbotSDK.initialize({
                enginePath:
                    "https://cdn.jsdelivr.net/npm/scanbot-web-sdk@7.0.0/bundle/bin/barcode-scanner/",
            });
            document
                .getElementById("start-scanning")
                .addEventListener("click", async () => {

                    const config =
                        new ScanbotSDK.UI.Config.BarcodeScannerScreenConfiguration();

                    const scanResult = await ScanbotSDK.UI.createBarcodeScanner(config);
                    if (scanResult?.items?.length > 0) {
                        document.getElementById("result").innerText =
                            `Barcode type: ${scanResult.items[0].barcode.format} \n` +
                            `Barcode content: "${scanResult.items[0].barcode.text}" \n`;
                    } else {
                        document.getElementById("result").innerText = "Scanning aborted by the user";
                    }
                });
        </script>
    </body>
</html>
Feel free to run the app and test its functionalities.
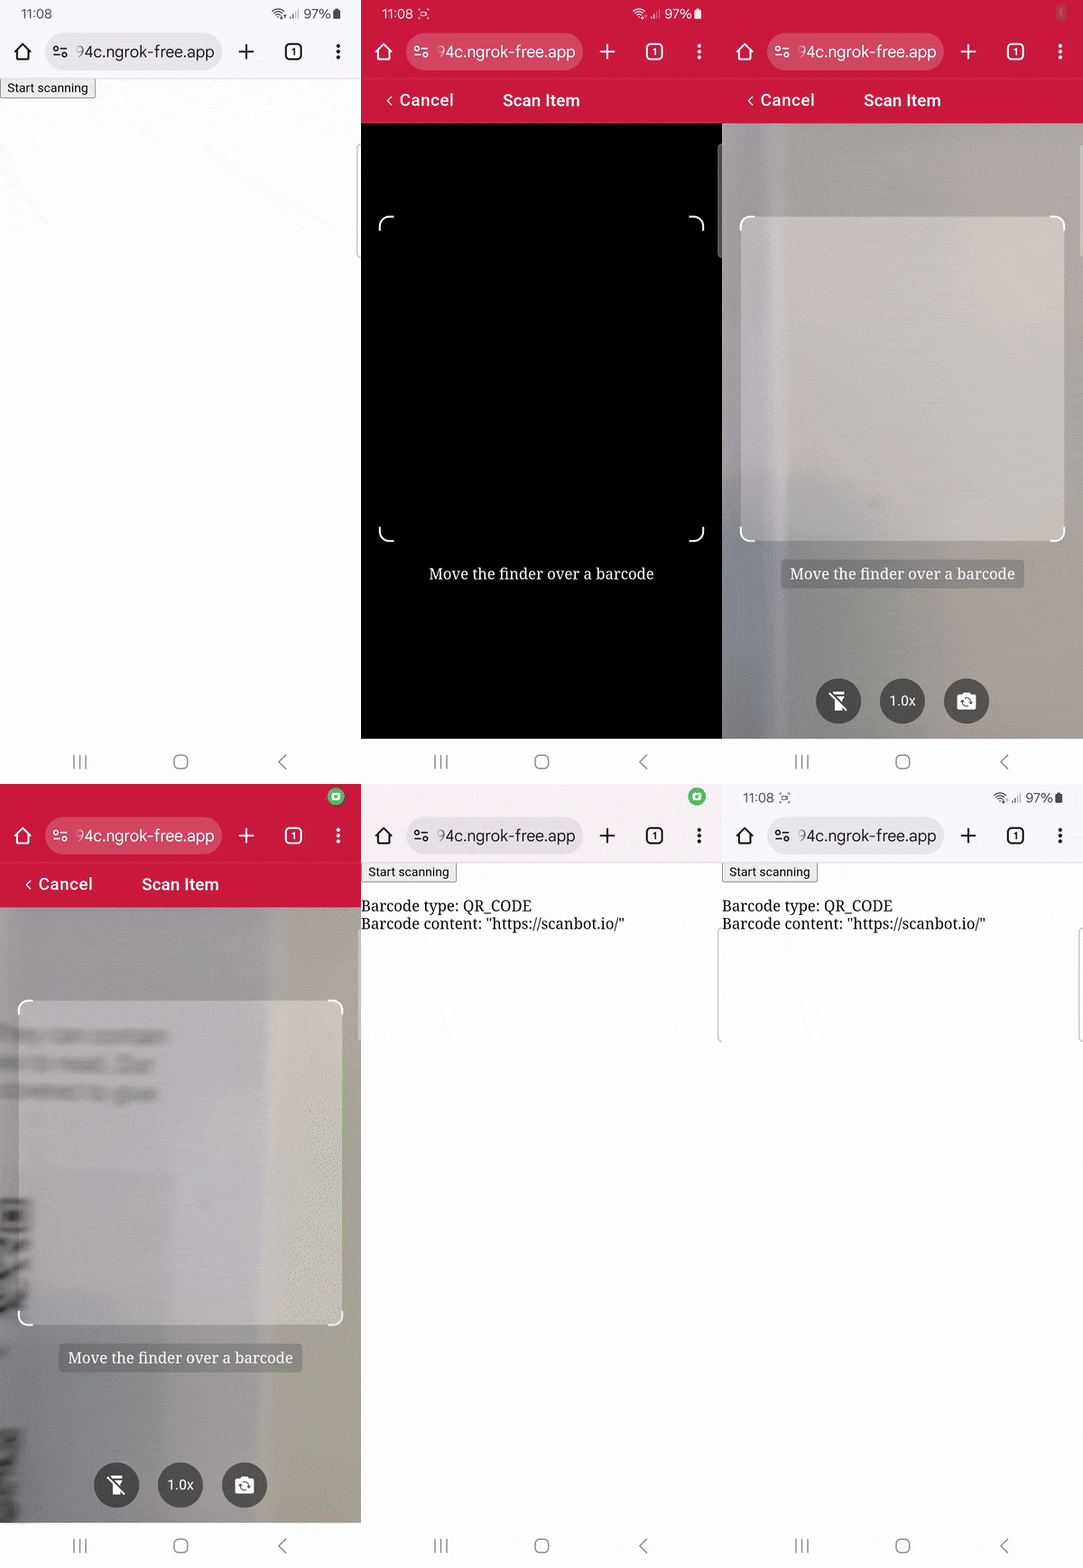
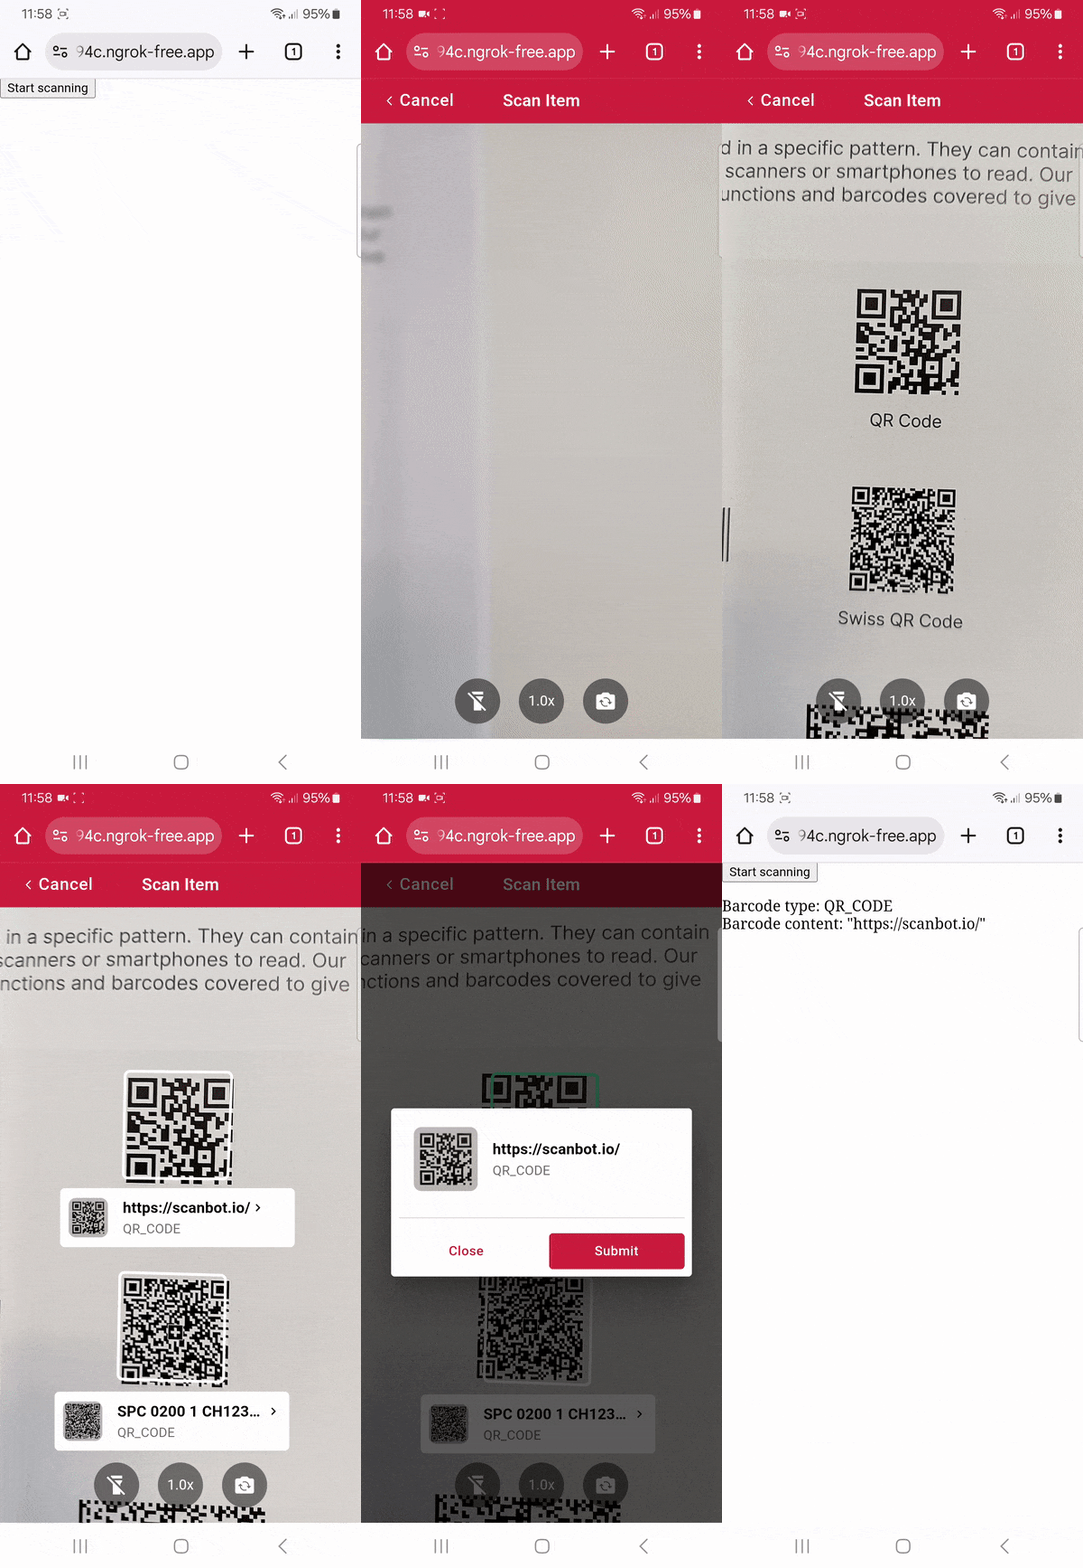
Many barcode scanners, including zbar-wasm, highlight detected barcodes in the video frame. We can go one step further and replace the viewfinder with an AR overlay that users can tap on to select which code they would like to scan. The value is then presented in a confirmation dialog.
// Disable the viewfinder
config.viewFinder.visible = false;

// Enable the AR overlay
config.useCase.arOverlay.visible = true;

// Let users tap on the QR code they would like to scan
config.useCase.arOverlay.automaticSelectionEnabled = false;

// Show the scanned code's value in a confirmation dialog
config.useCase.confirmationSheetEnabled = true;
Your final index.html will look like this:
<!DOCTYPE html>
<html lang="en">
    <head>
        <meta charset="UTF-8" />
        <meta
            name="viewport"
            content="width=device-width, initial-scale=1.0, maximum-scale=1.0, user-scalable=0"
        />
        <title>Web Barcode Scanner</title>
    </head>

    <body style="margin: 0">
        <button id="start-scanning">Start scanning</button>
        <p id="result"></p>
        <script type="module">
            import "https://cdn.jsdelivr.net/npm/scanbot-web-sdk@7.0.0/bundle/ScanbotSDK.ui2.min.js";
            const sdk = await ScanbotSDK.initialize({
                enginePath:
                    "https://cdn.jsdelivr.net/npm/scanbot-web-sdk@7.0.0/bundle/bin/barcode-scanner/",
            });
            document
                .getElementById("start-scanning")
                .addEventListener("click", async () => {

                    const config =
                        new ScanbotSDK.UI.Config.BarcodeScannerScreenConfiguration();
                        config.viewFinder.visible = false;
                        config.useCase.arOverlay.visible = true;
                        config.useCase.arOverlay.automaticSelectionEnabled = false;
                        config.useCase.confirmationSheetEnabled = true;

                    const scanResult = await ScanbotSDK.UI.createBarcodeScanner(config);
                    if (scanResult?.items?.length > 0) {
                        document.getElementById("result").innerText =
                            `Barcode type: ${scanResult.items[0].barcode.format} \n` +
                            `Barcode content: "${scanResult.items[0].barcode.text}" \n`;
                    } else {
                        document.getElementById("result").innerText = "Scanning aborted by the user";
                    }
                });
        </script>
    </body>
</html>
Now run the app again and scan a barcode or QR code …
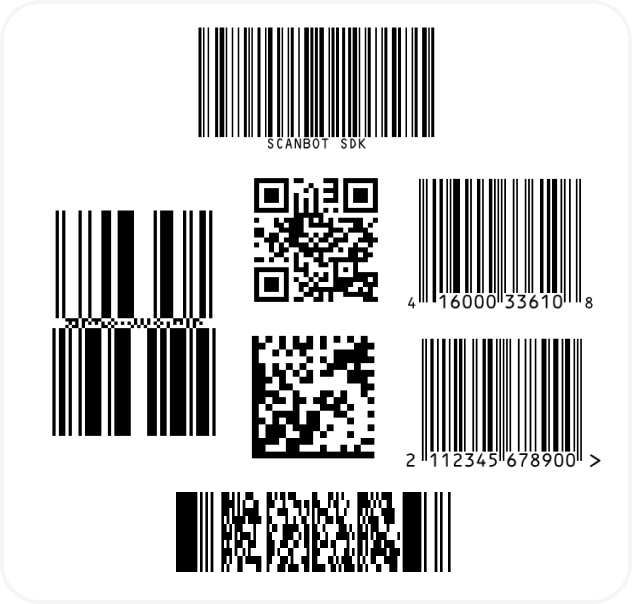
… to test your scanner!
💡 To test your web app on your phone, you have a few options. One option is to use a service like ngrok, which creates a tunnel to one of their SSL-certified domains. Their Quick Start guide will help you get up and running quickly.
🎉 Congratulations! You’ve built a powerful barcode scanning web app with an intuitive interface using just a few lines of code.
This is just one of the many scanner configurations the Scanbot SDK has to offer – take a look at the RTU UI documentation and API reference to learn more.
Integration guides are also available for the following Web frameworks:
Should you have questions about this tutorial or run into any issues, we’re happy to help! Just shoot us an email via tutorial-support@scanbot.io.
Happy scanning! 🤳

