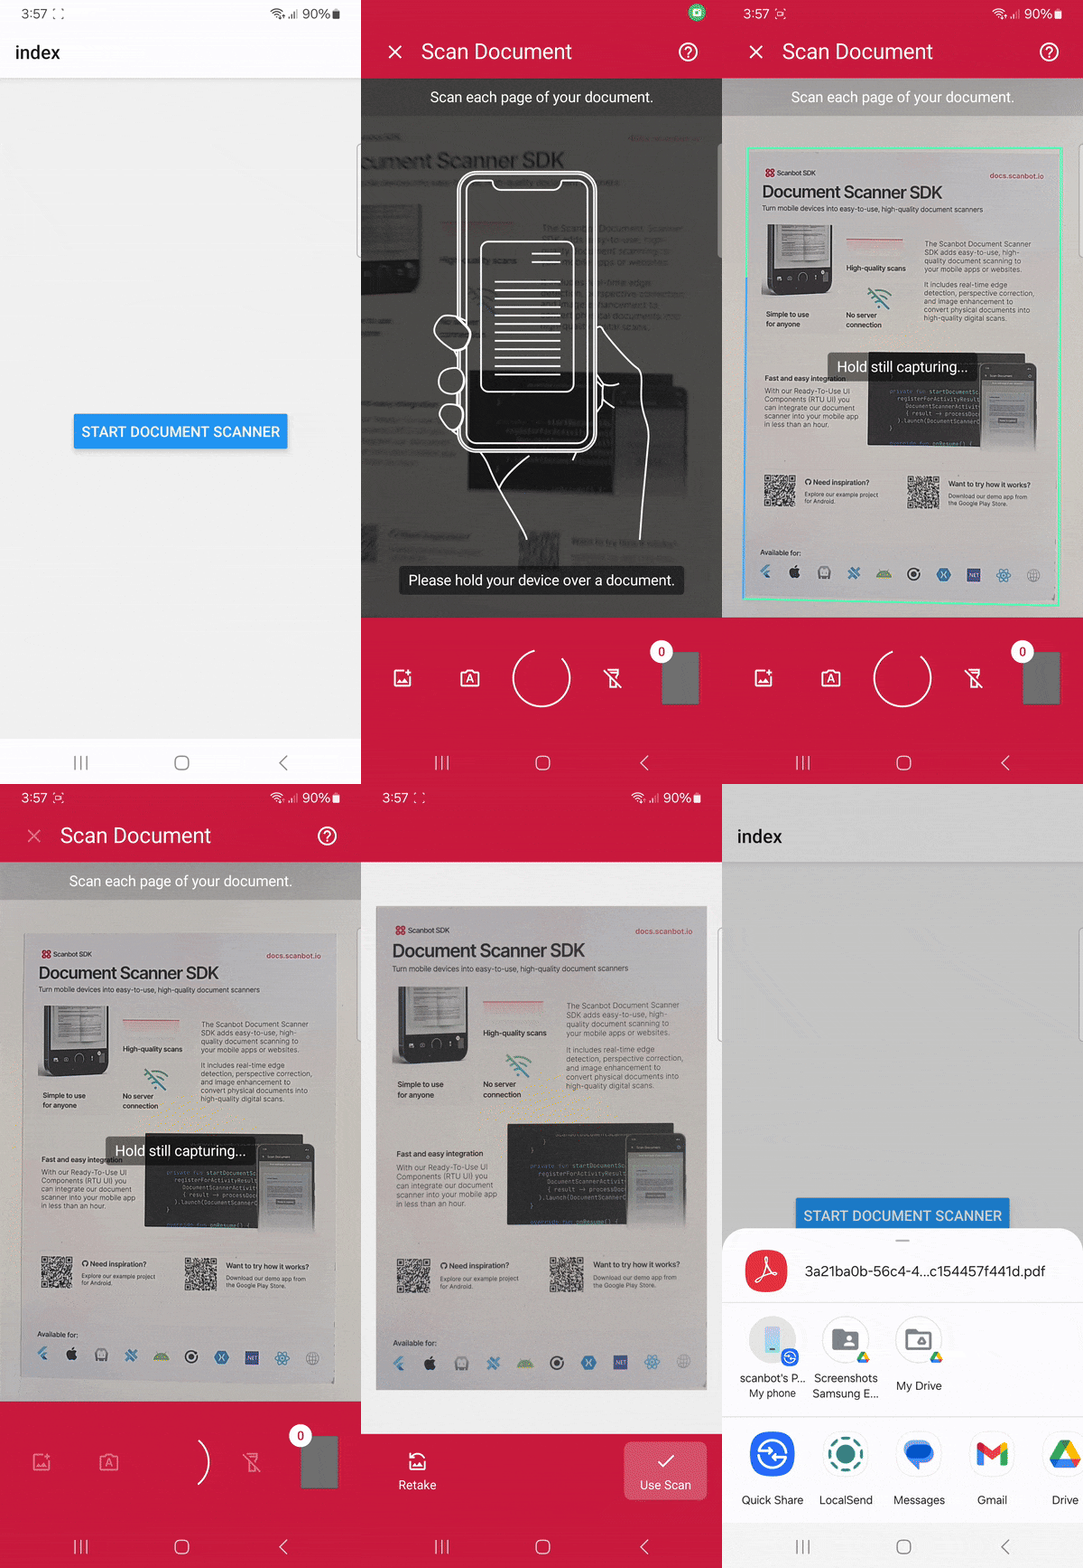
In this tutorial, we’ll use React Native and the Expo framework to build a cross-platform app for Android and iOS that scans documents and exports them as PDF files.
To implement the document scanning functionalities, PDF generation, and app UI, we’ll use the Scanbot React Native Document Scanner SDK.

Building our app involves the following steps:
- Preparing the project
- Installing expo-sharing and the Document Scanner SDK
- Initializing the SDK
- Implementing the scanning feature
- Implementing the PDF export feature
Requirements
Before starting app development with React Native, you need to set up your local development environment. You’ll also need a real device to get the full benefits from using the SDK. You can find the steps for preparing your local environment in the Expo documentation.
💡 Starting with React Native version 0.75, it’s recommended to use frameworks such as Expo to develop React Native applications. We’ll use Expo in this tutorial as well.
Of course, you can also integrate the Scanbot SDK without a framework. For further information, please refer to the official React Native documentation.
Step 1: Prepare the project
1. Create a new Expo project
First, let’s create our Expo app using the Expo CLI, which will walk us through the setup process.
To create an Expo app, run the following command in the terminal:
npx create-expo-app@latestWhen prompted, name your app, e.g., “expo-document-scanner”. Then navigate into the project directory.
cd expo-document-scanner2. Remove boilerplate code
The Expo CLI has generated some screens to ensure the app isn’t empty. The generated code can be quickly removed by running the following command:
npm run reset-projectNow the app directory only contains an index file, which is our only screen, and a _layout.tsx file.
💡 Npm is the default package manager in this project, so we’ll be using it for this tutorial. Feel free to set up the project with any other package manager supported by Expo.
3. Generate the native projects
To install expo-dev-client, we need to run the following command:
npx expo install expo-dev-clientAfterward, we generate our iOS and Android projects with:
npx expo prebuild⚠️ If you’re using a Scanbot SDK trial license, make sure that the Android application ID and iOS bundle identifier are the same.
Step 2: Install expo-sharing and the Document Scanner SDK
First, let’s install the expo-sharing package that we’ll use to share our generated PDF:
npx expo install expo-sharingNext, install the React Native Document Scanner SDK:
npm install react-native-scanbot-sdk💡 This will install the latest version of the Scanbot SDK. You can find more information about each version in our changelog.
Now we just need to make the necessary native changes to the projects.
You can use our config plugin or manually configure the native projects. We’ll showcase both so you can pick the method you prefer.
Method A: Expo config plugin
To utilize the plugin, add the following to your app.json file:
"plugins": [
  [
    "react-native-scanbot-sdk",
    {
      "iOSCameraUsageDescription": "Document & Barcode Scanning permission",
      "largeHeap": true,
      "mavenURLs": true
    }
  ]
],
Then run:
npx expo prebuildNow we’re all set. You can skip the Android and iOS native changes when using this plugin.
Method B: Manual configuration
Alternatively, you can also apply the changes to the native projects manually.
Android
Let’s enable the largeHeap flag to process more memory intensive operations.
Set the property android:largeHeap="true" in the <application> tag in the app’s Manifest in android/app/src/main/AndroidManifest.xml.
For development builds, we also need to add our Maven package URLs in android/build.gradle
allprojects {
    repositories {
      // ... other maven rpositories
      maven { url "https://nexus.scanbot.io/nexus/content/repositories/releases/" }
      maven { url "https://nexus.scanbot.io/nexus/content/repositories/snapshots/" }
    }
}
iOS
For iOS, we need to include a description for the camera permission in ios/{projectName}/Info.plist anywhere inside the element:
<key>NSCameraUsageDescription</key>
<string>Grant camera access to scan documents.</string>
Now that the project is set up, we can start integrating the document scanning functionalities.
Step 3: Initializing the SDK
Before using any feature of the Scanbot SDK, we need to initialize it. Ideally, initialization should be done as soon as the app is launched.
    ScanbotSDK
        .initializeSDK({ licenseKey: "" })
        .then(result => console.log(result))
        .catch(err => console.log(err));
There are several ways to initialize the SDK, depending on your use case. In this tutorial, we’re going to initialize the SDK inside a useEffect in our app/_layout.tsx file.
So _layout.tsx would look like this:
import {Stack} from "expo-router";
import {useEffect} from "react";
import ScanbotSDK from 'react-native-scanbot-sdk';

export default function RootLayout() {

    useEffect(() => {
        ScanbotSDK
            .initializeSDK({licenseKey: ""})
            .then(result => console.log(result))
            .catch(err => console.log(err));
    }, []);

    return (
        <Stack>
            <Stack.Screen name="index"/>
        </Stack>
    );
}
💡 Without a license key, our SDK only runs for 60 seconds per session. This is more than enough for the purposes of our tutorial, but if you like, you can generate a license key using the bundle and application identifiers.
Step 4: Implementing the scanning feature
In app/index.tsx, we’re going to add a button that will call up the scanning interface.
First, let’s add the necessary imports:
import {Button, View} from "react-native";
import {useCallback} from "react";
import ScanbotSDK from "react-native-scanbot-sdk";
import {DocumentScanningFlow, startDocumentScanner} from "react-native-scanbot-sdk/ui_v2";
Since we ran the reset-project command earlier, the file should only contain a single view with a Text component. Let’s replace it with a Button component:
<Button title={"Start Document Scanner"} onPress={onDocumentScanner} />We also need to define onDocumentScanner, which will start the document scanner:
const onDocumentScanner = useCallback(async () => {
    try {
        /** Check license status and return early if the license is not valid */
        if (!(await ScanbotSDK.getLicenseInfo()).isLicenseValid) {
            return;
        }
        /**
         * Create the document configuration object and
         * start the document scanner with the configuration
         */
        const configuration = new DocumentScanningFlow();
        const documentResult = await startDocumentScanner(configuration);
        /**
         * Handle the result if the result status is OK
         */
        if (documentResult.status === 'OK') {
            /* Print out the documentImageURI for each page */
            documentResult.data.pages.forEach((page) => console.log(page.documentImageURI));
        }
    } catch (e: any) {
        console.log("An error has occurred while running Document Scanner", e.message);
    }
}, []);
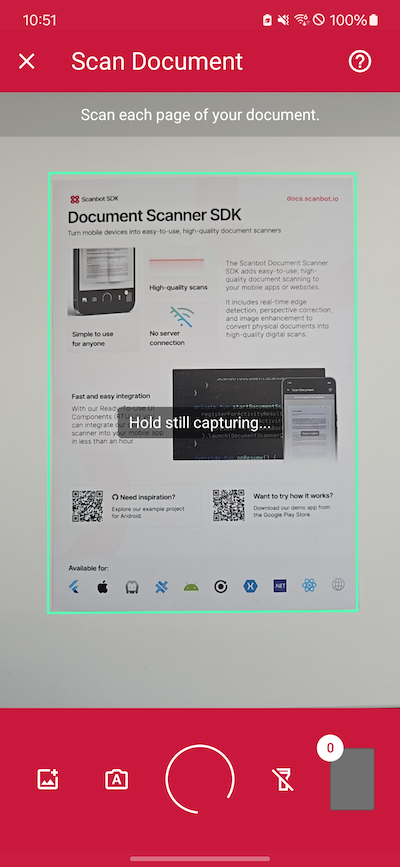
💡 In this tutorial, we use a default configuration object. It will start the Document Scanner UI with the default settings: in multi-page scanning mode with an acknowledge screen after scanning each page.
You can customize the UI and behavior of the Document Scanner by modifying the configuration object. For more information on how to customize the Document Scanner UI, please refer to the SDK’s RTU UI documentation.
If you want, you can now run the app to try out the scanner without the PDF export feature.
For Android:
npx expo run:android --deviceFor iOS:
npx expo run:ios --device
Step 5: Implement the PDF export feature
Now we’ll generate a PDF file from the scanned document and share it.
Once again, let’s first add the necessary imports:
import ScanbotSDK, {PdfConfiguration} from "react-native-scanbot-sdk";
import {shareAsync} from "expo-sharing";
To enable users to scan documents, generate a PDF, and share it, we need to modify the onDocumentScanner method. This method will first launch the document scanner, then process the scanned document to generate a PDF, and finally provide an option to share it.
const onDocumentScanner = useCallback(async () => {
    try {
        /** Check license status and return early if the license is not valid */
        if (!(await ScanbotSDK.getLicenseInfo()).isLicenseValid) {
            return;
        }
        /**
         * Create the document configuration object and
         * start the document scanner with the configuration
         */
        const configuration = new DocumentScanningFlow();
        const documentResult = await startDocumentScanner(configuration);
        /**
         * Handle the result if the result status is OK
         */
        if (documentResult.status === 'OK') {
            /* Print out the documentImageURI for each page */
            documentResult.data.pages.forEach((page) => console.log(page.documentImageURI));

            /* Create a PDF file from the provided document UUID */
            const createPDFResult = await ScanbotSDK.Document.createPDF({
                documentID: documentResult.data.uuid,
                pdfConfiguration: new PdfConfiguration(),
            })

            /* Share the created PDF file */
            shareAsync(createPDFResult.pdfFileUri, {
                dialogTitle: 'Share PDF file',
            })

        }
    } catch (e: any) {
        console.log("An error has occurred while running Document Scanner", e.message);
    }
}, []);
Now you can share a scanned document as a PDF file and use it. For example, you can send it via email or save it to cloud storage.
To run the app on your Android or iOS device, use the following commands:
For Android:
npx expo run:android --deviceFor iOS:
npx expo run:ios --device
Conclusion
And that’s it! You’ve successfully built a cross-platform document scanner with React Native 🎉
If this tutorial has piqued your interest in integrating document scanning functionalities into your React Native app, make sure to take a look at the other neat features in the React Native Document Scanner SDK’s documentation – or run our example project for a more hands-on experience.
Should you have questions about this tutorial or run into any issues, we’re happy to help! Just shoot us an email via tutorial-support@scanbot.io.
Happy scanning! 🤳


