In this tutorial, we’ll build an Android app for scanning PDF417 barcodes using Kotlin, Android Studio, and the Scanbot Android Barcode Scanner SDK.
The app will initially display a single “Start scanning” button. When clicked, the interface will open, enabling the user to scan a PDF417 code. After reading the barcode, the scanner will close, and the scanned value will be displayed on the screen. In an optional step, we’ll enhance the user experience by implementing an AR overlay and a confirmation dialog.


We’ll achieve this by …
- Preparing the project
- Initializing the SDK
- Setting up the main screen
- Implementing the barcode scanner
- Setting up PDF417 scanning
- Optional: Adjusting the scanning behavior
All you need is the latest version of Android Studio and you’re good to go.
Step 1: Prepare the project
Create a new Empty Views Activity and name the project (e.g., “Android PDF417 Scanner”).
When your project is ready, go to settings.gradle.kts and add the Maven repositories for the Scanbot SDK:
dependencyResolutionManagement {
    repositoriesMode.set(RepositoriesMode.FAIL_ON_PROJECT_REPOS)
    repositories {
        google()
        mavenCentral()

        // Add the repositories here:
        maven(url = "https://nexus.scanbot.io/nexus/content/repositories/releases/")
        maven(url = "https://nexus.scanbot.io/nexus/content/repositories/snapshots/")
    }
}
Now go to app/build.gradle.kts and add the dependencies for the Scanbot SDK and the RTU UI:
dependencies {
    implementation("io.scanbot:scanbot-barcode-scanner-sdk:6.2.1")
    implementation("io.scanbot:rtu-ui-v2-barcode:6.2.1")
Sync the project.
💡 We use Barcode Scanner SDK version 6.2.1 in this tutorial. You can find the latest version in the changelog.
Since we need to access the device camera to scan PDF417 codes, let’s also add the necessary permissions in AndroidManifest.xml:
<?xml version="1.0" encoding="utf-8"?>
<manifest xmlns:android="http://schemas.android.com/apk/res/android"
    xmlns:tools="http://schemas.android.com/tools">

    <uses-permission android:name="android.permission.CAMERA" />
    <uses-feature android:name="android.hardware.camera" />

    <application
    <!-- ... -->
Step 2: Initialize the SDK
Before we can use the Barcode Scanner SDK, we need to initialize it. The recommended approach is to do it in your Application implementation. This ensures the SDK is correctly initialized even when the app’s process is restored after being terminated in the background.
First, we need to create an Application subclass by right-clicking on the folder app/kotlin+java/com.example.androidbarcodescanner, selecting New > Kotlin Class/File, and naming it (e.g., “ExampleApplication”).
In the resulting ExampleApplication.kt, let’s first add the necessary imports:
import android.app.Application
import io.scanbot.sdk.barcode_scanner.ScanbotBarcodeScannerSDKInitializer
Then make ExampleApplication extend the Application class by adding : Application() and add the code for initializing the SDK inside it:
class ExampleApplication : Application() {

    override fun onCreate() {
        super.onCreate()

        ScanbotBarcodeScannerSDKInitializer()
            // Optional: uncomment the next line if you have a license key.
            // .license(this, LICENSE_KEY)
            .initialize(this)
    }
}
💡 Without a license key, our SDK only runs for 60 seconds per session. This is more than enough for the purposes of our tutorial, but if you like, you can generate a license key. Just make sure to change your applicationId in app/build.gradle.kts to io.scanbot.androidbarcodescanner and use that ID to generate the license.
Finally, we need to register the ExampleApplication class in AndroidManifest.xml:
<application
   android:name=".ExampleApplication"
   <!-- ... -->
Step 3: Set up the main screen
We’re going to build a rudimentary UI so we can quickly access the scanning interface in our app.
You can copy the following code for a simple one-button layout into app/res/layout/activity_main.xml:
<?xml version="1.0" encoding="utf-8"?>
<androidx.constraintlayout.widget.ConstraintLayout xmlns:android="http://schemas.android.com/apk/res/android"
    xmlns:app="http://schemas.android.com/apk/res-auto"
    xmlns:tools="http://schemas.android.com/tools"
    android:id="@+id/main"
    android:layout_width="match_parent"
    android:layout_height="match_parent"
    tools:context=".MainActivity">

    <Button
        android:id="@+id/btn_pdf417_scanning"
        android:layout_width="0dp"
        android:layout_height="wrap_content"
        android:text="Scan PDF417 Barcode"
        app:layout_constraintBottom_toBottomOf="parent"
        app:layout_constraintEnd_toEndOf="parent"
        app:layout_constraintHorizontal_bias="0.0"
        app:layout_constraintStart_toStartOf="parent"
        app:layout_constraintTop_toTopOf="parent"
        app:layout_constraintVertical_bias="0.5" />

</androidx.constraintlayout.widget.ConstraintLayout>
Step 4: Implement the barcode scanner
Now we’ll connect the button with the RTU UI’s single-barcode scanning mode.
Go to MainActivity.kt and add the necessary imports:
import android.widget.Button
import android.widget.Toast
import androidx.activity.result.ActivityResultLauncher
import io.scanbot.sdk.ui_v2.barcode.BarcodeScannerActivity
import io.scanbot.sdk.ui_v2.common.activity.registerForActivityResultOk
import io.scanbot.sdk.ui_v2.barcode.configuration.*
In the MainActivity class, add a private property that we’ll use to launch the barcode scanner.
private val barcodeResultLauncher: ActivityResultLauncher<BarcodeScannerConfiguration> =
        registerForActivityResultOk(BarcodeScannerActivity.ResultContract()) { resultEntity ->
        // Barcode Scanner result callback:
        // Get the first scanned barcode from the result object...
        val barcodeItem = resultEntity.result?.items?.first()
        // ... and process the result as needed. For example, display as a Toast:
        Toast.makeText(
            this,
            "Scanned: ${barcodeItem?.text} (${barcodeItem?.type})",
            Toast.LENGTH_LONG
        ).show()
    }
Next, in the onCreate() method, we set up an OnClickListener for our Scan PDF417 Barcode button. When the button is clicked, it launches barcodeResultLauncher using a configuration object.
findViewById<Button>(R.id.btn_pdf417_scanning).setOnClickListener {
    val config = BarcodeScannerConfiguration().apply {
    }
    barcodeResultLauncher.launch(config)
}
Step 5: Set up PDF417 scanning
As it is now, our scanner will read any barcode type. Restricting it to scanning only PDF417 codes prevents unintended scans and improves the scanner’s performance, as it doesn’t need to check each supported symbology. So let’s implement this in our code.
this.recognizerConfiguration.barcodeFormats = listOf(BarcodeFormat.PDF_417)By default, the scanner has a square viewfinder. An PDF417 barcode is generally much wider than it is high, which we can convey to the user by adjusting the viewfinder’s aspect ratio accordingly.
this.viewFinder.aspectRatio.height = 1.0
this.viewFinder.aspectRatio.width = 3.0
The result should look something like this:
findViewById<Button>(R.id.btn_pdf417_scanning).setOnClickListener {
    val config = BarcodeScannerConfiguration().apply {
        // Restrict scanning to PDF417 barcodes
        this.recognizerConfiguration.barcodeFormats = listOf(BarcodeFormat.PDF_417)

        // Define the viewfinder's aspect ratio.
        this.viewFinder.aspectRatio.height = 1.0
        this.viewFinder.aspectRatio.width = 3.0
    }
    barcodeResultLauncher.launch(config)
}
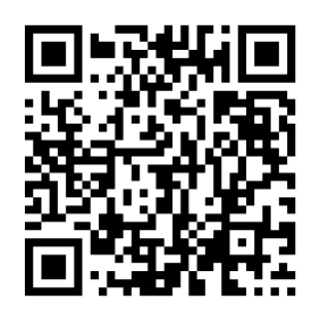
Now build and run your app and scan a PDF417 code …

… to test your scanner!

Optional: Adjust the scanning behavior
The way we set up our PDF417 barcode scanner is one way to do it, but with the Scanbot SDK, you can create all kinds of scanning experiences.
For example, you can remove the viewfinder entirely …
this.viewFinder.visible = false… and display each PDF417 barcode’s value directly on the screen in real time while letting users tap on a barcode value to submit it.
this.arOverlay.visible = true
this.arOverlay.automaticSelectionEnabled = false
We can also display a confirmation dialog for each tapped barcode.
this.confirmationSheetEnabled = trueThe result should look like this:
findViewById<Button>(R.id.btn_pdf417_scanning).setOnClickListener {
    val config = BarcodeScannerConfiguration().apply {
        // Initialize the use case for single scanning.
        this.useCase = SingleScanningMode().apply {
            // Enable the AR overlay and disable automatic selection
            this.arOverlay.visible = true
            this.arOverlay.automaticSelectionEnabled = false

            // Enable the confirmation dialog
            this.confirmationSheetEnabled = true
        }
        // Restrict scanning to PDF417 barcodes
        this.recognizerConfiguration.barcodeFormats = listOf(BarcodeFormat.PDF_417)

        // Define the viewfinder's aspect ratio.
        this.viewFinder.aspectRatio.height = 1.0
        this.viewFinder.aspectRatio.width = 3.0

        // Disable the viewfinder
        this.viewFinder.visible = false
    }
    barcodeResultLauncher.launch(config)
}
Now build and run your scanner again to test out its new behavior.

Conclusion
🎉 With this, you now have a fully functional Android app for scanning PDF417 barcodes!
There are many more scanner configurations for you to try – take a look at the SDK’s RTU UI documentation and the API reference to learn more.
💡 The Scanbot SDK also comes with built-in data parsers for various barcode formats, including PDF417 codes on ID cards, driver’s licenses, boarding passes, and German medical certificates.
Should you have questions about this tutorial or run into any issues, we’re happy to help! Just shoot us an email via tutorial-support@scanbot.io.
Happy scanning! 🤳


