In this tutorial, we’ll create a browser-based barcode scanner that can parse the data encoded in Health Industry Bar Codes (HIBC). The result will be a single stand-alone HTML file you can run on your server.
To achieve this, we’ll use plain JavaScript and the Scanbot Web Barcode Scanner SDK. We’re going to follow these steps:
- Setting up the barcode scanner
- Optimizing the scanner for HIBCs
- Implementing the HIBC parser
Let’s get started!
Want to see the final code right away? Click here.
index.html:
<!DOCTYPE html>
<html lang="en">
    <head>
        <meta charset="UTF-8" />
        <meta
            name="viewport"
            content="width=device-width, initial-scale=1.0, maximum-scale=1.0, user-scalable=0"
        />
        <title>HIBC Barcode Parser</title>
    </head>

    <body style="margin: 0">
        <button id="start-scanning">Start scanning</button>
        <p id="result"></p>
        <script type="module">
            import "https://cdn.jsdelivr.net/npm/scanbot-web-sdk@7.0.0/bundle/ScanbotSDK.ui2.min.js";
            const sdk = await ScanbotSDK.initialize({
                enginePath:
                    "https://cdn.jsdelivr.net/npm/scanbot-web-sdk@7.0.0/bundle/bin/barcode-scanner/",
            });
            document
                .getElementById("start-scanning")
                .addEventListener("click", async () => {
                    const config =
                        new ScanbotSDK.UI.Config.BarcodeScannerScreenConfiguration();
              			config.scannerConfiguration.barcodeFormats = ["CODE_39", "CODE_128", "DATA_MATRIX", "QR_CODE", "AZTEC", "PDF417"];
              			config.scannerConfiguration.extractedDocumentFormats = ["HIBC"];

                    const scanResult = await ScanbotSDK.UI.createBarcodeScanner(config);

                    if (scanResult?.items?.length > 0) {
                        const extractedDocument =
                            scanResult?.items[0].barcode.extractedDocument;

                        function extractDocumentFields(document) {
                            const fields = [];

                            const processFields = (fieldsArray) => {
                                if (!fieldsArray || !Array.isArray(fieldsArray))
                                    return;

                                fieldsArray.forEach((field) => {
                                    if (field.type?.name && field.value?.text) {
                                        fields.push(
                                            field.type.name +
                                                " : " +
                                                field.value.text,
                                        );
                                    }
                                });
                            };

                            processFields(document.fields);

                            if (
                                document.children &&
                                Array.isArray(document.children)
                            ) {
                                document.children.forEach((child) =>
                                    processFields(child.fields),
                                );
                            }

                            return fields;
                        }

                        const documentResult =
                            extractDocumentFields(extractedDocument);
                        document.getElementById("result").innerText =
                            documentResult.join("\n");
                    } else {
                        document.getElementById("result").innerText =
                            "Scanning aborted by the user";
                    }
                });
        </script>
    </body>
</html>
Step 1: Set up the barcode scanner
In your project folder, create an index.html with some boilerplate code.
<!DOCTYPE html>
<html lang="en">
    <head>
        <meta charset="UTF-8" />
        <meta
            name="viewport"
            content="width=device-width, initial-scale=1.0, maximum-scale=1.0, user-scalable=0"
        />
        <title>HIBC Barcode Parser</title>
    </head>
    <body>
    </body>
</html>
To set up our barcode scanner, we’ll have to do the following:
- Create a button that calls up the scanning interface when clicked.
- Include a
<p>element on the page for displaying the scanning result. - Import the Scanbot Web SDK using a CDN.
- Process the scan result before displaying it on the page.
⚠️ In this tutorial, we’re importing the SDK via jsDelivr. However, you should only do this for quick prototyping. In your production environment, please download the Web SDK directly (or install it via npm) and include its files in your project.
Your index.html will look something like this:
<!DOCTYPE html>
<html lang="en">
    <head>
        <meta charset="UTF-8" />
        <meta
            name="viewport"
            content="width=device-width, initial-scale=1.0, maximum-scale=1.0, user-scalable=0"
        />
        <title>HIBC Barcode Parser</title>
    </head>

    <body style="margin: 0">
        <button id="start-scanning">Start scanning</button>
        <p id="result"></p>
        <script type="module">
            import "https://cdn.jsdelivr.net/npm/scanbot-web-sdk@7.0.0/bundle/ScanbotSDK.ui2.min.js";
            const sdk = await ScanbotSDK.initialize({
                enginePath:
                    "https://cdn.jsdelivr.net/npm/scanbot-web-sdk@7.0.0/bundle/bin/barcode-scanner/",
            });
            document
                .getElementById("start-scanning")
                .addEventListener("click", async () => {

                    const config =
                        new ScanbotSDK.UI.Config.BarcodeScannerScreenConfiguration();

                    const scanResult = await ScanbotSDK.UI.createBarcodeScanner(config);
                    if (scanResult?.items?.length > 0) {
                        document.getElementById("result").innerText =
                            `Barcode type: ${scanResult.items[0].barcode.format} \n` +
                            `Barcode content: "${scanResult.items[0].barcode.text}" \n`;
                    } else {
                        document.getElementById("result").innerText = "Scanning aborted by the user";
                    }
                });
        </script>
    </body>
</html>
This already provides us with a fully functional barcode scanner – although we still have to adjust it a bit to make it better suited for the HIBC standard. Feel free to run the app and test its functionalities.
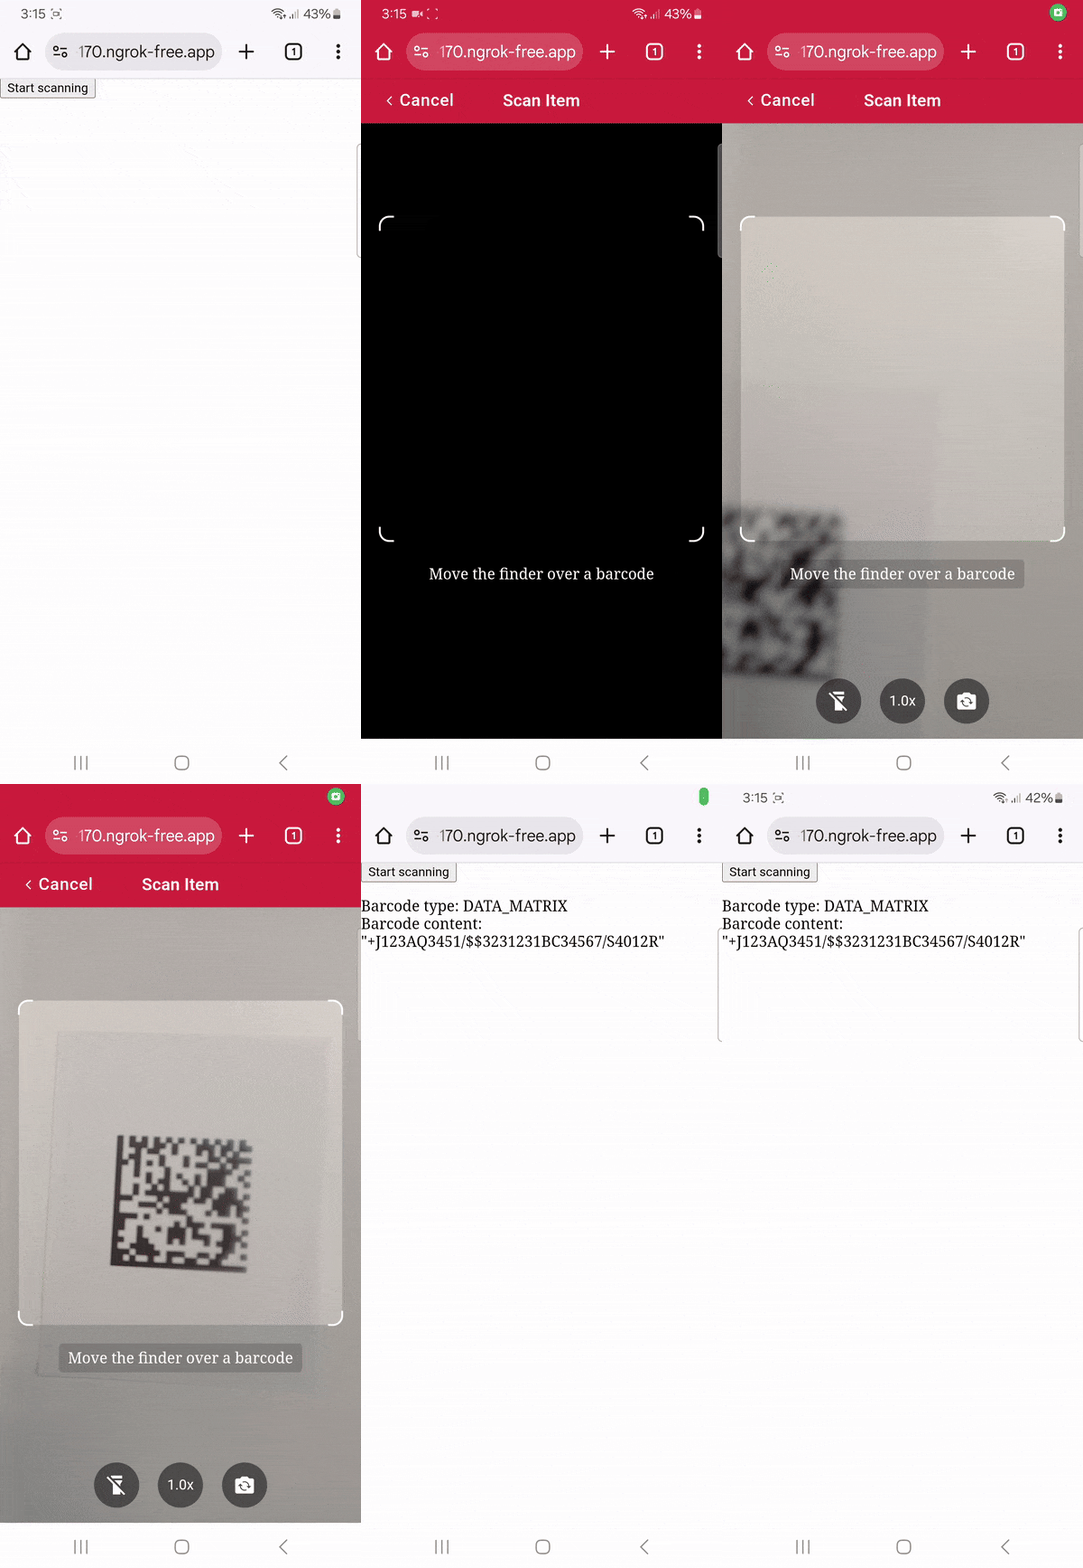
💡 To test your web app on your phone, you have a few options. One option is to use a service like ngrok, which creates a tunnel to one of their SSL-certified domains. Their Quick Start guide will help you get up and running quickly.
You’ll notice that scanning an HIBC outputs the encoded data, but it’s not yet parsed into a human-readable format. We’ll change that in step 3. But first, let’s adjust our scanner’s configuration.
Step 2: Optimize the scanner for HIBCs
As it is now, our scanner will read any barcode type. Restricting it to scanning only those supported by the HIBC standard prevents unintended scans and improves the scanner’s performance, as it doesn’t need to check each supported symbology.
HIBCs can use the following barcode types:
- Code 39
- Code 128
- Data Matrix Code (recommended)
- QR Code
- Aztec Code
- PDF417
So let’s implement this by modifying the BarcodeScannerScreenConfiguration we assigned to the config constant in the previous step.
config.scannerConfiguration.barcodeFormats = ["CODE_39", "CODE_128", "DATA_MATRIX", "QR_CODE", "AZTEC", "PDF417"];We’ll also make sure only structured data adhering to the HIBC standard is extracted.
config.scannerConfiguration.extractedDocumentFormats = ["HIBC"];The result looks like this:
<!-- Existing code -->
document
    .getElementById("start-scanning")
    .addEventListener("click", async () => {
        const config =
            new ScanbotSDK.UI.Config.BarcodeScannerScreenConfiguration();
        config.scannerConfiguration.barcodeFormats = ["CODE_39", "CODE_128", "DATA_MATRIX", "QR_CODE", "AZTEC", "PDF417"];
        config.scannerConfiguration.extractedDocumentFormats = ["HIBC"];

        const scanResult = await ScanbotSDK.UI.createBarcodeScanner(config);

        if (scanResult?.items?.length > 0) {
            document.getElementById("result").innerText =
                `Barcode type: ${scanResult.items[0].barcode.format} \n` +
                `Barcode content: "${scanResult.items[0].barcode.text}" \n`;
        } else {
            document.getElementById("result").innerText = "Scanning aborted by the user";
        }
    });
Step 3: Implement the HIBC parser
Without parsing the barcode’s output, it’s hard to make sense of the data encoded in an HIBC. Fortunately, the Scanbot Web SDK comes with a built-in HIBC barcode parser. Let’s implement it in our code. We’ll need to change what happens in the if (scanResult?.items?.length > 0) statement.
<!-- Existing code -->
if (scanResult?.items?.length > 0) {
    const extractedDocument =
        scanResult?.items[0].barcode.extractedDocument;

    function extractDocumentFields(document) {
        const fields = [];

        const processFields = (fieldsArray) => {
            if (!fieldsArray || !Array.isArray(fieldsArray))
                return;

            fieldsArray.forEach((field) => {
                if (field.type?.name && field.value?.text) {
                    fields.push(
                        field.type.name +
                            " : " +
                            field.value.text,
                    );
                }
            });
        };

        processFields(document.fields);

        if (
            document.children &&
            Array.isArray(document.children)
        ) {
            document.children.forEach((child) =>
                processFields(child.fields),
            );
        }

        return fields;
    }

    const documentResult =
        extractDocumentFields(extractedDocument);
    document.getElementById("result").innerText =
        documentResult.join("n");
} else {
    document.getElementById("result").innerText =
        "Scanning aborted by the user";
}
Let’s break this down:
- We define a function
extractDocumentFieldsthat takes a document object as an argument and extracts its fields into an array. Inside this function, we define another functionprocessFieldsto process an array of fields. This function checks if the provided array is valid and iterates over each field, pushing the field’s name and text value into thefieldsarray if they exist. - The
extractDocumentFieldsfunction first processes the fields of the main document. It then checks if the document has any children and, if so, processes the fields of each child document as well. The result is an array of field names and values. - After defining the function, the script calls
extractDocumentFieldswith the extracted document and stores the result indocumentResult. It then updates the inner text of the “result” HTML element to display the extracted fields, joined by newline characters.
The final code will look like this:
<!DOCTYPE html>
<html lang="en">
    <head>
        <meta charset="UTF-8" />
        <meta
            name="viewport"
            content="width=device-width, initial-scale=1.0, maximum-scale=1.0, user-scalable=0"
        />
        <title>HIBC Barcode Parser</title>
    </head>

    <body style="margin: 0">
        <button id="start-scanning">Start scanning</button>
        <p id="result"></p>
        <script type="module">
            import "https://cdn.jsdelivr.net/npm/scanbot-web-sdk@7.0.0/bundle/ScanbotSDK.ui2.min.js";
            const sdk = await ScanbotSDK.initialize({
                enginePath:
                    "https://cdn.jsdelivr.net/npm/scanbot-web-sdk@7.0.0/bundle/bin/barcode-scanner/",
            });
            document
                .getElementById("start-scanning")
                .addEventListener("click", async () => {
                    const config =
                        new ScanbotSDK.UI.Config.BarcodeScannerScreenConfiguration();
              			config.scannerConfiguration.barcodeFormats = ["CODE_39", "CODE_128", "DATA_MATRIX", "QR_CODE", "AZTEC", "PDF417"];
              			config.scannerConfiguration.extractedDocumentFormats = ["HIBC"];

                    const scanResult = await ScanbotSDK.UI.createBarcodeScanner(config);

                    if (scanResult?.items?.length > 0) {
                        const extractedDocument =
                            scanResult?.items[0].barcode.extractedDocument;

                        function extractDocumentFields(document) {
                            const fields = [];

                            const processFields = (fieldsArray) => {
                                if (!fieldsArray || !Array.isArray(fieldsArray))
                                    return;

                                fieldsArray.forEach((field) => {
                                    if (field.type?.name && field.value?.text) {
                                        fields.push(
                                            field.type.name +
                                                " : " +
                                                field.value.text,
                                        );
                                    }
                                });
                            };

                            processFields(document.fields);

                            if (
                                document.children &&
                                Array.isArray(document.children)
                            ) {
                                document.children.forEach((child) =>
                                    processFields(child.fields),
                                );
                            }

                            return fields;
                        }

                        const documentResult =
                            extractDocumentFields(extractedDocument);
                        document.getElementById("result").innerText =
                            documentResult.join("\n");
                    } else {
                        document.getElementById("result").innerText =
                            "Scanning aborted by the user";
                    }
                });
        </script>
    </body>
</html>
🎉 And with this, we’ve completed our HIBC scanner and parser web app!
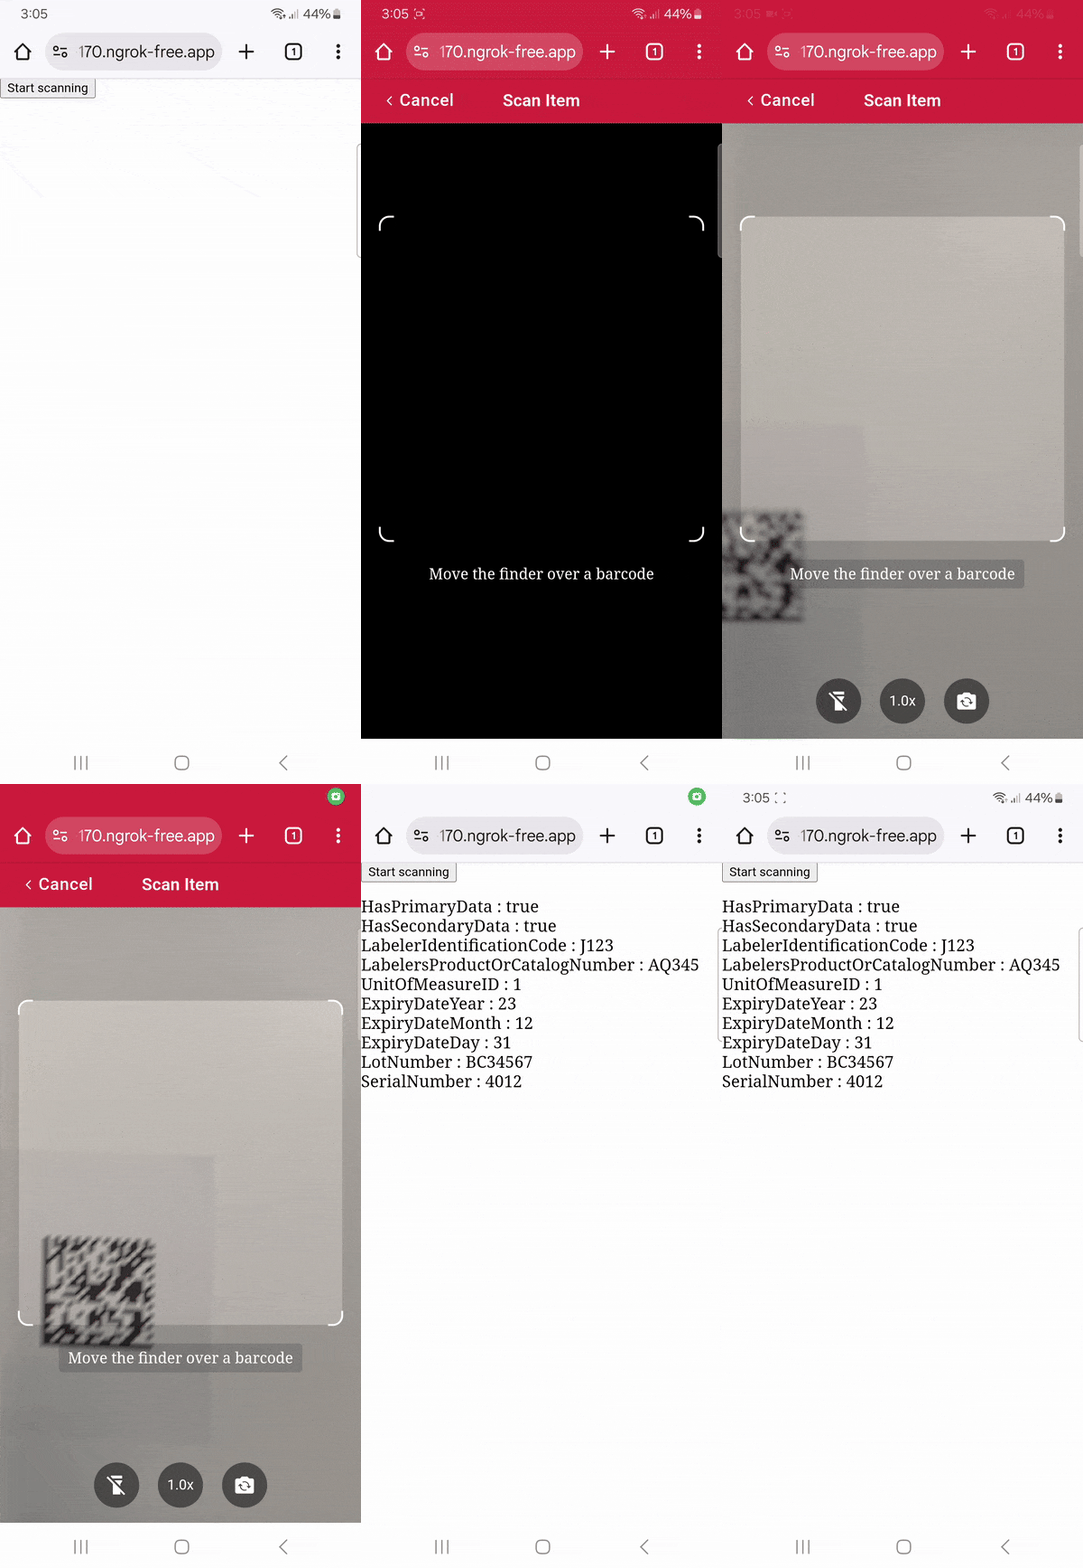
Run the app once more and scan an HIBC …
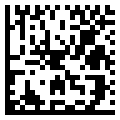
… to test your scanner!

Conclusion
This is just one of the many scanner configurations the Scanbot SDK has to offer – take a look at the RTU UI documentation and API reference to learn more.
Should you have questions about this tutorial or run into any issues, we’re happy to help! Just shoot us an email via tutorial-support@scanbot.io.
Happy scanning! 🤳
