In this tutorial, we’ll use Android Studio and the Scanbot MRZ Scanner SDK to create an app for extracting data from machine-readable zones on ID cards and similar documents.
We’ll achieve this by following these steps:
- Preparing the project
- Initializing the SDK
- Setting up the main screen
- Implementing the MRZ scanning feature
All you need is the latest version of Android Studio and you’re good to go.
Want to see the final code right away? Click here.
MainActivity.kt:
package com.example.androidmrzscanner

import android.os.Bundle
import androidx.activity.enableEdgeToEdge
import androidx.appcompat.app.AppCompatActivity
import androidx.core.view.ViewCompat
import androidx.core.view.WindowInsetsCompat
import android.widget.Button
import android.widget.Toast
import androidx.activity.result.ActivityResultLauncher
import io.scanbot.sdk.documentdata.entity.MRZ
import io.scanbot.sdk.ui_v2.mrz.MrzScannerActivity
import io.scanbot.sdk.ui_v2.mrz.configuration.MrzScannerScreenConfiguration

class MainActivity : AppCompatActivity() {
    private val resultLauncher: ActivityResultLauncher<MrzScannerScreenConfiguration> =
        registerForActivityResult(MrzScannerActivity.ResultContract()) { resultEntity: MrzScannerActivity.Result ->
            if (resultEntity.resultOk) {
                resultEntity.result?.mrzDocument?.let {
                    val mrz = MRZ(it)
                    val givenName: String = mrz.givenNames.value.text
                    val birthDate: String = mrz.birthDate.value.text
                    val expiryDate: String? = mrz.expiryDate?.value?.text
                    Toast.makeText(
                        this,
                        "Given Name: $givenName, Birth Date: $birthDate, Expiry Date: $expiryDate",
                        Toast.LENGTH_LONG
                    ).show()
                }
            }
        }
    override fun onCreate(savedInstanceState: Bundle?) {
        super.onCreate(savedInstanceState)
        enableEdgeToEdge()
        setContentView(R.layout.activity_main)
        ViewCompat.setOnApplyWindowInsetsListener(findViewById(R.id.main)) { v, insets ->
            val systemBars = insets.getInsets(WindowInsetsCompat.Type.systemBars())
            v.setPadding(systemBars.left, systemBars.top, systemBars.right, systemBars.bottom)
            insets
        }
        findViewById<Button>(R.id.btn_scan_mrz).setOnClickListener {
            val configuration = MrzScannerScreenConfiguration()
            resultLauncher.launch(configuration)
        }
    }
}
Step 1: Prepare the project
Create a new Empty Views Activity and name the project (e.g., “Android MRZ Scanner”).
When your project is ready, go to settings.gradle.kts and add the Maven repositories for our SDK:
dependencyResolutionManagement {
    repositoriesMode.set(RepositoriesMode.FAIL_ON_PROJECT_REPOS)
    repositories {
        google()
        mavenCentral()

        // Add the repositories here:
        maven(url = "https://nexus.scanbot.io/nexus/content/repositories/releases/")
        maven(url = "https://nexus.scanbot.io/nexus/content/repositories/snapshots/")
    }
}
Now go to app/build.gradle.kts and add the dependencies for the Scanbot SDK and the RTU UI:
dependencies {
    implementation("io.scanbot:sdk-package-2:7.0.0")
    implementation("io.scanbot:sdk-mrz-assets:7.0.0")
    implementation("io.scanbot:rtu-ui-v2-bundle:7.0.0")
Sync the project.
💡 We use Scanbot SDK version 7.0.0 in this tutorial. You can find the latest version in the changelog.
We need to access the device camera to scan MRZs. Therefore, add the necessary permissions in AndroidManifest.xml:
<?xml version="1.0" encoding="utf-8"?>
<manifest xmlns:android="http://schemas.android.com/apk/res/android"
    xmlns:tools="http://schemas.android.com/tools">

    // Add the permissions here:
    <uses-permission android:name="android.permission.CAMERA" />
    <uses-feature android:name="android.hardware.camera" />

    <application
    <!-- ... -->
Step 2: Initialize the SDK
Before we can use the Scanbot MRZ Scanner SDK, we need to initialize it. The recommended approach is to do it in your Application implementation. This ensures the SDK is correctly initialized even when the app‘s process is restored after being terminated in the background.
First, we need to create an Application subclass by right-clicking on the folder app/kotlin+java/com.example.androidmrzscanner, selecting New > Kotlin Class/File, and naming it (e.g. “ExampleApplication”).
In the resulting ExampleApplication.kt, let’s first add the necessary imports.
import android.app.Application
import io.scanbot.sdk.ScanbotSDKInitializer
Then we make ExampleApplication extend the Application class by adding : Application() and putting the code for initializing the SDK inside it.
class ExampleApplication : Application() {

    override fun onCreate() {
        super.onCreate()

        ScanbotSDKInitializer()
            // Optional: Uncomment the next line if you have a license key.
            // .license(this, LICENSE_KEY)
            .initialize(this)
    }
}
💡 Without a license key, our SDK only runs for 60 seconds per session. This is more than enough for the purposes of our tutorial, but if you like, you can generate a license key. Just make sure to change your applicationId in app/build.gradle.kts to io.scanbot.androiddocumentscanner and use that ID for generating the license.
Finally, we need to register the ExampleApplication class in AndroidManifest.xml.
<application
   android:name=".ExampleApplication"
   <!-- ... -->
Step 3: Set up the main screen
We’re going to build a rudimentary UI so we can quickly start the MRZ scanner from the main screen.
For this tutorial, we’re going to go with a single-button layout, which you can copy and paste into app/res/layout/activity_main.xml:
<?xml version="1.0" encoding="utf-8"?>
<androidx.constraintlayout.widget.ConstraintLayout xmlns:android="http://schemas.android.com/apk/res/android"
    xmlns:app="http://schemas.android.com/apk/res-auto"
    xmlns:tools="http://schemas.android.com/tools"
    android:id="@+id/main"
    android:layout_width="match_parent"
    android:layout_height="match_parent"
    tools:context=".MainActivity">

    <Button
        android:id="@+id/btn_scan_mrz"
        android:layout_width="0dp"
        android:layout_height="wrap_content"
        android:layout_marginBottom="20dp"
        android:text="Scan MRZ"
        app:layout_constraintEnd_toEndOf="parent"
        app:layout_constraintStart_toStartOf="parent"
        app:layout_constraintTop_toTopOf="parent" />


</androidx.constraintlayout.widget.ConstraintLayout>
Next, we’ll connect the button to our RTU UI’s MRZ scanning screen.
Step 4: Implement the MRZ scanning feature
Go to MainActivity.kt and add the necessary imports.
import android.widget.Button
import android.widget.Toast
import androidx.activity.result.ActivityResultLauncher
import io.scanbot.sdk.documentdata.entity.MRZ
import io.scanbot.sdk.ui_v2.mrz.MrzScannerActivity
import io.scanbot.sdk.ui_v2.mrz.configuration.MrzScannerScreenConfiguration
In the MainActivity class, add a private property that we’ll use to launch the MRZ scanner. We’ll use the registerForActivityResult function, passing in a contract (MrzScannerActivity.ResultContract()) that describes how to start the MRZ scanner and how to interpret the result it returns.
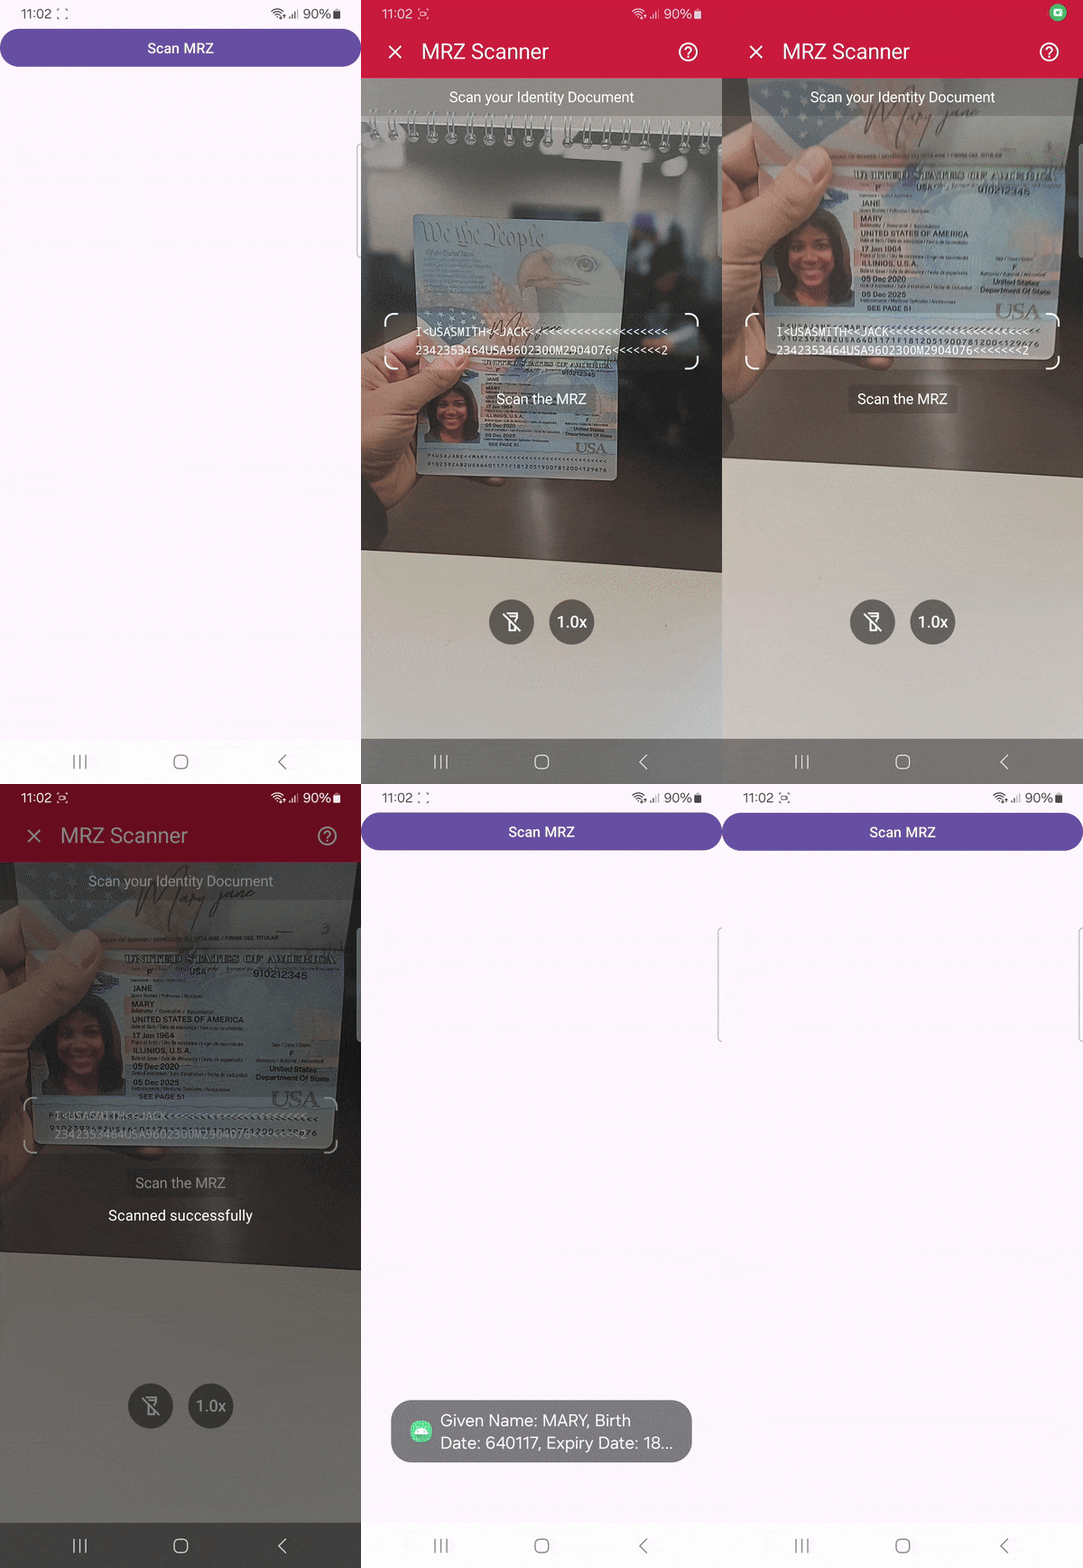
Along with the contract, we provide a lambda function that processes the result when the Scanbot SDK detects an MRZ code and closes its screen. In this function, we create a strongly typed MRZ object from the generic document data and extract the given name, birth date, and expiry date (as just three examples of the numerous data elements that can be encoded in an MRZ). These values are then displayed to the user as a toast notification.
class MainActivity : AppCompatActivity() {

    // Add the private property here:
    private val resultLauncher: ActivityResultLauncher<MrzScannerScreenConfiguration> =
        registerForActivityResult(MrzScannerActivity.ResultContract()) { resultEntity: MrzScannerActivity.Result ->
            if (resultEntity.resultOk) {
                resultEntity.result?.mrzDocument?.let {
                    val mrz = MRZ(it)
                    val givenName: String = mrz.givenNames.value.text
                    val birthDate: String = mrz.birthDate.value.text
                    val expiryDate: String? = mrz.expiryDate?.value?.text
                    Toast.makeText(
                        this,
                        "Given Name: $givenName, Birth Date: $birthDate, Expiry Date: $expiryDate",
                        Toast.LENGTH_LONG
                    ).show()
                }
            }
        }
    // ...
💡 For a complete list of the data elements you can extract from a machine-readable zone, please refer to the MRZ entry in the SDK’s API references.
Finally, in the onCreate() method, set up an OnClickListener for the Scan MRZ button. When the button is clicked, it starts the resultLauncher using a configuration object.
// ... paste after the existing code in onCreate():
findViewById<Button>(R.id.btn_scan_mrz).setOnClickListener {
    val configuration = MrzScannerScreenConfiguration()

    // Start the recognizer activity.
    resultLauncher.launch(configuration)
}
Your final MainActivity.kt will look like this:
package com.example.androidmrzscanner

import android.os.Bundle
import androidx.activity.enableEdgeToEdge
import androidx.appcompat.app.AppCompatActivity
import androidx.core.view.ViewCompat
import androidx.core.view.WindowInsetsCompat
import android.widget.Button
import android.widget.Toast
import androidx.activity.result.ActivityResultLauncher
import io.scanbot.sdk.documentdata.entity.MRZ
import io.scanbot.sdk.ui_v2.mrz.MrzScannerActivity
import io.scanbot.sdk.ui_v2.mrz.configuration.MrzScannerScreenConfiguration

class MainActivity : AppCompatActivity() {
    private val resultLauncher: ActivityResultLauncher<MrzScannerScreenConfiguration> =
        registerForActivityResult(MrzScannerActivity.ResultContract()) { resultEntity: MrzScannerActivity.Result ->
            if (resultEntity.resultOk) {
                resultEntity.result?.mrzDocument?.let {
                    val mrz = MRZ(it)
                    val givenName: String = mrz.givenNames.value.text
                    val birthDate: String = mrz.birthDate.value.text
                    val expiryDate: String? = mrz.expiryDate?.value?.text
                    Toast.makeText(
                        this,
                        "Given Name: $givenName, Birth Date: $birthDate, Expiry Date: $expiryDate",
                        Toast.LENGTH_LONG
                    ).show()
                }
            }
        }
    override fun onCreate(savedInstanceState: Bundle?) {
        super.onCreate(savedInstanceState)
        enableEdgeToEdge()
        setContentView(R.layout.activity_main)
        ViewCompat.setOnApplyWindowInsetsListener(findViewById(R.id.main)) { v, insets ->
            val systemBars = insets.getInsets(WindowInsetsCompat.Type.systemBars())
            v.setPadding(systemBars.left, systemBars.top, systemBars.right, systemBars.bottom)
            insets
        }
        findViewById<Button>(R.id.btn_scan_mrz).setOnClickListener {
            val configuration = MrzScannerScreenConfiguration()
            resultLauncher.launch(configuration)
        }
    }
}
Now build and run the app and scan a machine-readable zone …
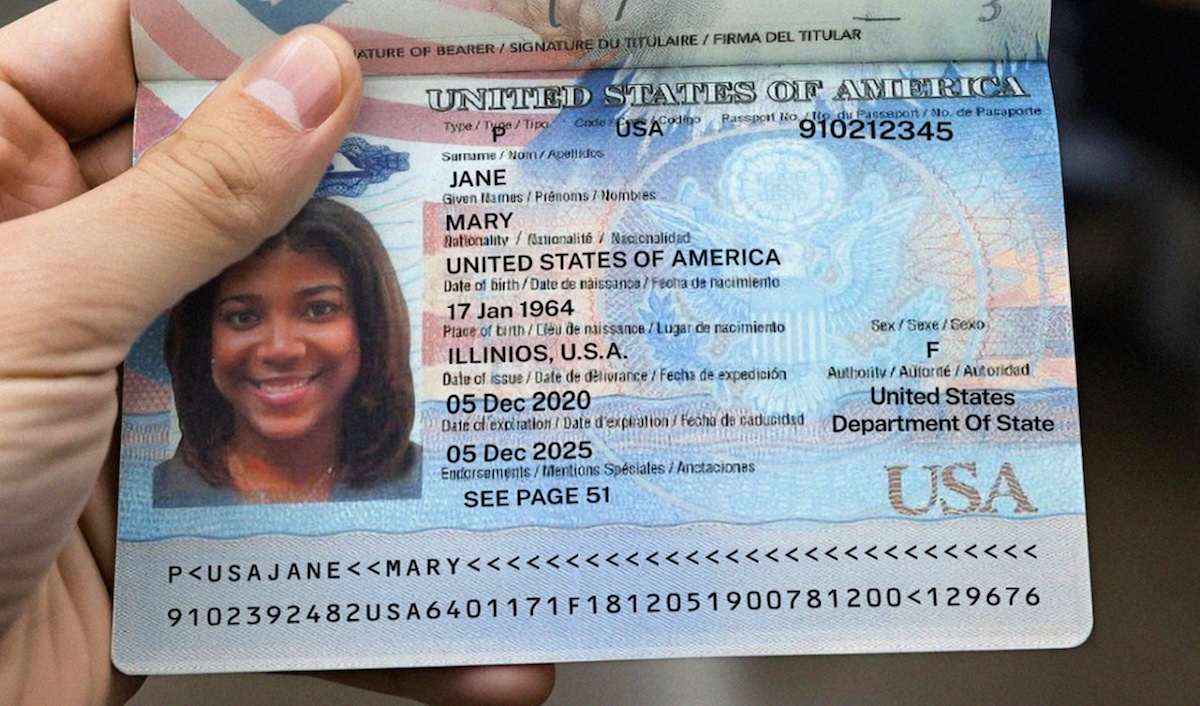
… to test your scanner!

And that’s it! You’ve successfully integrated a fully functional MRZ scanner into your Android app 🎉
If you like, you can further customize the scanning interface to suit your preferences. Head over to the documentation to learn more.
Conclusion
If this tutorial has piqued your interest in integrating scanning functionalities into your Android app, make sure to take a look at the other neat features in the Data Capture SDK’s documentation – or run our example project for a more hands-on experience.
Should you have questions about this tutorial or run into any issues, we’re happy to help! Just shoot us an email via tutorial-support@scanbot.io.
Happy scanning! 🤳
