The Scanbot SDK works completely offline and never connects to the internet. This ensures that no third party can gain access to the data you scan.
However, this also means that the license key for your app cannot be updated automatically. Instead, you need to change it in the app binaries, which usually means publishing a new version of the app to Google Play or the App Store.
To solve this and help streamline the process, you can store the license key on your remote server. Or you can get it via a Firebase Remote Config property.
In this article, we’ll explore the latter option since many developers have Firebase Analytics or Remote Config already integrated into their applications. To demonstrate how to use this technology to automatically update your license key, we’ll show you the complete integration process for our Android Barcode Scanner SDK using the following steps:
- Set up a new Firebase project
- Prepare the Remote Config property
- Register your app in the Firebase project
- Download the default values for Firebase
- Create a new Android project
- Fetch and apply the default values to the Barcode Scanner SDK
- Test the Remote Config
Requirements
We’ll use Android Studio to create a new Android application. For this, we’ll need:
- A machine running a recent version of macOS, Windows, or Linux
- Android Studio
- A Google account registered in Firebase
Step 1: Setting up a new Firebase project
Open the Firebase Console and click on Get Started with a Firebase project (or Create a project if you’ve used Firebase before).
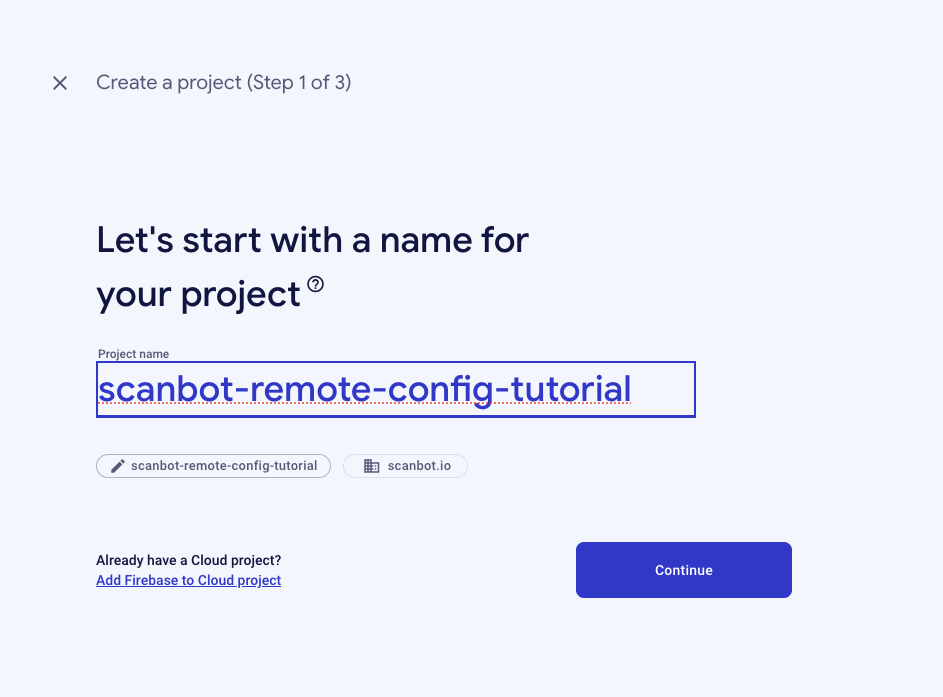
Now give the project a name:
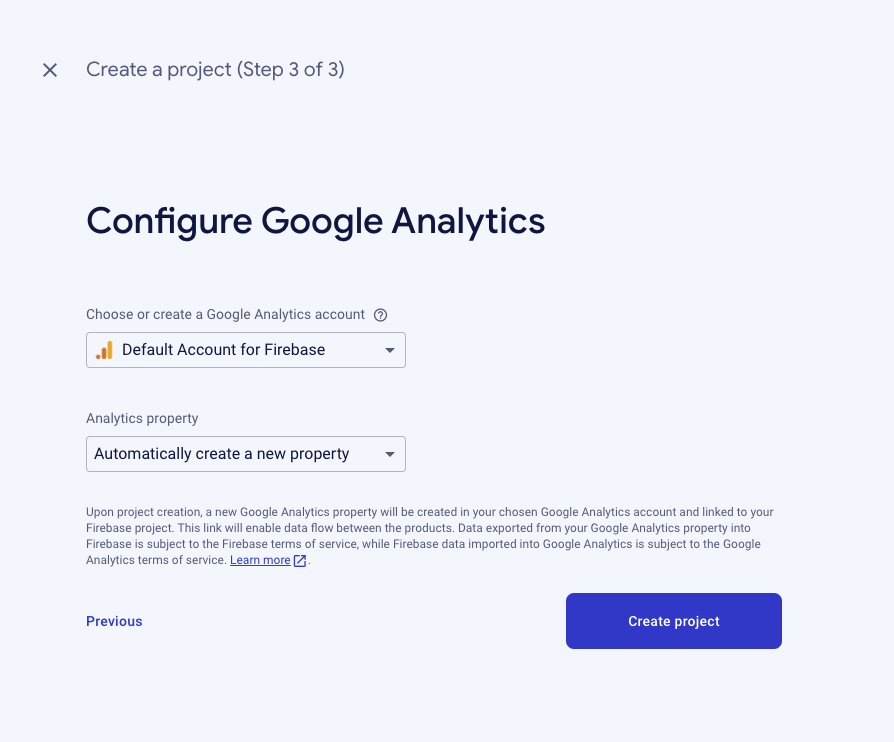
In the next step, we need to enable Google Analytics in our project because Remote Config is part of Google Analytics’ feature set.
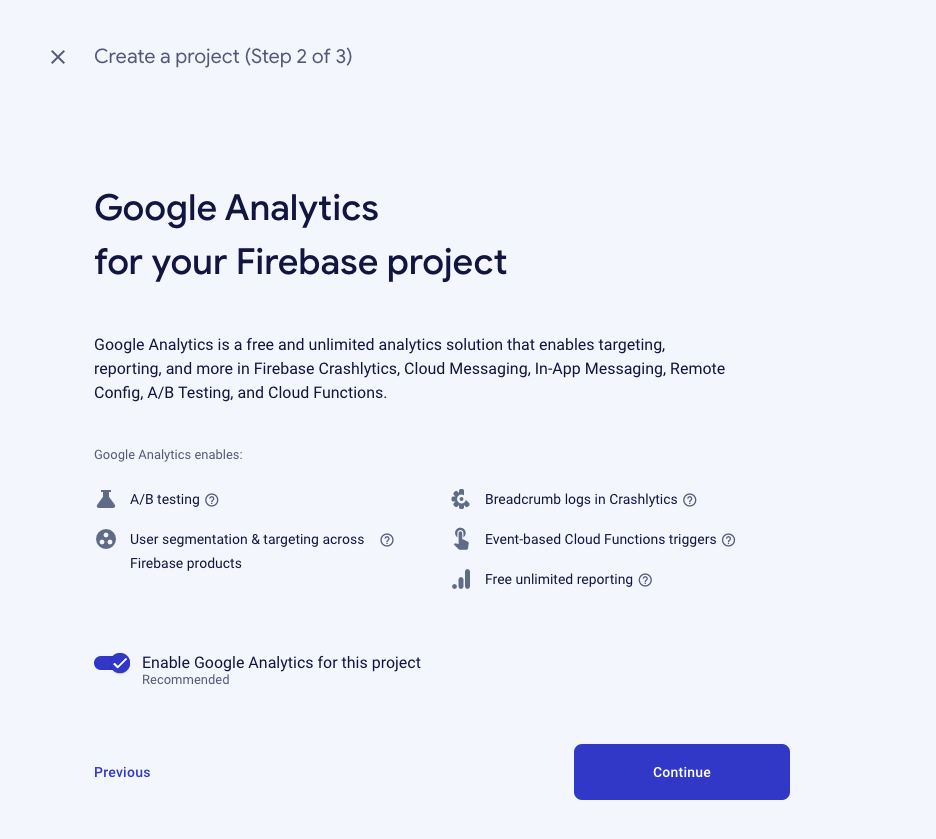
We’ll use the default selection and proceed.
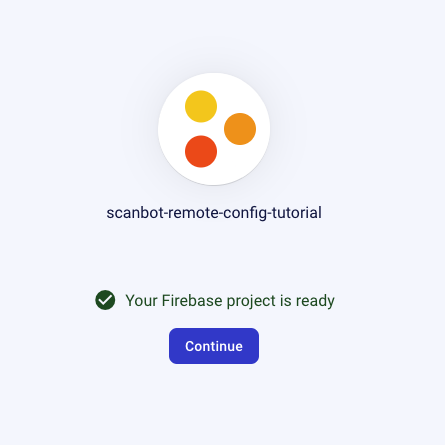
And with that, the project is ready!
Step 2: Preparing the Remote Config property
Now we’re ready to set up the license key property in the Remote Config.
Select Run > Remote Config.
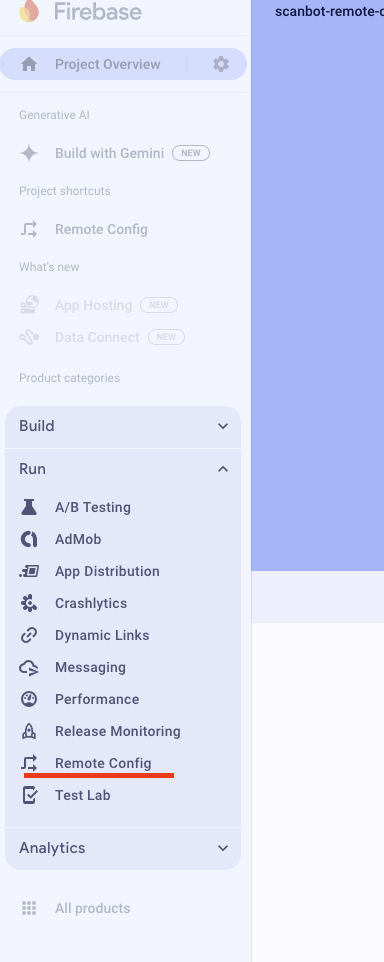
Then click on Create configuration.

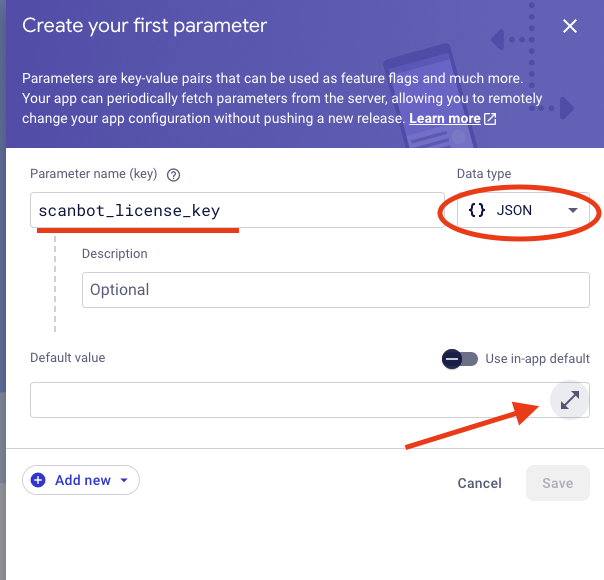
The next step is very important and involves setting up our project’s first property:
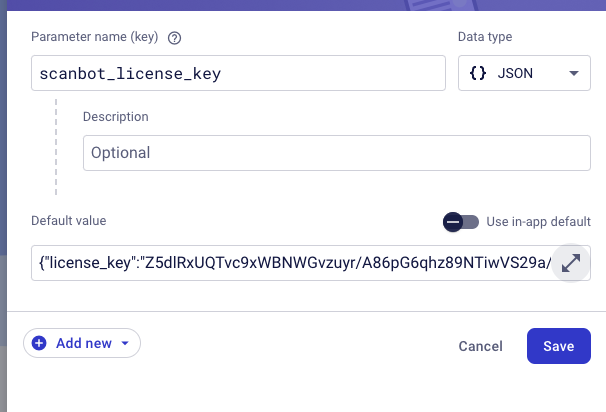
Since the Scanbot SDK’s license key contains some special characters, we can’t just use the data type String – instead, we need to switch to JSON.
Also, remember the property name used here. We’ll use scanbot_license_key for this guide.
Next, click on the double-ended arrow to set up the default value.
Now we need to enter the license key in a JSON format.
You can use the following JSON as a property, but don’t forget to replace <ENTER_YOUR_LICENSE_KEY_HERE> with your actual license key. If you aren’t a customer yet and need a trial license key for your project, you can get one here.
{
  "license_key": "<ENTER_YOUR_LICENSE_KEY_HERE>"
}
Now you just need to hit Save.
Firebase Console will remind you that you need to publish the changes. Let’s do that so we can use the property in our Android app.
Step 3: Registering our app in the Firebase project
Now you’ll see the Firebase Console for your newly created project. Let’s add our Android app to it. To do so, click on the Android icon below the project name.

First, we need to specify the application ID. In a real-life scenario, enter your own project’s application ID.
For the purposes of this guide, we’ll use io.scanbot.example.remoteconfig.
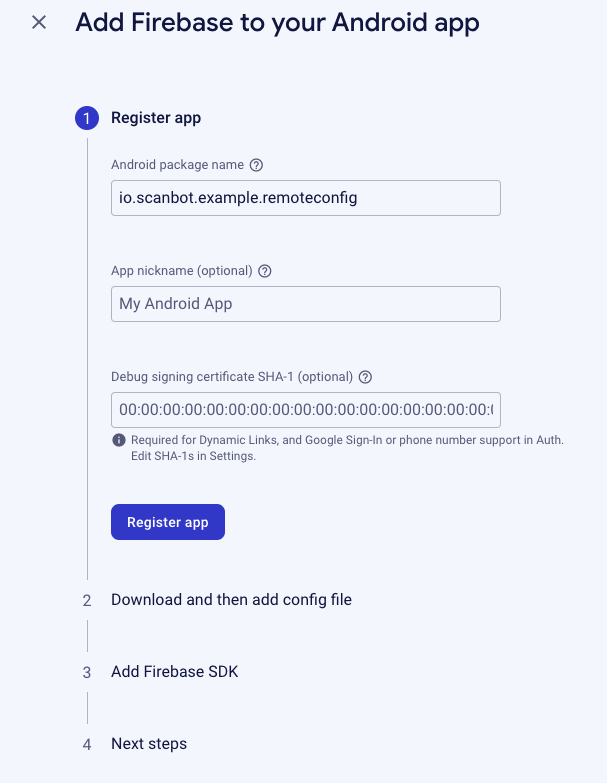
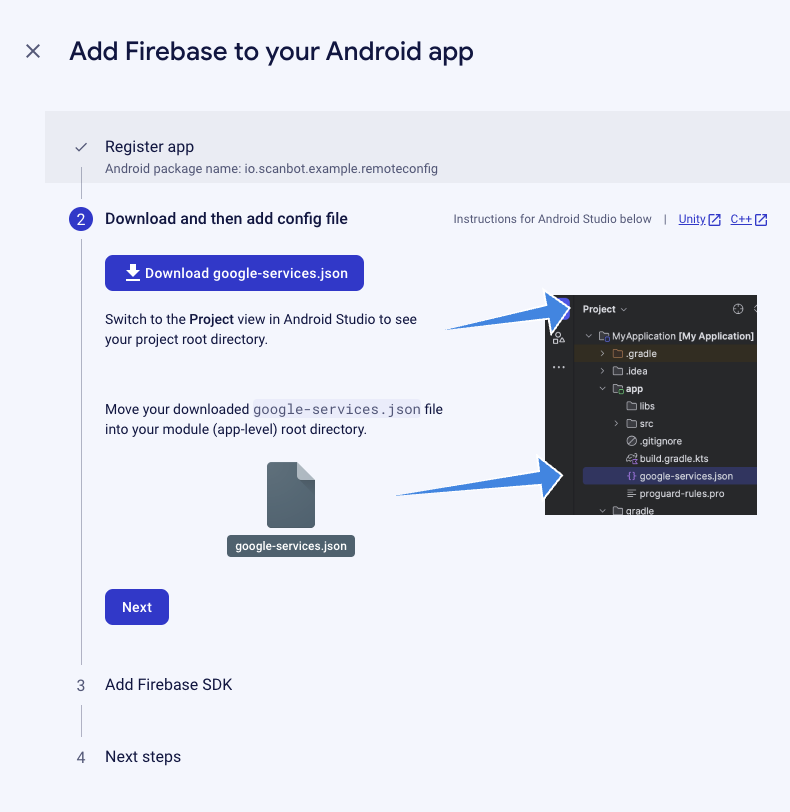
After clicking on Register app, we can download a configuration file that Firebase prepared for us by clicking on Download google-services.json.
Afterward, click on Next.
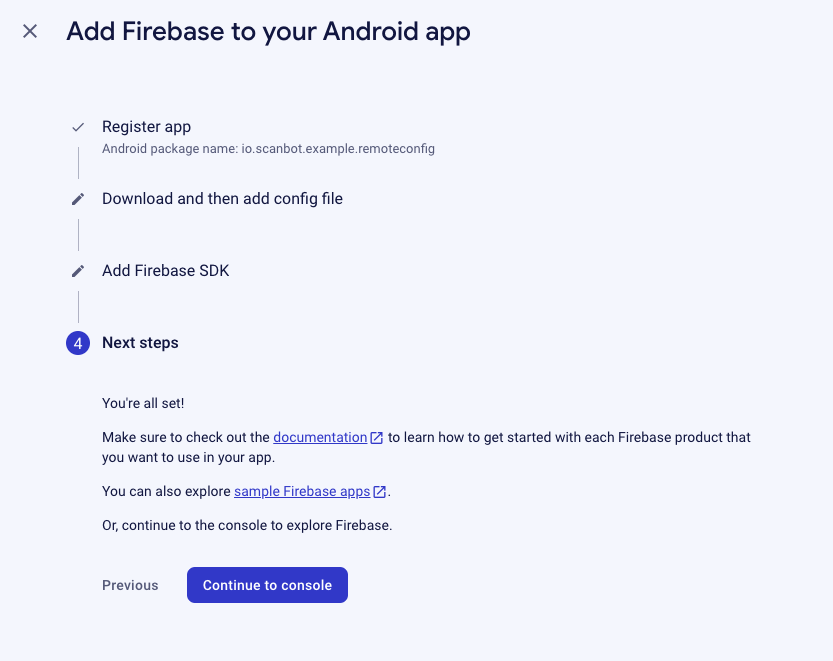
And we’re all set! Click on Continue to console.
Step 4: Downloading the default values for Firebase Remote Config
Now we need to download the default values for our Remote Config so our app knows which values it should use until the connection with Firebase Remote Config is set up.
To do this, open up the Firebase Console again, go to your project, and select Run > Remote Config once more.
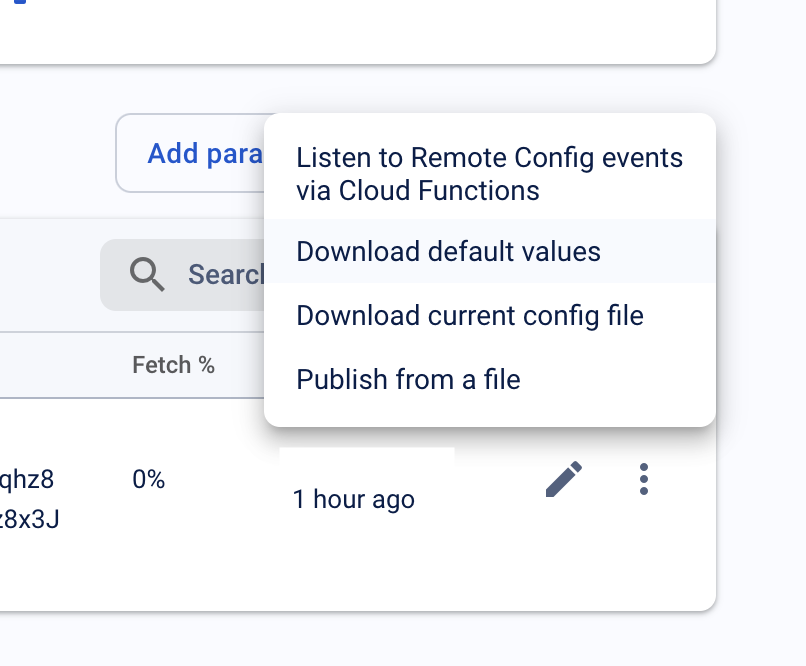
Select the property and click on the three dots next to it. Choose the Download default values option.
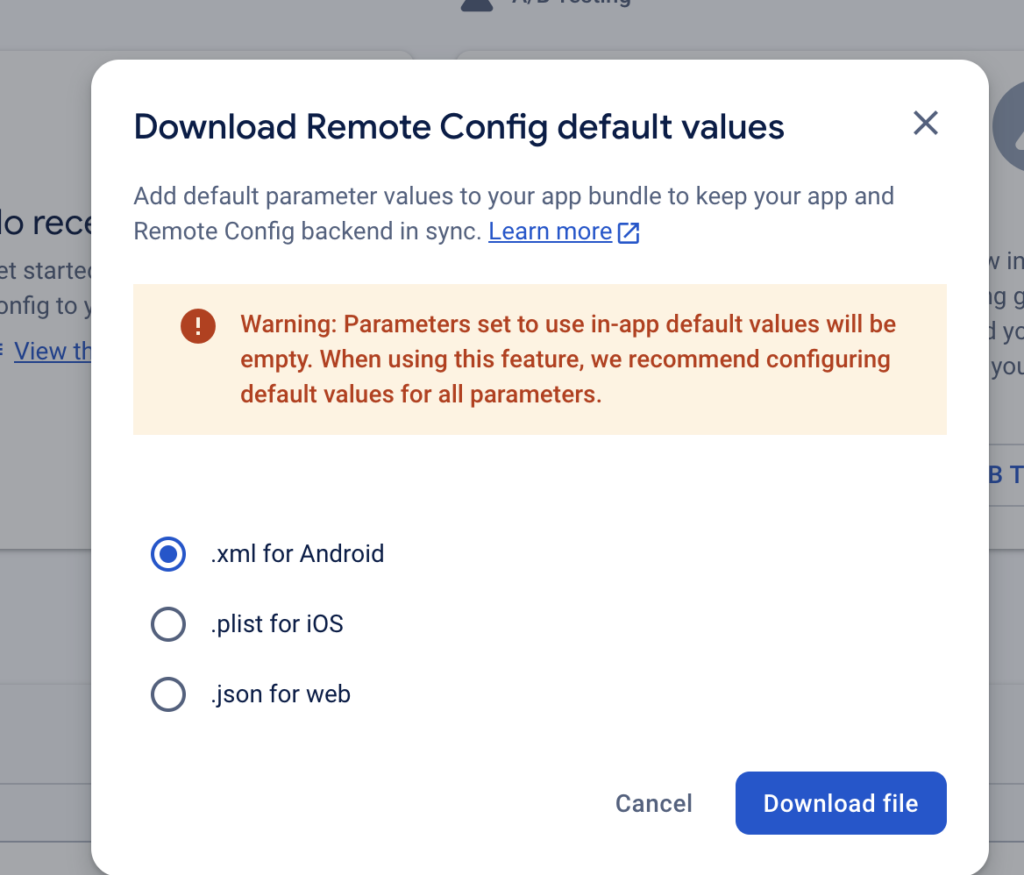
As a format, choose .xml for Android and click on Download file:
Step 5: Creating a new Android project
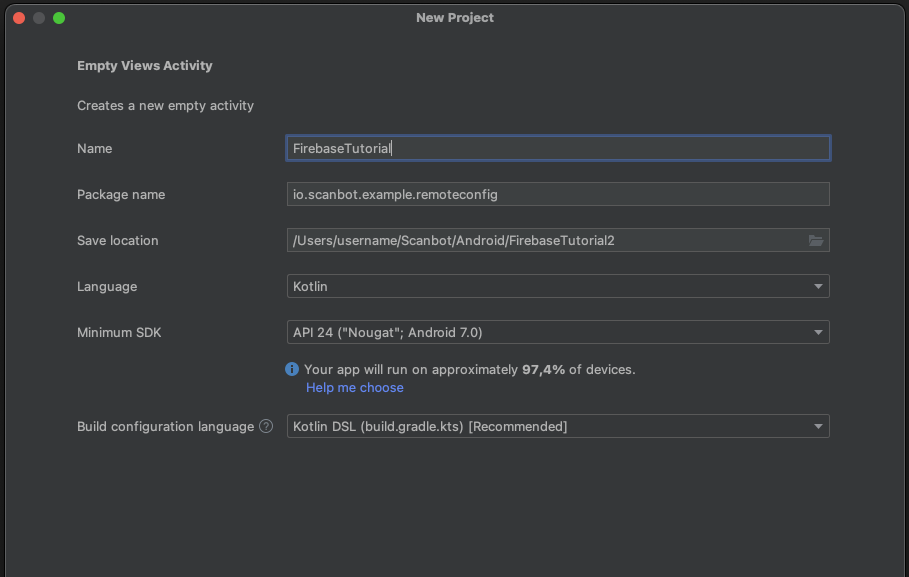
To create a new Android project, start by opening Android Studio and creating a new Empty Views Activity:
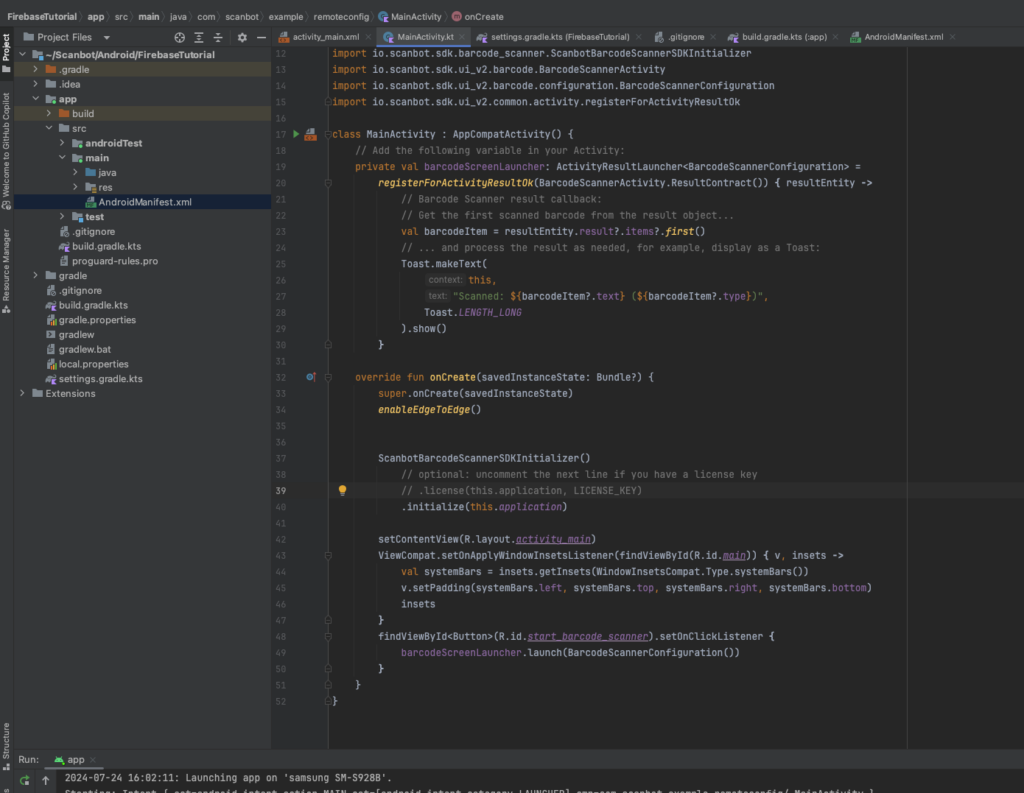
We’ll set up the project to use our Barcode Scanner SDK by following the Quick Start Guide:
Now we’re ready to set up Firebase in our project.
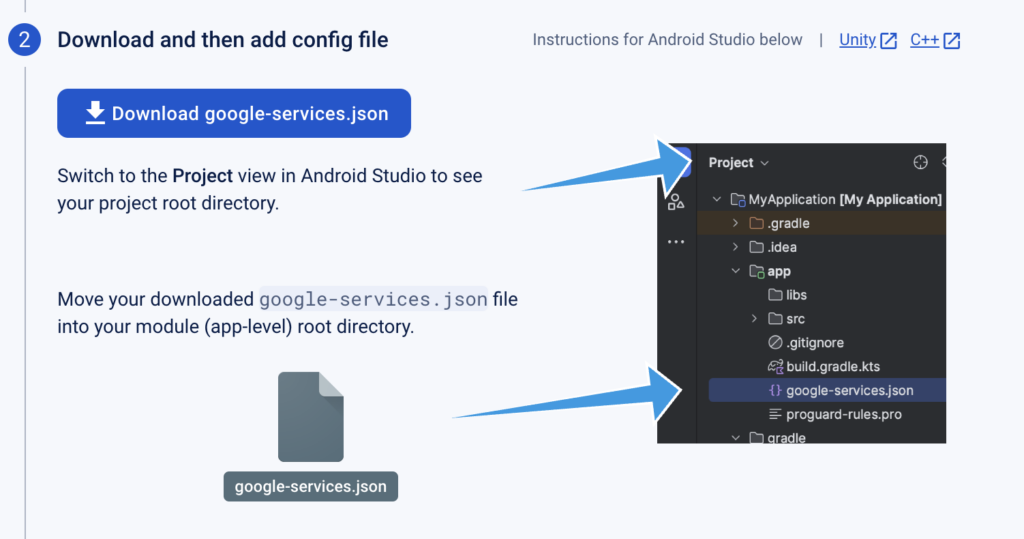
First, let’s put the file we downloaded earlier (google-services.json) into the app folder, just as we were told when downloading the config file.
Next, we need to add the following lines to the root build.gradle.kts to add the Google Services Plugin to our Build configuration:
id("com.google.gms.google-services") version "4.4.2" apply false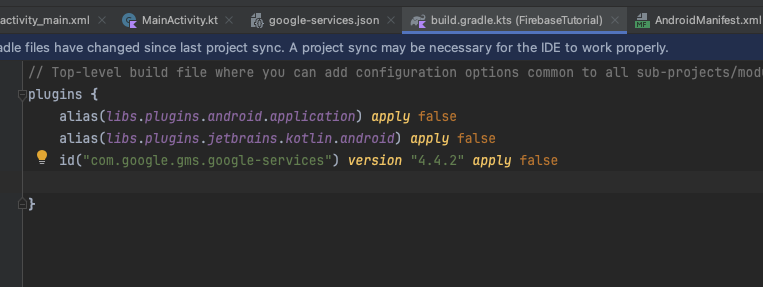
And add the dependency itself to app/build.gradle.kts with the following lines:
implementation(platform("com.google.firebase:firebase-bom:33.1.2"))
implementation("com.google.firebase:firebase-analytics")
implementation("com.google.firebase:firebase-config")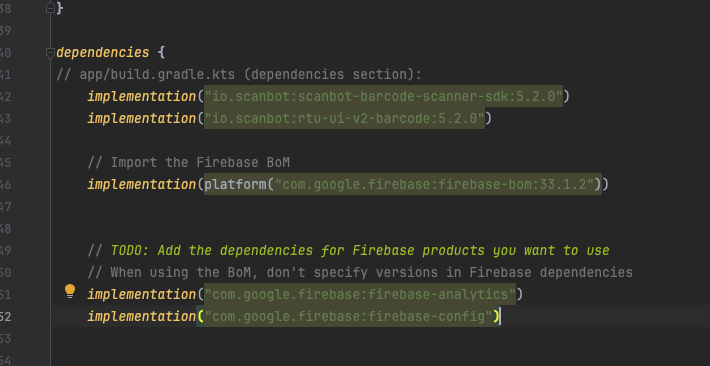
In addition, we need to apply the plugin at the very top of app/build.gradle.kts:
plugins {
    alias(libs.plugins.android.application)
    alias(libs.plugins.jetbrains.kotlin.android)
    id("com.google.gms.google-services") // <- Add this line
}
Finally, place the XML file we downloaded earlier (remote_config_defaults.xml) in app/src/main/res/xml/ to be used later.
Step 6: Fetching and applying the default values to the Barcode Scanner SDK
First of all, we need to create an Application subclass (see the Android Documentation). It’s instantiated before any other class when the process for your application is created, which makes it a great place to initialize the Scanbot SDK and fetch the Firebase Remote Config properties.
First, create the following class, a subclass of the Application class, in the io.scanbot.example.remoteconfig package:
class MyApplication : Application() {
    override fun onCreate() {
        super.onCreate()

        setupFirebase()
        fetchFirebaseValues()
        initializeScanbotSdk()
    }
}
We also need to register this class in AndroidManifest as an entry-point for our application via the android:name property of the application:
    <application
        android:name=".MyApplication"
        ...
Now let’s implement the functions one by one. Let’s start from setupFirebase:
private fun setupFirebase() {
    val remoteConfig: FirebaseRemoteConfig = Firebase.remoteConfig
    val configSettings = remoteConfigSettings {
        minimumFetchIntervalInSeconds = 3600
    }
    remoteConfig.setConfigSettingsAsync(configSettings)
    remoteConfig.setDefaultsAsync(R.xml.remote_config_defaults)
}
Here we specify that the Remote Config shouldn’t be requested any more often than once per hour (3600 seconds) and also specify that the default values should be taken from the XML file we downloaded earlier (remote_config_defaults.xml) and placed in app/src/main/res/xml/. This way, the default values will be used until the Firebase Remote Config first fetches the data from the server.
Still, make sure to update the license key in the default values and update the file in the build when you’ve received a new license key from Scanbot SDK for extending your license.
Now it’s time to implement fetchFirebaseValues:
private fun fetchFirebaseValues() {
    val remoteConfig: FirebaseRemoteConfig = Firebase.remoteConfig
    remoteConfig.fetchAndActivate()
}
With this, the app requests the update of the Firebase Remote Config and activates it. When we access the value from Remote Config, we will get the value received from the server.
So let’s do that next in the initializeScanbotSdk function:
private fun initializeScanbotSdk() {
    val remoteConfig: FirebaseRemoteConfig = Firebase.remoteConfig
    remoteConfig.ensureInitialized().addOnSuccessListener {
        val json = remoteConfig.getString("scanbot_license_key")
        val licenseKey = JSONObject(json).getString("license_key")
        Log.d("ScanbotFirebaseExample", "License key: $licenseKey")

        val license = ScanbotBarcodeScannerSDKInitializer()
            .license(this, licenseKey)
            .initialize(this)
        Log.d("ScanbotFirebaseExample", "Scanbot SDK initialized: $license")
    }
}
Here we access the Remote Config configuration and take the string value from the JSON. Then we pass this string to ScanbotBarcodeScannerSDKInitializer. Until the remote values are loaded, the app will use the defaults we provided in the XML file earlier.
It’s important to mention that setConfigSettingsAsync and setDefaultsAsync are (as their names suggest) asynchronous operations. So to make sure the configs are applied, we need to wrap the SDK initialization into the ensureInitialized function.
Your MyApplication class should now look something like this:
class MyApplication : Application() {
    override fun onCreate() {
        super.onCreate()

        setupFirebase()
        fetchFirebaseValues()
        initializeScanbotSdk()
    }

    private fun initializeScanbotSdk() {
        val remoteConfig: FirebaseRemoteConfig = Firebase.remoteConfig
        remoteConfig.ensureInitialized().addOnSuccessListener {
            val json = remoteConfig.getString("scanbot_license_key")
            val licenseKey = JSONObject(json).getString("license_key")
            Log.d("ScanbotFirebaseExample", "License key: $licenseKey")

            val license = ScanbotBarcodeScannerSDKInitializer()
                .license(this, licenseKey)
                .initialize(this)
            Log.d("ScanbotFirebaseExample", "Scanbot SDK initialized: $license")
        }
    }

    private fun fetchFirebaseValues() {
        val remoteConfig: FirebaseRemoteConfig = Firebase.remoteConfig
        remoteConfig.fetchAndActivate()
    }

    private fun setupFirebase() {
        val remoteConfig: FirebaseRemoteConfig = Firebase.remoteConfig
        val configSettings = remoteConfigSettings {
            minimumFetchIntervalInSeconds = 3600
        }
        remoteConfig.setConfigSettingsAsync(configSettings)
        remoteConfig.setDefaultsAsync(R.xml.remote_config_defaults)
    }
}
One more important thing to mention is that if you followed our Quick Start Guide and you have the following lines in your Main Activity, you will need to remove them since the initialization now happens in the Application subclass:
ScanbotBarcodeScannerSDKInitializer()
    // optional: uncomment the next line if you have a license key
    // .license(this.application, LICENSE_KEY)
    .initialize(this.application)
Now our project is ready and we can start the app to check if the config is applied.
By looking at Logcat, we can see that the property is fetched and the SDK is initialized.

Step 7: Testing the Remote Config
Finally, it’s time to test what happens if we actually change the value on the server. Let’s return to the Firebase Console and edit our property’s default value.
For testing purposes, we will set the value to random_value and hit Save.
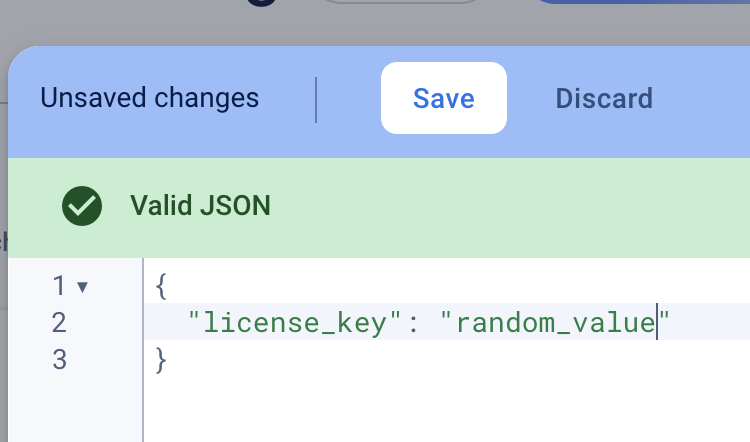
In the next dialog, click on Save again and publish the changes.
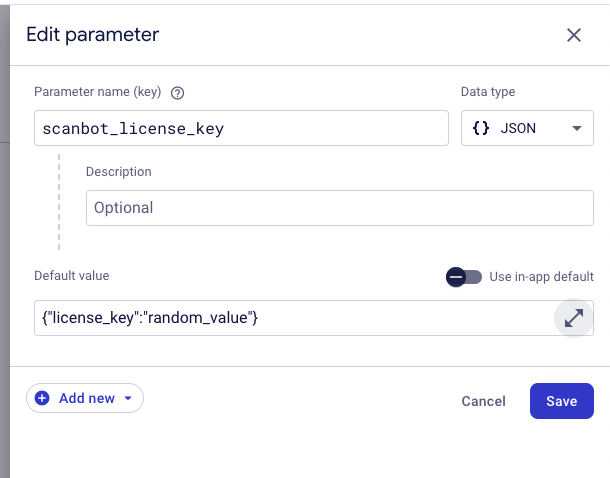
The update is now live. Since we’ve set up our app to not request updates more often than once per hour, it might take some time until the value is applied in the app. For testing purposes, we can also set minimumFetchIntervalInSeconds to 1.
Let’s see if the value is now applied in the app:

Yes! We see that the value from the Remote Config is now “random_value”. Since that’s not a valid license key, the Scanbot SDK reports that the license key is corrupted.
Let’s change it back to the real license key and see if the license check is working correctly again.

Great! As we can see, the license key is now coming not from the default values but from the Firebase Remote Config servers and is applied correctly. That means that from now on, we can update the license key in the app without publishing a new build to Google Play, which can help you save a lot of time and effort in the long run.
Although Firebase Remote Config is the easiest way to achieve this, it does come with some disadvantages. The biggest one is that if you use Firebase Remote Config, you have to include the whole Firebase/Google Analytics module in your app. This has implications for complying with data privacy regulations like the GDPR since this gives Google access to some meta information of your users.
An alternative solution would be to store the license key on your web server, accessing it via an API and then storing it in Shared Preferences, though this can be a much more complicated process. That’s why many developers prefer the Firebase Remote Config method.
Conclusion
We hope this guide on how to do license checks using Firebase Remote Config was helpful to you!
If you have questions about this guide or ran into any issues, we’re happy to help! Just shoot us an email via tutorial-support@scanbot.io. And keep an eye on this blog for more guides and tutorials!
