The Scanbot SDK works completely offline and never connects to the internet. This ensures that no third party can gain access to the data you scan and also allows you to use the scanner in locations without internet access.
However, this also means that the SDK’s license key cannot be updated automatically. Normally, this would require updating the app binaries and publishing a new version to Google Play or the App Store.
To simplify this process, you can store the license key on a remote server or retrieve it using Firebase Remote Config. In this guide, we’ll focus on Firebase Remote Config, as many developers already integrate Firebase services like Analytics and Remote Config into their apps.
We’ll walk you through the full process of using Firebase Remote Config to update the license key for the Flutter Barcode Scanner SDK, covering these steps:
- Set up a new Firebase project
- Configure the Remote Config property
- Register your app in the Firebase project
- Create a Flutter project with Firebase and the Barcode Scanner SDK
- Fetch and apply the license key to the SDK
- Test the Remote Config setup
Requirements
- A computer running macOS, Windows, or Linux
- A Google account linked to Firebase
- Flutter SDK: Download the latest version for your OS.
- Xcode (for macOS users): Install Xcode for iOS development.
- Visual Studio Code or Android Studio: Download VS Code or Android Studio for Flutter development.
⚠️ Windows users: To build and test iOS apps, you will need a Mac. Consider using a physical Mac or a remote Mac service for this.
Step 1: Setting up a Firebase project
Open the Firebase Console and click Get Started with Firebase or Create a project if you’ve used Firebase before.
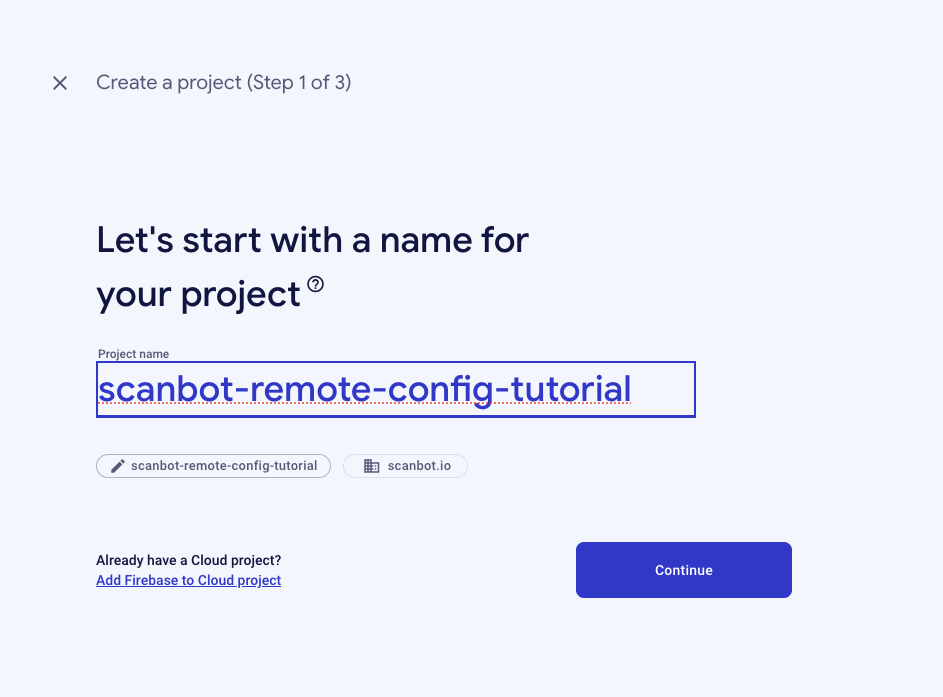
Name your project.
On the next screen, enable Google Analytics, since Remote Config is part of its features.
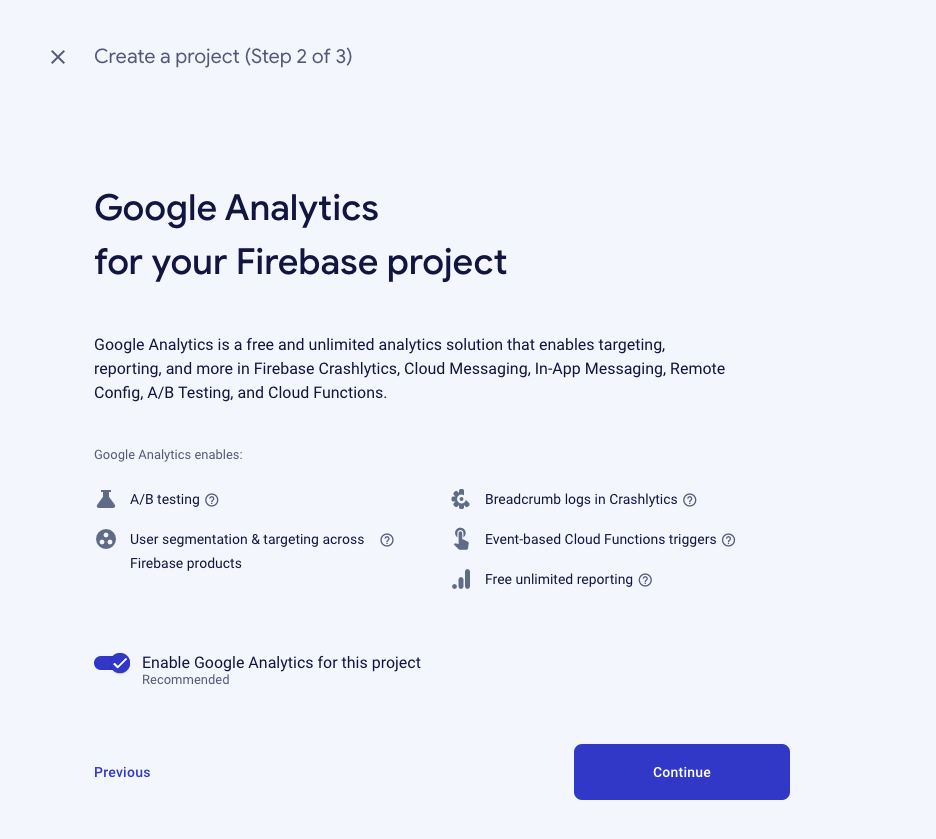
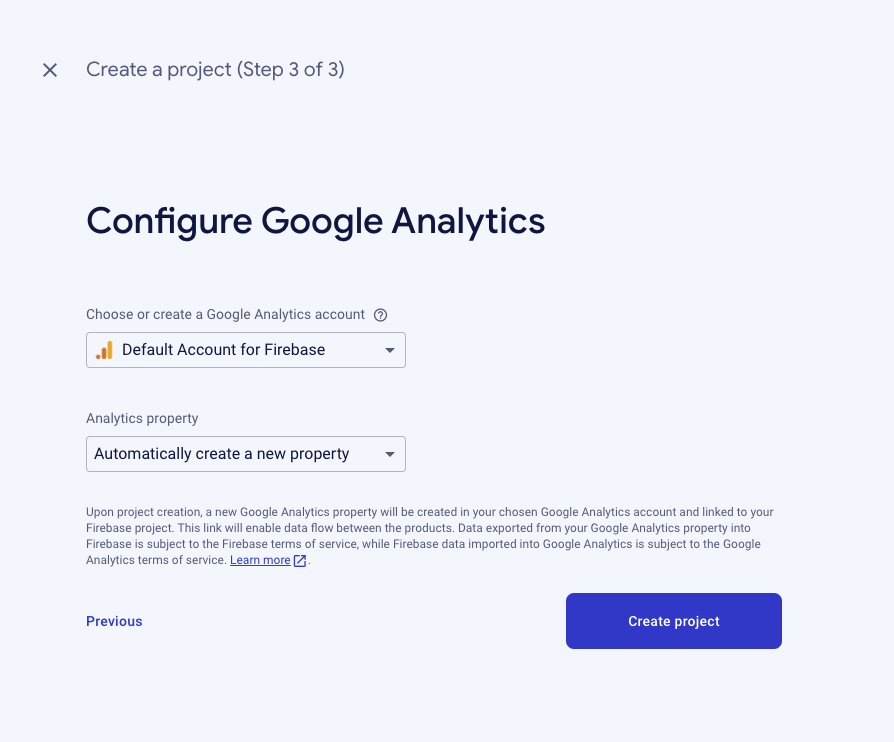
Use the default settings and proceed.
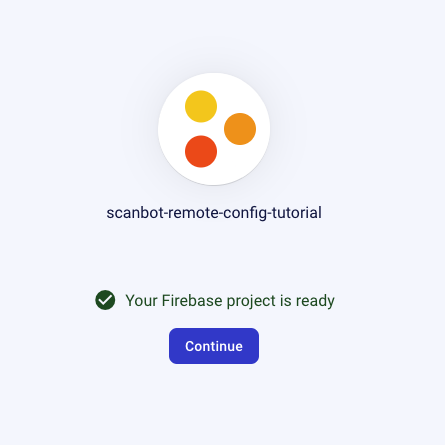
Your Firebase project is now ready!
Step 2: Configuring the Remote Config property
Next, let’s set up the Remote Config property for the license key.
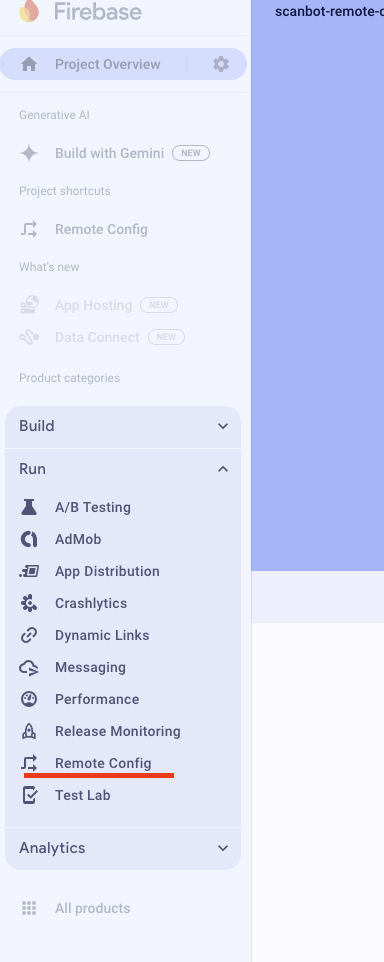
In the Firebase Console, navigate to Remote Config by selecting Run > Remote Config.
Click Create configuration.

Now, we’ll set up the first property for our project. Since the Scanbot SDK license key contains special characters, we’ll use the JSON data type instead of String.
For this guide, we’ll use scanbot_license_key as the property name.
Click the double-ended arrow icon to define a default value.
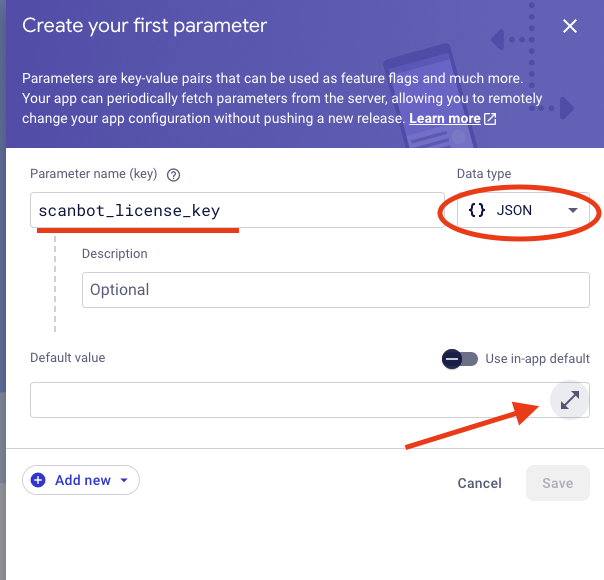
Enter your license key in JSON format. Replace <ENTER_YOUR_LICENSE_KEY_HERE> with your actual key. If you don’t have a key yet, you can request a trial license on our website.
{
  "license_key": "<ENTER_YOUR_LICENSE_KEY_HERE>"
}
Now, click Save.
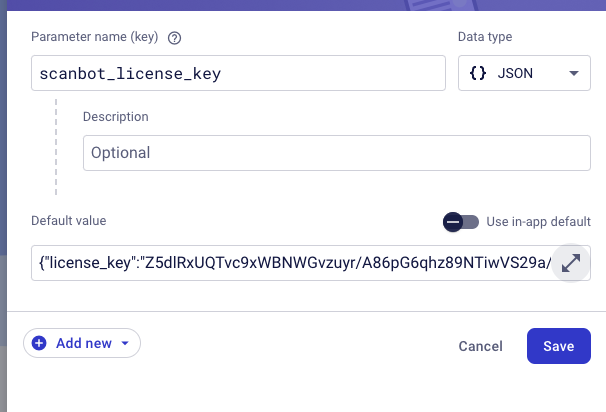
Firebase will remind you to publish the changes. Click to publish so the property can be used in your app.
Step 3: Registering your app in the Firebase project
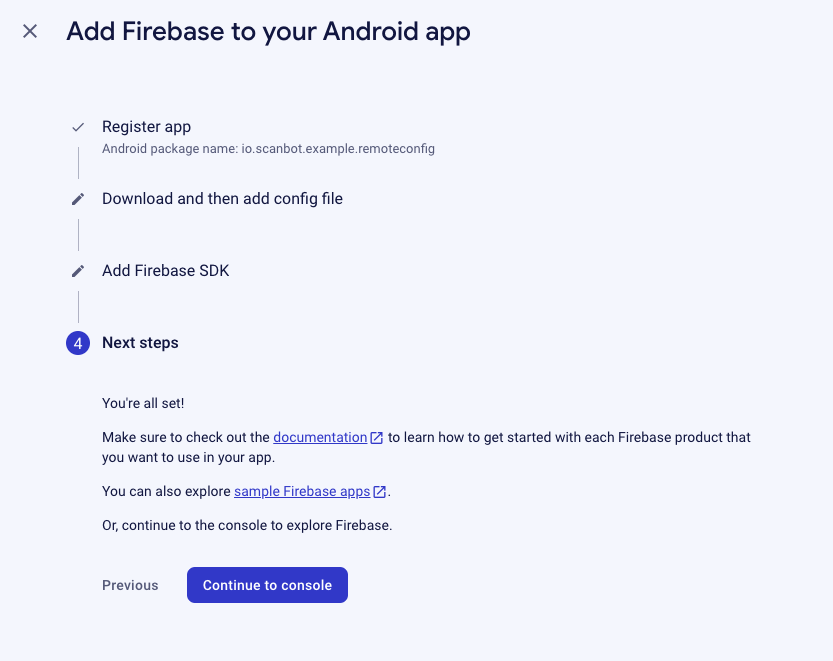
Now that you’ve created a Firebase project, it’s time to add your Android and iOS apps.
Android
Click the Android icon under the project name.

Enter your app’s Application ID. For this tutorial, we use io.scanbot.example.remoteconfig (in a real project, use your app’s ID).
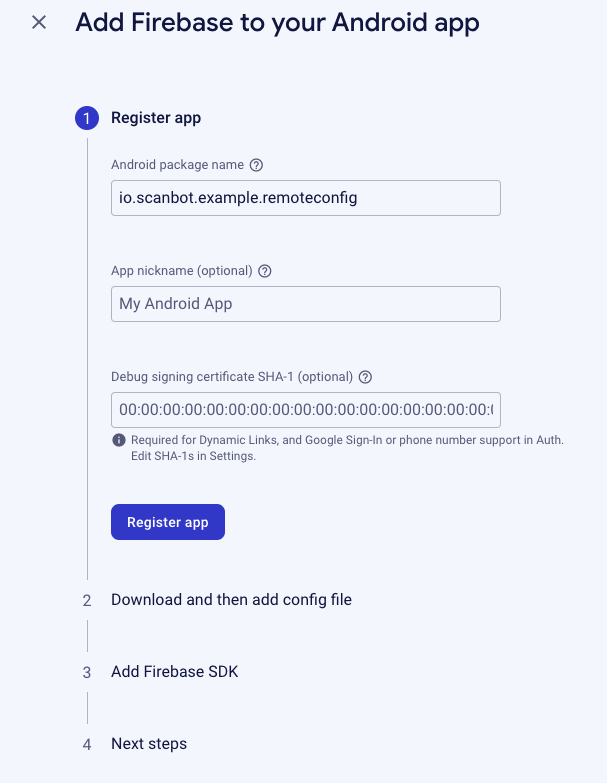
Register the app, then download the google-services.json file provided by Firebase.
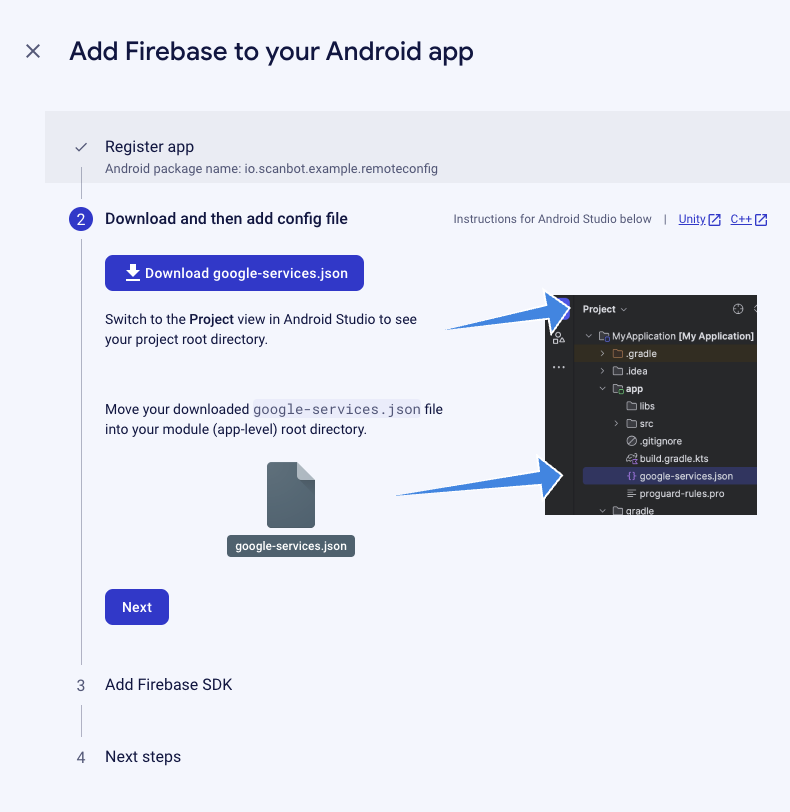
Click Next, and you’re done! Finally, click Continue to console.
iOS
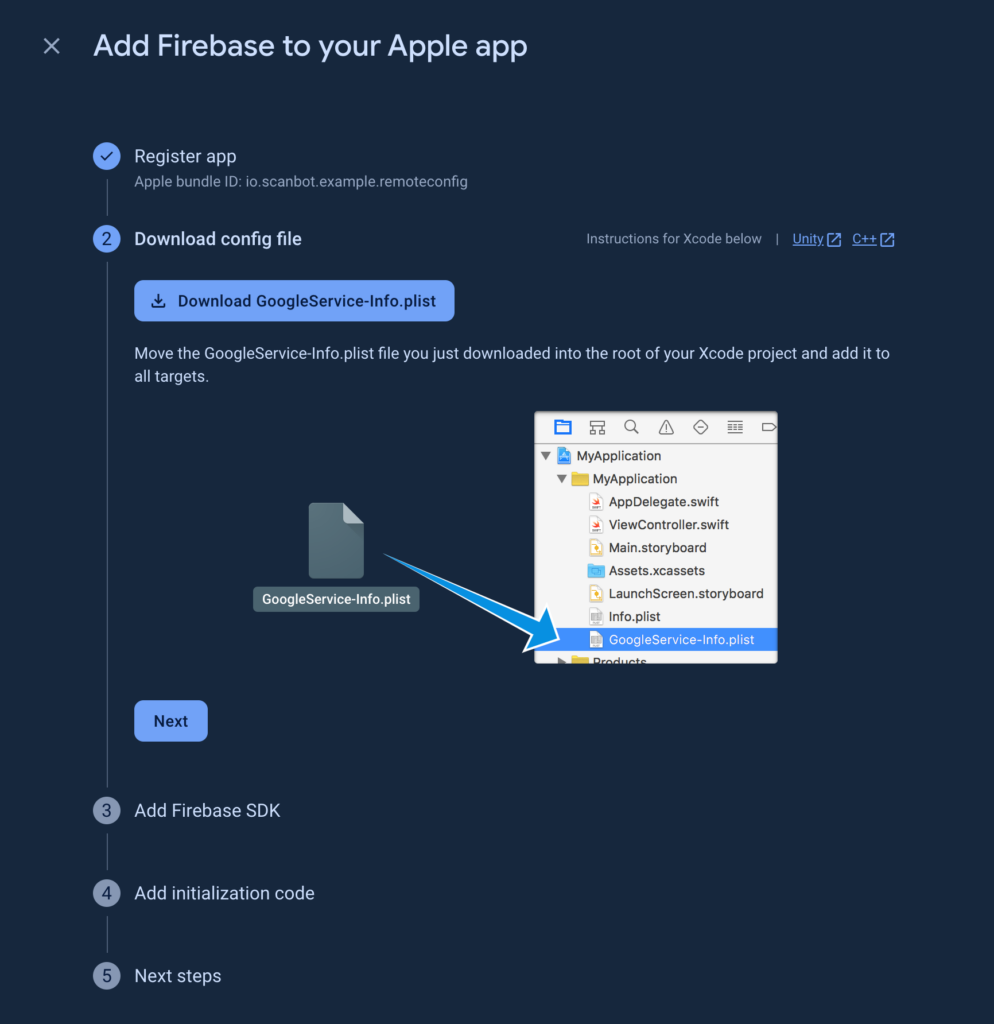
The iOS setup is almost identical:
- Click the iOS icon under the project name.
- Enter your app’s Bundle ID. For this guide, use io.scanbot.example.remoteconfig (or your actual app’s Bundle ID).
- Register the app, then download the
GoogleService-Info.plistfile. - Click Next, and finish by clicking Continue to console.
Step 4: Creating a new Flutter project with Firebase and the Barcode Scanner SDK
To create a new Flutter project using the CLI (we’ll name it “flutter_firebase” in this example), run the following command in your terminal:
flutter create flutter_firebase
cd flutter_firebase
Change the Android application ID and configurations
- Open the android/app/build.gradle file in your Flutter project.
- Find the following line in the
defaultConfigsection:applicationId "com.example.your_project" - Change it to the new namespace:
namespace = "io.scanbot.example.remoteconfig" - Save the file.
- The configuration file from the Firebase Console is called google-services.json). Add this file into the android/app directory within your Flutter project.
- To allow Firebase to use the configuration on Android, the ‘google-services’ plugin must be applied on the project. This requires modification to two files in the android/ directory. First, add the ‘google-services’ plugin as a dependency inside of the android/build.gradle file:
buildscript { dependencies { // ... other dependencies classpath 'com.google.gms:google-services:4.3.8' } } - Lastly, execute the plugin by adding the following underneath the line
apply plugin: 'com.android.application', within the /android/app/build.gradle file:apply plugin: 'com.google.gms.google-services' - Should you run into any issues, you can refer to the FlutterFire documentation
Change the iOS bundle ID and configurations
- Open Xcode:
- Open the ios/Runner.xcodeproj file using Xcode.
- Update the bundle identifier:
- In Xcode, navigate to the Runner project in the project navigator.
- Select the Runner target under TARGETS.
- Go to the General tab and locate the Bundle Identifier field.
- Change the bundle identifier to
io.scanbot.example.remoteconfig
- Save your changes:
- Save the changes to apply the new bundle identifier.
- Add the Firebase configuration file (
GoogleService-Info.plist):- Open the project in Xcode by navigating to ios/{projectName}.xcworkspace.
- In the project navigator, right-click on Runner and select Add Files to “Runner”.
- Select the GoogleService-Info.plist file and add it to your project.
⚠️ Adding the configuration file manually via the filesystem will not link the file properly to the project. For more details, see the manual Firebase installation instructions for Flutter on iOS.
- Update the podfile:
- Open the ios/Podfile.
- Set the platform version to:
platform :ios, '13.0'
If you encountered any issues during these steps, please refer to the manual installation instructions for Flutter on iOS.
Add the camera permissions
Since barcode scanning requires access to the device camera, you need to configure camera permissions for both Android and iOS.
- For Android, add the following to android/app/src/main/AndroidManifest.xml:
<uses-permission android:name="android.permission.CAMERA"/> <uses-feature android:name="android.hardware.camera" /> - For iOS, add the following to ios/Runner/Info.plist:
<key>NSCameraUsageDescription</key> <string>We need camera access to scan barcodes.</string>
Install the Scanbot Barcode Scanner SDK
To add the Scanbot Flutter Barcode Scanner SDK via the command line, you can run the following command using Flutter’s CLI:
flutter pub add barcode_scannerThis command will automatically add the barcode_scanner dependency to your pubspec.yaml file and ensure you’re using the latest version.
Install the Firebase SDK
To integrate Firebase Remote Config and Firebase Core into your Flutter project, follow these steps:
- Add the Firebase Remote Config plugin by running:
flutter pub add firebase_remote_config - Next, add Firebase Core, which is required for Firebase services:
flutter pub add firebase_core - After adding the dependencies, install them with:
flutter pub get - Once the dependencies are installed, rebuild your project to ensure everything is set up correctly:
flutter run
Step 5: Fetching and applying the Remote Config values to the Barcode Scanner SDK
Now that Firebase Remote Config is set up, the next step is to initialize the Flutter Barcode Scanner SDK using the license key retrieved from Firebase Remote Config.
Modify main.dart
Ensure Firebase is initialized before the app runs. Then update the main.dart file as follows:
import 'package:firebase_core/firebase_core.dart';
import 'package:flutter/material.dart';

void main() async {
  WidgetsFlutterBinding.ensureInitialized();
  await Firebase.initializeApp(); // Initialize Firebase
  runApp(const MyApp());
}

class MyApp extends StatelessWidget {
  const MyApp({super.key});

  @override
  Widget build(BuildContext context) {
    return MaterialApp(
      title: 'Flutter Demo',
      home: MyHomePage(),
    );
  }
}
This ensures that Firebase is properly initialized before your Flutter app starts.
Create the RemoteConfigService class
Next, create a new service that will handle fetching the license key from Firebase Remote Config.
In the lib/ directory, create a file named remote_config_service.dart:
import 'dart:convert';
import 'package:firebase_remote_config/firebase_remote_config.dart';

class RemoteConfigService {
  final FirebaseRemoteConfig remoteConfig;
  final String defaultLicense = ""; // Default license key

  RemoteConfigService(this.remoteConfig);

  // Initialize Firebase Remote Config with custom settings
  Future<void> initialize() async {
    try {
      await remoteConfig.setConfigSettings(RemoteConfigSettings(
        fetchTimeout: const Duration(minutes: 1),
        minimumFetchInterval: const Duration(hours: 4),
      ));

      // Fetch and activate the latest config
      await remoteConfig.fetchAndActivate();
    } catch (e) {
      print('Error initializing Remote Config: $e');
    }
  }

  // Fetch the Scanbot SDK license key from Remote Config
  Future<String> getLicenseFromConfigOrDefault() async {
    try {
      await remoteConfig.fetchAndActivate();
      String licenseKeyObject = remoteConfig.getString('scanbot_license_key');

      if (licenseKeyObject.isNotEmpty) {
        var licenseKeyJson = jsonDecode(licenseKeyObject);
        return licenseKeyJson['license_key'] ?? defaultLicense;
      } else {
        return defaultLicense;
      }
    } catch (e) {
      print('Error fetching license key: $e');
      return defaultLicense;
    }
  }
}
This service is responsible for initializing Firebase Remote Config and retrieving the license key.
Initialize the Scanbot SDK in main.dart
Now that you’ve created the service, integrate it into main.dart to initialize the Scanbot Barcode Scanner SDK with the license key from Remote Config.
Add the necessary imports:
import 'package:barcode_scanner/scanbot_barcode_sdk_v2.dart';
import 'package:firebase_remote_config/firebase_remote_config.dart';
import 'remote_config_service.dart';
Update the MyHomePage class to initialize the Scanbot SDK:
class MyHomePage extends StatefulWidget {
  @override
  _MyHomePageState createState() => _MyHomePageState();
}

class _MyHomePageState extends State<MyHomePage> {
  late final RemoteConfigService _remoteConfigService;

  @override
  void initState() {
    super.initState();
    _initializeScanbotSdk();
  }

  // Initialize the Scanbot SDK using the RemoteConfigService
  Future<void> _initializeScanbotSdk() async {
    try {
      _remoteConfigService = RemoteConfigService(FirebaseRemoteConfig.instance);
      await _remoteConfigService.initialize();

      String licenseKey = await _remoteConfigService.getLicenseFromConfigOrDefault();
      await ScanbotBarcodeSdk.initScanbotSdk(ScanbotSdkConfig(licenseKey: licenseKey));
    } catch (e) {
      print('Error: $e');
    }
  }
}
This ensures that the SDK is initialized with the correct license key.
Implement the barcode scanning functionalities
In main.dart, add a function to start the barcode scanner:
Future<void> _startBarcodeScanning() async {
  try {
    // Check ScanbotSDK license status
    var licenseStatus = await ScanbotBarcodeSdk.getLicenseStatus();
      if (licenseStatus.isLicenseValid) {
          return;
      }

    var result = await ScanbotBarcodeSdk.startBarcodeScanner(BarcodeScannerConfiguration());
    if (result.operationResult == OperationResult.SUCCESS) {
      var barcodeType = result.value?.items.first.type?.name;
      var barcodeData = result.value?.items.first.text;
      _showAlert("Barcode Scanned", "Type: $barcodeType\nData: $barcodeData");
    }
  } catch (e) {
    print('Error: $e');
  }
}

// Show an alert dialog with the scanned barcode info
void _showAlert(String title, String message) {
  showDialog(
    context: context,
    builder: (context) => AlertDialog(
      title: Text(title),
      content: Text(message),
      actions: [
        TextButton(
          onPressed: () => Navigator.of(context).pop(),
          child: const Text("OK"),
        ),
      ],
    ),
  );
}
Add the UI to trigger barcode scanning
Update the MyHomePage widget to include a button that starts the barcode scanning process:
@override
Widget build(BuildContext context) {
  return Scaffold(
    appBar: AppBar(
      title: const Text('Scanbot SDK Example'),
    ),
    body: Center(
      child: ElevatedButton(
        onPressed: _startBarcodeScanning,
        child: const Text('Start Barcode Scanning'),
      ),
    ),
  );
}
Now your app will fetch the license key from Firebase Remote Config, initialize the Scanbot Barcode Scanner SDK, and allow users to scan barcodes.
Run the application
To test the barcode scanning functionalities, run the following command:
flutter runPress the “Start Barcode Scanning” button to initiate the scanning workflow.
Step 6: Testing Remote Config updates
Now that the Remote Config setup is complete, let’s test how it behaves when we change the license key value on the server.
Edit the Remote Config value:
Go to the Firebase Console and update the license key’s value. For testing purposes, set it to random_value and save the changes.
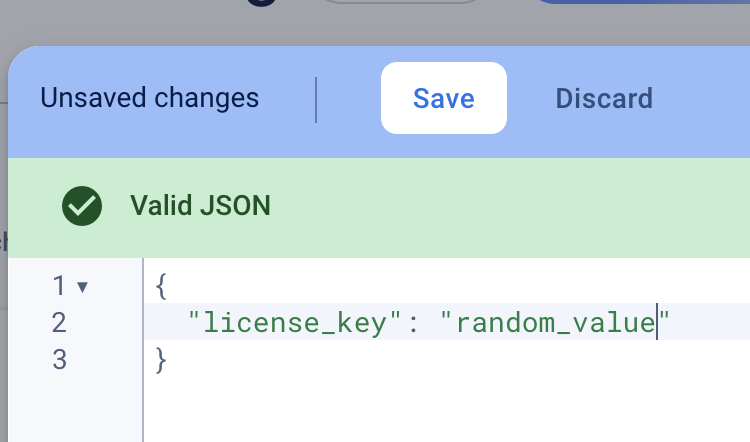
Publish the changes:
In the dialog that appears, click Save again to publish the updated value.

Apply the update:
The updated value is now live on Firebase. However, since we’ve set the minimumFetchInterval to 4 hours in the app, it may take some time for the changes to apply automatically. For quicker testing, you can temporarily set minimumFetchIntervalto 1 second to force the app to fetch updates more frequently. await remoteConfig.setConfigSettings( RemoteConfigSettings( fetchTimeout: const Duration(seconds: 1), minimumFetchInterval: const Duration(seconds: 1), ), );
Test the app:
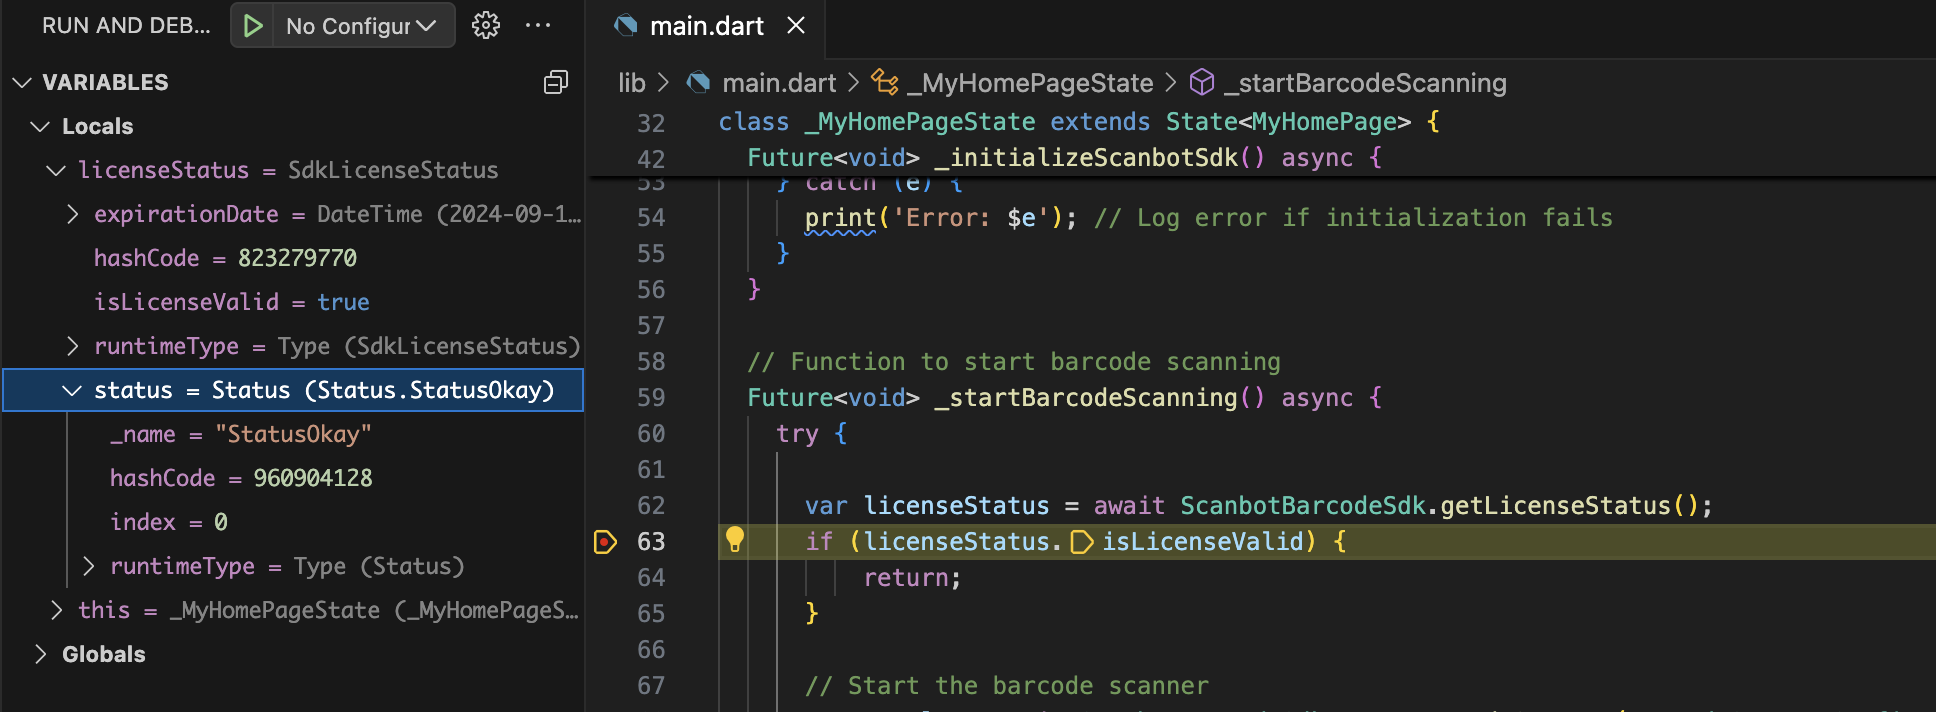
Restart the app to see if the new value is applied. If all works correctly, the app should fetch the random_value from Firebase Remote Config.

As expected, the Scanbot SDK reports the license key as corrupted, since random_value is not a valid license key.

Restore the correct license key:
Now, let’s change the Remote Config value back to the correct license key. After publishing the changes and restarting the app, the SDK should apply the valid key and work correctly again.
Conclusion
🎉 Success! The app now fetches and applies the license key from Firebase Remote Config without you having to publish a new build to the Play Store or App Store. This method is not only efficient but also saves time by allowing you to update critical app values remotely.
While Firebase Remote Config is a convenient solution, it does require including the full Firebase/Google Analytics package in your app. This has privacy implications, particularly with regulations like GDPR, as Google will have access to some user metadata.
As an alternative, you could store the license key on your own server and access it via an API, storing it locally using Shared Preferences. However, this approach can be more complex. For this reason, many developers prefer the Firebase Remote Config method for its simplicity and ease of use.
If you have questions about this guide or ran into any issues, we’re happy to help! Just shoot us an email via tutorial-support@scanbot.io. And keep an eye on this blog for more guides and tutorials!
