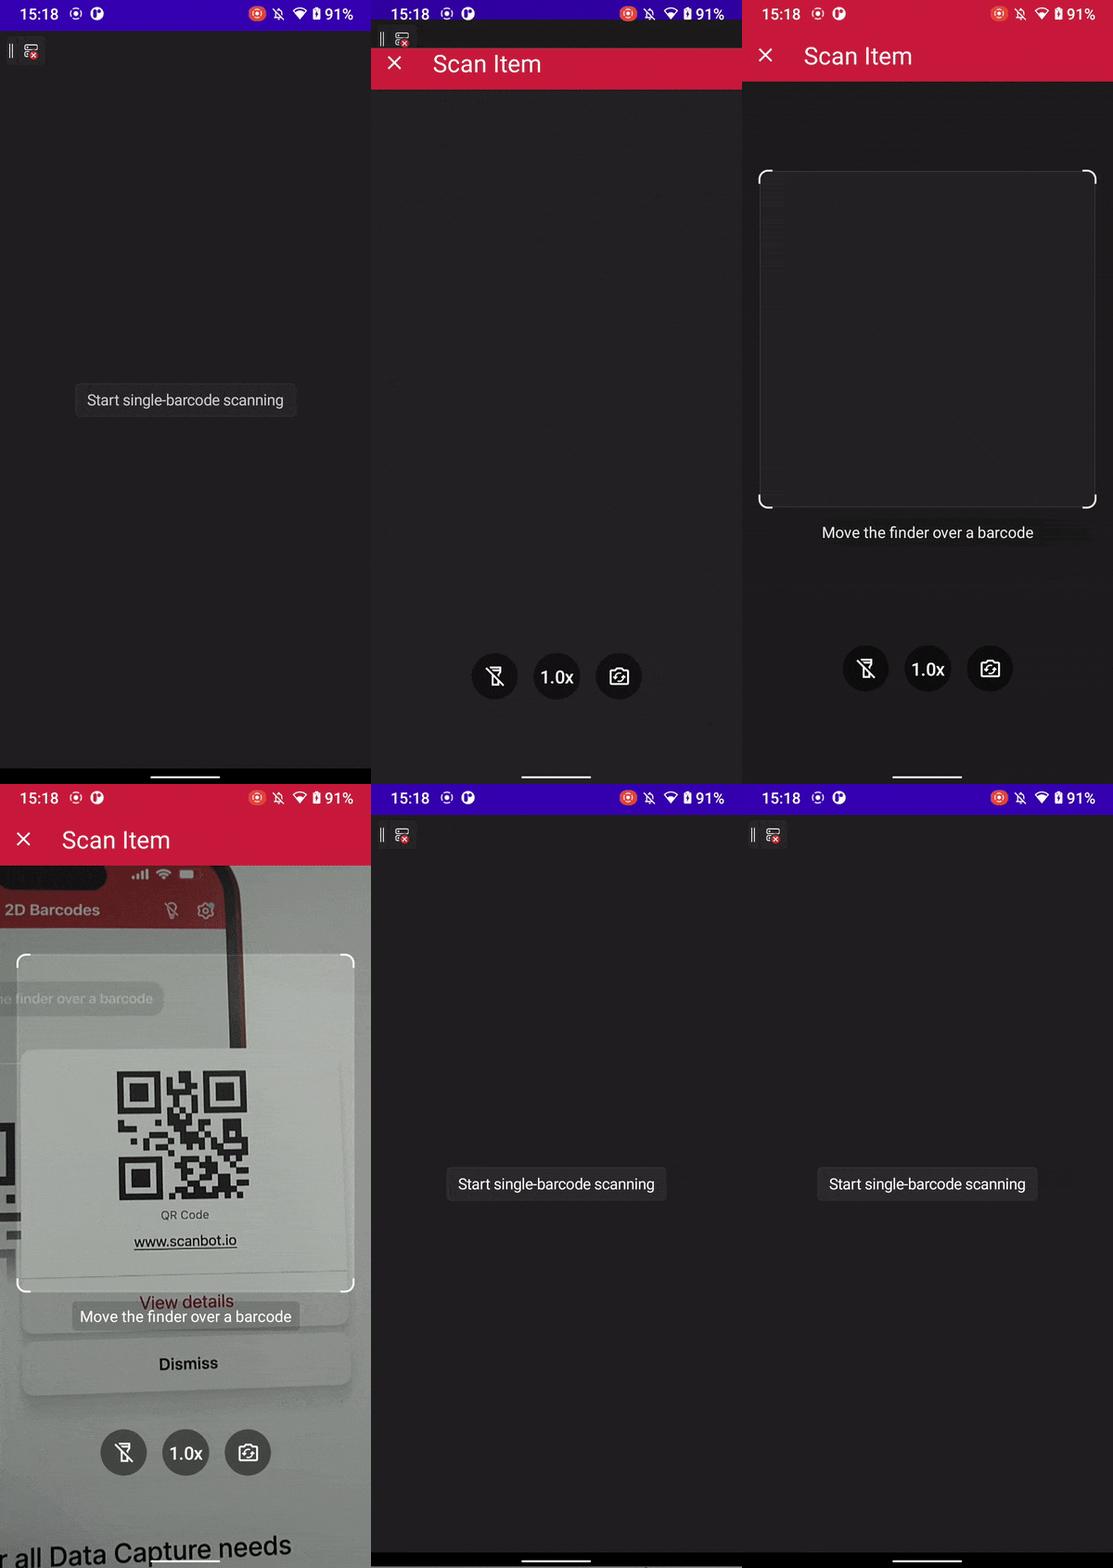
Uno Platform enables developers to build native mobile, desktop, web, and embedded applications using C# and XAML with a single codebase. In this tutorial, we’ll show you how you can build a barcode scanner for Android and iOS in Uno Platform using our .NET MAUI SDK.
We’ll follow these steps:
- Preparing the project
- Configuring the camera permissions
- Initializing the SDK
- Implementing the scanning screen
- Building and running the app
Requirements
- The latest .NET version for your development platform
- Microsoft’s build of OpenJDK 17
⚠️ A note for Windows users: If you want to develop your app for iOS, additional setup is required, including having a Mac available as a build server. You can learn more about this in the .NET MAUI documentation. In this tutorial, we’ll assume you’re developing on a Mac and using the CLI.
If this is your first time developing a .NET MAUI application on your machine, execute the following command:
sudo dotnet workload install mauiOnce everything’s ready, run the following command to install Uno’s development environment checker:
dotnet tool install -g uno.checkIf it’s been installed as expected, give it a run:
uno-checkIt may suggest fixes to apply to your environment to ensure smooth app development in Uno. Apply them at your own discretion, though it is generally safe to accept the fixes.
Next, we need the project templates. Let’s install them with the following command:
dotnet new install Uno.Templates1. Prepare the project
From a good working directory, run the following to create a new cross-platform Uno Platform app:
dotnet new unoapp -o UnoBarcodeScanner -tfm net8.0From your terminal, navigate to the generated project folder:
cd UnoBarcodeScannerVerify that everything is working as expected by running either of the following commands:
dotnet build . -f net8.0-android
dotnet build . -f net8.0-ios
If everything builds as expected, you can be sure your .NET development environment is configured correctly and that the Uno Platform project will work later on when we’re going to test everything.
The generated app supports multiple target frameworks, but we will only focus on net8.0-android and net8.0-ios in this tutorial, since that’s what our SDK supports.
In ./Directory.Packages.props, replace:
<ItemGroup>
</ItemGroup>
With:
<ItemGroup>
    <PackageVersion Include="ScanbotBarcodeSDK.MAUI" Version="6.1.0" />

    <!-- Package downgrades detected so we explicitly set the version -->
    <PackageVersion Include="Xamarin.AndroidX.Activity" Version="1.8.2.1" />
    <PackageVersion Include="Xamarin.AndroidX.Collection" Version="1.4.0.1" />
    <PackageVersion Include="Xamarin.AndroidX.Collection.Ktx" Version="1.4.0.1" />

    <!-- Needed for the framework to interop with MAUI and to avoid name conflicts between several WinUI and MAUI classes. -->
    <PackageVersion Include="Uno.Extensions.Maui.WinUI" Version="5.0.2" />
</ItemGroup>
In ./UnoBarcodeScanner/UnoBarcodeScanner.csproj, insert the following before the </Project> end tag:
<ItemGroup Condition="$(TargetFramework.Contains('android'))">
    <PackageReference Include="ScanbotBarcodeSDK.MAUI" />

    <!-- Package downgrades detected so we explicitly include the packages -->
    <PackageReference Include="Xamarin.AndroidX.Activity" NoWarn="NU1605" />
    <PackageReference Include="Xamarin.AndroidX.Collection" NoWarn="NU1605" />
    <PackageReference Include="Xamarin.AndroidX.Collection.Ktx" NoWarn="NU1605" />
</ItemGroup>

<ItemGroup Condition="$(TargetFramework.Contains('ios'))">
      <PackageReference Include="ScanbotBarcodeSDK.MAUI" />
</ItemGroup>

<ItemGroup>
    <!-- Needed for the framework to interop with MAUI and to avoid name conflicts between several WinUI and MAUI classes. -->
    <PackageReference Include="Uno.Extensions.Maui.WinUI" />
</ItemGroup>
At the time of writing, the default Uno Platform app template uses Central Package Management, which is why there are two files to update instead of one. If your project doesn’t make use of Central Package Management, then installing the SDK just requires specifying the appropriate <PackageReference> elements in your project file.
We can verify our changes by testing the build process:
dotnet build UnoBarcodeScanner -f net8.0-android
dotnet build UnoBarcodeScanner -f net8.0-ios -r ios-arm64
If everything builds as expected, we are ready to proceed.
💡 When building for Android, it’s possible for package downgrades to be detected depending on the version of the Uno Platform SDK being used. For this article, we used 5.4.10, but you may end up using a future version.
If there are package conflicts, add the appropriate <PackageReference> and <PackageVersion> tags to the project with the relevant information and make sure <PackageReference> has NoWarn="NU1605" added to it so that the related build error will go away for that particular package.
2. Configure the camera permissions
Since scanning barcodes requires access to the device camera, we need to add the corresponding permissions.
For Android, add the following to ./UnoBarcodeScanner/Platforms/Android/AndroidManifest.xml inside the <manifest> element:
<uses-permission android:name="android.permission.CAMERA" />
<uses-feature android:name="android.hardware.camera" />
For iOS, add the following to ./UnoBarcodeScanner/Platforms/iOS/Info.plist anywhere inside the <dict> element:
<key>NSCameraUsageDescription</key>
<string>Please provide camera access.</string>
3. Initialize the SDK
In ./UnoBarcodeScanner/App.xaml.cs, before the OnLaunched method, add the following line:
private const string licenseKey = "";In the OnLaunched method, replace:
#if DEBUG
        MainWindow.EnableHotReload();
#endif
With:
#if DEBUG
        MainWindow.EnableHotReload();
#endif

        // This initaliser is the one to use if all you want is our RTU-UI or our barcode detectors.
        ScanbotSDK.MAUI.SBSDKInitializer.Initialize(licenseKey, new ScanbotSDK.MAUI.SBSDKConfiguration
        {
            EnableLogging = true,
            ErrorHandler = (status, feature) =>
            {
                System.Diagnostics.Debug.WriteLine($"License error: {status}, {feature}");
            }
        });
In ./UnoBarcodeScanner/Platforms/Android/MainActivity.Android.cs, inside the MainActivity class, add the following method override:
protected override void OnCreate(Bundle savedInstanceState)
{
    base.OnCreate(savedInstanceState);
    ScanbotSDK.MAUI.DependencyManager.RegisterActivity(this);
}
4. Implement the scanning screen
Now that the SDK is ready, we can use its Ready-To-Use UI Components to integrate and customize the high-level UI components for scanning barcodes.
In ./UnoBarcodeScanner/MainPage.xaml, replace:
<TextBlock AutomationProperties.AutomationId="HelloTextBlock"
          Text="Hello Uno Platform!"
          HorizontalAlignment="Center" />
With:
<Button Click="StartSingleScanning">
          Start single-barcode scanning
</Button>
In ./UnoBarcodeScanner/MainPage.xaml.cs, at the top of the file, add:
using ScanbotSDK.MAUI;
using ScanbotSDK.MAUI.Barcode;
using ScanbotSDK.MAUI.Common;
Then, inside of the MainPage class definition, add the following method:
private async void StartSingleScanning(object sender, EventArgs e)
{
    try
    {
        if (!ScanbotSDKMain.LicenseInfo.IsValid)
        {
            var invalidLicense = new ContentDialog
            {
                Title = "License invalid",
                Content = "Trial license expired.",
                CloseButtonText = "Dismiss"
            };

            // Make sure to set the XamlRoot.
            invalidLicense.XamlRoot = this.XamlRoot;

            await invalidLicense.ShowAsync();
            return;
        }

        // Create the default configuration object.
        var configuration = new BarcodeScannerConfiguration();

        // Initialize the single-scan use case.
        var singleUsecase = new SingleScanningMode();

        // Set the configured use case.
        configuration.UseCase = singleUsecase;

        var result = await ScanbotSDKMain.RTU.BarcodeScanner.LaunchAsync(configuration);

        var barcodeAsText = result.Items.Select(barcode => $"{barcode.Type}: {barcode.Text}")
                        .FirstOrDefault() ?? string.Empty;

        var barcodeResult = new ContentDialog
        {
            Title = "Found barcode",
            Content = barcodeAsText,
            CloseButtonText = "Finish"
        };
        barcodeResult.XamlRoot = this.XamlRoot;

        await barcodeResult.ShowAsync();
    }
    catch (TaskCanceledException)
    {
        // For when the user cancels the action.
    }
    catch (Exception ex)
    {
        // For any other errors that occur.
        System.Diagnostics.Debug.WriteLine(ex.Message);
    }
}
💡 This snippet is very similar to what we use in our quick start guide. The only major difference is the use of ContentDialog to show the alert message instead of DisplayAlert. The first is specific to Uno Platform and the second to MAUI. Since the project has MAUI inside it, you could technically use both, but we used ContentDialog for illustrative purposes.
5. Build and run the app
Now we’re ready to run our app with:
dotnet build UnoBarcodeScanner -f net8.0-android -t:Run
dotnet build UnoBarcodeScanner -f net8.0-ios -r ios-arm64 -t:Run
🎉 Congratulations! You’ve successfully integrated a barcode scanner into your Uno Platform app!
If this tutorial has piqued your interest in integrating barcode scanning functionalities into your MAUI app, make sure to take a look at our SDK’s other neat features in our documentation – or run our example project for a more hands-on experience!
Should you have questions about this tutorial or ran into any issues, we’re happy to help! Just shoot us an email via tutorial-support@scanbot.io.
Happy coding!
