In this tutorial, we’ll walk you through how to create a barcode scanner app using the React Native Vision Camera library. This tutorial focuses exclusively on implementing the library’s barcode scanning functionality, making it easier to quickly build this feature into your mobile application.
To achieve this, we’re going to follow these steps:
- Create a new React Native project
- Install the React Native Vision Camera library
- Configure the permissions
- Request the camera permissions
- Add the barcode scanner
- Test the app
Prerequisites
Before you start creating the project, make sure your development environment is set up with the following tools:
- Node.js: Highly recommended when developing React Native apps. You can download it from the Node.js website if you don’t have it.
- Android Studio: This includes the SDKs and emulators needed to build and test your app. Download the latest version from the Android Studio website.
- Java Development Kit (JDK): React Native requires Java for Android builds. You can download the Oracle JDK or use Microsoft’s OpenJDK instead.
Ensure these tools are installed and configured before continuing with the barcode scanner tutorial.
Step 1: Create a new React Native project
As your first step, you have to create a new React Native project. Open your terminal and run the following command to create a new project named BarcodeScannerApp:
npx react-native init BarcodeScannerAppAfter creating the project, navigate to your project:
cd BarcodeScannerAppStep 2: Install the React Native Vision Camera library
To add camera capabilities to the React Native app, we will use the Vision Camera library. This library provides a range of features for working with camera streams and processing visual data. You can install it by running the following command in your project directory:
npm install react-native-vision-cameraThis tutorial will focus exclusively on the Vision Camera library’s barcode scanning functionality. This feature allows the app to detect and process different barcode symbologies.
Step 3: Configure the permissions
To allow the app to access the camera, you need to update the AndroidManifest.xml file located at android/app/src/main/AndroidManifest.xml. Add the following permission tags to the <manifest> tag:
<uses-permission android:name="android.permission.CAMERA" />The following code block shows how the complete AndroidManifest.xml file should look after adding the camera permission:
<manifest xmlns:android="http://schemas.android.com/apk/res/android">

    <uses-permission android:name="android.permission.INTERNET" />
    <uses-permission android:name="android.permission.CAMERA" />

    <application
      android:name=".MainApplication"
      android:label="@string/app_name"
      android:icon="@mipmap/ic_launcher"
      android:roundIcon="@mipmap/ic_launcher_round"
      android:allowBackup="false"
      android:theme="@style/AppTheme"
      android:supportsRtl="true">
      <activity
        android:name=".MainActivity"
        android:label="@string/app_name"
        android:configChanges="keyboard|keyboardHidden|orientation|screenLayout|screenSize|smallestScreenSize|uiMode"
        android:launchMode="singleTask"
        android:windowSoftInputMode="adjustResize"
        android:exported="true">
        <intent-filter>
            <action android:name="android.intent.action.MAIN" />
            <category android:name="android.intent.category.LAUNCHER" />
        </intent-filter>
      </activity>
    </application>
</manifest>
Step 4: Request the camera permissions
Now that you’ve configured camera permissions in AndroidManifest.xml, the next step is to handle camera access within the app. To ensure that the app requests the necessary permissions from the user before accessing the camera, we’ll use a hook to ask the user permission to use the camera when the app starts.
Open your App.tsx file and modify it to handle the permission request:
import React, { useState, useEffect } from "react";
import { SafeAreaView, Text, StyleSheet } from "react-native";
import { Camera } from "react-native-vision-camera";

const App: React.FC = () => {
  const [hasPermission, setHasPermission] = useState<boolean>(false);

  useEffect(() => {
    const getPermissions = async () => {
      const cameraPermission = await Camera.requestCameraPermission();
      setHasPermission(cameraPermission === "granted");
    };

    getPermissions();
  }, []);

  if (!hasPermission) return <Text>No camera permission</Text>;

  return <SafeAreaView style={styles.container}>...</SafeAreaView>;
};

export default App;
The code above manages camera permissions using React hooks. The useEffect hook triggers when the app starts, running the getPermissions function to request camera access. If permission is granted, the state variable hasPermission is updated to true, allowing the camera feed to display. If permission is denied, the app will show a message informing the user that camera access is required. This ensures the app doesn’t try to access the camera without user consent.
Step 5: Add the barcode scanner
After setting the permission request, you can add the barcode scanning feature code. At this step, you will use the Vision Camera library functionalities.
First, import the necessary functions from react-native-vision-camera:
import {
  Camera,
  useCameraDevices,
  useCodeScanner,
  getCameraDevice,
} from "react-native-vision-camera";
Next, you’ll need to fetch a list of available camera devices and select the back camera for barcode scanning.
const devices = useCameraDevices();
const device = getCameraDevice(devices, "back");
Since we handled the permission request in step 4, we can now configure the barcode scanner using the useCodeScanner() hook. This hook requires two main properties:
codeTypes: An array specifying the types of barcodes the app will scan. For this tutorial, we’ll use EAN-13 barcodes. You can explore the Vision Camera documentation for a full list of supported barcode types.onCodeScanned: A callback function that triggers when a barcode is scanned. For this tutorial, the function loops through the scanned codes and displays an alert with the barcode type.
The following code block presents the complete code for the useCodeScanner() hook.
const codeScanner: CodeScanner = useCodeScanner({
    codeTypes: ['ean-13'],
    onCodeScanned: (codes) => {
      for (const code of codes) {
        setIsScanning(false)
        console.log(`Code Value: ${code.value}`);
         Alert.alert('Scanned Code', `${code.value}`, [
           {
             text: 'OK',
             onPress: () => setIsScanning(true), // Stop scanning after alert
           },
       ]);
      }
    },
  });
Afterward, you need to handle the UI response for loading the camera and managing permissions. The following code ensures the app shows a message while the device is being identified and notifies the user if camera access hasn’t been granted.
if (!device) return <Text>Loading camera...</Text>;
if (!hasPermission) return <Text>No camera permission</Text>;
Lastly, configure the app’s interface. The Camera component displays the camera feed using the back camera device. At the same time, the codeScanner processes each frame to scan for barcodes. You can also control how often frames are processed using the frameProcessorFps attribute. The following code block presents the app UI configuration.
return (
  <SafeAreaView style={styles.container}>
    <Camera
      style={StyleSheet.absoluteFill}
      device={device}
      isActive={true}
      frameProcessorFps={2}
      codeScanner={codeScanner}
    />
    <View style={styles.infoContainer}>
      <Text style={styles.infoText}>Point the camera at a code</Text>
    </View>
  </SafeAreaView>
);
Below is the complete code for the App.tsx file after adding the barcode scanning functionality:
import React, { useState, useEffect } from 'react';
import { SafeAreaView, Text, View, StyleSheet, Alert } from 'react-native';
import { Camera, useCameraDevices, useCodeScanner, getCameraDevice } from 'react-native-vision-camera';

const App: React.FC = (props) => {
  const [hasPermission, setHasPermission] = useState<boolean>(false);
  const [isScanning, setIsScanning] = useState<boolean>(true);
  const devices = useCameraDevices();
  const device = getCameraDevice(devices, 'back');

  useEffect(() => {
    const getPermissions = async () => {
      const cameraPermission = await Camera.requestCameraPermission();
      console.log(cameraPermission)
      setHasPermission(cameraPermission === 'granted');
    };

    getPermissions();
  }, []);

  const codeScanner: CodeScanner = useCodeScanner({
    codeTypes: ['ean-13'],
    onCodeScanned: (codes) => {
      for (const code of codes) {
        setIsScanning(false)
        console.log(`Code Value: ${code.value}`);
         Alert.alert('Scanned Code', `${code.value}`, [
           {
             text: 'OK',
             onPress: () => setIsScanning(true), // Stop scanning after alert
           },
       ]);
      }
    },
  });

  if (device == null) return <Text>Loading camera...</Text>;
  if (!hasPermission) return <Text>No camera permission</Text>;

  return (
    <SafeAreaView style={styles.container}>
      <Camera
        style={StyleSheet.absoluteFill}
        device={device}
        isActive={true}
        frameProcessorFps={2}
        {...props}
        codeScanner={isScanning ? codeScanner : undefined}
      />
      <View style={styles.infoContainer}>
        <Text style={styles.infoText}>Point the camera at a code</Text>
      </View>
    </SafeAreaView>
  );
};

const styles = StyleSheet.create({
  container: {
    flex: 1,
    justifyContent: 'center',
    alignItems: 'center',
  },
  infoContainer: {
    position: 'absolute',
    bottom: 50,
    backgroundColor: 'rgba(0,0,0,0.5)',
    padding: 10,
    borderRadius: 5,
  },
  infoText: {
    color: 'white',
    fontSize: 16,
  },
});

export default App;
Step 6: Test the app
To test your application, run the Android app with the following command:
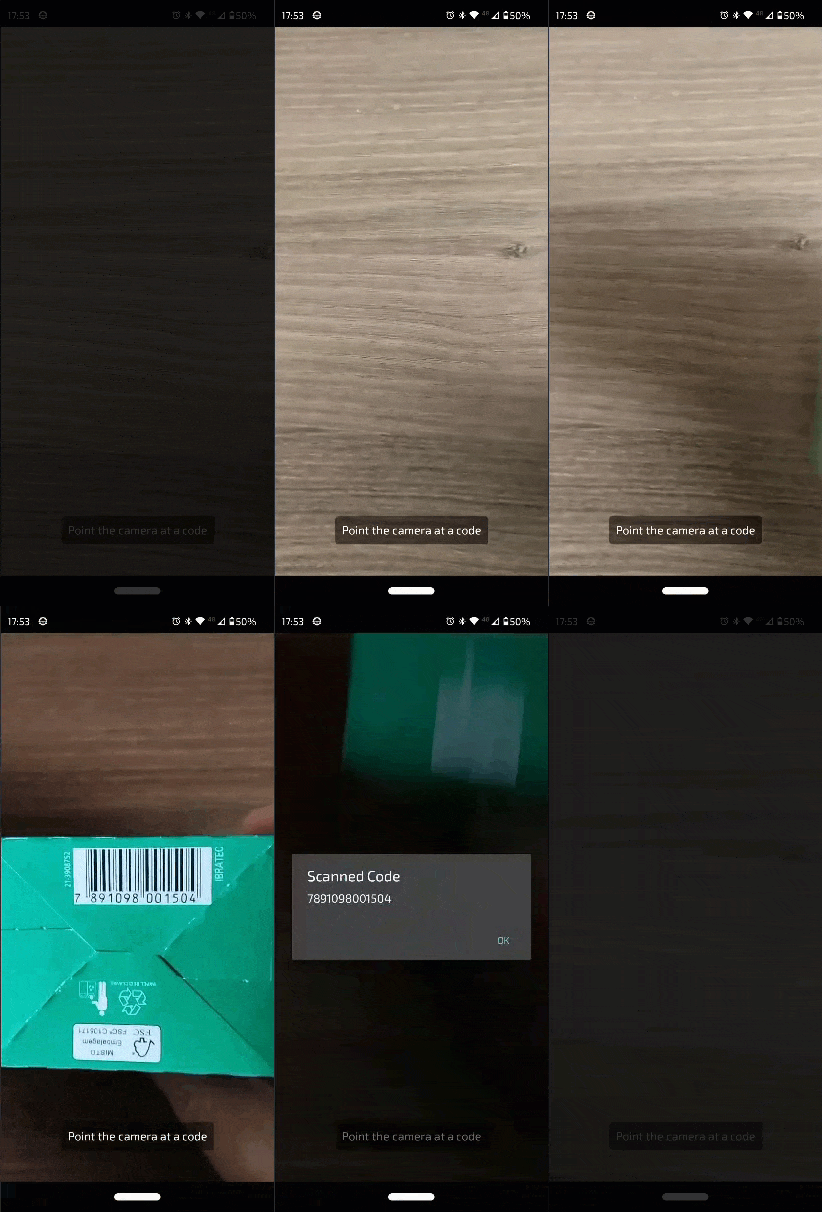
npx react-native run-androidThen, point the camera at an EAN-13 Barcode. Once the code is scanned, an alert will display the code’s value on the screen.
Disadvantages of using the React Native Vision Camera library for scanning barcodes
While it is a useful tool for React Native developers, there are a few notable disadvantages to using the Vision Camera library for scanning barcodes:
- Performance and stability issues: Several developers have reported crashes when using the library for barcode scanning on Android devices, particularly after scanning a barcode, causing the application to close unexpectedly. The library also has had issues handling different device orientations.
- Compatibility and support: There have been reports of functionality working in some versions but breaking in others. Some developers also have experienced problems with scanning barcodes on specific devices.
- Implementation challenges: Implementing barcode scanning can be tricky, with some developers reporting difficulties in getting the scanner to recognize barcodes consistently. Frame processors, which are used for real-time image processing, also do not work well with the scanner functionality, requiring developers to find workarounds.
- Permissions and access: Some users have encountered problems with camera permissions, particularly on Android devices, leading to errors like “Access denied finding property ‘vendor.camera.aux.packagelist'”.
For companies that heavily rely on barcode scanning in their business processes, we recommend using an enterprise-grade solution instead.
Building a React Native Barcode Scanner with the Scanbot SDK
We developed the Scanbot Barcode Scanner SDK to help enterprises overcome the hurdles presented by free barcode scanning software. Our goal was to have a developer-friendly solution available for a wide range of platforms that consistently delivers high-quality results – even in challenging circumstances.
In the following section, we’ll show you how easy it is to integrate our Barcode Scanner SDK into your React Native app. Thanks to our SDK’s Ready-to-Use UI Components, you can even use an AR overlay to display multiple barcodes’ contents right in the viewfinder.
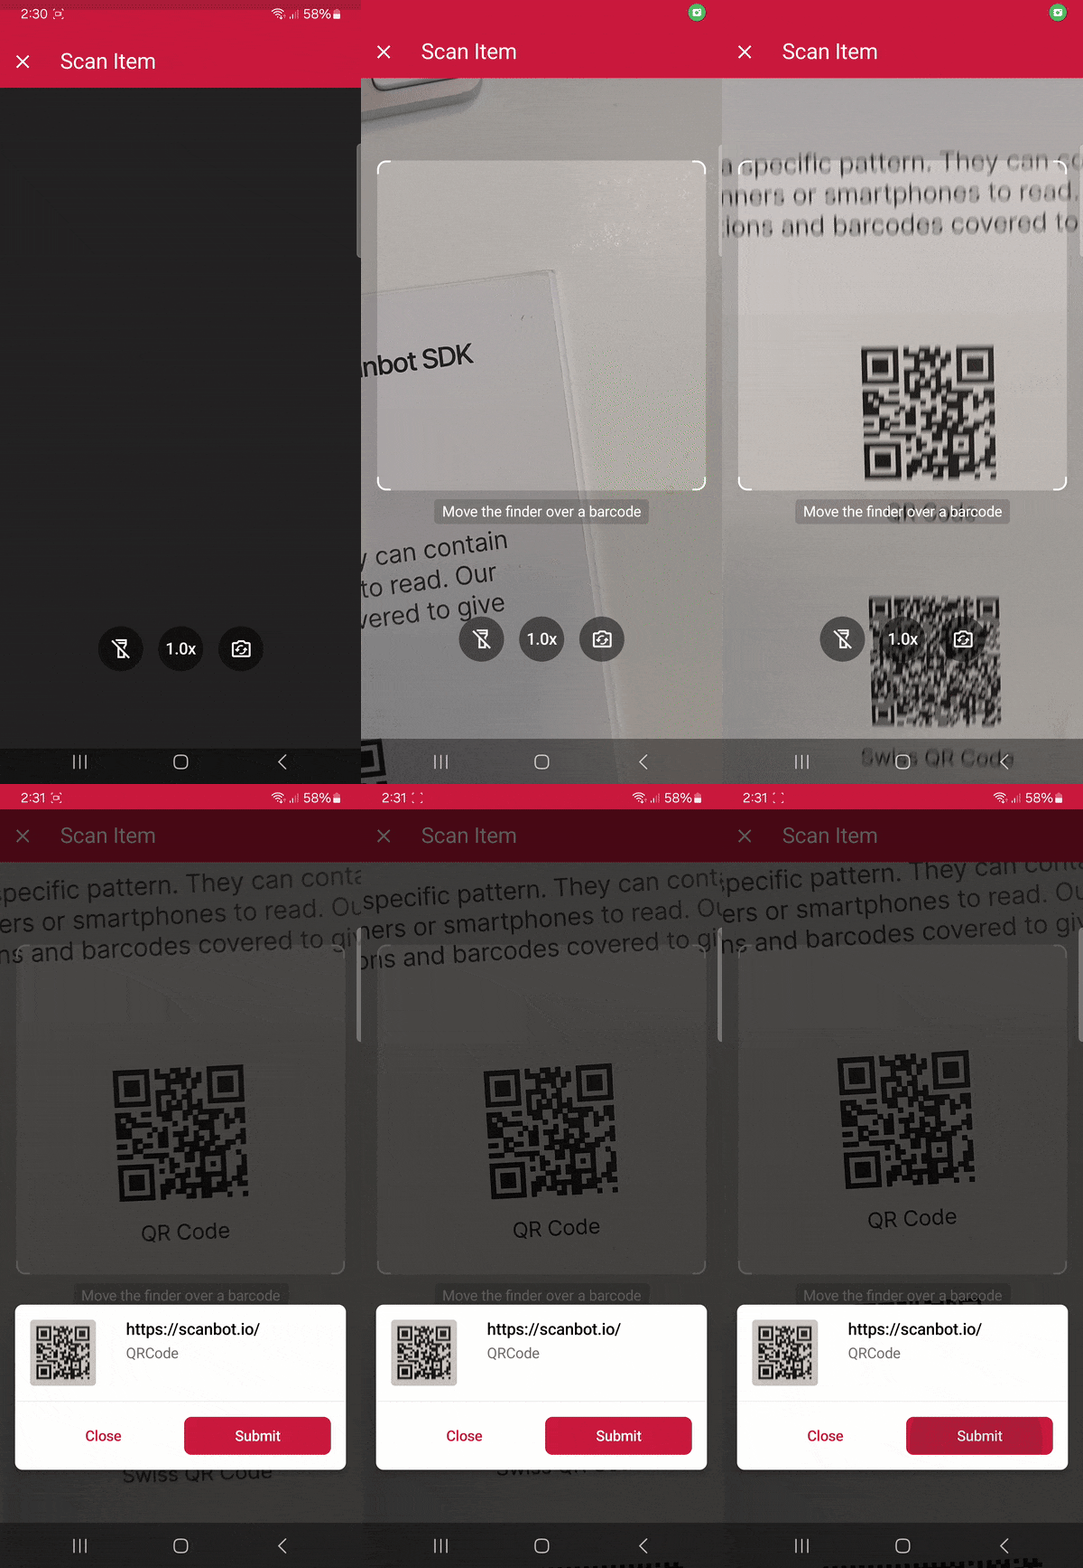
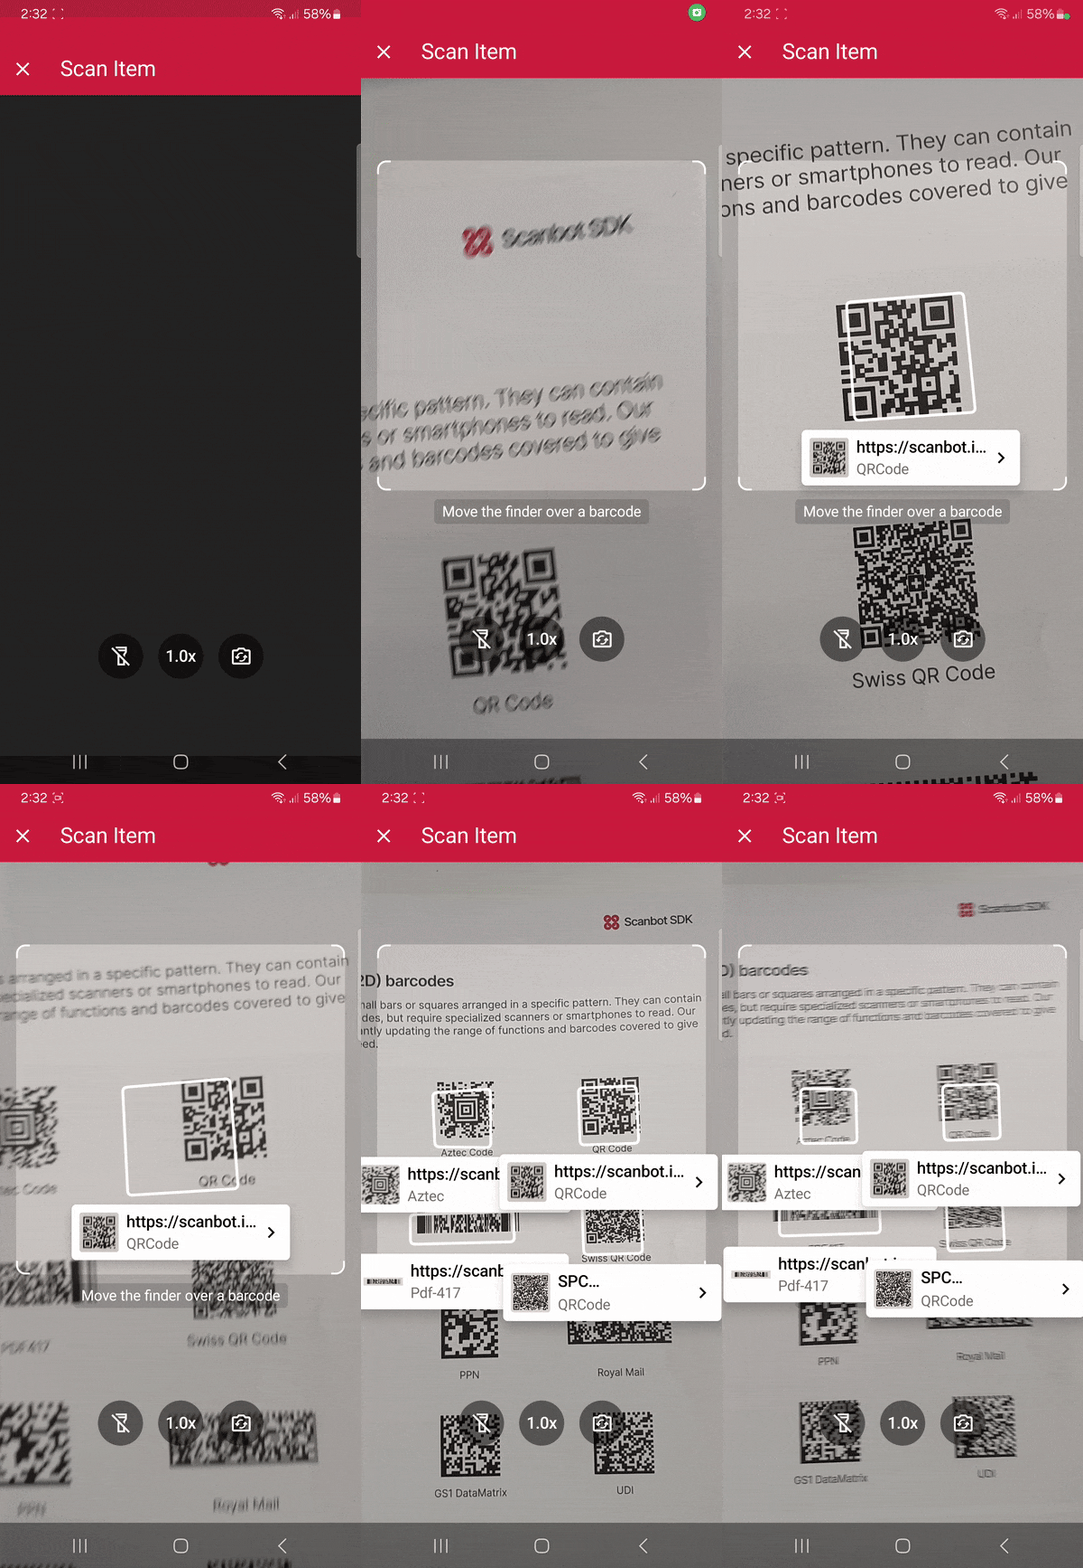
We’re going to follow these steps to build our app:
- Preparing the project
- Installing the SDK
- Initializing the SDK
- Implementing the scanning modes
- Building the app and scanning some barcodes
Requirements
We’re going to use Expo in this tutorial, so you’ll need to set up your local development environment. The steps for preparing your local environment for development can be found in the Expo documentation.
💡 Starting with React Native version 0.75, it’s recommended to use frameworks such as Expo to develop React Native applications. We’ll use Expo in this tutorial as well.
Of course, you can also integrate our SDK without a framework. For further information, please refer to the official React Native documentation.
Step 1: Prepare the project
First, let’s create our Expo app using the Expo CLI, which will walk us through the setup process. To create an Expo app, run the following command in the terminal:
npx create-expo-app@latestLet’s open the project with your favorite code editor and prepare it to install the Scanbot SDK.
Remove boilerplate code
The Expo CLI has generated some screens to ensure the app isn’t empty. We can remove the generated code quickly by running the following command:
npm run reset-projectNow the app directory only contains an index file, which is our only screen, and a _layout.tsx file.
⚠️ Npm is the default package manager in this project, so we’ll be using it for this tutorial. Feel free to set up the project with other package managers supported by Expo.
Generate the native projects
To install expo-dev-client, we need to run the following command:
npx expo install expo-dev-clientAfter that, we generate our iOS and Android projects with:
npx expo prebuild⚠️ If you are using a React Native Barcode Scanner SDK trial licence, make sure that the Android applicationId and iOS bundle identifier are the same.
Step 2: Install the SDK
Let’s install and configure the React Native Barcode Scanner SDK.
First we need to run:
npx expo install react-native-scanbot-barcode-scanner-sdkNow that the npm package has been installed, all that’s left is to make the necessary native changes to the projects.
You can use our config plugin or manually configure the native projects. We’ll showcase both so you can pick the method you prefer.
Method A: Expo config plugin
To utilize the plugin, add the following to your app.json file:
"plugins": [
  "expo-router",
  [
    "react-native-scanbot-barcode-scanner-sdk",
    {
      "iOSCameraUsageDescription": "Camera permission is needed to scan barcodes",
      "androidCameraPermission": true,
      "androidCameraFeature": true,
      "mavenURLs": true
    }
  ]
],
Then run:
npx expo prebuildNow we’re all set. You can skip the Android and iOS native changes when using this plugin.
Method B: Manual configuration
Alternatively, you can also apply the changes to the native projects manually.
Android
For Android, we first need to add the camera permissions in android/app/src/main/AndroidManifest.xml.
<uses-permission android:name="android.permission.CAMERA" />
<uses-feature android:name="android.hardware.camera" />
For development builds, we also need to add our Maven package URLs in android/build.gradle.
allprojects {
    repositories {
        ... other maven rpositories
      maven { url "https://nexus.scanbot.io/nexus/content/repositories/releases/" }
      maven { url "https://nexus.scanbot.io/nexus/content/repositories/snapshots/" }
    }
}
💡 For more information about individual releases, please refer to our changelog.
iOS
For iOS, we need to include a description for the camera permission in ios/{projectName}/Info.plist anywhere inside the element:
<key>NSCameraUsageDescription</key>
<string>Camera permission is needed to scan barcodes</string>
Now that the project is set up, we can start integrating the barcode scanning functionalities.
Step 3: Initialize the SDK
Before using any feature of the React Native Barcode Scanner SDK, we need to initialize it. Ideally, initialization should be done as soon as the app is launched.
There are many ways to initialize the SDK that depend on your use case. In our example, we’re going to initialize the SDK inside a useEffect in our _layout.txt file.
ScanbotBarcodeSDK
  .initializeSdk({ licenseKey: "" })
  .then(result => console.log(result))
  .catch(err => console.log(err));
So the _layout.txt would look like this:
import { Stack } from "expo-router";
import { useEffect } from "react";
import ScanbotBarcodeSDK from "react-native-scanbot-barcode-scanner-sdk"

export default function RootLayout() {

useEffect(() => {
  ScanbotBarcodeSDK
    .initializeSdk({ licenseKey: "" })
    .then(result => console.log(result))
    .catch(err => console.log(err));
}, []);

  return (
    <Stack>
      <Stack.Screen name="index" />
    </Stack>
  );
}
💡 Without a license key, our SDK only runs for 60 seconds per session. This is more than enough for the purposes of our tutorial, but if you like, you can generate a license key using the bundle and application identifiers.
Step 4: Implement the scanning modes
Our RTU UI components make it easy to deploy our Barcode Scanner SDK’s different scanning modes in your app. Let’s start with the simplest use case: single-barcode scanning.
In app/index.tsx, we’re going to add a button that will start the scanning process. After we ran the reset project script, the index.tsx should only contain a single view with a text component. Let’s replace the Text component with a button component like this:
<Button title={"Start single barcode scanning"} onPress={onSingleBarcodeScan} />Now we need to define onBarcodeScannerPress, which will start the single-barcode scanning mode:
const onSingleBarcodeScan = useCallback(async () => {
  try {
    /** Check license status and return early if the license is not valid */
    if (!(await ScanbotBarcodeSDK.getLicenseInfo()).data?.isLicenseValid) {
      return;
    }
    /**
     * Instantiate a configuration object of BarcodeScannerConfiguration and
     * start the barcode scanner with the configuration
     */
    const config = new BarcodeScannerConfiguration();
    /** Initialize the use case for single scanning */
    config.useCase = new SingleScanningMode();
    /** Start the BarcodeScanner */
    const result = await startBarcodeScanner(config);
    /** Handle the result if result status is OK */
    if (result.status === 'OK' && result.data) {
      Alert.alert(
        "Barcode Scanning successfully!",
        `${result.data.items.map(barcode =>
          `Barcode value: ${barcode.text} and type: ${barcode.type}`
        ).join("\n")}`);
    } else {
      console.log("The user has canceled the Barcode Scanning")
    }
  } catch (e: any) {
    console.log("An error has occurred while running Barcode Scanner", e.message);
  }
}, []);
Our final screen should look like this:
import {Alert, Button, View} from "react-native";
import {useCallback} from "react";
import {
  BarcodeScannerConfiguration,
  SingleScanningMode,
  startBarcodeScanner
} from "react-native-scanbot-barcode-scanner-sdk/ui_v2";
import ScanbotBarcodeSDK from "react-native-scanbot-barcode-scanner-sdk";

export default function Index() {

  const onSingleBarcodeScan = useCallback(async () => {
    try {
      /** Check license status and return early if the license is not valid */
      if (!(await ScanbotBarcodeSDK.getLicenseInfo()).data?.isLicenseValid) {
        return;
      }
      /**
       * Instantiate a configuration object of BarcodeScannerConfiguration and
       * start the barcode scanner with the configuration
       */
      const config = new BarcodeScannerConfiguration();
      /** Initialize the use case for single scanning */
      config.useCase = new SingleScanningMode();
      /** Start the BarcodeScanner */
      const result = await startBarcodeScanner(config);
      /** Handle the result if result status is OK */
      if (result.status === 'OK' && result.data) {
        Alert.alert(
          "Barcode Scanning successfully!",
          `${result.data.items.map(barcode =>
            `Barcode value: ${barcode.text} and type: ${barcode.type}`
          ).join("\n")}`);
      } else {
        console.log("The user has canceled the Barcode Scanning")
      }
    } catch (e: any) {
      console.log("An error has occurred while running Barcode Scanner", e.message);
    }
  }, []);

  return (
    <View
      style={{
        flex: 1,
        justifyContent: "center",
        alignItems: "center",
      }}
    >
      <Button title={"Start single barcode scanning"} onPress={onSingleBarcodeScan}/>
    </View>
  );
}
Now we’re ready to start building our app and scan some barcodes. Let’s also add the multi-barcode scanning and AR overlay modes in the same way:
const onMultiBarcodeScan = useCallback(async () => {
  try {
    /** Check license status and return early if the license is not valid */
    if (!(await ScanbotBarcodeSDK.getLicenseInfo()).data?.isLicenseValid) {
      return;
    }
    /**
     * Instantiate a configuration object of BarcodeScannerConfiguration and
     * start the barcode scanner with the configuration
     */
    const config = new BarcodeScannerConfiguration();
    /** Initialize the use case for multi-scanning */
    config.useCase = new MultipleScanningMode();
    /** Start the BarcodeScanner */
    const result = await startBarcodeScanner(config);
    /** Handle the result if result status is OK */
    if (result.status === 'OK' && result.data) {
      Alert.alert(
        "Barcode Scanning successfully!",
        `${result.data.items.map(barcode =>
          `Barcode value: ${barcode.text} and type: ${barcode.type}`
        ).join("\n")}`);
    } else {
      console.log("The user has canceled the Barcode Scanning")
    }
  } catch (e: any) {
    console.log("An error has occurred while running Barcode Scanner", e.message);
  }
}, []);

const onAROverlayBarcodeScan = useCallback(async () => {
  try {
    /** Check license status and return early if the license is not valid */
    if (!(await ScanbotBarcodeSDK.getLicenseInfo()).data?.isLicenseValid) {
      return;
    }
    /**
     * Instantiate a configuration object of BarcodeScannerConfiguration and
     * start the barcode scanner with the configuration
     */
    const config = new BarcodeScannerConfiguration();
    /** Initialize the use case for multi-scanning */
    config.useCase = new MultipleScanningMode();
    /** Configure AR Overlay. */
    config.useCase.arOverlay.visible = true;
    config.useCase.arOverlay.automaticSelectionEnabled = false;
    /** Start the BarcodeScanner */
    const result = await startBarcodeScanner(config);
    /** Handle the result if result status is OK */
    if (result.status === 'OK' && result.data) {
      Alert.alert(
        "Barcode Scanning successfully!",
        `${result.data.items.map(barcode =>
          `Barcode value: ${barcode.text} and type: ${barcode.type}`
        ).join("\n")}`);
    } else {
      console.log("The user has canceled the Barcode Scanning")
    }
  } catch (e: any) {
    console.log("An error has occurred while running Barcode Scanner", e.message);
  }
}, []);
Finally, we need to add the buttons to start the scanning modes:
  <Button title={"Start multi-barcode scanning"} onPress={onMultiBarcodeScan}/>
  <Button title={"Start AR Overlay barcode scanning"} onPress={onAROverlayBarcodeScan}/>
Step 5: Build the app and scanning some barcodes
We’re all done setting up our app.
To run the app on your Android or iOS device, use the following commands:
For Android:
npx expo run:android --deviceFor iOS:
npx expo run:ios --deviceNow you can go ahead and scan 1D and 2D barcodes – one at a time, several at once, or with a real-time preview of their values via the AR overlay!

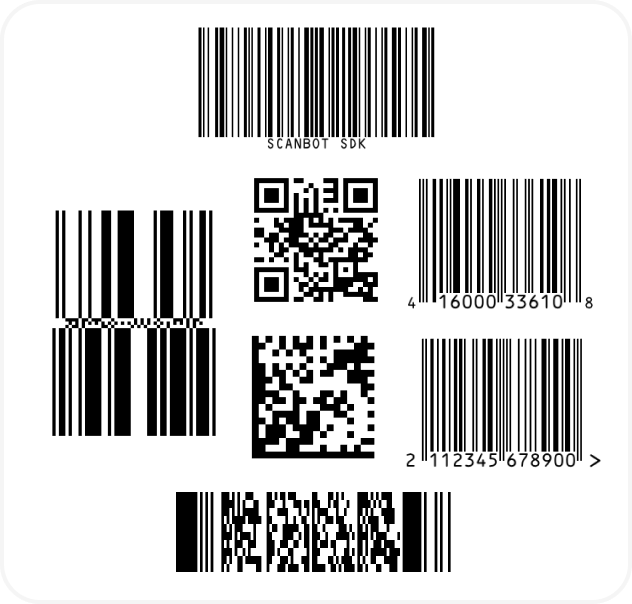
And if you’re in need of some sample barcodes for testing purposes, we’ve got you covered:
Conclusion
If this tutorial has piqued your interest in integrating barcode scanning functionalities into your React Native app, make sure to take a look at our SDK’s other neat features in our documentation or run our example project.
Should you have questions about this tutorial or ran into any issues, we’re happy to help! Just shoot us an email via tutorial-support@scanbot.io.
Happy coding!


