In this tutorial, we’ll create a cross-platform app for scanning barcodes and QR codes using .NET MAUI and the Scanbot .NET MAUI Barcode Scanner SDK.
First, we’re going to implement single-barcode scanning in our app. Afterwards, we’ll adapt the scanner to support multi-barcode scanning and implement an AR overlay.
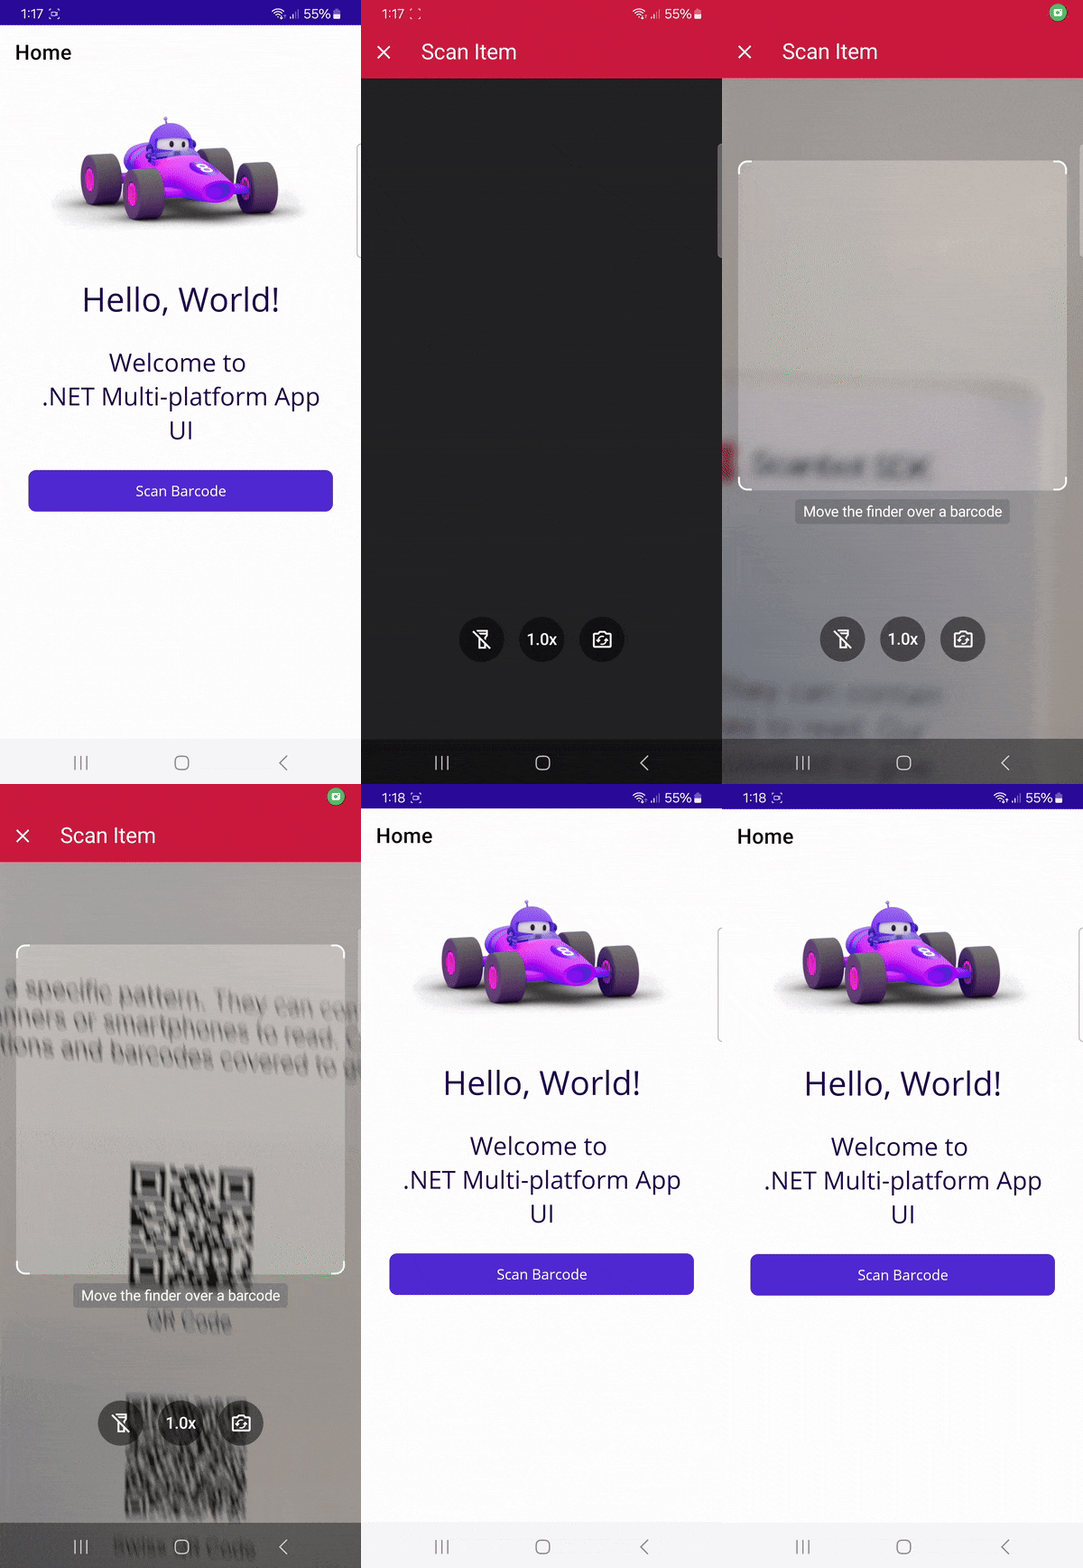
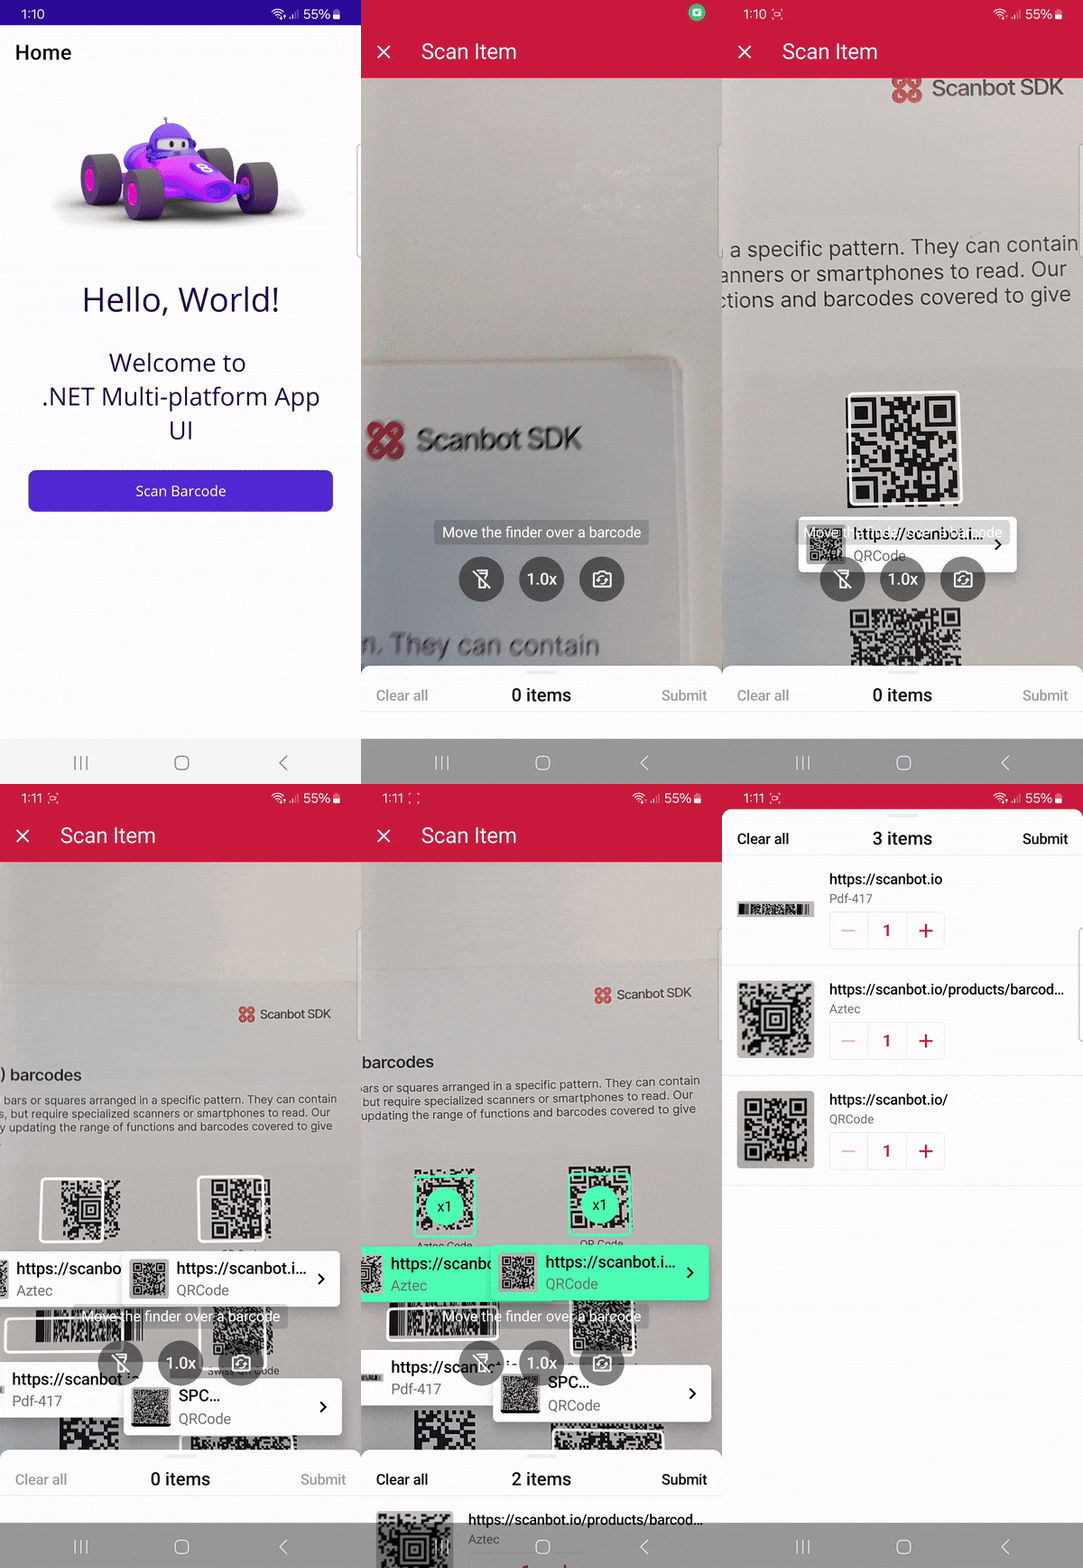
We’ll achieve this in five steps:
- Preparing the .NET MAUI project
- Installing the Barcode Scanner SDK
- Initializing the SDK
- Implementing single-barcode scanning
- Implementing multi-barcode scanning with AR overlay
Let’s get started!
Requirements
There are several options for developing .NET MAUI applications, including the ability to build and launch projects from the .NET CLI if you are so inclined. Whatever method you choose, make sure you have the latest .NET version for your development platform of choice. You’ll also need Microsoft’s build of OpenJDK 17.
In this tutorial, we’re going to develop our app with Android and iOS as target platforms.
⚠️ A note for Windows users: If you want to develop your app for iOS, additional setup is required, including having a Mac available as a build server. You can learn more about this in the .NET MAUI documentation. In this tutorial, we’ll assume you’re developing on a Mac and using the CLI.
If this is your first time developing a .NET MAUI application on your machine, execute the following command:
sudo dotnet workload install mauiStep 1: Prepare the .NET MAUI project
First, create a new directory for your project and navigate into it.
mkdir test-mauicd test-mauiThen create the project with the following command:
dotnet new mauiSince we need access to the device camera to scan barcodes, let’s add the necessary camera permissions for Android and iOS.
For Android, add the following to Platforms/Android/AndroidManifest.xml inside the <manifest> element:
<uses-permission android:name="android.permission.CAMERA" />
<uses-feature android:name="android.hardware.camera" />
For iOS, add the following to Platforms/iOS/Info.plist anywhere inside the <dict> element:
<key>NSCameraUsageDescription</key>
<string>Please provide camera access.</string>
Step 2: Install the Barcode Scanner SDK
In this tutorial, we’re using Scanbot Barcode Scanner SDK version 7.0.2. You can find the latest version in the SDK’s changelog.
Add the following code to the test-maui.csproj file in your project folder:
<ItemGroup>
        <PackageReference Include="ScanbotBarcodeSDK.MAUI" Version="7.0.2" />
</ItemGroup>
Then run:
dotnet restore💡 If there are package conflicts, add the appropriate <PackageReference> tags to the project and make sure <PackageReference> has NoWarn="NU1605" added to it to suppress the related build error for that particular package.
Step 3: Initialize the SDK
In MauiProgram.cs, initialize the Barcode Scanner SDK by replacing the contents with the following code:
using Microsoft.Extensions.Logging;
using ScanbotSDK.MAUI;
namespace test_maui;
public static class MauiProgram
{
    private const string LicenseKey = "";
    public static MauiApp CreateMauiApp()
    {
        var builder = MauiApp.CreateBuilder();
        builder
            .UseMauiApp<App>()
            .ConfigureFonts(fonts =>
            {
                fonts.AddFont("OpenSans-Regular.ttf", "OpenSansRegular");
                fonts.AddFont("OpenSans-Semibold.ttf", "OpenSansSemibold");
            });
#if DEBUG
        builder.Logging.AddDebug();
#endif
        SBSDKInitializer.Initialize(LicenseKey, new SBSDKConfiguration
            {
                EnableLogging = true,
                ErrorHandler = (status, feature) =>
                {
                    Console.WriteLine($"License error: {status}, {feature}");
                }
            });
        return builder.Build();
    }
}
This will set an empty license key, initialize the SDK, and enable logging and error handling.
💡 Without a license key, the Barcode Scanner SDK only runs for 60 seconds per session. This is more than enough for the purposes of this tutorial, but if you like, you can generate a license key using the <ApplicationId> found in test-maui.csproj.
Step 4: Implement single-barcode scanning
We’ll first implement single-barcode scanning in our .NET MAUI app.
In MainPage.xaml.cs, first add the necessary imports.
using ScanbotSDK.MAUI;
using ScanbotSDK.MAUI.Barcode;
Then replace the OnCounterClicked() method with the following:
private async void StartBarcodeScanner(object sender, EventArgs e)
{
    try
    {
        if (!ScanbotSDKMain.LicenseInfo.IsValid)
        {
            await DisplayAlert(title: "License invalid", message: "Trial license expired.", cancel: "Dismiss");
            return;
        }
        // Create the default configuration object.
        var configuration = new BarcodeScannerScreenConfiguration();
        var result = await ScanbotSDKMain.RTU.BarcodeScanner.LaunchAsync(configuration);
        var barcodeAsText = result.Items.Select(barcode => $"{barcode.Barcode.Format}: {barcode.Barcode.Text}")
                        .FirstOrDefault() ?? string.Empty;
        await DisplayAlert("Found barcode", barcodeAsText, "Finish");
    }
    catch (TaskCanceledException)
    {
        // For when the user cancels the action.
    }
    catch (Exception ex)
    {
        // For any other errors that occur.
        Console.WriteLine(ex.Message);
    }
}
This configures our barcode scanner with the default behavior and implements a text pop-up showing a barcode’s type and encoded data when scanned.
Now go to MainPage.xaml and edit the CounterBtn so it calls our StartBarcodeScanner() method when clicked.
<Button
                x:Name="BarcodeScannerBtn"
                Text="Scan Barcode"
                SemanticProperties.Hint="Starts the process to scan a barcode"
                Clicked="StartBarcodeScanner"
                HorizontalOptions="Fill" />
Build and run the app to test the single-barcode scanning functionality.
For iOS:
dotnet build . -f net8.0-ios -t:Run -r ios-arm64For Android:
dotnet build . -f net8.0-android -t:Run
In the next step, we’ll change the scanner’s behavior to scan multiple barcodes and display their values on the scanning screen using an AR overlay.
Step 5: Implement multi-barcode scanning with AR overlay
Go back to MainPage.xaml.cs and below var configuration = new BarcodeScannerScreenConfiguration();, create a new instance of the MultipleScanningMode class and assign it to a variable usecase.
var usecase = new MultipleScanningMode();Then modify this object to enable the AR overlay, disable the automatic selection of barcodes as they enter the scanning area (requiring the user to select them manually instead), and disable the viewfinder (since having it doesn’t make much sense when using the AR overlay).
usecase.ArOverlay.Visible = true;
usecase.ArOverlay.AutomaticSelectionEnabled = false;
configuration.ViewFinder.Visible = false;
Finally, apply the configuration.
configuration.UseCase = usecase;Your final MainPage.xaml.cs will look something like this:
using ScanbotSDK.MAUI;
using ScanbotSDK.MAUI.Barcode;
namespace test_maui;
public partial class MainPage : ContentPage
{
    int count = 0;
    public MainPage()
    {
        InitializeComponent();
    }
    private async void StartBarcodeScanner(object sender, EventArgs e)
    {
        try
        {
            if (!ScanbotSDKMain.LicenseInfo.IsValid)
            {
                await DisplayAlert(title: "License invalid", message: "Trial license expired.", cancel: "Dismiss");
                return;
            }
            var configuration = new BarcodeScannerScreenConfiguration();
            var usecase = new MultipleScanningMode();
            usecase.ArOverlay.Visible = true;
            usecase.ArOverlay.AutomaticSelectionEnabled = false;
            configuration.ViewFinder.Visible = false;
            configuration.UseCase = usecase;
            var result = await ScanbotSDKMain.RTU.BarcodeScanner.LaunchAsync(configuration);
            var barcodeAsText = result.Items.Select(barcode => $"{barcode.Barcode.Format}: {barcode.Barcode.Text}")
                            .FirstOrDefault() ?? string.Empty;
            await DisplayAlert("Found barcode", barcodeAsText, "Finish");
        }
        catch (TaskCanceledException)
        {
            // When the user cancels the action.
        }
        catch (Exception ex)
        {
            Console.WriteLine(ex.Message);
        }
    }
}
Now build and run the app again and try out the new scanning behavior.

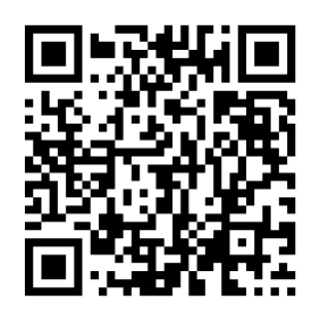
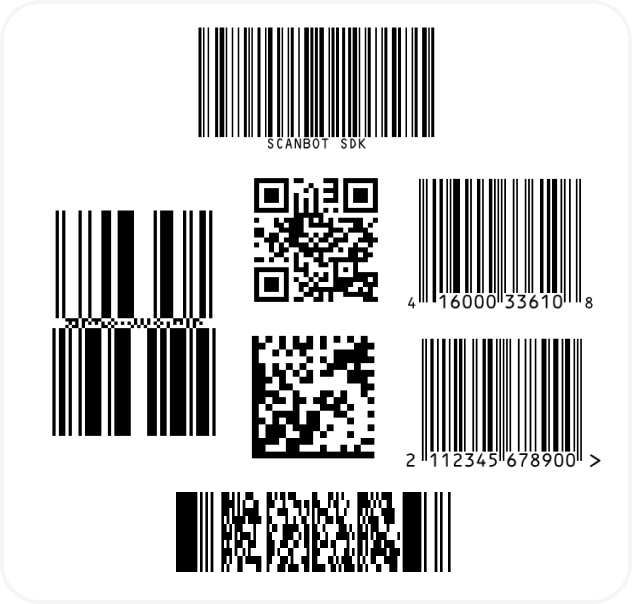
If you’re in need of some sample barcodes for testing purposes, we’ve got you covered:
💡 If you run into errors while building the Android app, try the command _dotnet build . -f net8.0-android -t:Run --no-incremental_.
The option --no-incremental disables incremental building. When used, it forces a clean rebuild of the entire project, ignoring any previously built components.
Conclusion
🎉 Congratulations! You’ve successfully built a cross-platform barcode scanning app for iOS and Android with .NET MAUI!
Should you have questions about this tutorial or ran into any issues, we’re happy to help! Just shoot us an email via tutorial-support@scanbot.io.
Happy scanning! 🤳
