In this tutorial, we’ll use Flutter to build a cross-platform app for Android and iOS that scans documents and exports them as PDF files.
To implement the document scanning functionalities, PDF generation, and app UI, we’ll use the Scanbot Flutter Document Scanner SDK.
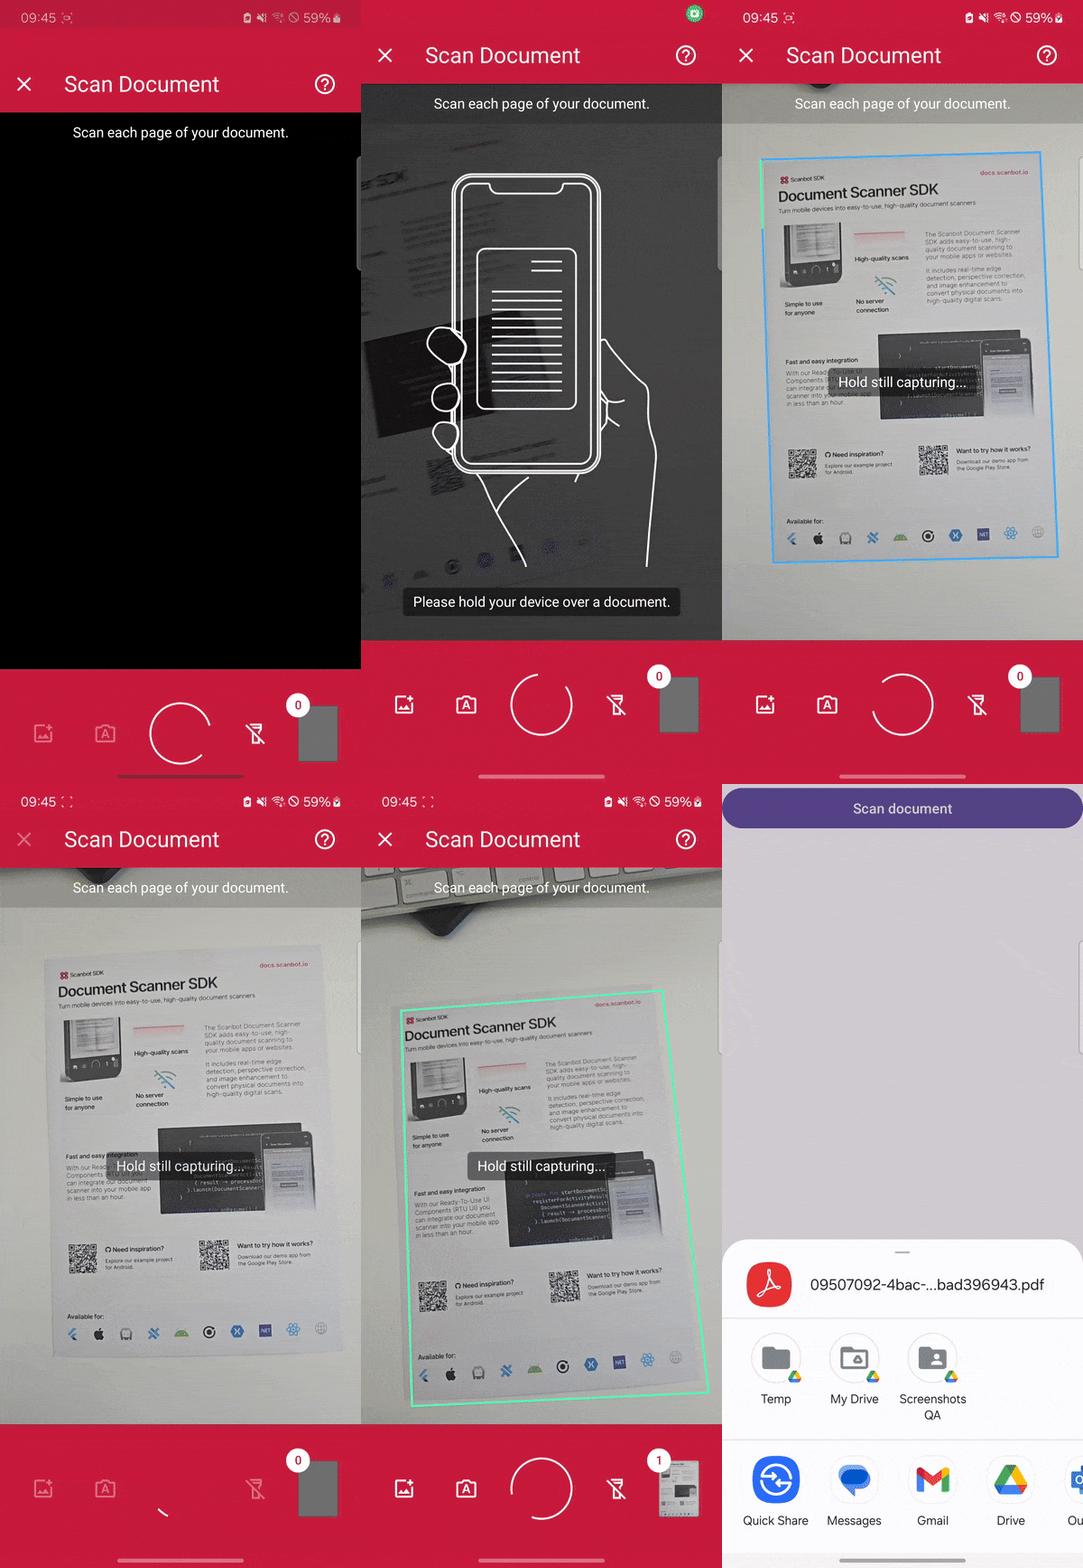
Building our app involves the following steps:
- Preparing the project
- Initializing the SDK
- Setting up the main widget
- Implementing the scanning feature
- Implementing the PDF export feature
Prerequisites
- Flutter SDK: Ensure you have the latest version installed.
- Development tools:
- For Android: Android Studio with the Android SDK.
- For iOS: macOS with the latest Xcode and CocoaPods installed.
- Optional: Visual Studio Code with the Flutter and Dart extensions.
Step 1: Prepare the project
1. Create a New Flutter Project
Open your terminal and execute:
flutter create document_scanner_app
cd document_scanner_app
2. Add the Scanbot SDK package
Open pubspec.yaml and add the scanbot_sdk dependency.
dependencies:
  flutter:
    sdk: flutter
  scanbot_sdk: ^7.0.1
Then, fetch the package.
flutter pub get💡 We use Document Scanner SDK version 7.0.1 in this tutorial. You can find the latest version in the changelog.
3. Configure Android-specific settings
We need to access the device camera to scan documents. Therefore, open android/app/src/main/AndroidManifest.xml and add the necessary permissions:
<uses-permission android:name="android.permission.CAMERA" />
<uses-feature android:name="android.hardware.camera" />
4. Configure iOS-specific settings
Now open ios/Runner/Info.plist and add:
<key>NSCameraUsageDescription</key>
<string>Grant camera access to scan documents.</string>
Step 2: Initialize the SDK
Before we can use the Scanbot Document Scanner SDK, we need to initialize it. Make sure to call the initialization after entering the main widget creation. This ensures the SDK is correctly initialized.
In lib/main.dart, import the Scanbot SDK package:
import 'package:scanbot_sdk/scanbot_sdk.dart';
import 'package:scanbot_sdk/scanbot_sdk_ui_v2.dart';
Within your main widget, initialize the Scanbot SDK. This is typically done in the initState method of your main widget’s state class:
class _MyHomePageState extends State<MyHomePage> {
  @override
  void initState() {
    super.initState();
    _initScanbotSdk();
  }

  Future<void> _initScanbotSdk() async {
    var config = ScanbotSdkConfig(
      licenseKey: "",
      loggingEnabled: true,
    );

    try {
      await ScanbotSdk.initScanbotSdk(config);
      print('Scanbot SDK initialized successfully');
    } catch (e) {
      print('Error initializing Scanbot SDK: $e');
    }
  }
  //...
💡 Without a license key, our SDK only runs for 60 seconds per session. This is more than enough for the purposes of our tutorial, but if you like, you can generate a license key using your app identifier.
Step 3: Set up the main widget
Next, we’ll create a simple user interface that includes a button to initiate the document scanning process. Still in lib/main.dart, and in your main widget’s state class, define a widget with a button labeled “Scan Document”:
class _MyHomePageState extends State<MyHomePage> {
  // ... (existing code)

  @override
  Widget build(BuildContext context) {
    return Scaffold(
      appBar: AppBar(
        title: Text('Document Scanner'),
      ),
      body: Center(
        child: ElevatedButton(
          onPressed: _startDocumentScanner,
          child: Text('Scan Document'),
        ),
      ),
    );
  }

  Future<void> _startDocumentScanner() async {
    // To be implemented in the next step
  }
}
Next, we’ll connect the button with our RTU UI’s scanning screen.
Step 4: Implement the scanning feature
Within the _startDocumentScanner method, configure and launch the Scanbot Document Scanner UI. This involves creating a DocumentScanningFlow configuration and starting the scanner:
class _MyHomePageState extends State<MyHomePage> {
  // ... (existing code)

    Future<void> _startDocumentScanner() async {
        var configuration = multiPageScanningFlow();
        var documentResult = await ScanbotSdkUiV2.startDocumentScanner(configuration);
        // Handle the document if the status is 'OK'
        if(documentResult.status == OperationStatus.OK) {
        }
    }

    DocumentScanningFlow multiPageScanningFlow() {
        // Create the default configuration object.
        var configuration = DocumentScanningFlow();

        // Customize text resources, behavior and UI:
        // ...

        return configuration;
        }
    }
In this tutorial, we use a default configuration object. It will start the Document Scanner UI with the default settings: in multi-page scanning mode with an acknowledge screen after scanning each page. You can customize the UI and behavior of the Document Scanner by modifying the configuration object. For more information on how to customize the Document Scanner UI, please refer to the RTU UI documentation.
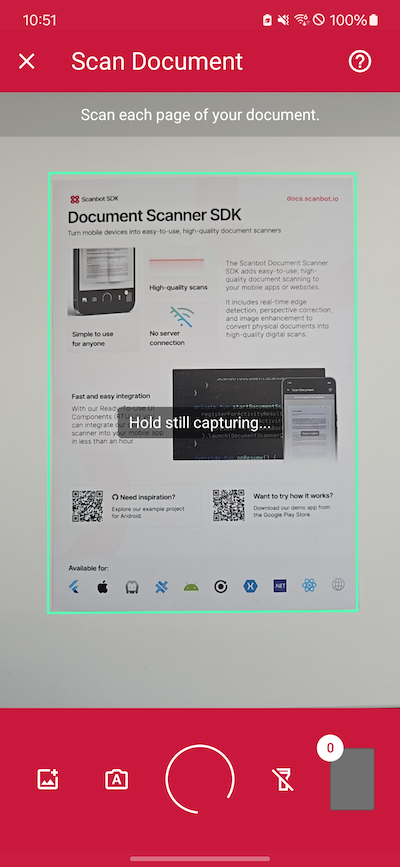
If you want, you can now run the app to try out the scanner without the PDF export feature.
Step 5: Implement the PDF export feature
Before implementing the export functionality, we need to add the share_plus dependency to pubspec.yaml and run flutter pub get once more.
dependencies:
  flutter:
    sdk: flutter
  scanbot_sdk: ^7.0.1
  share_plus: ^11.1.0
To enable users to scan documents, generate a PDF, and share it, we need to modify the _startDocumentScanner method. This method will first launch the document scanner, then process the scanned document to generate a PDF, and finally provide an option to share it.
Future<void> _startDocumentScanner() async {
    var configuration = multiPageScanningFlow();
    var documentResult = await ScanbotSdkUiV2.startDocumentScanner(
      configuration,
    );

    if (documentResult.status == OperationStatus.OK) {

      // Convert the scanned document into a PDF file
      var result = await ScanbotSdk.document.createPDFForDocument(
        PDFFromDocumentParams(
          documentID: documentResult.data!.uuid,
          pdfConfiguration: PdfConfiguration(
          pageSize: PageSize.A4,
          pageDirection: PageDirection.PORTRAIT
          )
        )
      );

      // Extract the PDF file URI and trigger the sharing process
      final pdfURI = result.pdfFileUri.replaceFirst("file://", "");
      await _sharePdf(pdfURI);
    }
  }

  // Method to share the generated PDF file
  Future<void> _sharePdf(String pdfURI) async {
    if (pdfURI.isEmpty) return;

    final file = File(pdfURI);
    if (!file.existsSync()) {
      ScaffoldMessenger.of(
        context,
      ).showSnackBar(SnackBar(content: Text("PDF file not found")));
      return;
    }

    // Locate the UI box to ensure proper sharing dialog positioning
    final box = context.findRenderObject() as RenderBox?;
    await Share.shareXFiles(
      [XFile(pdfURI)],
      text: "Share PDF file!",
      sharePositionOrigin: box!.localToGlobal(Offset.zero) & box.size,
    );
  }

  DocumentScanningFlow multiPageScanningFlow() {
    var configuration = DocumentScanningFlow();
    return configuration;
  }
Now you can share a scanned document as a PDF file and use it. For example, you can send it via email or save it to a cloud storage.

Conclusion
And that’s it! You’ve successfully integrated a fully functional document scanner into your app 🎉
If this tutorial has piqued your interest in integrating document scanning functionalities into your Flutter app, make sure to take a look at the other neat features in the Flutter Document Scanner SDK’s documentation – or run our example project for a more hands-on experience.
Should you have questions about this tutorial or run into any issues, we’re happy to help! Just shoot us an email via tutorial-support@scanbot.io.
Happy scanning! 🤳
