Integrating SSCC barcode scanning into an iOS, Android, or web app enhances supply chain traceability. We’ll look at how you can extract the data encoded in SSCC shipping labels to streamline your tracking and tracing processes.
What is an SSCC?
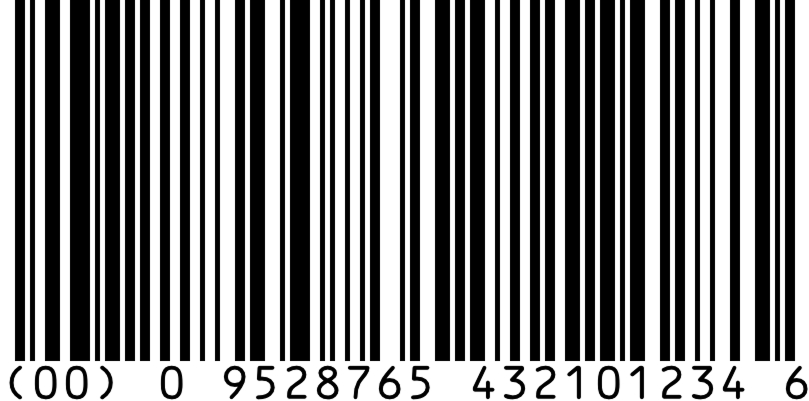
A Serial Shipping Container Code (SSCC) is a unique 18-digit identifier assigned to logistics units such as pallets, cartons, and containers. Owing to its length, it is also known as SSCC-18. It is typically printed on shipping labels in two formats: as a human-readable sequence of digits, and encoded in a barcode.
The latter is usually a GS1-128 barcode, though SSCCs can also be encoded in other barcode formats, such as GS1 DataMatrix or GS1 QR Code.
GS1-128 is a global standard used for encoding data on logistics labels. Its advantage is that apart from the SSCC, it can also encode additional information such as batch numbers and expiration dates. What makes this possible are the GS1 Application Identifiers (AIs).
This brings us to the structure of SSCCs.
How are SSCCs structured?
An SSCC barcode comprises several elements:
- Application Identifier (AI): The two-digit numeric prefix “(00)” indicates that the barcode contains an SSCC, with its specific data format and structure.
- Extension Digit: A number between 0–9 that helps differentiate multiple SSCCs assigned by the same manufacturer. In our example below, this is “0”.
- GS1 Company Prefix: A unique identification number between 4–12 digits, issued to companies by GS1. Our example shows “9528765”.
- Serial Reference Number: A unique number identifying individual logistics units – “432101234” in the example.
Check Digit: Used for error detection within the SSCC number, thus ensuring data accuracy. In the example, this is “6”.

What is an SSCC barcode used for?
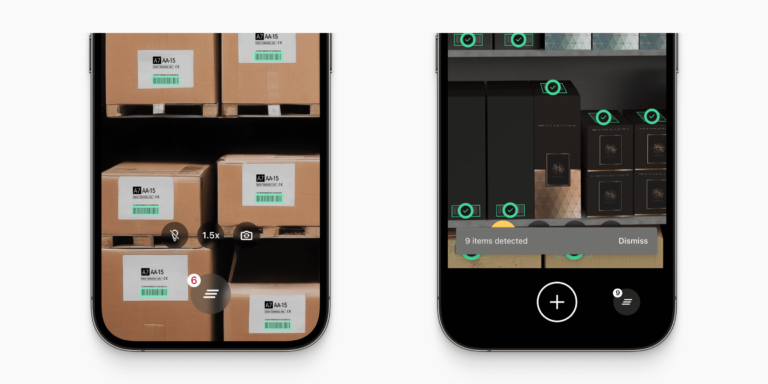
Typically, these barcodes are printed alongside the human-readable SSCC on GS1 shipping labels. These labels are then attached to a shipping unit, often a pallet. GS1 recommends attaching two identical labels to adjacent sides of the shipping unit.
The purpose of SSCC barcodes is to enhance the end-to-end traceability of whole units throughout the supply chain. But how does this system work in practice?
SSCC data is initially shared by the creator of the unit with all supply chain stakeholders via an Electronic Data Interchange (EDI) system. This provides them with detailed information about the contents, quantities, and SSCCs of the arriving pallets.
Later, SSCC barcodes are scanned at every step of the unit’s lifecycle, from manufacturing to shipping to its final destination, e.g., a retail store. Each scan updates the unit’s status in real time, establishing a clear record of its journey and current location.
Furthermore, this allows stakeholders to instantly match the data received via EDI with that contained in the scanned SSCCs. All in all, SSCC scanning ensures shipment accuracy, streamlines receiving processes, and updates inventory systems automatically.
How to build an SSCC scanner web app in just a few steps
Creating a browser-based barcode scanner that can parse the data encoded in SSCC barcodes is straightforward. In this example, we’ll implement an SSCC scanner in a single stand-alone HTML file you can run on your server.
To achieve this, we’ll use plain JavaScript and the Scanbot Web Barcode Scanner SDK. We’re going to follow these steps:
- Setting up the barcode scanner
- Optimizing the scanner for GS1-128 barcodes
- Implementing SSCC handling

Let’s get started!
Step 1: Set up the barcode scanner
In your project folder, create an index.html with some boilerplate code.
<!DOCTYPE html>
<html lang="en">
    <head>
        <meta charset="UTF-8" />
        <meta
            name="viewport"
            content="width=device-width, initial-scale=1.0, maximum-scale=1.0, user-scalable=0"
        />
        <title>SSCC Barcode Scanner</title>
    </head>
    <body>
    </body>
</html>
To set up our barcode scanner, we’ll have to do the following:
- Create a button that calls up the scanning interface when clicked.
- Include a
<p>element on the page for displaying the scanning result. - Import the Scanbot Web SDK using a CDN.
- Process the scan result before displaying it on the page.
⚠️ In this tutorial, we’re importing the SDK via jsDelivr. However, you should only do this for quick prototyping. In your production environment, please download the Web SDK directly (or install it via npm) and include its files in your project.
Your index.html will look something like this:
<!DOCTYPE html>
<html lang="en">
    <head>
        <meta charset="UTF-8" />
        <meta
            name="viewport"
            content="width=device-width, initial-scale=1.0, maximum-scale=1.0, user-scalable=0"
        />
        <title>SSCC Barcode Scanner</title>
    </head>

    <body style="margin: 0">
        <button id="start-scanning">Start scanning</button>
        <p id="result"></p>
        <script type="module">
            import "https://cdn.jsdelivr.net/npm/scanbot-web-sdk@7.0.0/bundle/ScanbotSDK.ui2.min.js";
            const sdk = await ScanbotSDK.initialize({
                enginePath:
                    "https://cdn.jsdelivr.net/npm/scanbot-web-sdk@7.0.0/bundle/bin/barcode-scanner/",
            });
            document
                .getElementById("start-scanning")
                .addEventListener("click", async () => {

                    const config =
                        new ScanbotSDK.UI.Config.BarcodeScannerScreenConfiguration();

                    const scanResult = await ScanbotSDK.UI.createBarcodeScanner(config);
                    if (scanResult?.items?.length > 0) {
                        document.getElementById("result").innerText = scanResult.items[0].barcode.text;
                    } else {
                        document.getElementById("result").innerText = "Scanning aborted by the user";
                    }
                });
        </script>
    </body>
</html>
💡 We use Web Barcode Scanner SDK version 7.0.0 in this tutorial. You can find the latest version in the changelog.
This already provides us with a fully functional barcode scanner – although we still have to adjust it a bit to make it better suited for SSCC barcodes. Let’s do that now.
Step 2: Optimize the scanner for GS1-128 barcodes
SSCC barcodes use GS1-128, which is the Code 128 symbology combined with the GS1 standard. But as it is now, our scanner will read any barcode type. Restricting it to scanning only Code 128 barcodes prevents unintended scans and improves the scanner’s performance, as it doesn’t need to check each supported symbology.
So let’s restrict scanning to the Code 128 symbology by modifying the BarcodeScannerScreenConfiguration we assigned to the config constant in the previous step.
config.scannerConfiguration.barcodeFormats = ["CODE_128"]Right now, scanning a GS1-standardized barcode with our app would output the encoded data without the special characters signaling the so-called application identifiers specified in the GS1 standard. We can change this by setting the scanner configuration’s gs1Handling property to "DECODE_FULL" (more about that in the SDK’s API documentation).
config.scannerConfiguration.gs1Handling = ScanbotSDK.Config.Gs1HandlingValues[4]If you want, you can also change the viewfinder’s aspect ratio. It’s square by default, but since SSCC barcodes come in a horizontal format, it makes sense to also convey this in our scanning interface. This is mainly a cosmetic change, but do keep in mind that only barcodes located inside the viewfinder will be scanned.
config.viewFinder.aspectRatio.height = 1;
config.viewFinder.aspectRatio.width = 2;
The result looks like this:
<!-- Existing code -->
document
    .getElementById("start-scanning")
    .addEventListener("click", async () => {
        const config =
            new ScanbotSDK.UI.Config.BarcodeScannerScreenConfiguration();
        config.scannerConfiguration.barcodeFormats = ["CODE_128"]
        config.viewFinder.aspectRatio.height = 1;
        config.viewFinder.aspectRatio.width = 2;

        const scanResult = await ScanbotSDK.UI.createBarcodeScanner(config);

        if (scanResult?.items?.length > 0) {
            document.getElementById("result").innerText = scanResult.items[0].barcode.text;
        } else {
            document.getElementById("result").innerText = "Scanning aborted by the user";
        }
    });
💡 To test your web app on your phone, you have a few options. One option is to use a service like ngrok, which creates a tunnel to one of their SSL-certified domains. Their Quick Start guide will help you get up and running quickly.
Step 3: Implement SSCC handling
Finally, we need to configure our app to look for application identifiers and the corresponding values in the returned scanResult object. We can do that with the following code:
if (scanResult?.items?.length > 0) {
    if (scanResult.items[0].barcode.isGS1Message) {
        const data = scanResult.items[0].barcode.extractedDocument;
        if (!data?.children?.length) {
            document.getElementById("result").innerText = "";
            return;
        }

        const results = data.children
            .map((child) => {
                const fields = child.fields;
                if (!fields?.length) return undefined;

                const dataSet = { label: "", value: "" };

                for (const field of fields) {
                    const typeName = field.type?.name;
                    const text = field.value?.text || "";

                    if (typeName === "ElementDescription") {
                        dataSet.label = text;
                    } else if (typeName === "RawValue") {
                        dataSet.value = text;
                    }
                }

                return dataSet;
            })
            .filter((field) => field !== undefined);

        if (!results.length) {
            document.getElementById("result").innerText = "";
            return;
        }

        document.getElementById("result").innerText = results
            .map((item) => `${item.label}: ${item.value}\n`)
            .join("\n");
    } else {
        document.getElementById("result").innerText = "No application identifiers found";
    }
} else {
    document.getElementById("result").innerText = "Scanning aborted by the user";
}
With these changes, our final index.html looks like this:
<!DOCTYPE html>
<html lang="en">

<head>
    <meta charset="UTF-8" />
    <meta name="viewport" content="width=device-width, initial-scale=1.0, maximum-scale=1.0, user-scalable=0" />
    <title>SSCC Barcode Scanner</title>
</head>

<body style="margin: 0">
    <button id="start-scanning">Start scanning</button>
    <p id="result"></p>
    <script type="module">
        import "https://cdn.jsdelivr.net/npm/scanbot-web-sdk@7.0.0/bundle/ScanbotSDK.ui2.min.js";
        const sdk = await ScanbotSDK.initialize({
            enginePath:
                "https://cdn.jsdelivr.net/npm/scanbot-web-sdk@7.0.0/bundle/bin/barcode-scanner/",
        });
        document
            .getElementById("start-scanning")
            .addEventListener("click", async () => {
                const config =
                    new ScanbotSDK.UI.Config.BarcodeScannerScreenConfiguration();

                config.scannerConfiguration.barcodeFormats =
                    ["CODE_128"]

                config.scannerConfiguration.gs1Handling = ScanbotSDK.Config.Gs1HandlingValues[4]

                config.viewFinder.aspectRatio.height = 1;
                config.viewFinder.aspectRatio.width = 2;

                const scanResult = await ScanbotSDK.UI.createBarcodeScanner(config);

                if (scanResult?.items?.length > 0) {
                    if (scanResult.items[0].barcode.isGS1Message) {
                        const data = scanResult.items[0].barcode.extractedDocument;
                        if (!data?.children?.length) {
                            document.getElementById("result").innerText = "";
                            return;
                        }

                        const results = data.children
                            .map((child) => {
                                const fields = child.fields;
                                if (!fields?.length) return undefined;

                                const dataSet = { label: "", value: "" };

                                for (const field of fields) {
                                    const typeName = field.type?.name;
                                    const text = field.value?.text || "";

                                    if (typeName === "ElementDescription") {
                                        dataSet.label = text;
                                    } else if (typeName === "RawValue") {
                                        dataSet.value = text;
                                    }
                                }

                                return dataSet;
                            })
                            .filter((field) => field !== undefined);

                        if (!results.length) {
                            document.getElementById("result").innerText = "";
                            return;
                        }

                        document.getElementById("result").innerText = results
                            .map((item) => `${item.label}: ${item.value}\n`)
                            .join("\n");
                    } else {
                        document.getElementById("result").innerText = "No application identifiers found";
                    }
                } else {
                    document.getElementById("result").innerText = "Scanning aborted by the user";
                }
            });
    </script>
</body>

</html>
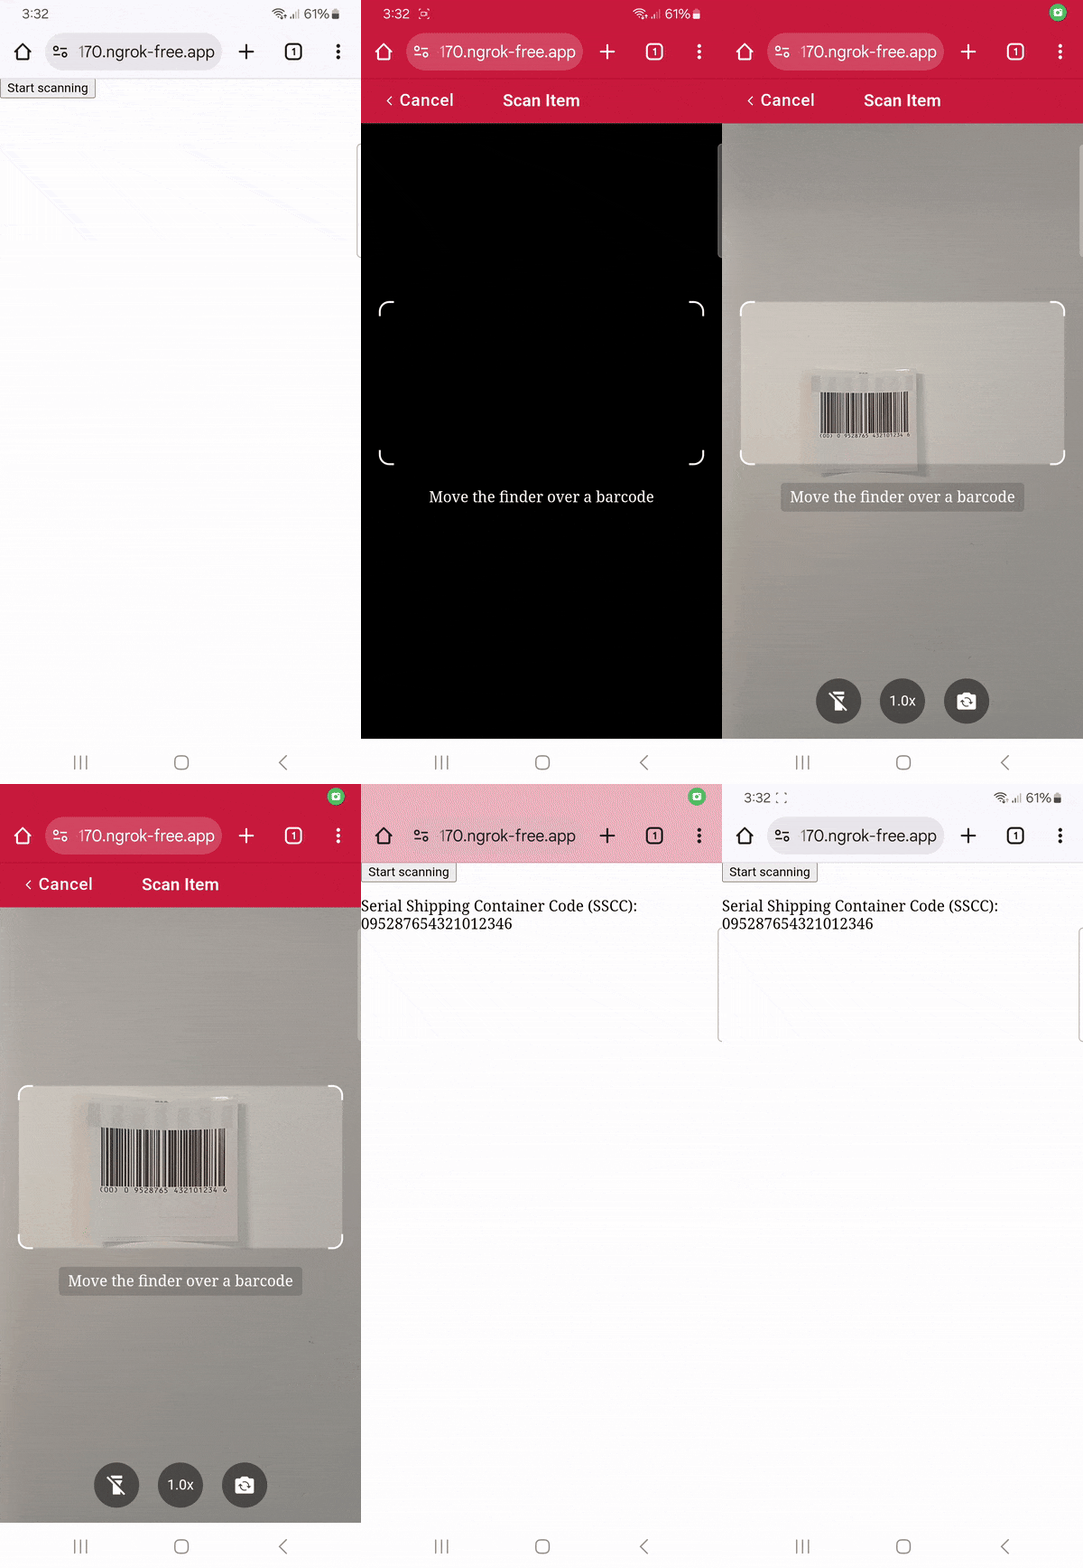
Now run the app and scan a SSCC barcode …

… to test your scanner!

You can run the Scanbot SDK from your project for 60 seconds per session without a license. For more in-depth testing, we recommend you generate a free trial license.
Streamline workflows with a mobile SSCC scanner – get started today
With the Scanbot GS1-128 Barcode Scanner SDK, you can scan SSCCs with any ordinary smartphone or tablet. The data is returned in key-value pairs, ideal for automatic processing. For instance, when workers scan pallets upon arrival in the warehouse, the label information can be automatically cross-referenced with data from the EDI.
Scanbot SDK’s barcode scanning software is designed to handle the demanding conditions of each supply chain stage.
The software uses the device’s camera and advanced computer vision technology to ensure accurate scanning even of scratched, distorted, poorly printed, or blurry barcodes.
As the SDK uses on-device processing and thus works entirely offline, it can even be used where network connectivity is spotty. Data can then simply be transmitted as soon as connectivity is restored.
At the same time, there is neither usage nor device tracking. For this reason, the SDK comes at a flat annual fee in a fixed-price model.
Do you want to learn more about the SDK? Our experts are always happy to chat. Simply message us at sdk@scanbot.io.


