In this tutorial, we’ll create a web app for scanning documents and exporting them as PDF files using React. We’ll set up our project with Vite and write the app in TypeScript. For the actual document scanning functionalities and app UI, we’ll use the Scanbot Web Document Scanner SDK.
We’ll create our app by following these steps:
- Setting up the project
- Initializing the SDK
- Configuring the document scanner
- Implementing the PDF export feature
Let’s get started!
Want to see the final code right away? Click here.
App.tsx:
import { useEffect, useState } from "react";
import ScanbotSDK from 'scanbot-web-sdk/ui';
import { DocumentScannerUIResult, PdfConfiguration } from "scanbot-web-sdk/@types";

const App = () => {
    // State to store our scanning result
    const [scanResult, setScanResult] = useState<DocumentScannerUIResult | null>(null);

    // Initialize the SDK when the component mounts
    useEffect(() => {
        const init = async () => {
            try {
                await ScanbotSDK.initialize({
                    licenseKey: "",  // Empty for 60-second trial mode
                    enginePath: "/wasm/"
                });
            } catch (error) {
                console.error("Failed to initialize Scanbot SDK:", error);
            }
        };

        init();
    }, []);

    // Function to launch the document scanner UI
    const runDocumentScanner = async () => {
        try {
            const config = new ScanbotSDK.UI.Config.DocumentScanningFlow();

            const result = await ScanbotSDK.UI.createDocumentScanner(config);

            if (result) {
                setScanResult(result);
            }

            return result;
        } catch (error) {
            console.error("Error during document scanning:", error);
        }
    }

    // Helper function to download the PDF file
    const exportPdf = async (documentData: ArrayBuffer) => {
        const a = document.createElement("a");
        document.body.appendChild(a);
        a.style.display = "none";
        const blob = new Blob([documentData], {type: 'application/pdf'});
        const url = window.URL.createObjectURL(blob);
        a.href = url;
        a.download = 'Scanbot-Web-Document-Tutorial.pdf';
        a.click();
        window.URL.revokeObjectURL(url);
        document.body.removeChild(a);
    }

    // Function to handle the PDF export process
    const handleDocumentExport = async () => {
        if (!scanResult) return;

        try {
            const options: Partial<PdfConfiguration> = {
                pageSize: "A4",
                pageDirection: "PORTRAIT",
                pageFit: "FIT_IN",
                dpi: 72,
                jpegQuality: 80
            }

            const document = await scanResult.document.createPdf(options);
            await exportPdf(document);
        } catch (error) {
            console.error("Error exporting PDF:", error);
        }
    }

    return (
        <div>
            <button onClick={runDocumentScanner}>Run Scanner</button>
            {scanResult && <button onClick={handleDocumentExport}>Export PDF</button>}
        </div>
    );
}

export default App;
Step 1: Set up the project
We’ll be using Vite to set up our project. Vite is a modern build tool optimized for speed and performance.
Open a terminal and create a new Vite project with the following command:
npm create vite@latestYou will be asked to name your project. For this tutorial, let’s go with “scanbot-react-doc-tut”.
Then, when prompted to select a framework, choose React and select TypeScript as the variant.
Now run:
cd scanbot-react-doc-tut
npm install
npm run dev
Open src/App.tsx and replace the file’s contents with the following:
const App = () => {
  return <></>;
};

export default App;
Step 2: Initialize the SDK
Open another terminal, navigate to your project folder, and install the Scanbot Web SDK package with the following command:
npm i scanbot-web-sdkThe SDK contains WebAssembly binaries that should be hosted on your server. We ship these binaries with the npm package. Since Node.js doesn’t copy the binaries to the target automatically, you need to manually copy them to the desired destination (we recommend the public asset directory).
You can quickly copy them from node_modules to a folder called wasm in the public asset directory using the following command:
mkdir -p public/wasm && cp -r node_modules/scanbot-web-sdk/bundle/bin/complete/* public/wasm💡 To ensure these files are always copied to the same directory for all users and updated when the SDK itself is updated, you can add the command as a post-installation script to your package.json:
"postinstall": "mkdir -p public/wasm && cp -r node_modules/scanbot-web-sdk/bundle/bin/complete/* public/wasm"Now we can initialize ScanbotSDK within App.tsx. You have the option of leaving the licenseKey empty to use a trial mode that works for 60 seconds per session or getting a free 7-day trial by submitting the trial license form on our website.
Step 3: Configure the document scanner
First, we’ll need to create the configuration that we’ll use for the document scanner in App.tsx.
To create the configuration, we can call a method that returns an instance of the configuration object, which we can then modify as needed.
const config = new ScanbotSDK.UI.Config.DocumentScanningFlow();This config object will be what we use to make changes to the RTU UI. However, for now, let’s just use it to create our document scanner.
await ScanbotSDK.UI.createDocumentScanner(config);Now, let’s assign the scanner to a variable and wrap it within an asynchronous function so we can easily assign it to a button within our App. This allows us to easily trigger the scanner with a button press in our application.
Let’s name the variable “result”, since it will store the outcome returned by runDocumentScanner.
const runDocumentScanner = async () => {
    const config = new ScanbotSDK.UI.Config.DocumentScanningFlow();

    const result = await ScanbotSDK.UI.createDocumentScanner(config);

    return result;
}
To trigger the scanner with a button press, we add a button to our React component and assign the runDocumentScanner function to its onClick event.
return (
    <div>
        <button onClick={runDocumentScanner}>Run Scanner</button>
    </div>
);
Our App.tsx should now look like this:
import { useEffect } from "react";
import ScanbotSDK from 'scanbot-web-sdk/ui';

const App = () => {
    useEffect(() => {
        const init = async () => {
            await ScanbotSDK.initialize({
                licenseKey: "",
                enginePath: "/wasm/"
            });
        };

        init();
    }, []);

    const runDocumentScanner = async () => {
        const config = new ScanbotSDK.UI.Config.DocumentScanningFlow();

        const result = await ScanbotSDK.UI.createDocumentScanner(config);

        return result;
    }

    return (
        <div>
            <button onClick={runDocumentScanner}>Run Scanner</button>
        </div>
    );
}

export default App;
You can now run the app to check that everything works as expected.
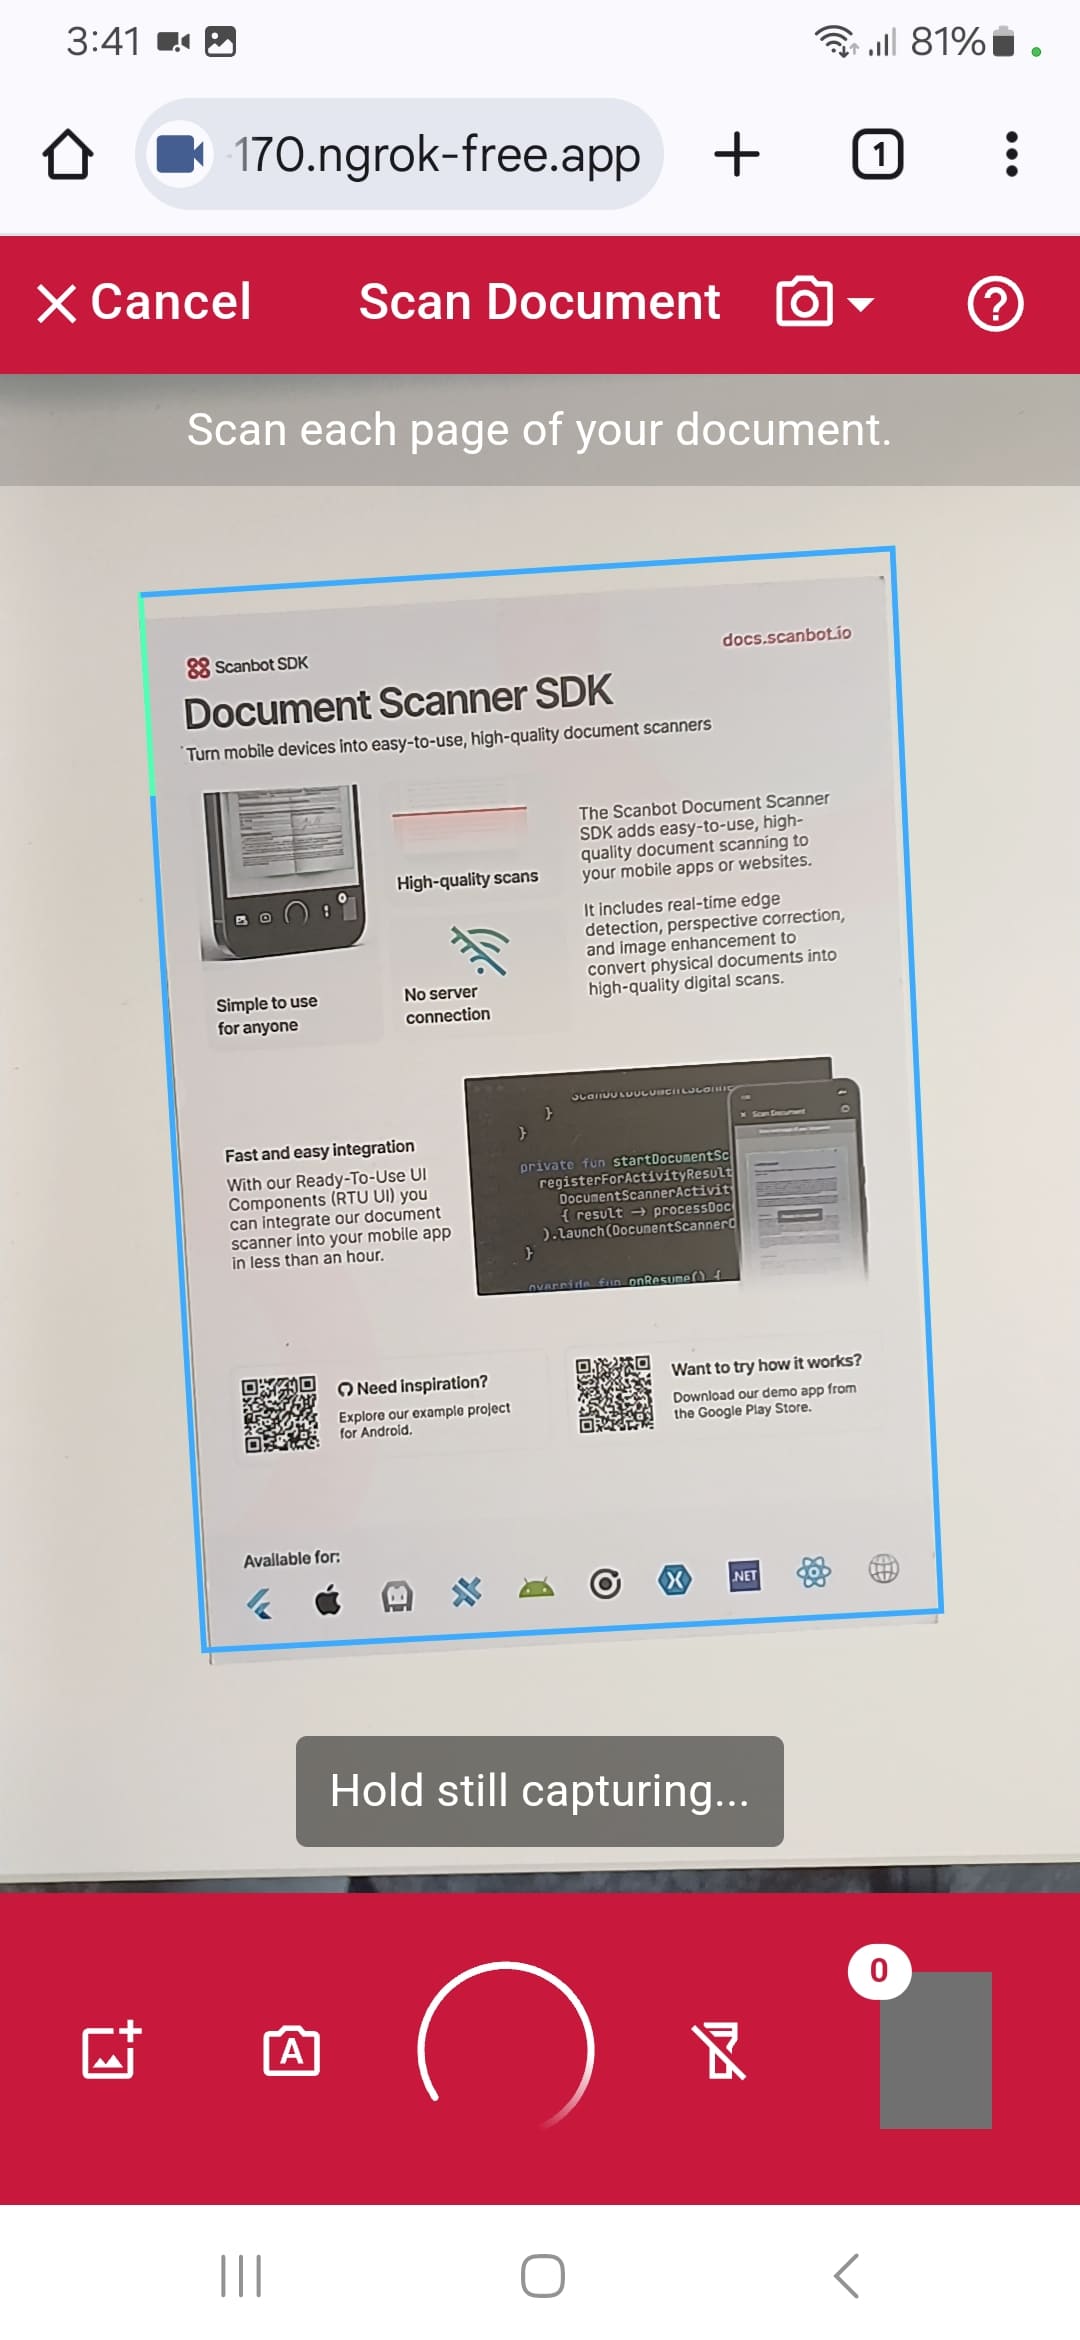
💡 To test your web app on your phone, you have a few options. One option is to use a service like ngrok, which creates a tunnel to one of their SSL-certified domains. Their Quick Start guide will help you get up and running quickly.
Currently, you cannot do anything with the scanned pages, so let’s change that!
Step 4: Implement the PDF export feature
Let’s start by adding a state to store the scanned document.
import { useEffect, useState } from "react";
import ScanbotSDK from 'scanbot-web-sdk/ui';
import { DocumentScannerUIResult } from "scanbot-web-sdk/@types";

const [scanResult, setScanResult] = useState<DocumentScannerUIResult | null>(null);
Then we can set the value of scanResult in our runDocumentScanner function when the scanning results are returned. We’ll also add some basic error handling.
const runDocumentScanner = async () => {
    try {
        const config = new ScanbotSDK.UI.Config.DocumentScanningFlow();
        const result = await ScanbotSDK.UI.createDocumentScanner(config);

        if (result) {
            setScanResult(result);
        }

        return result;
    } catch (error) {
        console.error("Error during document scanning:", error);
    }
}
Now that we have our document stored, we can use the SDK’s built-in createPdf method to generate the PDF.
The createPdf method of the SDK allows you to pass options (all of which can be seen here) to customize your PDF. Then, we just need to add a helper function to allow us to download the file.
First, let’s import the necessary PDF configuration type.
import { PdfConfiguration } from "scanbot-web-sdk/@types";Now, let’s create our export functions.
const handleDocumentExport = async () => {
    if (!scanResult) return;

    try {
        const options: Partial<PdfConfiguration> = {
            pageSize: "A4",
            pageDirection: "PORTRAIT",
            pageFit: "FIT_IN",
            dpi: 72,
            jpegQuality: 80
        }

        const document = await scanResult.document.createPdf(options);
        await exportPdf(document);
    } catch (error) {
        console.error("Error exporting PDF:", error);
    }
}

const exportPdf = async (documentData: ArrayBuffer) => {
    const a = document.createElement("a");
    document.body.appendChild(a);
    a.style.display = "none";
    const blob = new Blob([documentData], {type: 'application/pdf'});
    const url = window.URL.createObjectURL(blob);
    a.href = url;
    a.download = 'Scanbot-Web-Document-Tutorial.pdf';
    a.click();
    window.URL.revokeObjectURL(url);
    document.body.removeChild(a);
}
Finally, we need to add a button to trigger the download to our page. We’ll only show this button once a document has been scanned.
return (
    <div>
        <button onClick={runDocumentScanner}>Run Scanner</button>
        {scanResult && <button onClick={handleDocumentExport}>Export PDF</button>}
    </div>
);
Our final app looks like this:
import { useEffect, useState } from "react";
import ScanbotSDK from 'scanbot-web-sdk/ui';
import { DocumentScannerUIResult, PdfConfiguration } from "scanbot-web-sdk/@types";

const App = () => {
    // State to store our scanning result
    const [scanResult, setScanResult] = useState<DocumentScannerUIResult | null>(null);

    // Initialize the SDK when the component mounts
    useEffect(() => {
        const init = async () => {
            try {
                await ScanbotSDK.initialize({
                    licenseKey: "",  // Empty for 60-second trial mode
                    enginePath: "/wasm/"
                });
            } catch (error) {
                console.error("Failed to initialize Scanbot SDK:", error);
            }
        };

        init();
    }, []);

    // Function to launch the document scanner UI
    const runDocumentScanner = async () => {
        try {
            const config = new ScanbotSDK.UI.Config.DocumentScanningFlow();

            const result = await ScanbotSDK.UI.createDocumentScanner(config);

            if (result) {
                setScanResult(result);
            }

            return result;
        } catch (error) {
            console.error("Error during document scanning:", error);
        }
    }

    // Helper function to download the PDF file
    const exportPdf = async (documentData: ArrayBuffer) => {
        const a = document.createElement("a");
        document.body.appendChild(a);
        a.style.display = "none";
        const blob = new Blob([documentData], {type: 'application/pdf'});
        const url = window.URL.createObjectURL(blob);
        a.href = url;
        a.download = 'Scanbot-Web-Document-Tutorial.pdf';
        a.click();
        window.URL.revokeObjectURL(url);
        document.body.removeChild(a);
    }

    // Function to handle the PDF export process
    const handleDocumentExport = async () => {
        if (!scanResult) return;

        try {
            const options: Partial<PdfConfiguration> = {
                pageSize: "A4",
                pageDirection: "PORTRAIT",
                pageFit: "FIT_IN",
                dpi: 72,
                jpegQuality: 80
            }

            const document = await scanResult.document.createPdf(options);
            await exportPdf(document);
        } catch (error) {
            console.error("Error exporting PDF:", error);
        }
    }

    return (
        <div>
            <button onClick={runDocumentScanner}>Run Scanner</button>
            {scanResult && <button onClick={handleDocumentExport}>Export PDF</button>}
        </div>
    );
}

export default App;
Now run the app again to test the PDF export feature.

Conclusion
🎉 Congratulations! You can now scan documents from your browser and export them as PDFs!
If this tutorial has piqued your interest in integrating document scanning functionalities into your web app or website, make sure to take a look at our SDK’s other neat features in our documentation – or run our example project for a more hands-on experience.
Integration guides are also available for the following Web frameworks:
Should you have questions about this tutorial or run into any issues, we’re happy to help! Just shoot us an email via tutorial-support@scanbot.io.
Happy scanning! 🤳
