In this tutorial, we’ll use Jetpack Compose, a declarative UI framework using Kotlin, and the Scanbot Android Barcode Scanner SDK to create a simple barcode scanning app in Android Studio.
We’ll implement three different scanning modes: scanning one barcode at a time, multiple barcodes at once, and displaying the barcode values in the viewfinder using the SDK’s AR overlay.
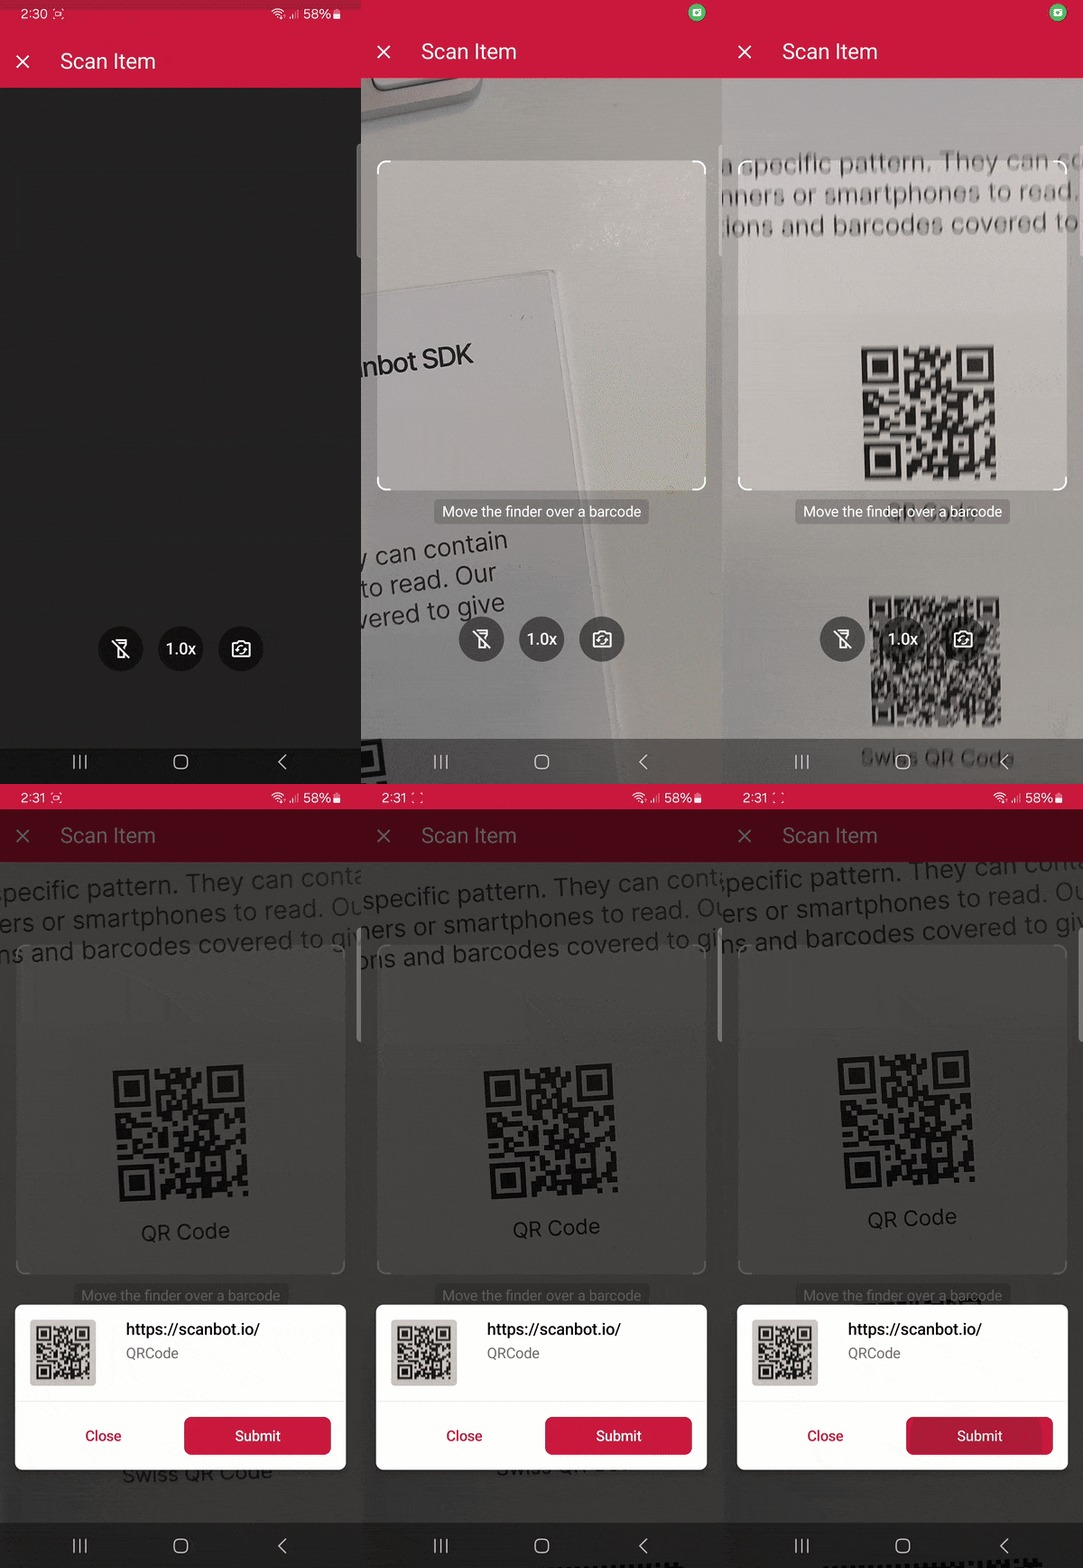
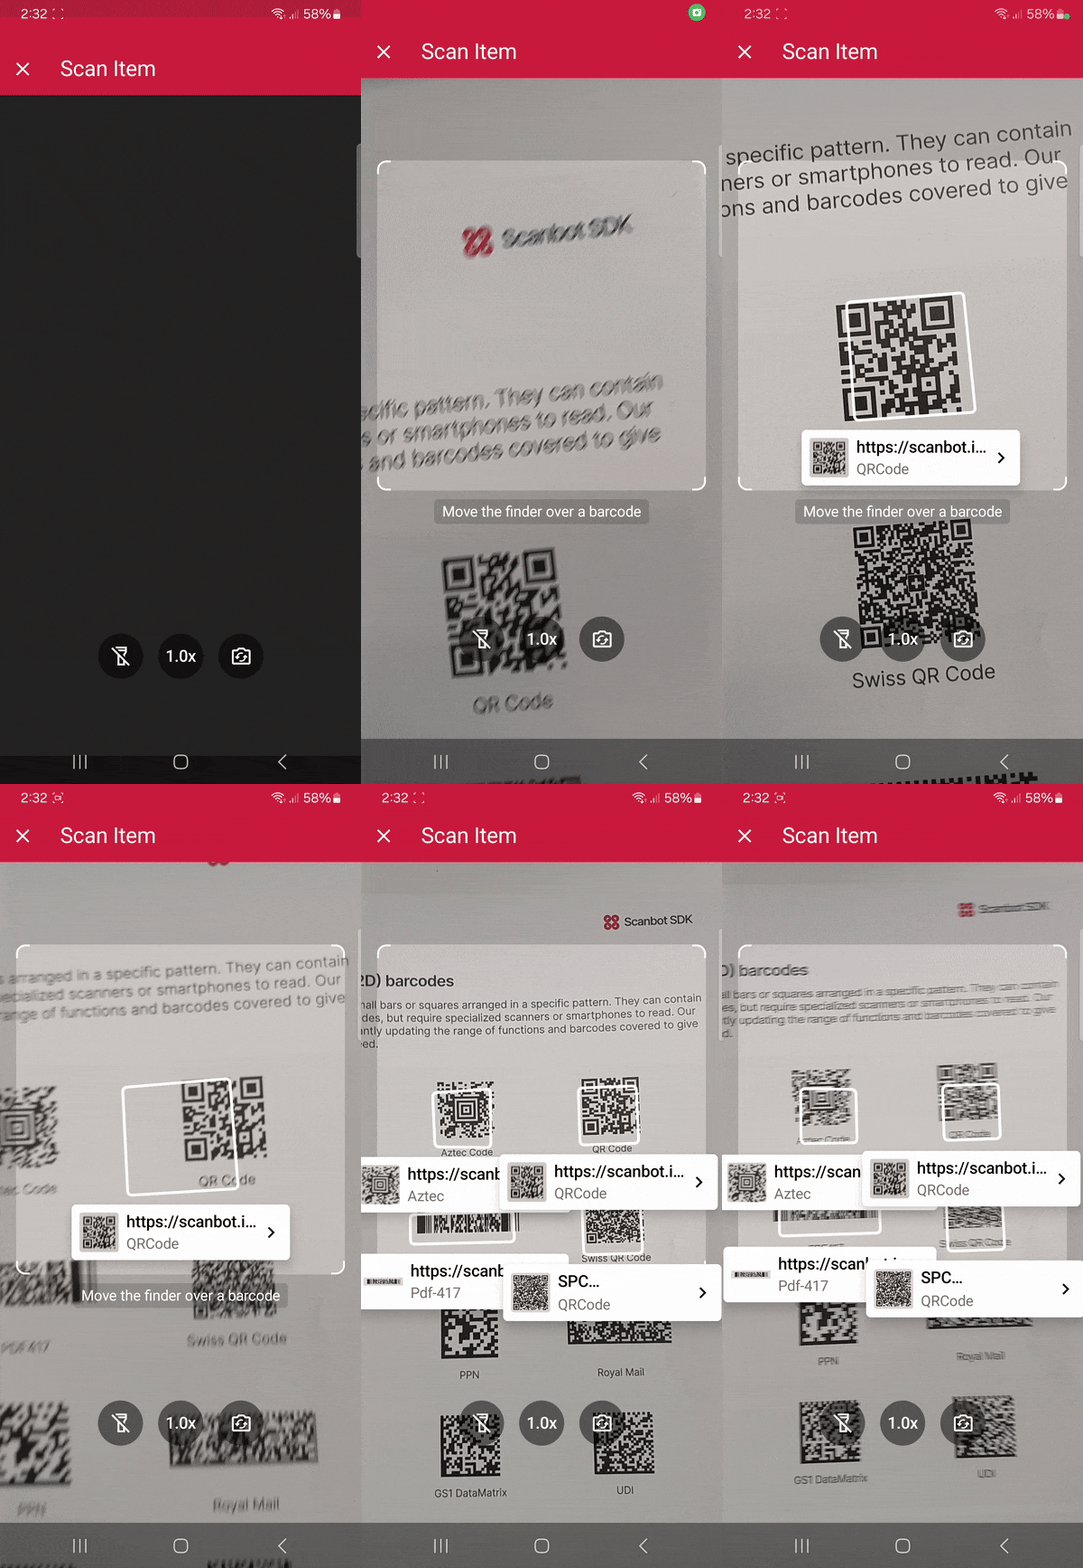
We’ll achieve this in five steps:
- Prepare the project
- Initialize the SDK
- Set up the main screen
- Implement the scanning modes
- Scan some barcodes!
All you need is the latest version of Android Studio and you’re good to go.
Step 1: Preparing the project
Open Android Studio, create a new Empty Activity project, and name it (e.g., “Compose Barcode Scanner”).
When your project is ready, go to settings.gradle.kts and add the Maven repositories for our SDK:
dependencyResolutionManagement {
    repositoriesMode.set(RepositoriesMode.FAIL_ON_PROJECT_REPOS)
    repositories {
        google()
        mavenCentral()

        // Add the repositories here:
        maven(url = "https://nexus.scanbot.io/nexus/content/repositories/releases/")
        maven(url = "https://nexus.scanbot.io/nexus/content/repositories/snapshots/")
    }
}
Now go to app/build.gradle.kts and add the dependencies for the Scanbot SDK and the RTU UI:
dependencies {
    implementation("io.scanbot:scanbot-barcode-scanner-sdk:6.1.0")
    implementation("io.scanbot:rtu-ui-v2-barcode:6.1.0")
Sync the project.
💡 We’re using version 6.1.0 of the Scanbot Barcode Scanner SDK in this tutorial. You can find the latest version in the changelog.
Since we need to access the device camera to scan barcodes, let’s also add the necessary permissions in AndroidManifest.xml:
<?xml version="1.0" encoding="utf-8"?>
<manifest xmlns:android="http://schemas.android.com/apk/res/android"
    xmlns:tools="http://schemas.android.com/tools">

    <uses-permission android:name="android.permission.CAMERA" />
    <uses-feature android:name="android.hardware.camera" />

    <application
    ...
Step 2: Initializing the SDK
Before we can use the Scanbot Barcode Scanner SDK, we need to initialize it. The recommended approach is to do it in your Application implementation. This ensures the SDK is correctly initialized even when the app’s process is restored after being terminated in the background.
First, we need to create an Application subclass by right-clicking on the folder app/kotlin+java/com.example.composebarcodescanner, selecting New > Kotlin Class/File, and naming it (e.g. “ExampleApplication”).
In the resulting ExampleApplication.kt, let’s first add the necessary imports:
import android.app.Application
import io.scanbot.sdk.barcode_scanner.ScanbotBarcodeScannerSDKInitializer
Then we make ExampleApplication extend the Application class by adding : Application() and put the code for initializing the SDK inside it:
class ExampleApplication : Application() {

    override fun onCreate() {
        super.onCreate()

        ScanbotBarcodeScannerSDKInitializer()
            // Optional: uncomment the next line if you have a license key.
            // .license(this, LICENSE_KEY)
            .initialize(this)
    }
}
💡 Without a license key, our SDK only runs for 60 seconds per session. This is more than enough for the purposes of our tutorial, but if you like, you can generate a license key. Just make sure to change your applicationId in app/build.gradle.kts to io.scanbot.androidbarcodescanner and use that ID for generating the license.
Finally, we need to register the Example Application class in AndroidManifest.xml:
<application
   android:name=".ExampleApplication"
   ...
Step 3: Setting up the main screen
Now we’re going to build a rudimentary UI so we can quickly access the different scanning modes in our finished app.
For this tutorial, we’re going to go with a simple three-button layout.
Since the Compose template has already put a composable into MainActivity.kt, we’ll just replace the contents of MainActivity.kt with the following code, which includes the three buttons and the corresponding listeners:
package com.example.composebarcodescanner // replace package name if necessary

import android.os.Bundle
import androidx.activity.ComponentActivity
import androidx.activity.compose.setContent
import androidx.activity.enableEdgeToEdge
import androidx.compose.foundation.layout.Column
import androidx.compose.foundation.layout.fillMaxSize
import androidx.compose.foundation.layout.fillMaxWidth
import androidx.compose.foundation.layout.padding
import androidx.compose.material3.Scaffold
import androidx.compose.material3.Text
import androidx.compose.material3.TextButton
import androidx.compose.runtime.Composable
import androidx.compose.ui.Modifier
import androidx.compose.ui.tooling.preview.Preview
import com.example.composebarcodescanner.ui.theme.ComposeBarcodeScannerTheme // replace package name if necessary

class MainActivity : ComponentActivity() {
    override fun onCreate(savedInstanceState: Bundle?) {
        super.onCreate(savedInstanceState)
        enableEdgeToEdge()
        setContent {
            ComposeBarcodeScannerTheme {
                Scaffold(modifier = Modifier.fillMaxSize()) { innerPadding ->
                    BarcodeScannerModes(
                        modifier = Modifier.padding(innerPadding),
                        openSingleBarcodeScanning = {
                            // TODO: We will implement this later
                        },
                        openMultiBarcodeScanning = {
                            // TODO: We will implement this later
                        },
                        openArOverlay = {
                            // TODO: We will implement this later
                        },
                    )
                }
            }
        }
    }
}

@Composable
fun BarcodeScannerModes(
    modifier: Modifier = Modifier,
    openSingleBarcodeScanning: () -> Unit = { },
    openMultiBarcodeScanning: () -> Unit = { },
    openArOverlay: () -> Unit = { }
) {
    Column(modifier = modifier) {
        TextButton(onClick = openSingleBarcodeScanning, modifier = Modifier.fillMaxWidth()) {
            Text("Single-barcode scanning")
        }
        TextButton(onClick = openMultiBarcodeScanning, modifier = Modifier.fillMaxWidth()) {
            Text("Multi-barcode scanning")
        }
        TextButton(onClick = openArOverlay, modifier = Modifier.fillMaxWidth()) {
            Text("AR overlay")
        }
    }
}

@Preview(showBackground = true)
@Composable
fun BarcodeScannerModesPreview() {
    ComposeBarcodeScannerTheme {
        BarcodeScannerModes()
    }
}
Step 4: Implementing the scanning modes
Now we’ll connect each button with one of our RTU UI’s scanning modes, starting with single-barcode scanning.
Let’s first add the necessary imports to MainActivity.kt:
import android.widget.Toast
import androidx.compose.runtime.CompositionLocalProvider
import androidx.compose.runtime.getValue
import androidx.compose.runtime.mutableStateOf
import androidx.compose.runtime.remember
import androidx.compose.runtime.setValue
import io.scanbot.sdk.ui_v2.barcode.BarcodeScannerView
import io.scanbot.sdk.ui_v2.barcode.common.mappers.COMMON_CODES
import io.scanbot.sdk.ui_v2.barcode.configuration.BarcodeFormat
import io.scanbot.sdk.ui_v2.barcode.configuration.BarcodeNativeConfiguration
import io.scanbot.sdk.ui_v2.barcode.configuration.BarcodeScannerConfiguration
import io.scanbot.sdk.ui_v2.barcode.configuration.CollapsedVisibleHeight
import io.scanbot.sdk.ui_v2.barcode.configuration.LocalBarcodeNativeConfiguration
import io.scanbot.sdk.ui_v2.barcode.configuration.MultipleBarcodesScanningMode
import io.scanbot.sdk.ui_v2.barcode.configuration.MultipleScanningMode
import io.scanbot.sdk.ui_v2.barcode.configuration.SheetMode
import io.scanbot.sdk.ui_v2.barcode.configuration.SingleScanningMode
import io.scanbot.sdk.ui_v2.common.ScanbotColor
To use the RTU UI, we need to set up a configuration object for the barcode scanner. We’ll do this in the MainActivity class. For simplicity, we will implement the mutable state for the configuration object and the barcode scanner view in the MainActivity class, and if it is present, we will switch to the corresponding view. Therefore, we introduce a conditional statement in the MainActivity class to either display a list of scanning modes or the barcode scanner view.
// Replace the contents of ComposeBarcodeScannerTheme with the following:
ComposeBarcodeScannerTheme {
    var configuration by remember { mutableStateOf<BarcodeScannerConfiguration?>(null) }
    if (configuration == null) {
        Scaffold(modifier = Modifier.fillMaxSize()) { innerPadding ->
            BarcodeScannerModes(
                modifier = Modifier.padding(innerPadding),
                openSingleBarcodeScanning = {
                    // TODO: We will implement this later
                },
                openMultiBarcodeScanning = {
                    // TODO: We will implement this later
                },
                openArOverlay = {
                    // TODO: We will implement this later
                },
            )
        }
    } else {
        configuration?.let {
            // We need to wrap BarcodeScannerView into CompositionLocalProvider to be able
            // to reset the scanning session after the successful scan
            CompositionLocalProvider(
                LocalBarcodeNativeConfiguration provides BarcodeNativeConfiguration(
                    enableContinuousScanning = true
                )
            ) {
                BarcodeScannerView(
                    configuration = it,
                    onBarcodeScanned = { result ->
                        // Reset the configuration to null to return to the main screen.
                        configuration = null
                    },
                    onBarcodeScannerClosed = {
                        // Reset the configuration to null to return to the main screen.
                        configuration = null
                    }
                )
            }
        }
    }
}
Let’s implement a common result presentation for all scanning modes. We will display the barcode value in a toast.
Replace the onBarcodeScanned parameter of the BarcodeScannerView with the following code:
onBarcodeScanned = { result ->
    // Barcode Scanner result callback:
    // Get the first scanned barcode from the result object...
    val barcodeItem = result.items.first()
    // ... and process the result as needed. For example, display as a Toast:
    Toast.makeText(
        this,
        "Scanned: ${barcodeItem.text} (${barcodeItem.type})",
        Toast.LENGTH_LONG
    ).show()

    // Reset the configuration to null to return to the main screen.
    configuration = null
},
Single-barcode scanning
Now we’ll implement the openSingleBarcodeScanning function as the parameter we send to the BarcodeScannerModes composable.
Add the following code to the MainActivity class:
openSingleBarcodeScanning = {
    configuration = BarcodeScannerConfiguration().apply {
        // See below...
    }
},
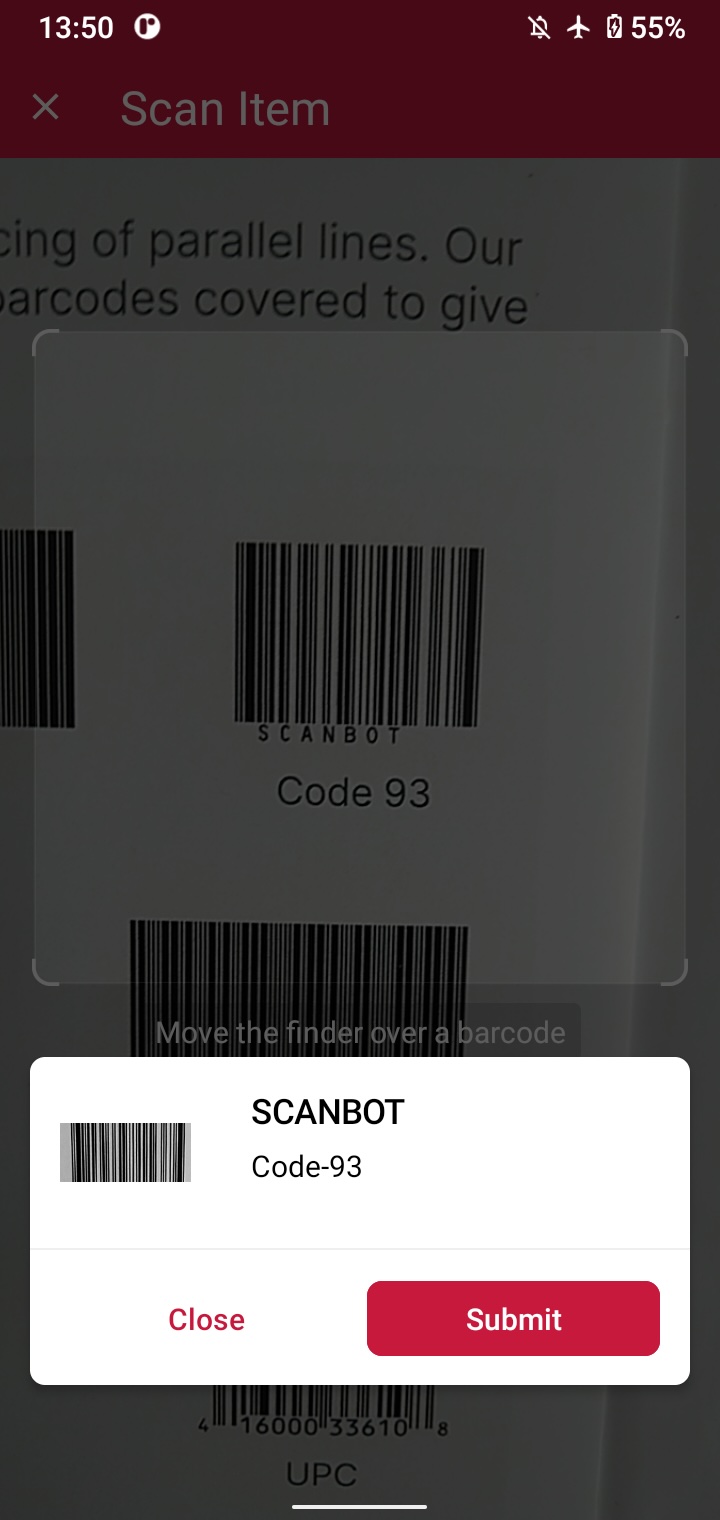
Now paste the configuration for the RTU UI’s single-barcode scanning mode (from the documentation) into the apply block:
openSingleBarcodeScanning = {
    configuration = BarcodeScannerConfiguration().apply {
        // Configure parameters (use explicit `this.` receiver for better code completion):

        // Initialize the use case for single scanning.
        this.useCase = SingleScanningMode().apply {
            // Enable and configure the confirmation sheet.
            this.confirmationSheetEnabled = true
            this.sheetColor = ScanbotColor("#FFFFFF")

            // Hide/unhide the barcode image.
            this.barcodeImageVisible = true

            // Configure the barcode title of the confirmation sheet.
            this.barcodeTitle.visible = true
            this.barcodeTitle.color = ScanbotColor("#000000")

            // Configure the barcode subtitle of the confirmation sheet.
            this.barcodeSubtitle.visible = true
            this.barcodeSubtitle.color = ScanbotColor("#000000")

            // Configure the cancel button of the confirmation sheet.
            this.cancelButton.text = "Close"
            this.cancelButton.foreground.color = ScanbotColor("#C8193C")
            this.cancelButton.background.fillColor = ScanbotColor("#00000000")

            // Configure the submit button of the confirmation sheet.
            this.submitButton.text = "Submit"
            this.submitButton.foreground.color = ScanbotColor("#FFFFFF")
            this.submitButton.background.fillColor = ScanbotColor("#C8193C")

            // Configure other parameters, pertaining to single-scanning mode as needed.
        }

        // Set an array of accepted barcode types.
        this.recognizerConfiguration.barcodeFormats = BarcodeFormat.COMMON_CODES

        // Configure other parameters as needed.
    }
},
If you want, you can run the app to try out the single-barcode scanning feature before we move on to the next mode.
Multi-barcode scanning
Let’s now set up the function for multi-barcode scanning, also for the BarcodeScannerModes composable in MainActivity.kt …
openMultiBarcodeScanning = {
    configuration = BarcodeScannerConfiguration().apply {
        // See below...
    }
},
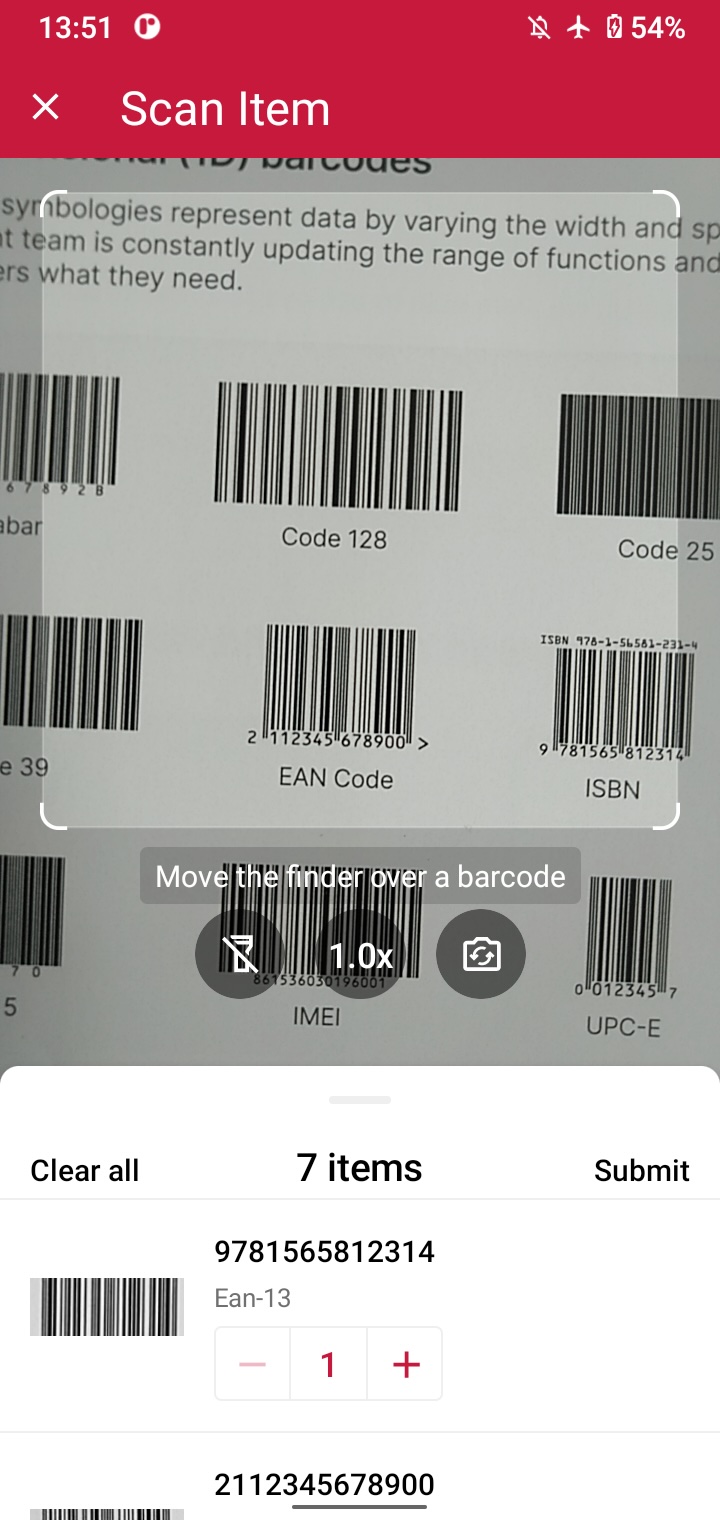
… and paste the configuration for multi-scanning into the apply block:
openMultiBarcodeScanning = {
    configuration = BarcodeScannerConfiguration().apply {
        // Configure parameters (use explicit `this.` receiver for better code completion):
        // Initialize the use case for multiple scanning.
        this.useCase = MultipleScanningMode().apply {
            // Set the counting mode.
            this.mode = MultipleBarcodesScanningMode.COUNTING
            // Set the sheet mode for the barcodes preview.
            this.sheet.mode = SheetMode.COLLAPSED_SHEET
            // Set the height for the collapsed sheet.
            this.sheet.collapsedVisibleHeight = CollapsedVisibleHeight.LARGE
            // Enable manual count change.
            this.sheetContent.manualCountChangeEnabled = true
            // Set the delay before same barcode counting repeat.
            this.countingRepeatDelay = 1000
            // Configure the submit button.
            this.sheetContent.submitButton.text = "Submit"
            this.sheetContent.submitButton.foreground.color = ScanbotColor("#000000")
            // Configure other parameters, pertaining to multiple-scanning mode as needed.
        }
        // Set an array of accepted barcode types.
        this.recognizerConfiguration.barcodeFormats = BarcodeFormat.COMMON_CODES
        // Configure other parameters as needed.
    }
},
Try it out if you like and then move on to the final scanning mode.
AR overlay
By now you know the drill. In MainActivity.kt, set up the final function, this time for the AR overlay:
openArOverlay = {
    configuration = BarcodeScannerConfiguration().apply {
        // See below...
    }
},
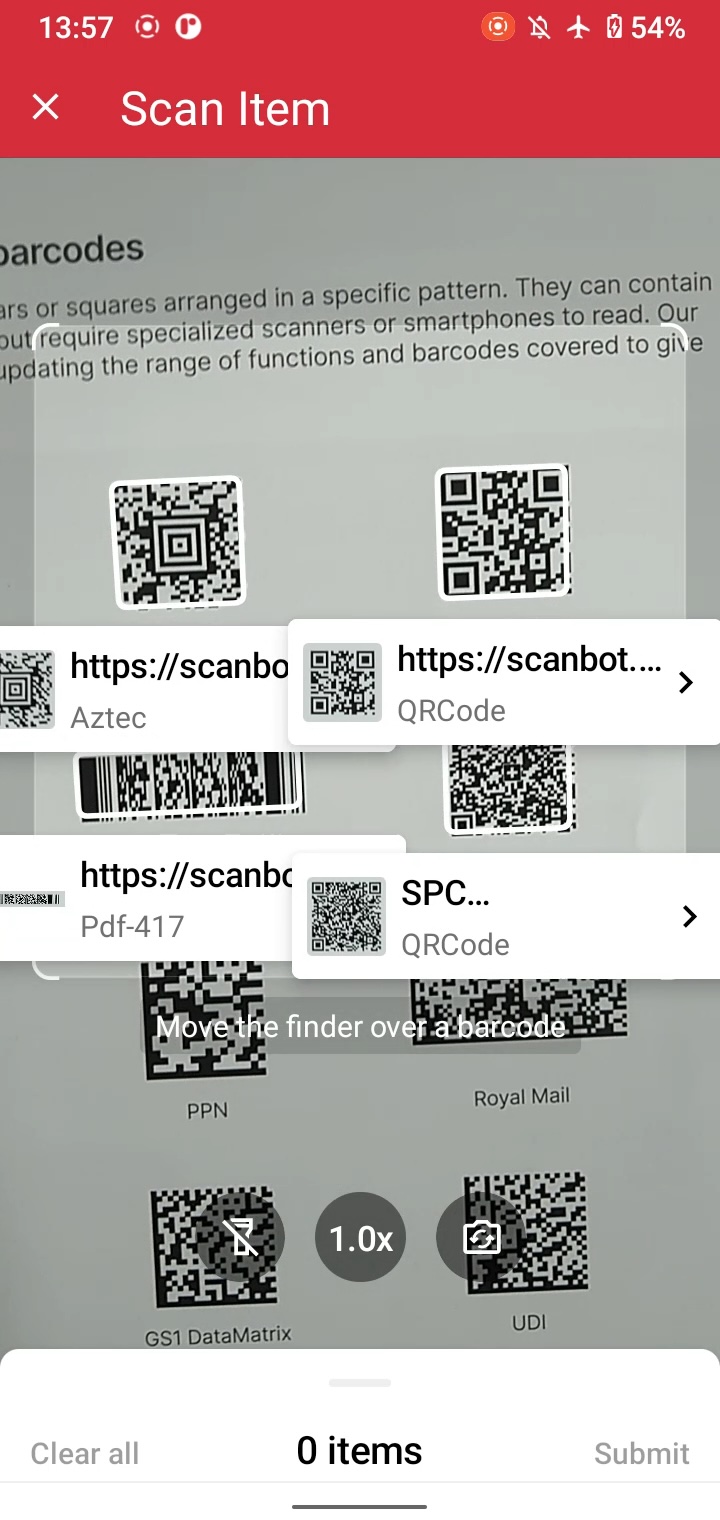
… and paste in the configuration for the AR overlay:
openArOverlay = {
    configuration = BarcodeScannerConfiguration().apply {
        // Configure parameters (use explicit `this.` receiver for better code completion):

        // Configure the use case.
        this.useCase = MultipleScanningMode().apply {
            this.mode = MultipleBarcodesScanningMode.UNIQUE
            this.sheet.mode = SheetMode.COLLAPSED_SHEET
            this.sheet.collapsedVisibleHeight = CollapsedVisibleHeight.SMALL
            // Configure AR Overlay.
            this.arOverlay.visible = true
            this.arOverlay.automaticSelectionEnabled = false

            // Configure other parameters, pertaining to use case as needed.
        }

        // Set an array of accepted barcode types.
        this.recognizerConfiguration.barcodeFormats = BarcodeFormat.COMMON_CODES

        // Configure other parameters as needed.
    }
},
Build and run the app… and that’s it! 🎉
Step 5: Scanning some barcodes!
You can now scan barcodes one at a time, multiple barcodes in one go, and display their values on the screen via the AR overlay.
Happy scanning! 🤳
Conclusion
If this tutorial has piqued your interest in integrating barcode scanning functionalities into your Android app, make sure to take a look at our SDK’s other neat features in our documentation – or run our example project for a more hands-on experience.
Should you have questions about this tutorial or run into any issues, we’re happy to help! Just shoot us an email via tutorial-support@scanbot.io.
