In this tutorial, you’ll learn how to use Google’s ML Kit library to build a barcode scanning app for iOS with Xcode and SwiftUI. We’ll use CocoaPods to integrate the GoogleMLKit/BarcodeScanning library into our project.

To build our app, we’ll follow these steps:
- Configuring the Xcode project
- Installing the ML Kit dependencies via CocoaPods
- Implementing the barcode scanning functionalities
- Embedding the barcode scanner view
- Configuring camera permissions
Prerequisites
- A Mac with an up-to-date version of Xcode
- CocoaPods installed on your Mac
- A physical iOS device, since the iOS simulator lacks camera access
Step 1: Configure the Xcode project
Open Xcode and create a new iOS app project with SwiftUI as the interface. In this tutorial, we’ll go with “iOS ML Kit Barcode Scanner” as the product name.
When you’ve finished setting up your project, the next step is to disable script sandboxing. Xcode’s sandbox prevents scripts from writing to files for security reasons. However, CocoaPods relies on these scripts to manage dependencies and generate necessary project files.
To do this, select your project in Xcode’s project navigator, select it once more in the project and targets list, and open the Build Settings tab. Then use the search bar on the top right to filter for “User Script Sandboxing“. Toggle the setting to “No“. Repeat this for your target if necessary.

Step 2: Install the ML Kit dependencies via CocoaPods
Next, close Xcode (since CocoaPods won’t work properly if Xcode is open) and open a terminal. Navigate to your project directory (the one containing the .xcodeproj file), then run the following command to create a Podfile for your project:
pod initOpen the Podfile in your preferred text editor …
open -a TextEdit Podfile… and replace its content with the following:
platform :ios, '15.0'
use_frameworks!

target 'iOS ML Kit Barcode Scanner' do
  # Pods for ML Kit
  pod 'GoogleMLKit/BarcodeScanning', '4.0.0'

  post_install do |installer|
      installer.generated_projects.each do |project|
            project.targets.each do |target|
                target.build_configurations.each do |config|
                    config.build_settings['IPHONEOS_DEPLOYMENT_TARGET'] = '15.0'
                 end
            end
     end
  end
end
💡 The post_install hook automatically updates all pod dependencies to use iOS 15.0 as their minimum deployment target, preventing Xcode warnings about version mismatches between your app and its dependencies.
Save the Podfile, and back in your terminal, run the following command to install the GoogleMLKit/BarcodeScanning dependency:
pod installStep 3: Implement the barcode scanning functionalities
In your project folder, you should now see an .xcworkspace file. Open this file to get back into your project. This ensures Xcode recognizes the CocoaPods dependencies.
In the directory that contains your project’s Swift files (one level down from the project’s root folder), create a new BarcodeScannerView.swift file and paste the following code:
import SwiftUI
import AVFoundation
import Combine
import MLKitBarcodeScanning
import MLKitVision

struct BarcodeScannerView: View {
    @StateObject private var scanner = BarcodeScanner()
    @State private var scannedCode: String = ""
    @State private var showAlert = false

    var body: some View {
        ZStack {
            CameraView(scanner: scanner)
                .edgesIgnoringSafeArea(.all)

            VStack {
                Text("Scan a Barcode")
                    .font(.title)
                    .fontWeight(.bold)
                    .foregroundColor(.white)
                    .padding()
                    .background(Color.black.opacity(0.7))
                    .cornerRadius(10)
                    .padding(.top, 50)

                Spacer()

                if !scannedCode.isEmpty {
                    VStack(spacing: 10) {
                        Text("Scanned Code:")
                            .font(.headline)
                            .foregroundColor(.white)

                        Text(scannedCode)
                            .font(.system(size: 16, weight: .medium, design: .monospaced))
                            .foregroundColor(.white)
                            .padding()
                            .background(Color.green.opacity(0.8))
                            .cornerRadius(10)
                            .padding(.horizontal)
                    }
                    .padding(.bottom, 50)
                }
            }
        }
        .onReceive(scanner.$detectedBarcode) { barcode in
            if let barcode = barcode {
                scannedCode = barcode
                showAlert = true
            }
        }
        .alert("Barcode Detected", isPresented: $showAlert) {
            Button("OK") {
                scanner.resetDetection()
            }
        } message: {
            Text("Value: \(scannedCode)")
        }
    }
}

class BarcodeScanner: NSObject, ObservableObject {
    @Published var detectedBarcode: String?
    private var captureSession: AVCaptureSession?
    private let barcodeScanner = MLKitBarcodeScanning.BarcodeScanner.barcodeScanner()

    func setupCamera(session: AVCaptureSession) {
        self.captureSession = session
    }

    func scanBarcode(from sampleBuffer: CMSampleBuffer) {
        guard let imageBuffer = CMSampleBufferGetImageBuffer(sampleBuffer) else { return }

        let visionImage = VisionImage(buffer: sampleBuffer)
        visionImage.orientation = .up

        barcodeScanner.process(visionImage) { [weak self] barcodes, error in
            guard let self = self, error == nil, let barcodes = barcodes, !barcodes.isEmpty else {
                return
            }

            if let firstBarcode = barcodes.first, let rawValue = firstBarcode.rawValue {
                DispatchQueue.main.async {
                    if self.detectedBarcode == nil {
                        self.detectedBarcode = rawValue
                    }
                }
            }
        }
    }

    func resetDetection() {
        detectedBarcode = nil
    }
}

struct CameraView: UIViewRepresentable {
    @ObservedObject var scanner: BarcodeScanner

    func makeUIView(context: Context) -> UIView {
        let view = UIView(frame: .zero)

        let captureSession = AVCaptureSession()
        captureSession.sessionPreset = .high

        guard let videoCaptureDevice = AVCaptureDevice.default(.builtInWideAngleCamera, for: .video, position: .back),
              let videoInput = try? AVCaptureDeviceInput(device: videoCaptureDevice),
              captureSession.canAddInput(videoInput) else {
            return view
        }

        captureSession.addInput(videoInput)

        let videoOutput = AVCaptureVideoDataOutput()
        videoOutput.setSampleBufferDelegate(context.coordinator, queue: DispatchQueue(label: "videoQueue"))

        if captureSession.canAddOutput(videoOutput) {
            captureSession.addOutput(videoOutput)
        }

        let previewLayer = AVCaptureVideoPreviewLayer(session: captureSession)
        previewLayer.frame = view.bounds
        previewLayer.videoGravity = .resizeAspectFill
        view.layer.addSublayer(previewLayer)

        context.coordinator.previewLayer = previewLayer

        scanner.setupCamera(session: captureSession)

        DispatchQueue.global(qos: .userInitiated).async {
            captureSession.startRunning()
        }

        return view
    }

    func updateUIView(_ uiView: UIView, context: Context) {
        if let previewLayer = context.coordinator.previewLayer {
            DispatchQueue.main.async {
                previewLayer.frame = uiView.bounds
            }
        }
    }

    func makeCoordinator() -> Coordinator {
        Coordinator(scanner: scanner)
    }

    class Coordinator: NSObject, AVCaptureVideoDataOutputSampleBufferDelegate {
        var scanner: BarcodeScanner
        var previewLayer: AVCaptureVideoPreviewLayer?

        init(scanner: BarcodeScanner) {
            self.scanner = scanner
        }

        func captureOutput(_ output: AVCaptureOutput, didOutput sampleBuffer: CMSampleBuffer, from connection: AVCaptureConnection) {
            scanner.scanBarcode(from: sampleBuffer)
        }
    }
}

// MARK: - Preview
struct BarcodeScannerView_Previews: PreviewProvider {
    static var previews: some View {
        BarcodeScannerView()
    }
}
Let’s break down the most important parts.
Entry point: showing the scanner
struct ContentView: View {
    var body: some View {
        BarcodeScannerView()
    }
}
ContentView is the app’s main screen. It simply loads BarcodeScannerView, which handles everything – camera setup, barcode scanning, and displaying results.
Barcode scanner view: Camera + UI + detection
struct BarcodeScannerView: View {
    @StateObject private var scanner = BarcodeScanner()
    @State private var scannedCode: String = ""
    @State private var showAlert = false
Here we create:
scanner: handles ML Kit barcode scanningscannedCode: stores the detected barcode’s valueshowAlert: controls the popup when a barcode is found
Camera and overlay UI
ZStack {
    CameraView(scanner: scanner)
        .edgesIgnoringSafeArea(.all)

    VStack {
        Text("Scan a Barcode")
            .font(.title)
            .foregroundColor(.white)
            .padding()
            .background(Color.black.opacity(0.7))
            .cornerRadius(10)
            .padding(.top, 50)

        Spacer()
The ZStack places the camera preview behind the UI text. The title tells the user to scan a barcode.
Displaying the scanned result
if !scannedCode.isEmpty {
    VStack(spacing: 10) {
        Text("Scanned Code:")
        Text(scannedCode)
            .font(.system(size: 16, weight: .medium, design: .monospaced))
            .foregroundColor(.white)
            .padding()
            .background(Color.green.opacity(0.8))
            .cornerRadius(10)
    }
    .padding(.bottom, 50)
}
Once a barcode is detected, its value appears neatly at the bottom of the screen.
Handling detection and alert
.onReceive(scanner.$detectedBarcode) { barcode in
    if let barcode = barcode {
        scannedCode = barcode
        showAlert = true
    }
}
.alert("Barcode Detected", isPresented: $showAlert) {
    Button("OK") {
        scanner.resetDetection()
    }
} message: {
    Text("Value: \(scannedCode)")
}
SwiftUI listens to scanner.$detectedBarcode. When ML Kit finds a barcode, it updates scannedCode, shows an alert, and resets when confirmed.
Barcode detection logic (ML Kit + AVFoundation)
class BarcodeScanner: NSObject, ObservableObject {
    @Published var detectedBarcode: String?
    private var captureSession: AVCaptureSession?
    private let barcodeScanner = MLKitBarcodeScanning.BarcodeScanner.barcodeScanner()
This class connects camera frames to ML Kit. @Published allows SwiftUI to react when a barcode is detected.
Scanning each frame
func scanBarcode(from sampleBuffer: CMSampleBuffer) {
    guard let imageBuffer = CMSampleBufferGetImageBuffer(sampleBuffer) else { return }

    let visionImage = VisionImage(buffer: sampleBuffer)
    visionImage.orientation = .up

    barcodeScanner.process(visionImage) { [weak self] barcodes, error in
        guard let self = self, error == nil, let barcodes = barcodes, !barcodes.isEmpty else { return }

        if let rawValue = barcodes.first?.rawValue {
            DispatchQueue.main.async {
                if self.detectedBarcode == nil {
                    self.detectedBarcode = rawValue
                }
            }
        }
    }
}
This converts each live frame into a VisionImage for ML Kit to analyze. If ML Kit finds a barcode, it publishes the value to SwiftUI.
Camera setup: live video feed
struct CameraView: UIViewRepresentable {
    @ObservedObject var scanner: BarcodeScanner
CameraView bridges UIKit’s AVFoundation camera into SwiftUI.
Creating the camera session
func makeUIView(context: Context) -> UIView {
    let view = UIView(frame: .zero)
    let captureSession = AVCaptureSession()
    captureSession.sessionPreset = .high
This sets up a high-quality camera session for live preview.
Adding input and output
guard let videoDevice = AVCaptureDevice.default(.builtInWideAngleCamera, for: .video, position: .back),
      let videoInput = try? AVCaptureDeviceInput(device: videoDevice),
      captureSession.canAddInput(videoInput) else { return view }
captureSession.addInput(videoInput)

let videoOutput = AVCaptureVideoDataOutput()
videoOutput.setSampleBufferDelegate(context.coordinator, queue: DispatchQueue(label: "videoQueue"))
captureSession.addOutput(videoOutput)
This adds the camera input and video output. Each frame is sent to the coordinator, which triggers barcode scanning.
Showing the camera preview
let previewLayer = AVCaptureVideoPreviewLayer(session: captureSession)
previewLayer.videoGravity = .resizeAspectFill
view.layer.addSublayer(previewLayer)
This displays the live camera feed as the background.
Coordinator, forwarding frames to ML Kit
class Coordinator: NSObject, AVCaptureVideoDataOutputSampleBufferDelegate {
    var scanner: BarcodeScanner
    init(scanner: BarcodeScanner) { self.scanner = scanner }

    func captureOutput(_ output: AVCaptureOutput, didOutput sampleBuffer: CMSampleBuffer, from connection: AVCaptureConnection) {
        scanner.scanBarcode(from: sampleBuffer)
    }
}
This code acts as a bridge between the camera feed and ML Kit – every frame is analyzed in real time.
Step 4: Embed the barcode scanner view
Next, open the ContentView.swift file located in the same folder and replace its content with the following code:
import SwiftUI

struct ContentView: View {
    var body: some View {
        BarcodeScannerView()
    }
}
Step 5: Configure camera permissions
Finally, you’ll need to ensure the app can access the device camera.
In Xcode, select your project in the project navigator, select the target once more in the project and targets list, and open the Info tab. Add a new key “Privacy – Camera Usage Description” and provide a value, e.g., “Grant camera access to scan barcodes”.
Alternatively, you can directly edit the project’s Info.plist file.
<key>NSCameraUsageDescription</key>
<string>Grant camera access to scan barcodes</string>
Your barcode scanner is now ready! Build the app and run it on your iOS device to scan some barcodes.

Conclusion
This concludes our tutorial on how to use Google ML Kit to build a barcode scanner app for iOS.
Free solutions like this one can be great for prototyping and personal projects. However, Google doesn’t offer enterprise support for ML Kit, so companies relying on it for their scanning needs won’t be able to submit feature requests nor count on help when things don’t work as expected.
We developed the Scanbot Barcode Scanner SDK to help companies overcome these hurdles. Our goal was to provide a developer-friendly solution for a wide range of platforms that consistently delivers high-quality results, even in challenging circumstances – enterprise-grade support included.
In the following tutorial, we’ll show you how to set up a barcode scanning app using the Scanbot iOS Barcode Scanner SDK.
Building an iOS barcode scanner app with the Scanbot SDK
To set up our app, we’ll follow these steps:
- Preparing the project
- Setting up the app entry point
- Implementing the barcode scanner view
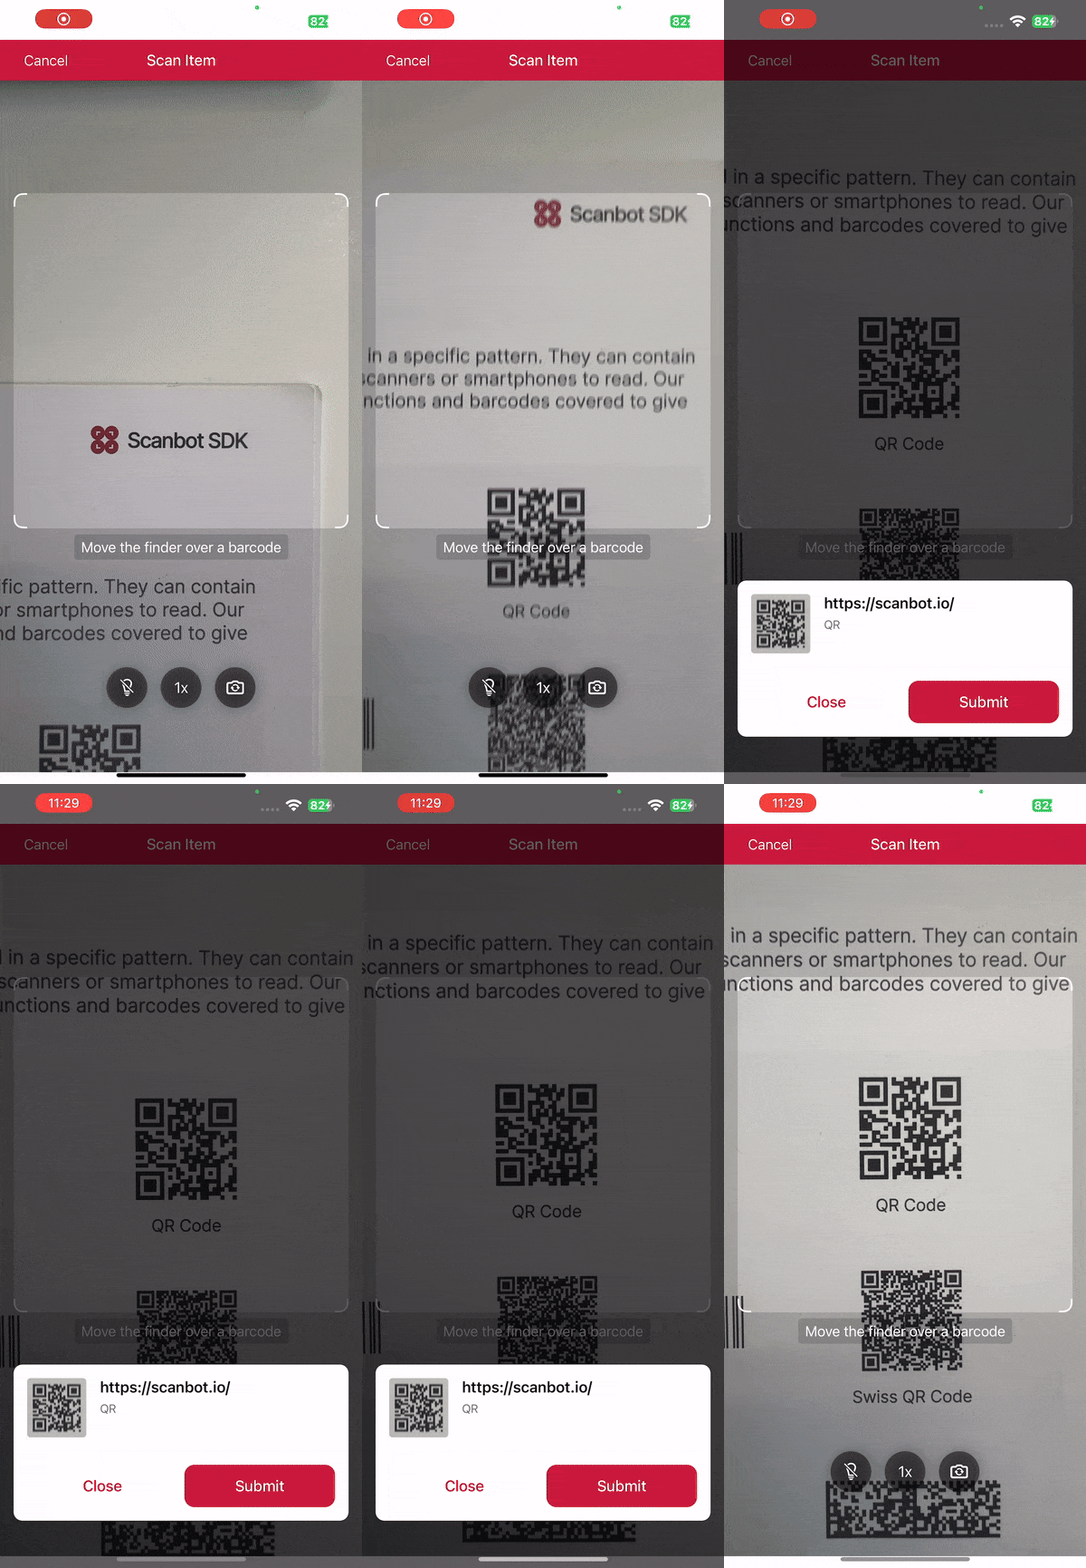
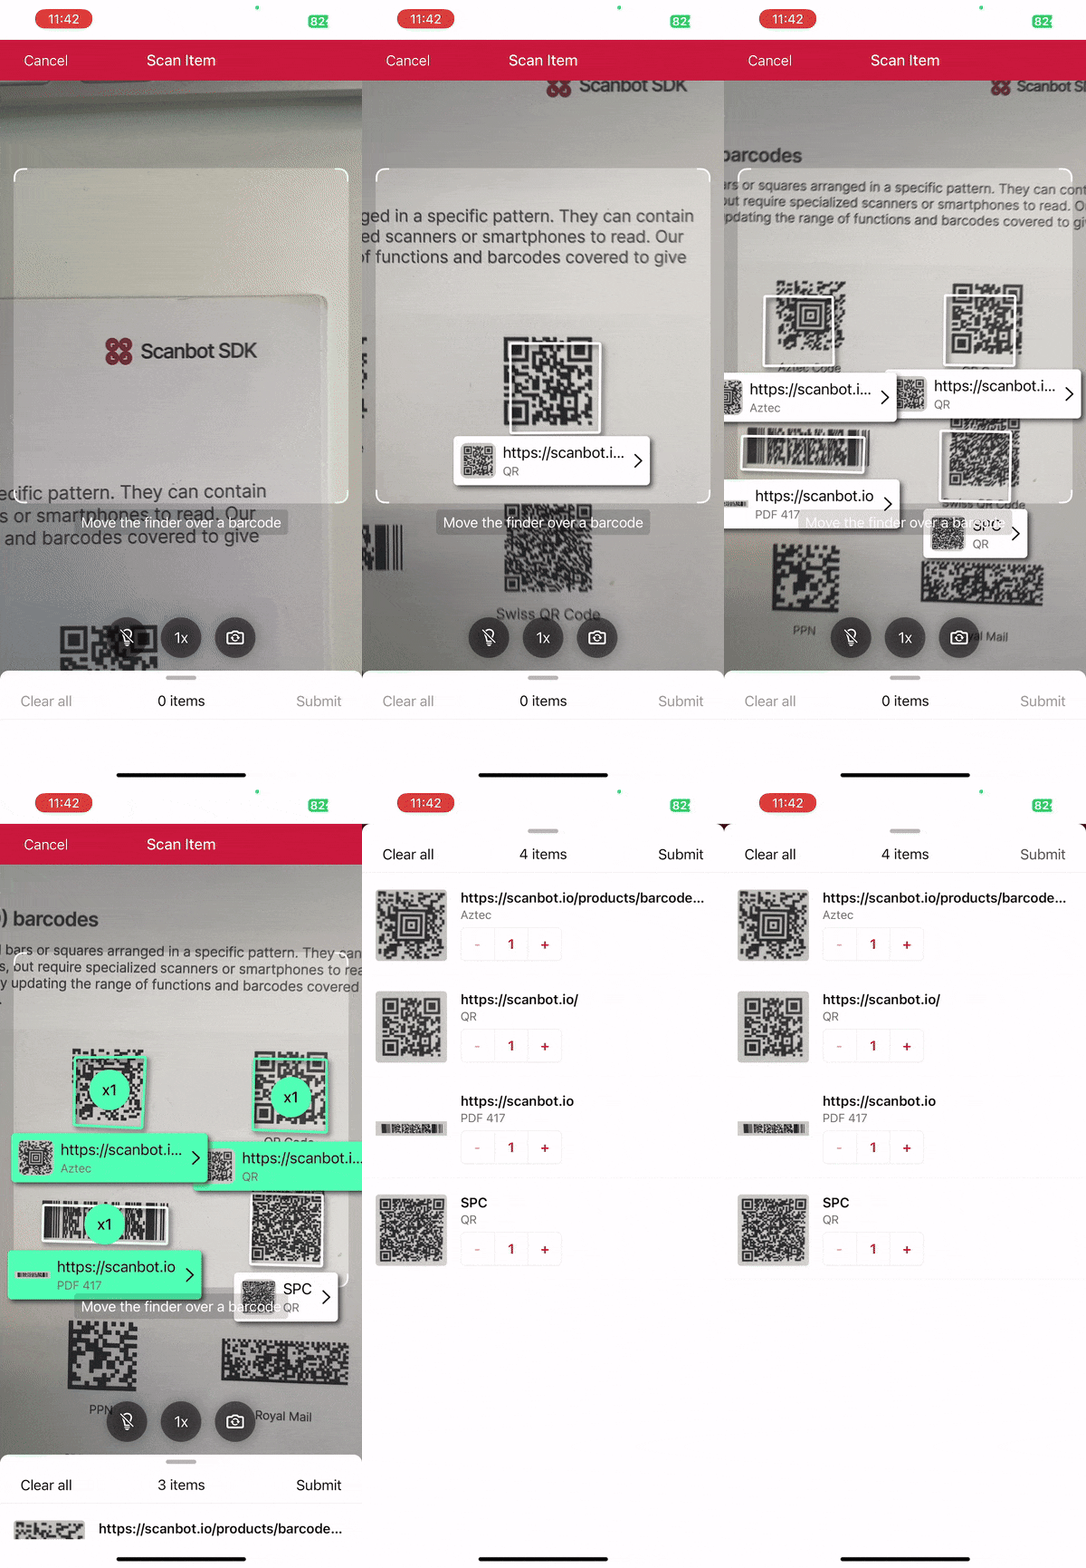
Thanks to the SDK’s Ready-to-Use UI Components, we’ll have an intuitive user interface out of the box.
Step 1: Prepare the project
Open Xcode and create a new iOS App project. Name the project (e.g., “SwiftUI Barcode Scanner”), choose SwiftUI as the interface, and Swift as the language.
After opening your project, go to File > Add Package Dependencies… and add the Scanbot Barcode Scanner SDK package for the Swift Package Manager.
Now open your Main App Target’s Info tab and add a Privacy – Camera Usage Description key with a value such as “Grant camera access to scan barcodes”.
Step 2: Set up the app entry point
Open SwiftUI_Barcode_ScannerApp.swift, import the Scanbot Barcode Scanner SDK, and implement the init() method to set the SDK’s license key.
import SwiftUI

// Import the SDK
import ScanbotBarcodeScannerSDK

@main
struct iOS_Swift_UI_Barcode_ScannerApp: App {

    // Set the license key
    init() {
        //Scanbot.setLicense("<YOUR_LICENSE_KEY_HERE>")
    }

    var body: some Scene {
        WindowGroup {
            ContentView()
        }
    }
}
If you have a license key, you can uncomment the code and replace <YOUR_LICENSE_KEY_HERE> with your actual key. Otherwise, leave the code as is. The SDK will then run in trial mode for 60 seconds per session.
Step 3: Implement the barcode scanner view
Open ContentView.swift and once again import the SDK.
import ScanbotBarcodeScannerSDKThen, inside struct ContentView: View {} and above var body: some View {}, add the configuration for single-barcode scanning.
let configuration: SBSDKUI2BarcodeScannerScreenConfiguration = {
    let config = SBSDKUI2BarcodeScannerScreenConfiguration()
    let usecase = SBSDKUI2SingleScanningMode()
    config.useCase = usecase
    return config
}()
Then replace the boilerplate code inside var body: some View {} with the barcode scanner view and pass the configuration.
var body: some View {
    SBSDKUI2BarcodeScannerView(
        configuration: configuration,
        onSubmit: { result in
            // Handle the scanned barcode results
        },
        onCancel: {
            // Handle the user tapping the 'Cancel' button
        },
        onError: { error in
            // Handle errors
        }
    )
}
In this tutorial, we’re going to print the format and value of the first barcode recognized in the camera stream to the console.
onSubmit: { (result: SBSDKUI2BarcodeScannerUIResult?) in
    if let result = result {
        guard let barcodeItem = result.items.first else {
            print("No barcode found")
            return
        }
        let format = barcodeItem.barcode.format.name
        let value = barcodeItem.barcode.textWithExtension
        print("\(format): \(value)")
    }
},
To make sure you only scan the barcode you want, you can make use of the confirmation dialogue included in the SDK’s RTU UI components. To use it, simply enable the required component in the usecase configuration.
    let configuration: SBSDKUI2BarcodeScannerScreenConfiguration = {
        let config = SBSDKUI2BarcodeScannerScreenConfiguration()
        let usecase = SBSDKUI2SingleScanningMode()

        // Enable the confirmation dialogue
        usecase.confirmationSheetEnabled = true

        config.useCase = usecase
        return config
    }()
Now our iOS Barcode Scanner app is ready. Build and run the app and give it a try!

Optional: Implement multi-barcode scanning with an AR overlay
As it is now, our app prints the value of the first scanned barcode to the console. But we can also scan multiple barcodes at once. As an added bonus, we can also display the barcodes’ values right in the scanning screen while giving users the option to tap on any barcode to add it to a results sheet.
To achieve this, simply replace the single-barcode scanning configuration in ContentView.swift with the multi-scanning one and also enable the AR overlay:
let configuration: SBSDKUI2BarcodeScannerScreenConfiguration = {
    let config = SBSDKUI2BarcodeScannerScreenConfiguration()
    let usecase = SBSDKUI2MultipleScanningMode()
    usecase.arOverlay.visible = true
    config.useCase = usecase
    return config
}()
You can change the results handling to reflect that multiple barcodes’ values should be printed to the console:
if let result = result {
    guard !result.items.isEmpty else {
        print("No barcode found")
        return
    }
    for barcodeItem in result.items {
        let format = barcodeItem.barcode.format.name
        let value = barcodeItem.barcode.textWithExtension
        print("\(format): \(value)")
    }
}
Your final ContentView.swift will then look something like this:
import SwiftUI
import ScanbotBarcodeScannerSDK

struct ContentView: View {
    let configuration: SBSDKUI2BarcodeScannerScreenConfiguration = {
        let config = SBSDKUI2BarcodeScannerScreenConfiguration()
        let usecase = SBSDKUI2MultipleScanningMode()
        usecase.arOverlay.visible = true
        config.useCase = usecase
        return config
    }()

    var body: some View {
        SBSDKUI2BarcodeScannerView(
            configuration: configuration,
            onSubmit: { (result: SBSDKUI2BarcodeScannerUIResult?) in
                if let result = result {
                    guard !result.items.isEmpty else {
                        print("No barcode found")
                        return
                    }
                    for barcodeItem in result.items {
                        let format = barcodeItem.barcode.format.name
                        let value = barcodeItem.barcode.textWithExtension
                        print("\(format): \(value)")
                    }
                }
            },
            onCancel: {
                // Handle the user tapping the 'Cancel' button
            },
            onError: { error in
                // Handle errors
            }
        )
    }
}

#Preview {
    ContentView()
}
Now build and run the app again to test your multi-barcode scanner.

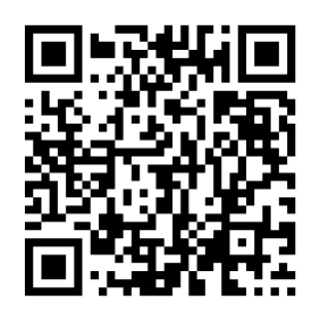
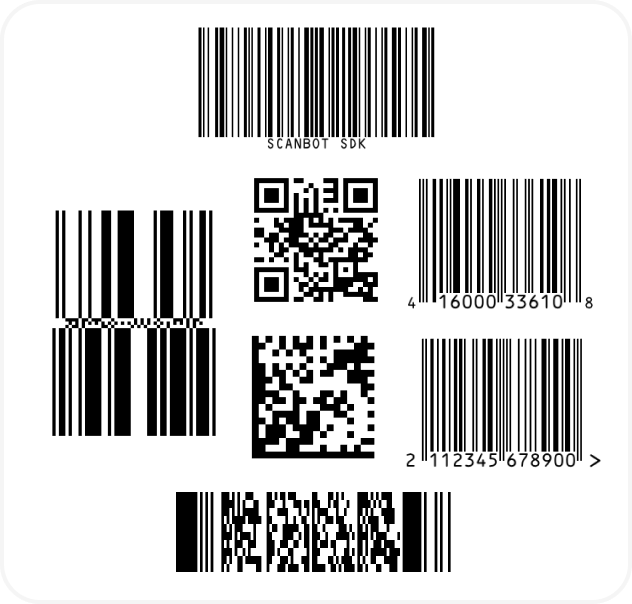
If you’re in need of some barcodes, we’ve got you covered:
Conclusion
🎉 Congratulations! You’ve successfully built a powerful iOS barcode scanning app in SwiftUI!
This is just one of the many scanner configurations the Scanbot SDK has to offer – take a look at the RTU UI documentation and API references to learn more.
Should you have questions or run into any issues, we’re happy to help! Just shoot us an email via tutorial-support@scanbot.io.
Happy scanning! 🤳

