In this tutorial, we’ll use Xcode, Swift, and the Scanbot Barcode Scanner SDK to create a powerful scanning app for extracting data from barcodes and QR codes.
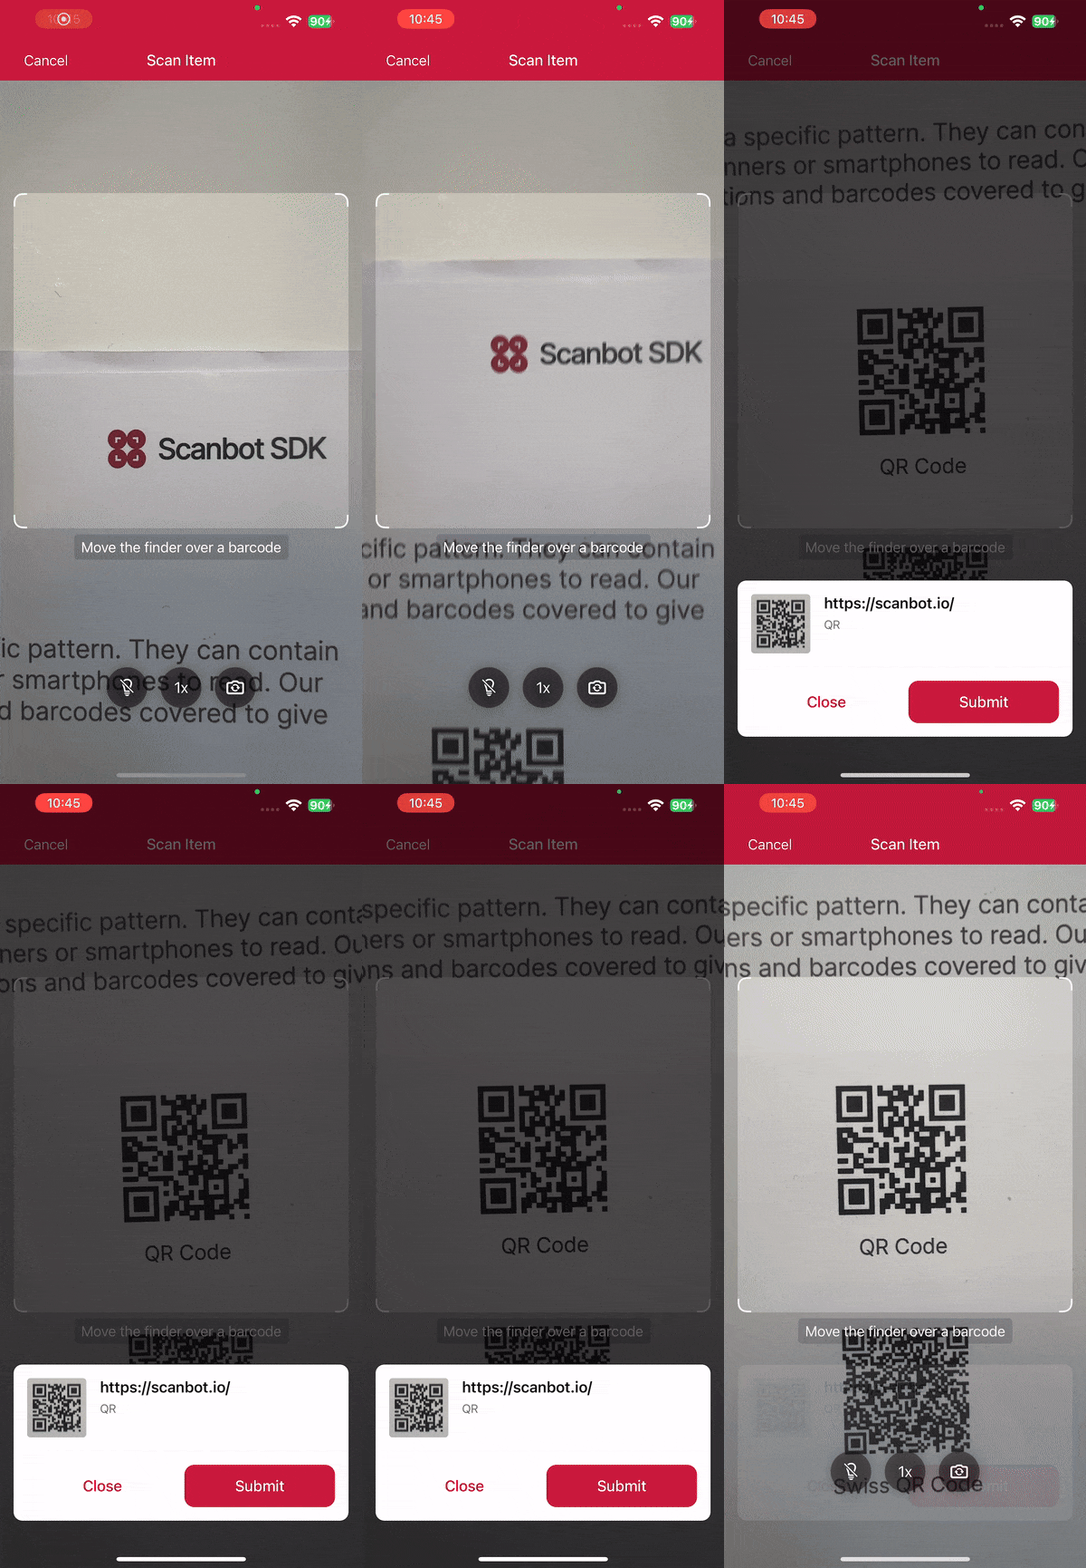

We’ll achieve this in three easy steps:
- Preparing the project
- Setting up the main screen
- Implementing the barcode scanning feature
All you need is a Mac with the latest version of Xcode and a test device, since we’ll need to use the camera.
Want to see the final code right away? Click here.
ViewController.swift:
import UIKit
import ScanbotBarcodeScannerSDK

class ViewController: UIViewController {

    override func viewDidLoad() {
        super.viewDidLoad()
    }

    @IBAction func scanBarcodesButtonTapped(_ sender: Any) {
        let configuration = SBSDKUI2BarcodeScannerScreenConfiguration()

        let multipleUsecase = SBSDKUI2MultipleScanningMode()
        multipleUsecase.arOverlay.visible = true
        configuration.useCase = multipleUsecase

        SBSDKUI2BarcodeScannerViewController.present(on: self,
                                                     configuration: configuration) { controller, cancelled, error, result in
            if let result {
                guard !result.items.isEmpty else {
                    print("No barcode found")
                    return
                }
                for barcodeItem in result.items {
                    let format = barcodeItem.barcode.format.name
                    let value = barcodeItem.barcode.textWithExtension
                    print("\(format): \(value)")
                }
            }
            controller.presentingViewController?.dismiss(animated: true)
        }
    }
}
Step 1: Prepare the project
Open Xcode and create a new iOS App project. Name the project (e.g., “iOS Barcode Scanner”), choose Storyboard as the interface, and Swift as the language.
After opening your project, go to File > Add Package Dependencies… and add the Scanbot Barcode Scanner SDK package for the Swift Package Manager.
Open your Main App Target’s Info tab and add a Privacy – Camera Usage Description key with a value such as “Grant camera access to scan barcodes”.
In AppDelegate.swift, add a line for setting the license key to the application(_:didFinishLaunchingWithOptions:) method. We don’t need one for this tutorial, but if you have a license key you’d like to use, uncomment the code below and replace <YOUR_LICENSE_KEY> with your actual key.
func application(_ application: UIApplication, didFinishLaunchingWithOptions launchOptions: [UIApplication.LaunchOptionsKey: Any]?) -> Bool {
    // Uncomment the following line and replace <YOUR_LICENSE_KEY> with your actual key
    // Scanbot.setLicense("<YOUR_LICENSE_KEY>")

    return true
}
Without a license key, the SDK will run in trial mode for 60 seconds per session. If you need more than that, you can generate a free trial license.
Step 2: Set up the main screen
We’ll now create a simple UI for starting our barcode scanner.
First, open Main.storyboard and add a UIButton with a meaningful label (e.g., “Scan Barcodes”) to the main view.
After that, create an IBAction for the button in ViewController.swift and implement the button action to present the scanner view controller.
@IBAction func scanBarcodesButtonTapped(_ sender: UIButton) {
    // Code to present the scanner view controller will go here.
}
We’ll also need to add the following import to ViewController.swift:
import ScanbotBarcodeScannerSDKStep 3: Implement the barcode scanning feature
This step involves presenting the Barcode Scanner view controller. The Scanbot SDK provides a pre-built UI for the scanning process.
Inside scanBarcodesButtonTapped() in ViewController.swift, first create the default configuration object.
let configuration = SBSDKUI2BarcodeScannerScreenConfiguration()Then present the scanner modally and handle the results processing. In this example, we’re going the print the format and value of the first barcode recognized in the camera stream to the console.
SBSDKUI2BarcodeScannerViewController.present(on: self,
                                             configuration: configuration) { controller, cancelled, error, result in
    // Process the results, e.g., like this:
    if let result {
        guard let barcodeItem = result.items.first else {
            print("No barcode found")
            return
        }
        let format = barcodeItem.barcode.format.name
        let value = barcodeItem.barcode.textWithExtension

        print("\(format): \(value)")
    }
    controller.presentingViewController?.dismiss(animated: true)
}
While this works, this makes scanning so fast you can barely recognize what’s going on. To change that, you can make use of the confirmation dialogue included in the SDK’s RTU UI components. To use it, simply initialize the single-barcode scanning use case, enable the required component, and then set the configured use case.
let configuration = SBSDKUI2BarcodeScannerScreenConfiguration()

// Configure single-barcode scanning here.
let singleUsecase = SBSDKUI2SingleScanningMode()
singleUsecase.confirmationSheetEnabled = true
configuration.useCase = singleUsecase

SBSDKUI2BarcodeScannerViewController.present(on: self,
                                             configuration: configuration) { controller, cancelled, error, result in
// ...
This will prompt the user to confirm the scanned barcode before it’s printed to the console.
Build and run the scanner to give it a try!

Optional: Implement multi-barcode scanning with an AR overlay
As it is now, our app outputs the value of a single barcode and closes the scanning interface. But we can also scan multiple barcodes at once. As an added bonus, we can also display the barcodes’ values right in the scanning screen while giving users the option to tap on any barcode to add it to a results sheet.
To achieve this, simply replace the single-barcode scanning configuration with the multi-scanning one and also enable the AR overlay:
let multipleUsecase = SBSDKUI2MultipleScanningMode()
multipleUsecase.arOverlay.visible = true
configuration.useCase = multipleUsecase
You can change the results handling to reflect that multiple barcodes’ values should be printed to the console:
if let result {
    guard !result.items.isEmpty else {
        print("No barcode found")
        return
    }
    // Loop through all detected barcodes
    for barcodeItem in result.items {
        let format = barcodeItem.barcode.format.name
        let value = barcodeItem.barcode.textWithExtension
        print("\(format): \(value)")
    }
}
Your final ViewController.swift will then look something like this:
import UIKit
import ScanbotBarcodeScannerSDK

class ViewController: UIViewController {

    override func viewDidLoad() {
        super.viewDidLoad()
    }

    @IBAction func scanBarcodesButtonTapped(_ sender: Any) {
        let configuration = SBSDKUI2BarcodeScannerScreenConfiguration()

        let multipleUsecase = SBSDKUI2MultipleScanningMode()
        multipleUsecase.arOverlay.visible = true
        configuration.useCase = multipleUsecase

        SBSDKUI2BarcodeScannerViewController.present(on: self,
                                                     configuration: configuration) { controller, cancelled, error, result in
            if let result {
                guard !result.items.isEmpty else {
                    print("No barcode found")
                    return
                }
                for barcodeItem in result.items {
                    let format = barcodeItem.barcode.format.name
                    let value = barcodeItem.barcode.textWithExtension
                    print("\(format): \(value)")
                }
            }
            controller.presentingViewController?.dismiss(animated: true)
        }
    }
}
Now build and run the app again to test your multi-barcode scanner.

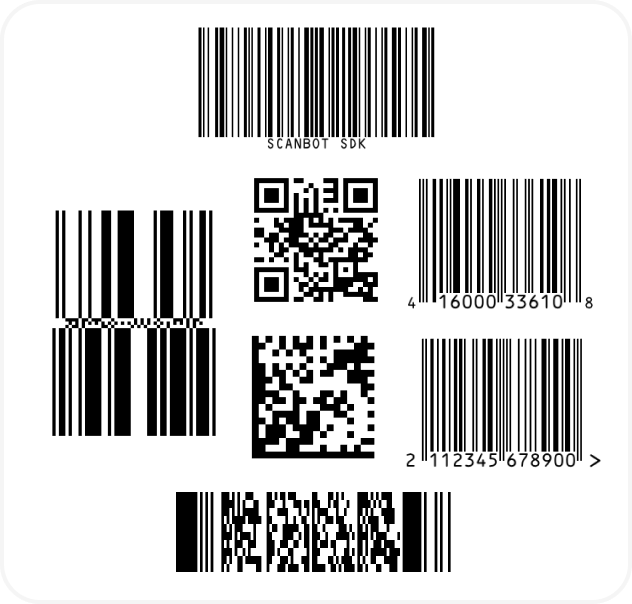
If you’re in need of some barcodes, we’ve got you covered:
Conclusion
🎉 Congratulations! You’ve built a powerful barcode scanning app for iOS with just a few lines of Swift code!
This is just one of the many scanner configurations the Scanbot SDK has to offer – take a look at the RTU UI documentation and API references to learn more.
Should you have questions or run into any issues, we’re happy to help! Just shoot us an email via tutorial-support@scanbot.io.
Happy scanning! 🤳
Building an enterprise-grade barcode scanning app for real-world scenarios
As you continue building your iOS barcode scanning app, it’s worth stepping back to consider some broader technical and strategic insights that can enhance your app’s performance, reliability, and long-term value.
Differences between native APIs and commercial SDKs
As a developer, you may wonder about the role of Apple’s native frameworks – AVFoundation or Vision – when it comes to scanning barcodes. AVFoundation is a lower-level tool that supports basic linear barcode scanning. It’s lightweight and flexible, but lacks high-level features like scan UI or support for damaged or complex barcodes. The Vision framework, on the other hand, integrates with Core ML and offers modern APIs, but still falls short when it comes to multi-barcode scanning or decoding in challenging environments. In contrast, a commercial barcode scanning SDK is purpose-built for production use cases, offering superior accuracy, better performance in poor lighting, and support for a wide variety of barcode formats.
Performance in real-world conditions
Barcode scanning isn’t always done in ideal conditions. That’s why it’s helpful to benchmark your solution across variables such as lighting, barcode quality, distance, and motion. Commercial solutions consistently outperform native APIs – especially when dealing with low-light environments, fast-moving barcodes, or damaged labels. Where native tools might struggle or fail, specifically trained algorithms provide fast and reliable detection, making it a safer bet for commercial or mission-critical use cases.
Understanding cost and licensing trade-offs
Another important factor to consider is the cost of integration. This investment is often offset by reduced development time and long-term maintenance overhead. Building a barcode solution from scratch using native APIs or open-source libraries might appear cost-effective initially, but it often comes with hidden costs: time spent troubleshooting, writing custom parsing logic, and handling edge cases. For businesses aiming to ship quickly and scale reliably, a commercial SDK often proves to be the more economical option over time.
Working with industry standards
For industries like retail, healthcare, and logistics, it’s not enough to simply read a barcode—you need to interpret the structured data inside it. Your solution should support industry standards such as GS1 and HIBC, enabling your app to parse and extract critical fields like product IDs, expiration dates, and batch numbers directly from the scan result. This level of semantic decoding is essential when regulatory compliance or backend integration is required.
Building for offline use
A robust scanning app should function reliably even without an internet connection and process barcode data directly on the device. To ensure data is not lost during connectivity outages, consider queuing scan results locally in encrypted storage and syncing them with your server once the connection is restored. Techniques like exponential backoff and retry queues can improve reliability and user trust.
Prioritizing security and privacy
Security is another key consideration, especially when working with third-party libraries. No data should be transmitted externally unless you explicitly send it. To enhance this further, encrypt all locally stored scan data and implement secure transfer protocols when syncing to the cloud.
Enhancing accessibility and user experience
Inclusive design benefits everyone. To improve accessibility, ensure your scanner works well with the VoiceOver screen reader, supports large fonts, and provides haptic or audio feedback to signal successful scans. These features not only make your app more usable for people with disabilities but also improve overall user satisfaction.
Troubleshooting common issues
Lastly, a few quick tips for overcoming common integration challenges: If your scanner doesn’t activate, check that camera permissions are correctly set in your app’s Info.plist. If scans return no results, double-check that the desired barcode formats are enabled in the SDK configuration. Crashes on app startup often trace back to issues with SDK initialization or an invalid license – review the setup instructions and license validation logic to ensure everything is in place.
By considering these advanced topics, you’re not just building a barcode scanner, but a reliable, secure, and user-friendly solution that’s ready for real-world deployment. Whether you’re shipping an enterprise app or a lightweight utility, these best practices will help you deliver greater value to your users.
