With the mobile_scanner Flutter package, you can integrate barcode scanning functionalities into your cross-platform app. It uses ML Kit for scanning on mobile devices (with CameraX on Android and AVFoundation on iOS) and zxing-js for browser-based scanning.
In this tutorial, we’ll walk you through the process of setting up a Flutter project and implementing barcode scanning using mobile_scanner.
Prerequisites
- The latest version of the Flutter SDK
- An IDE with Flutter support, such as VS Code or Android Studio
- A physical device for each target platform or an emulator with camera access
Step 1: Create a Flutter project
Open a terminal and create a Flutter project using the following command:
flutter create barcode_scannerThen navigate to the barcode_scanner directory.
cd barcode_scannerStep 2: Add the dependencies
Open pubspec.yaml and add the mobile_scanner package under dependencies.
dependencies:
  flutter:
    sdk: flutter
  mobile_scanner: 6.0.0
Now run the following command to fetch and download the package:
flutter pub getStep 3: Set the minimum required versions
Android Min SDK
Navigate to android/app/build.gradle and set minSdkVersion to 21 or higher.
defaultConfig {
  ...
  minSdkVersion 21
}
Step 4: Configure the camera permissions
The camera must have active permissions for the mobile scanner to work. Define the following permissions for Android and iOS in the specified locations.
Android
Add the permission to android/app/src/main/AndroidManifest.xml:
<manifest xmlns:android="http://schemas.android.com/apk/res/android">
    // Add the permission here:
    <uses-permission android:name="android.permission.CAMERA" />
    <application
    ...
iOS
Also add the permission anywhere in ios/Runner/Info.plist:
<key>NSCameraUsageDescription</key>
<string>Grant access to your camera to start scanning</string>
Step 5: Implement barcode scanning
Finally, implement the barcode scanning logic by replacing the code in lib/main.dart with the following:
import 'package:flutter/material.dart';
import 'package:mobile_scanner/mobile_scanner.dart';
void main() {
runApp(const BarcodeScannerApp());
}
class BarcodeScannerApp extends StatelessWidget {
const BarcodeScannerApp({super.key});
@override
Widget build(BuildContext context) {
return const MaterialApp(
debugShowCheckedModeBanner: false,
home: BarcodeScannerScreen(),
);
}
}
class BarcodeScannerScreen extends StatefulWidget {
const BarcodeScannerScreen({super.key});
@override
State<BarcodeScannerScreen> createState() => _BarcodeScannerScreenState();
}
class _BarcodeScannerScreenState extends State<BarcodeScannerScreen> {
String barcodeResult = "Point the camera at a barcode";
@override
Widget build(BuildContext context) {
return Scaffold(
appBar: AppBar(title: const Text("Barcode Scanner")),
body: Column(
children: [
Expanded(
flex: 3,
child: MobileScanner(
onDetect: (BarcodeCapture capture) {
final List<Barcode> barcodes = capture.barcodes;
if (barcodes.isNotEmpty && barcodes.first.rawValue != null) {
setState(() {
barcodeResult = barcodes.first.rawValue!;
});
}
},
),
),
Expanded(
flex: 1,
child: Center(
child: Text(
barcodeResult,
style: const TextStyle(fontSize: 18, fontWeight: FontWeight.bold),
),
),
),
],
),
);
}
}The above code logic does the following:
- Imports:
flutter/material.dart: Required for UImobile_scanner/mobile_scanner.dart: Required for barcode scanning
- Flutter app structure:
main()to initialize and run the app withrunApp(const BarcodeScannerApp());BarcodeScannerApp: AStatelessWidgetthat initializesMaterialAppBarcodeScannerScreen: AStatefulWidgetto handle dynamic UI changes
- Barcode scanner and camera implementation:
onDetectcallback extractsbarcodes.first.rawValueand updatesbarcodeResultsetState()triggers a UI update when a barcode is scanned
- Displaying scanned barcodes:
Text(barcodeResult): Displays the scan resultsTextStyle: Makes the result readable
Step 6: Run the app
Connect your device or start an emulator. Then run the app using:
flutter runNow you can scan barcodes using your camera and get the scanned value displayed on the screen. Extend this app by adding UI enhancements and features such as flash control and gallery scanning per your requirements.
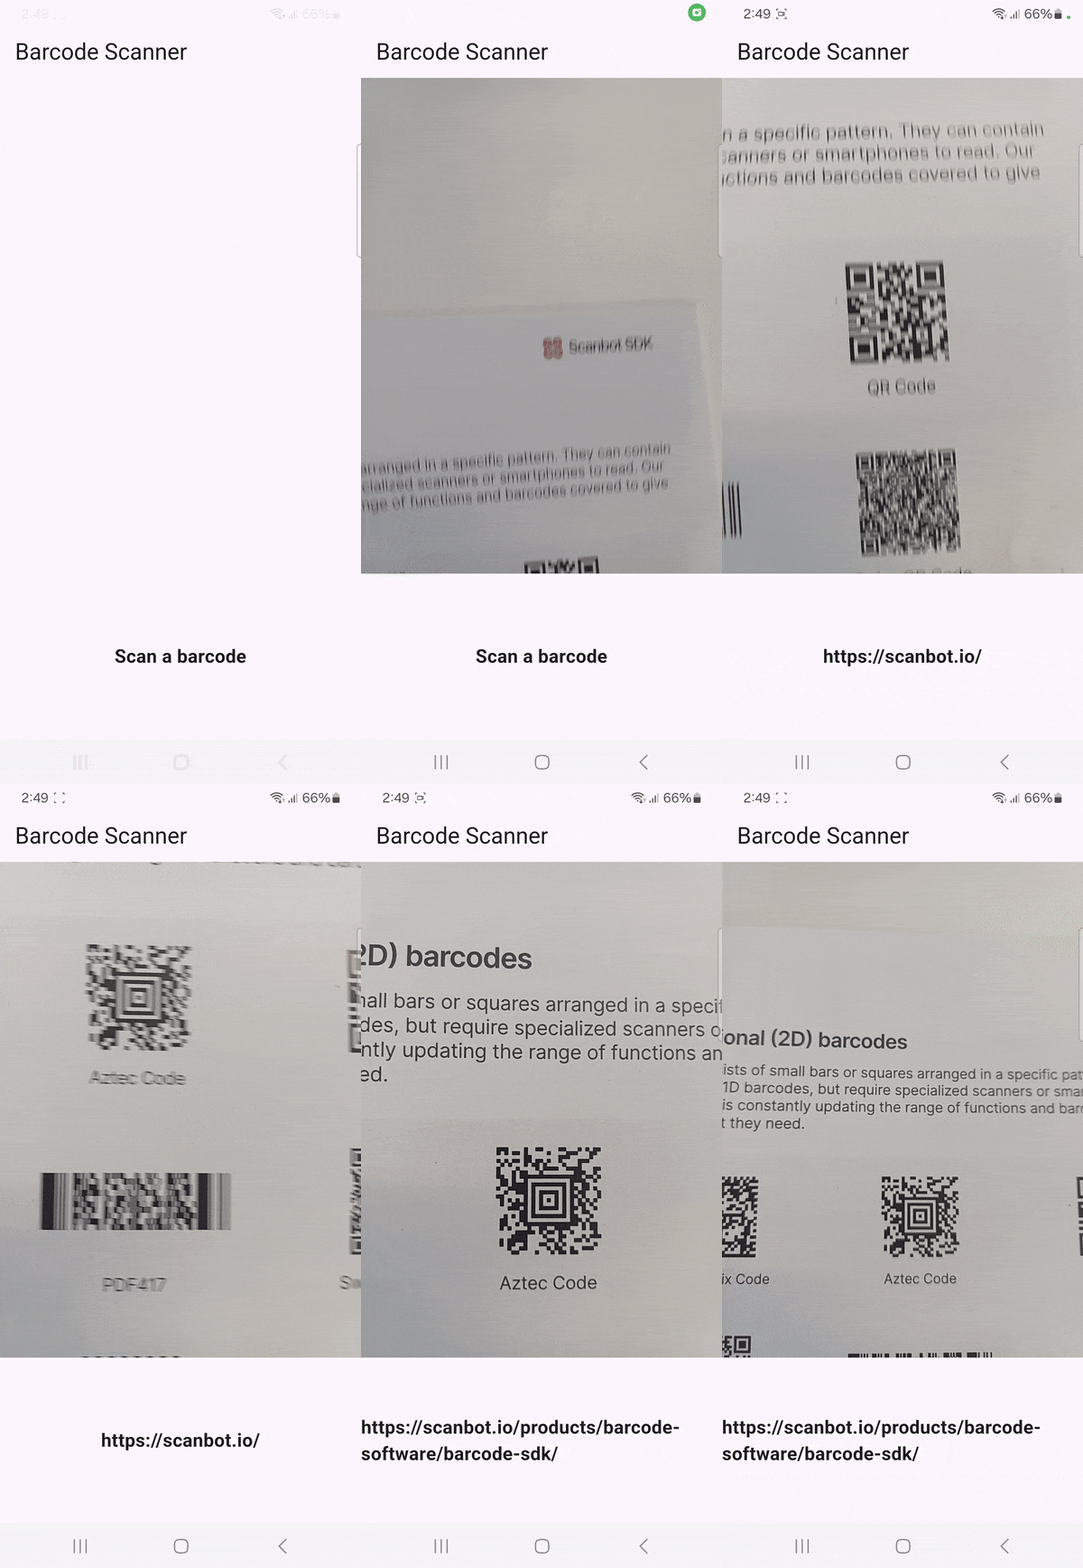
Disadvantages of using the mobile_scanner package for scanning barcodes
While the mobile_scanner package is a useful tool for Flutter developers, it comes with a few notable downsides:
- Since it uses ML Kit on mobile devices but zxing-js for scanning in the browser, the supported barcode types differ between platforms, leading to inconsistent performance.
- Users have reported slow scanning performance on certain devices and compatibility issues across various screen sizes and camera types.
- There have been discrepancies between the package’s documentation, the examples on GitHub, and the actual library code.
- Major migrations between versions have been difficult in the past, leading to compatibility problems.
- Users have encountered device-specific issues like inconsistent behavior with multiple cameras and the flashlight functionality not working properly.
For companies that heavily rely on barcode scanning in their business processes, we recommend using an enterprise-grade solution instead.
Building a Flutter Barcode Scanner with the Scanbot SDK
We developed the Scanbot Barcode Scanner SDK to help enterprises overcome the hurdles presented by free barcode scanning software. Our goal was to have a developer-friendly solution available for a wide range of platforms that consistently delivers high-quality results – even in challenging circumstances.
With the SDK’s Ready-to-Use UI Components, you can even use an AR overlay to display multiple barcodes’ contents directly in the viewfinder, enhancing the scanning experience.
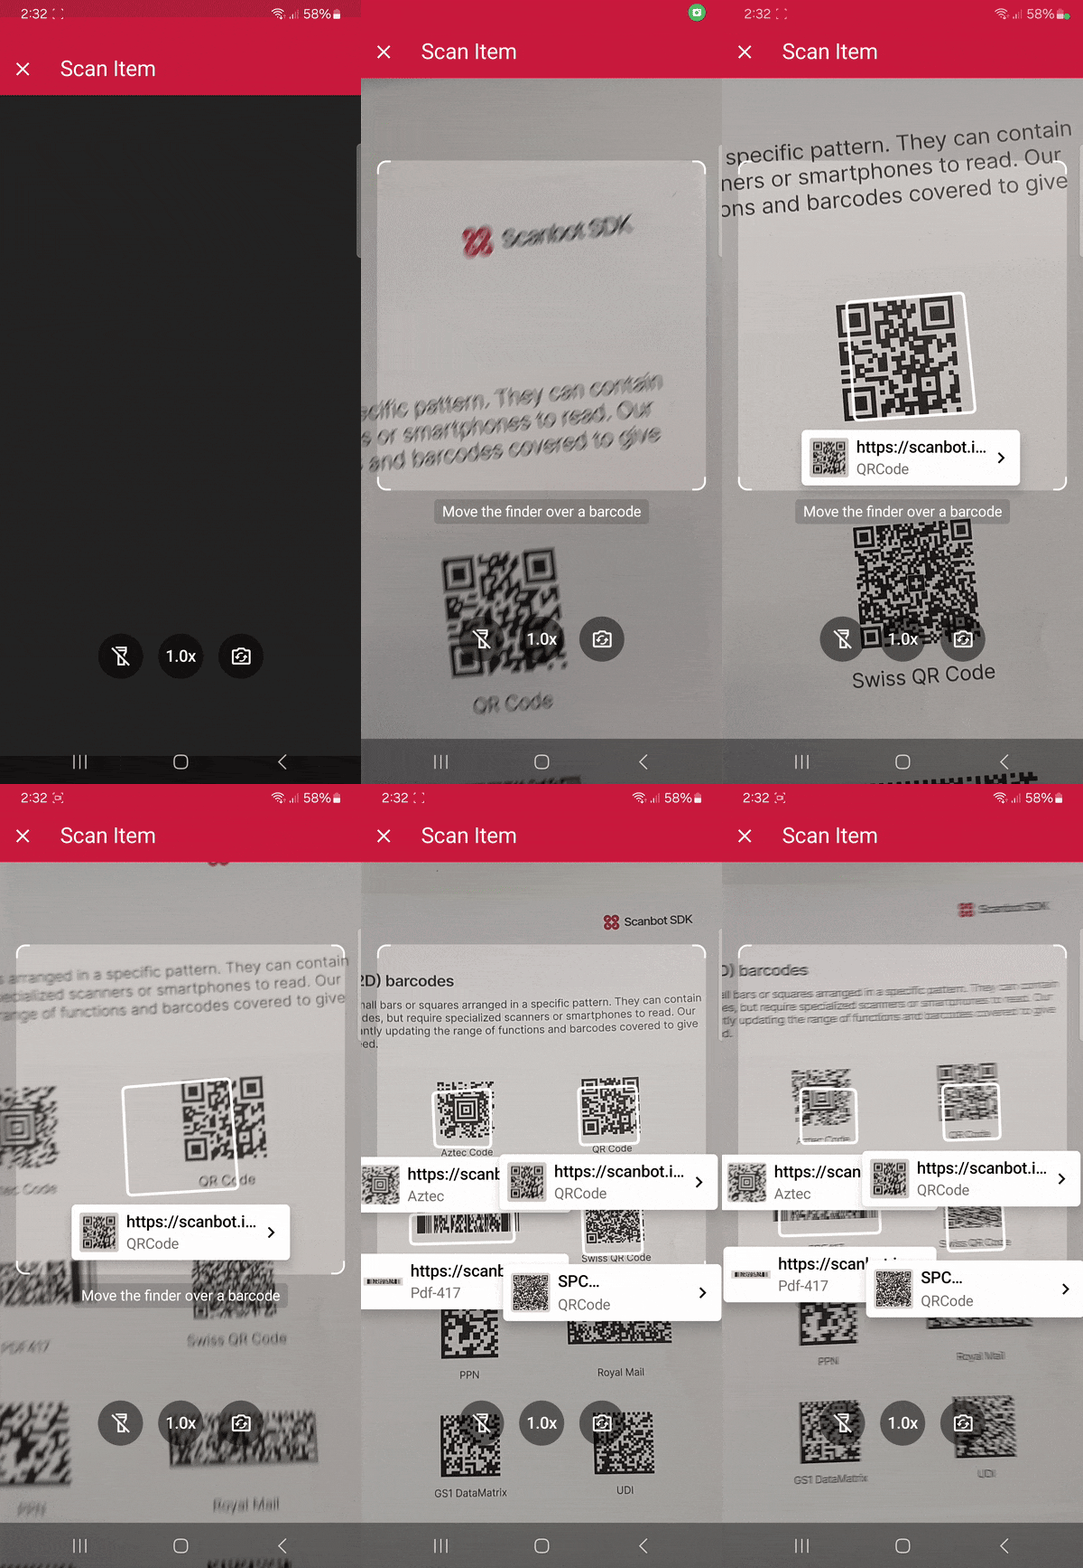
Setting up a Flutter app to scan 1D or 2D barcodes is straightforward. We’re going to follow these steps:
- Prepare the project.
- Install the SDK.
- Initialize the SDK.
- Implement the scanning modules.
- Start scanning barcodes!
Requirements
To develop Flutter applications for Android and iOS, ensure you have the following:
- Flutter SDK: Download the latest version for your OS.
- Dart SDK: No separate installation needed, since it’s integrated with Flutter.
- The right IDEs for your target platforms:
- Android Studio to develop for Android. It includes the Android SDK and AVD Manager.
- Xcode for iOS development on macOS.
- You can also use Visual Studio Code, which supports Flutter plugins.
⚠️ A note to Windows users: A Mac is necessary to build and test iOS apps. Consider using a remote Mac service or a physical Mac as a build server.
1. Preparing the project
First, create a new directory for your project and navigate into it:
mkdir test-flutter
cd test-flutter
Create a new Flutter project:
flutter create test_barcode_scanner
cd test_barcode_scanner
Since we need access to the device camera to scan barcodes, let’s add the necessary camera permissions for Android and iOS.
Add camera permissions to android/app/src/main/AndroidManifest.xml:
<uses-permission android:name="android.permission.CAMERA"/>
<uses-feature android:name="android.hardware.camera" />
And in ios/Runner/Info.plist:
<key>NSCameraUsageDescription</key>
<string>We need camera access to scan barcodes.</string>
2. Installing the SDK
Add the Scanbot Flutter Barcode Scanner package to your pubspec.yaml:
dependencies:
  flutter:
    sdk: flutter
	barcode_scanner: ^5.1.0
Run the following commnand to install the packages:
flutter pub get
💡 Please refer to our changelog for the latest version of the Barcode Scanner SDK.
Now that the project is set up, we can integrate the barcode scanning functionalities.
3. Initializing the SDK
Initialize the SDK in main.dart:
import 'package:flutter/material.dart';
import 'package:barcode_scanner/scanbot_barcode_sdk_v2.dart';

const BARCODE_SDK_LICENSE_KEY = "";

void main() {
  runApp(const MyApp());
}

class MyApp extends StatelessWidget {
  const MyApp({super.key});

  @override
  Widget build(BuildContext context) {
    return const MaterialApp(
      home: MyHomePage(),
    );
  }
}

class MyHomePage extends StatefulWidget {
  const MyHomePage({super.key});

  @override
  State<MyHomePage> createState() => _MyHomePageState();
}

class _MyHomePageState extends State<MyHomePage> {
  @override
  void initState() {
    super.initState();
    _initScanbotSdk();
  }

  Future<void> _initScanbotSdk() async {
    var config = ScanbotSdkConfig(
      licenseKey: BARCODE_SDK_LICENSE_KEY,
      loggingEnabled: true,
    );

    try {
      await ScanbotBarcodeSdk.initScanbotSdk(config);
      print('Scanbot SDK initialized successfully');
    } catch (e) {
      print('Error initializing Scanbot SDK: $e');
    }
  }

  @override
  Widget build(BuildContext context) {
  ...
}
💡 Without a license key, our SDK only runs for 60 seconds per session. This is more than enough for the purposes of our tutorial, but if you like, you can generate a license key using your applicationId.
4. Implementing the scanning modes
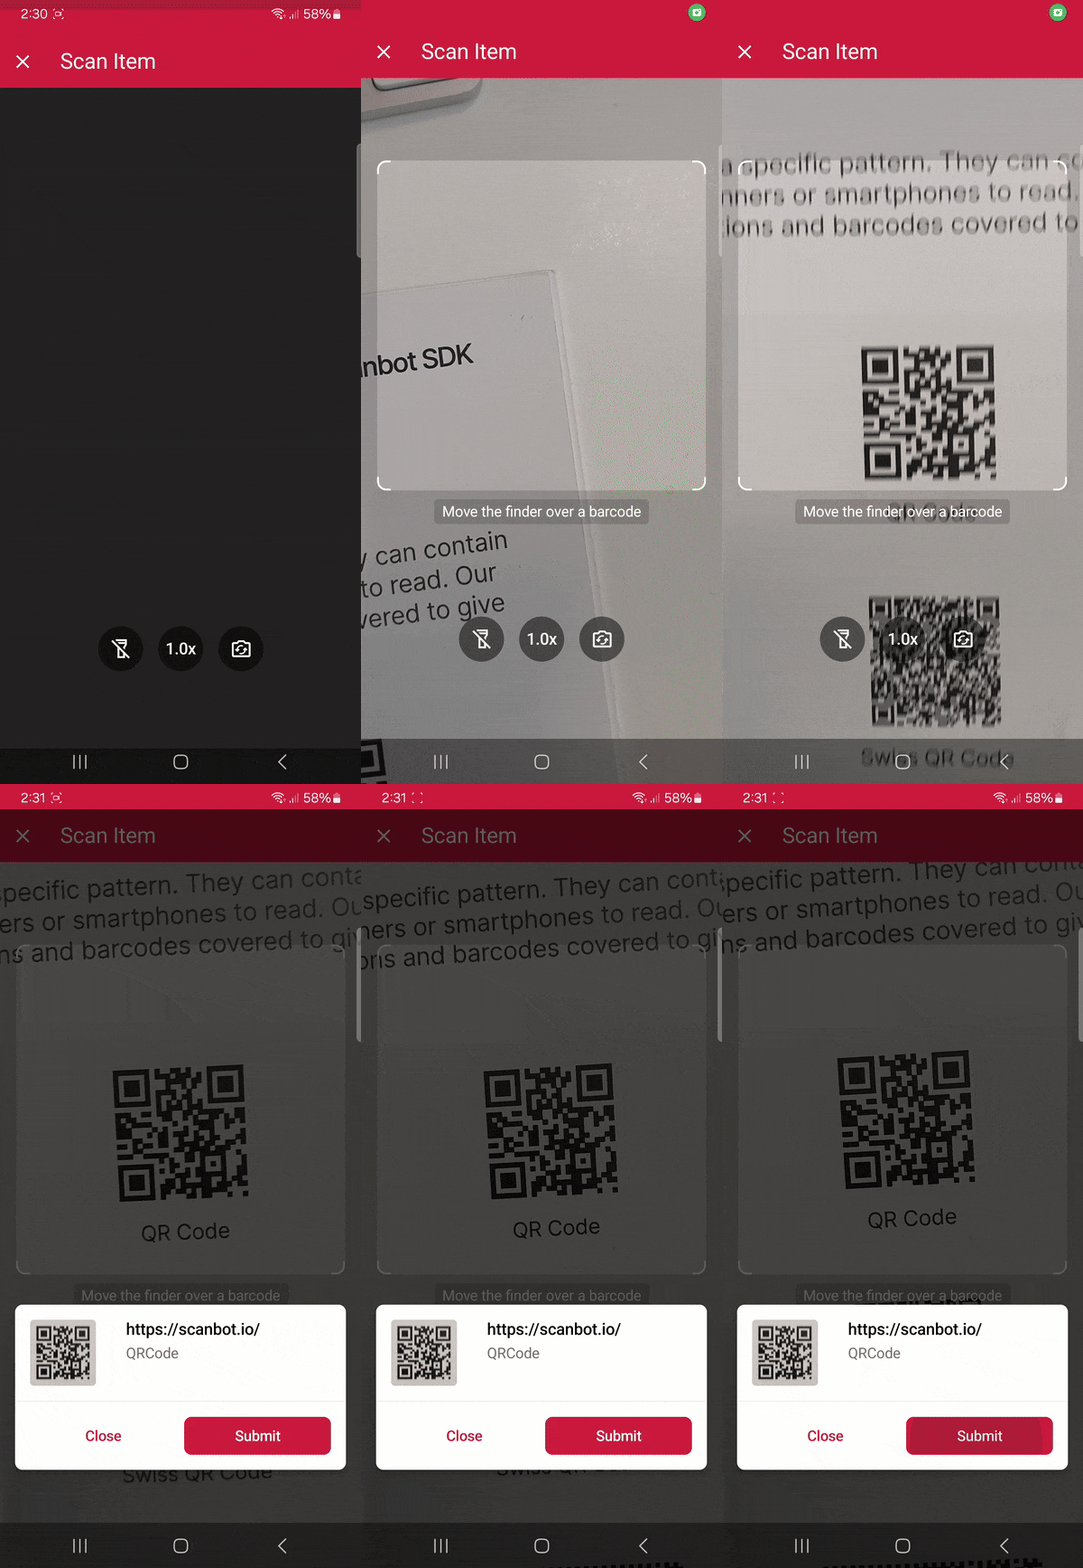
The SDK’s RTU UI components make it easy to deploy our Flutter Barcode Scanner package’s different scanning modes in your app. Let’s start with the simplest use case: single-barcode scanning.
Implement the barcode scanning functionality:
void _startBarcodeScanning() async {
  try {
    // Create the default configuration object.
    var configuration = BarcodeScannerConfiguration();

    // Initialize the use case for single scanning.
    var scanningMode = SingleScanningMode();
    // Enable and configure the confirmation sheet.
    scanningMode.confirmationSheetEnabled = true;
    scanningMode.sheetColor = ScanbotColor("#FFFFFF");

    // Hide/unhide the barcode image.
    scanningMode.barcodeImageVisible = true;

    // Configure the barcode title of the confirmation sheet.
    scanningMode.barcodeTitle.visible = true;
    scanningMode.barcodeTitle.color = ScanbotColor("#000000");

    // Configure the barcode subtitle of the confirmation sheet.
    scanningMode.barcodeSubtitle.visible = true;
    scanningMode.barcodeSubtitle.color = ScanbotColor("#000000");

    // Configure the cancel button of the confirmation sheet.
    scanningMode.cancelButton.text = "Close";
    scanningMode.cancelButton.foreground.color = ScanbotColor("#C8193C");
    scanningMode.cancelButton.background.fillColor = ScanbotColor("#00000000");

    // Configure the submit button of the confirmation sheet.
    scanningMode.submitButton.text = "Submit";
    scanningMode.submitButton.foreground.color = ScanbotColor("#FFFFFF");
    scanningMode.submitButton.background.fillColor = ScanbotColor("#C8193C");

    // Configure other parameters, pertaining to single-scanning mode as needed.

    configuration.useCase = scanningMode;

    // Set an array of accepted barcode types.
    // configuration.recognizerConfiguration.barcodeFormats = [
    //   scanbotV2.BarcodeFormat.AZTEC,
    //   scanbotV2.BarcodeFormat.PDF_417,
    //   scanbotV2.BarcodeFormat.QR_CODE,
    //   scanbotV2.BarcodeFormat.MICRO_QR_CODE,
    //   scanbotV2.BarcodeFormat.MICRO_PDF_417,
    //   scanbotV2.BarcodeFormat.ROYAL_MAIL,
    ///  .....
    // ];

    // Configure other parameters as needed.

    var result = await ScanbotBarcodeSdk.startBarcodeScanner(configuration);

    if(result.operationResult == OperationResult.SUCCESS)
    {
      // TODO: present barcode result as needed
      print(result.value?.items.first.type?.name);
    }
  } catch (e) {
    print('Error: $e');
  }
}
Now let’s go to the build method and add the button on the start screen so it calls our _startBarcodeScanning method when clicked:
@override
Widget build(BuildContext context) {
  return Scaffold(
    appBar: AppBar(
      title: const Text('Barcode Scanner'),
    ),
    body: Center(
      child: ElevatedButton(
        onPressed: _startBarcodeScanning,
        style: ElevatedButton.styleFrom(
          padding: const EdgeInsets.symmetric(vertical: 20, horizontal: 40),
          textStyle: const TextStyle(fontSize: 18),
        ),
        child: const Text("Start single-barcode scanning"),
      ),
    ),
  );
}
If you like, you can build and run the app to see if everything is working correctly so far:
flutter run
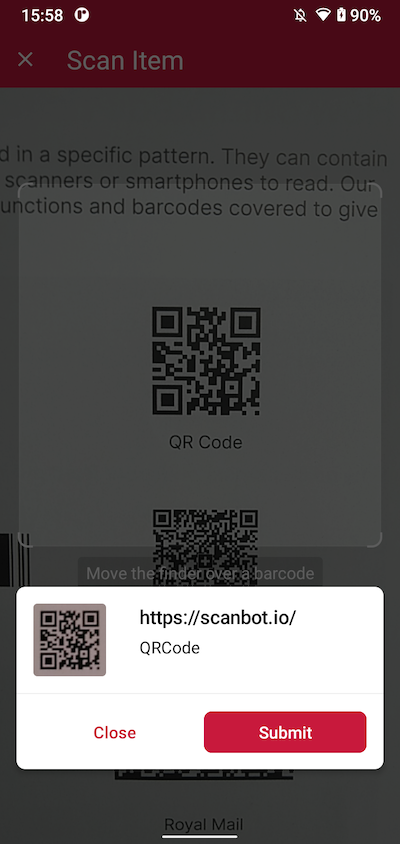
In the next step, we’re going to insert both the multi-barcode scanning and the AR overlay modules.
Let’s create two more methods, _startBarcodeMultiScanning and _startAROverlay:
void _startBarcodeMultiScanning() async {
  try {
    // Create the default configuration object.
    var configuration = BarcodeScannerConfiguration();

    // Initialize the use case for multiple scanning.
    var scanningMode = MultipleScanningMode();

    // Set the counting mode.
    scanningMode.mode = MultipleBarcodesScanningMode.COUNTING;

    // Set the sheet mode for the barcodes preview.
    scanningMode.sheet.mode = SheetMode.COLLAPSED_SHEET;

    // Set the height for the collapsed sheet.
    scanningMode.sheet.collapsedVisibleHeight = CollapsedVisibleHeight.LARGE;

    // Enable manual count change.
    scanningMode.sheetContent.manualCountChangeEnabled = true;

    // Set the delay before same barcode counting repeat.
    scanningMode.countingRepeatDelay = 1000;

    // Configure the submit button.
    scanningMode.sheetContent.submitButton.text = "Submit";
    scanningMode.sheetContent.submitButton.foreground.color =
        ScanbotColor("#000000");

    // Configure other parameters, pertaining to multiple-scanning mode as needed.

    configuration.useCase = scanningMode;

    // Set an array of accepted barcode types.
    // configuration.recognizerConfiguration.barcodeFormats = [
    //   BarcodeFormat.AZTEC,
    //   BarcodeFormat.PDF_417,
    //   BarcodeFormat.QR_CODE,
    //   BarcodeFormat.MICRO_QR_CODE,
    //   BarcodeFormat.MICRO_PDF_417,
    //   BarcodeFormat.ROYAL_MAIL,
    ///  .....
    // ];

    // Configure other parameters as needed.

    var result = await ScanbotBarcodeSdk.startBarcodeScanner(configuration);

    if(result.operationResult == OperationResult.SUCCESS)
    {
      // TODO: present barcode result as needed
      print(result.value?.items.first.type?.name);
    }
  } catch (e) {
    print('Error: $e');
  }
}
void _startAROverlay() async {
    try {
     // Create the default configuration object.
      var configuration = new BarcodeScannerConfiguration();

      // Configure the usecase.
      var usecase = new MultipleScanningMode();
      usecase.mode = MultipleBarcodesScanningMode.UNIQUE;
      usecase.sheet.mode = SheetMode.COLLAPSED_SHEET;
      usecase.sheet.collapsedVisibleHeight = CollapsedVisibleHeight.SMALL;

      // Configure AR Overlay.
      usecase.arOverlay.visible = true;
      usecase.arOverlay.automaticSelectionEnabled = false;

      // Set the configured usecase.
      configuration.useCase = usecase;

      // Set an array of accepted barcode types.
      // configuration.recognizerConfiguration.barcodeFormats = [
      //   BarcodeFormat.AZTEC,
      //   BarcodeFormat.PDF_417,
      //   BarcodeFormat.QR_CODE,
      //   BarcodeFormat.MICRO_QR_CODE,
      //   BarcodeFormat.MICRO_PDF_417,
      //   BarcodeFormat.ROYAL_MAIL,
      ///  .....
      // ];

      var result = await ScanbotBarcodeSdk.startBarcodeScanner(configuration);

      if (result.operationResult == OperationResult.SUCCESS) {
        // TODO: present barcode result as needed
        print(result.value?.items.first.type?.name);
      }
    } catch (e) {
      print('Error: $e');
    }
  }
And let’s not forget to insert the buttons:
@override
  Widget build(BuildContext context) {
    return Scaffold(
      appBar: AppBar(
        title: const Text('Barcode Scanner'),
      ),
      body: Center(
        child: Column(
          mainAxisAlignment: MainAxisAlignment.center,
          children: [
            ElevatedButton(
              onPressed: _startBarcodeScanning,
              style: ElevatedButton.styleFrom(
                padding: const EdgeInsets.symmetric(vertical: 20, horizontal: 40),
                textStyle: const TextStyle(fontSize: 18),
              ),
              child: const Text("Start single-barcode scanning"),
            ),
            const SizedBox(height: 20),
            ElevatedButton(
              onPressed: _startBarcodeMultiScanning,
              style: ElevatedButton.styleFrom(
                padding: const EdgeInsets.symmetric(vertical: 20, horizontal: 40),
                textStyle: const TextStyle(fontSize: 18),
              ),
              child: const Text("Start multi-barcode scanning"),
            ),
            const SizedBox(height: 20),
            ElevatedButton(
              onPressed: _startAROverlay,
              style: ElevatedButton.styleFrom(
                padding: const EdgeInsets.symmetric(vertical: 20, horizontal: 40),
                textStyle: const TextStyle(fontSize: 18),
              ),
              child: const Text("Start the AR overlay"),
            ),
          ],
        ),
      ),
    );
  }
Your final main.dart should look something like this:
import 'package:flutter/material.dart';
import 'package:barcode_scanner/scanbot_barcode_sdk_v2.dart';

const BARCODE_SDK_LICENSE_KEY = "";

void main() {
  runApp(const MyApp());
}

class MyApp extends StatelessWidget {
  const MyApp({super.key});

  @override
  Widget build(BuildContext context) {
    return const MaterialApp(
      home: MyHomePage(),
    );
  }
}

class MyHomePage extends StatefulWidget {
  const MyHomePage({super.key});

  @override
  State<MyHomePage> createState() => _MyHomePageState();
}

class _MyHomePageState extends State<MyHomePage> {
  @override
  void initState() {
    super.initState();
    _initScanbotSdk();
  }

  Future<void> _initScanbotSdk() async {
    var config = ScanbotSdkConfig(
      licenseKey: BARCODE_SDK_LICENSE_KEY,
      loggingEnabled: true,
    );

    try {
      await ScanbotBarcodeSdk.initScanbotSdk(config);
      print('Scanbot SDK initialized successfully');
    } catch (e) {
      print('Error initializing Scanbot SDK: $e');
    }
  }

  @override
  Widget build(BuildContext context) {
    return Scaffold(
      appBar: AppBar(
        title: const Text('Barcode Scanner'),
      ),
      body: Center(
        child: Column(
          mainAxisAlignment: MainAxisAlignment.center,
          children: [
            ElevatedButton(
              onPressed: _startBarcodeScanning,
              style: ElevatedButton.styleFrom(
                padding: const EdgeInsets.symmetric(vertical: 20, horizontal: 40),
                textStyle: const TextStyle(fontSize: 18),
              ),
              child: const Text("Start single-barcode scanning"),
            ),
            const SizedBox(height: 20),
            ElevatedButton(
              onPressed: _startBarcodeMultiScanning,
              style: ElevatedButton.styleFrom(
                padding: const EdgeInsets.symmetric(vertical: 20, horizontal: 40),
                textStyle: const TextStyle(fontSize: 18),
              ),
              child: const Text("Start multi-barcode scanning"),
            ),
            const SizedBox(height: 20),
            ElevatedButton(
              onPressed: _startAROverlay,
              style: ElevatedButton.styleFrom(
                padding: const EdgeInsets.symmetric(vertical: 20, horizontal: 40),
                textStyle: const TextStyle(fontSize: 18),
              ),
              child: const Text("Start the AR overlay"),
            ),
          ],
        ),
      ),
    );
  }

  void _startBarcodeScanning() async {
    try {
      // Create the default configuration object.
      var configuration = BarcodeScannerConfiguration();

      // Initialize the use case for single scanning.
      var scanningMode = SingleScanningMode();
      // Enable and configure the confirmation sheet.
      scanningMode.confirmationSheetEnabled = true;
      scanningMode.sheetColor = ScanbotColor("#FFFFFF");

      // Hide/unhide the barcode image.
      scanningMode.barcodeImageVisible = true;

      // Configure the barcode title of the confirmation sheet.
      scanningMode.barcodeTitle.visible = true;
      scanningMode.barcodeTitle.color = ScanbotColor("#000000");

      // Configure the barcode subtitle of the confirmation sheet.
      scanningMode.barcodeSubtitle.visible = true;
      scanningMode.barcodeSubtitle.color = ScanbotColor("#000000");

      // Configure the cancel button of the confirmation sheet.
      scanningMode.cancelButton.text = "Close";
      scanningMode.cancelButton.foreground.color = ScanbotColor("#C8193C");
      scanningMode.cancelButton.background.fillColor = ScanbotColor("#00000000");

      // Configure the submit button of the confirmation sheet.
      scanningMode.submitButton.text = "Submit";
      scanningMode.submitButton.foreground.color = ScanbotColor("#FFFFFF");
      scanningMode.submitButton.background.fillColor = ScanbotColor("#C8193C");

      // Configure other parameters, pertaining to single-scanning mode as needed.

      configuration.useCase = scanningMode;

      // Set an array of accepted barcode types.
      // configuration.recognizerConfiguration.barcodeFormats = [
      //   scanbotV2.BarcodeFormat.AZTEC,
      //   scanbotV2.BarcodeFormat.PDF_417,
      //   scanbotV2.BarcodeFormat.QR_CODE,
      //   scanbotV2.BarcodeFormat.MICRO_QR_CODE,
      //   scanbotV2.BarcodeFormat.MICRO_PDF_417,
      //   scanbotV2.BarcodeFormat.ROYAL_MAIL,
      ///  .....
      // ];

      // Configure other parameters as needed.

      var result = await ScanbotBarcodeSdk.startBarcodeScanner(configuration);

      if(result.operationResult == OperationResult.SUCCESS)
      {
        // TODO: present barcode result as needed
        print(result.value?.items.first.type?.name);
      }
    } catch (e) {
      print('Error: $e');
    }
  }

  void _startBarcodeMultiScanning() async {
    try {
      // Create the default configuration object.
      var configuration = BarcodeScannerConfiguration();

      // Initialize the use case for multiple scanning.
      var scanningMode = MultipleScanningMode();

      // Set the counting mode.
      scanningMode.mode = MultipleBarcodesScanningMode.COUNTING;

      // Set the sheet mode for the barcodes preview.
      scanningMode.sheet.mode = SheetMode.COLLAPSED_SHEET;

      // Set the height for the collapsed sheet.
      scanningMode.sheet.collapsedVisibleHeight = CollapsedVisibleHeight.LARGE;

      // Enable manual count change.
      scanningMode.sheetContent.manualCountChangeEnabled = true;

      // Set the delay before same barcode counting repeat.
      scanningMode.countingRepeatDelay = 1000;

      // Configure the submit button.
      scanningMode.sheetContent.submitButton.text = "Submit";
      scanningMode.sheetContent.submitButton.foreground.color =
          ScanbotColor("#000000");

      // Configure other parameters, pertaining to multiple-scanning mode as needed.

      configuration.useCase = scanningMode;

      // Set an array of accepted barcode types.
      // configuration.recognizerConfiguration.barcodeFormats = [
      //   BarcodeFormat.AZTEC,
      //   BarcodeFormat.PDF_417,
      //   BarcodeFormat.QR_CODE,
      //   BarcodeFormat.MICRO_QR_CODE,
      //   BarcodeFormat.MICRO_PDF_417,
      //   BarcodeFormat.ROYAL_MAIL,
      ///  .....
      // ];

      // Configure other parameters as needed.

      var result = await ScanbotBarcodeSdk.startBarcodeScanner(configuration);

      if(result.operationResult == OperationResult.SUCCESS)
      {
        // TODO: present barcode result as needed
        print(result.value?.items.first.type?.name);
      }
    } catch (e) {
      print('Error: $e');
    }
  }

  void _startAROverlay() async {
    try {
     // Create the default configuration object.
      var configuration = new BarcodeScannerConfiguration();

      // Configure the usecase.
      var usecase = new MultipleScanningMode();
      usecase.mode = MultipleBarcodesScanningMode.UNIQUE;
      usecase.sheet.mode = SheetMode.COLLAPSED_SHEET;
      usecase.sheet.collapsedVisibleHeight = CollapsedVisibleHeight.SMALL;

      // Configure AR Overlay.
      usecase.arOverlay.visible = true;
      usecase.arOverlay.automaticSelectionEnabled = false;

      // Set the configured usecase.
      configuration.useCase = usecase;

      // Set an array of accepted barcode types.
      // configuration.recognizerConfiguration.barcodeFormats = [
      //   BarcodeFormat.AZTEC,
      //   BarcodeFormat.PDF_417,
      //   BarcodeFormat.QR_CODE,
      //   BarcodeFormat.MICRO_QR_CODE,
      //   BarcodeFormat.MICRO_PDF_417,
      //   BarcodeFormat.ROYAL_MAIL,
      ///  .....
      // ];

      var result = await ScanbotBarcodeSdk.startBarcodeScanner(configuration);

      if (result.operationResult == OperationResult.SUCCESS) {
        // TODO: present barcode result as needed
        print(result.value?.items.first.type?.name);
      }
    } catch (e) {
      print('Error: $e');
    }
  }
}
Now let’s build and run the app again so we can try out our new scanning modules.
5. Scanning some barcodes!
Now you can go ahead and scan 1D and 2D barcodes – one after the other, many at the same time, and even with an AR overlay that lets you preview their values!

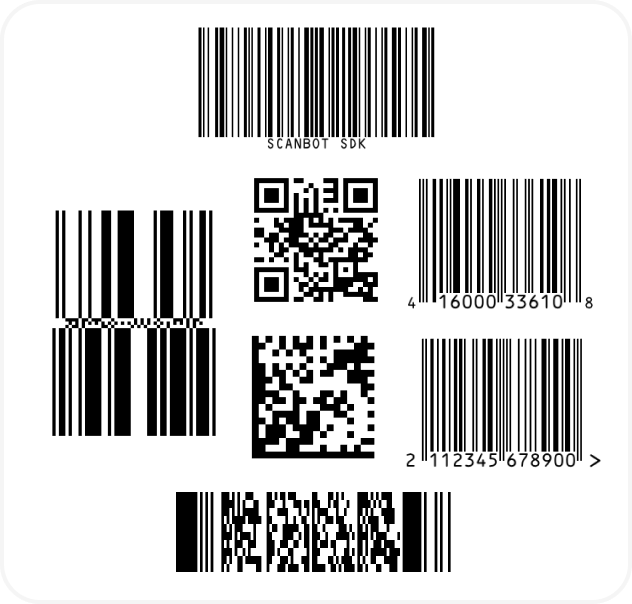
And if you’re in need of some sample barcodes for testing purposes, we’ve got you covered:
If this tutorial has piqued your interest in integrating barcode scanning functionalities into your Flutter app, make sure to take a look at our SDK’s other neat features in our documentation.
Should you have questions about this tutorial or ran into any issues, we’re happy to help! Just shoot us an email via tutorial-support@scanbot.io.
Happy coding!

