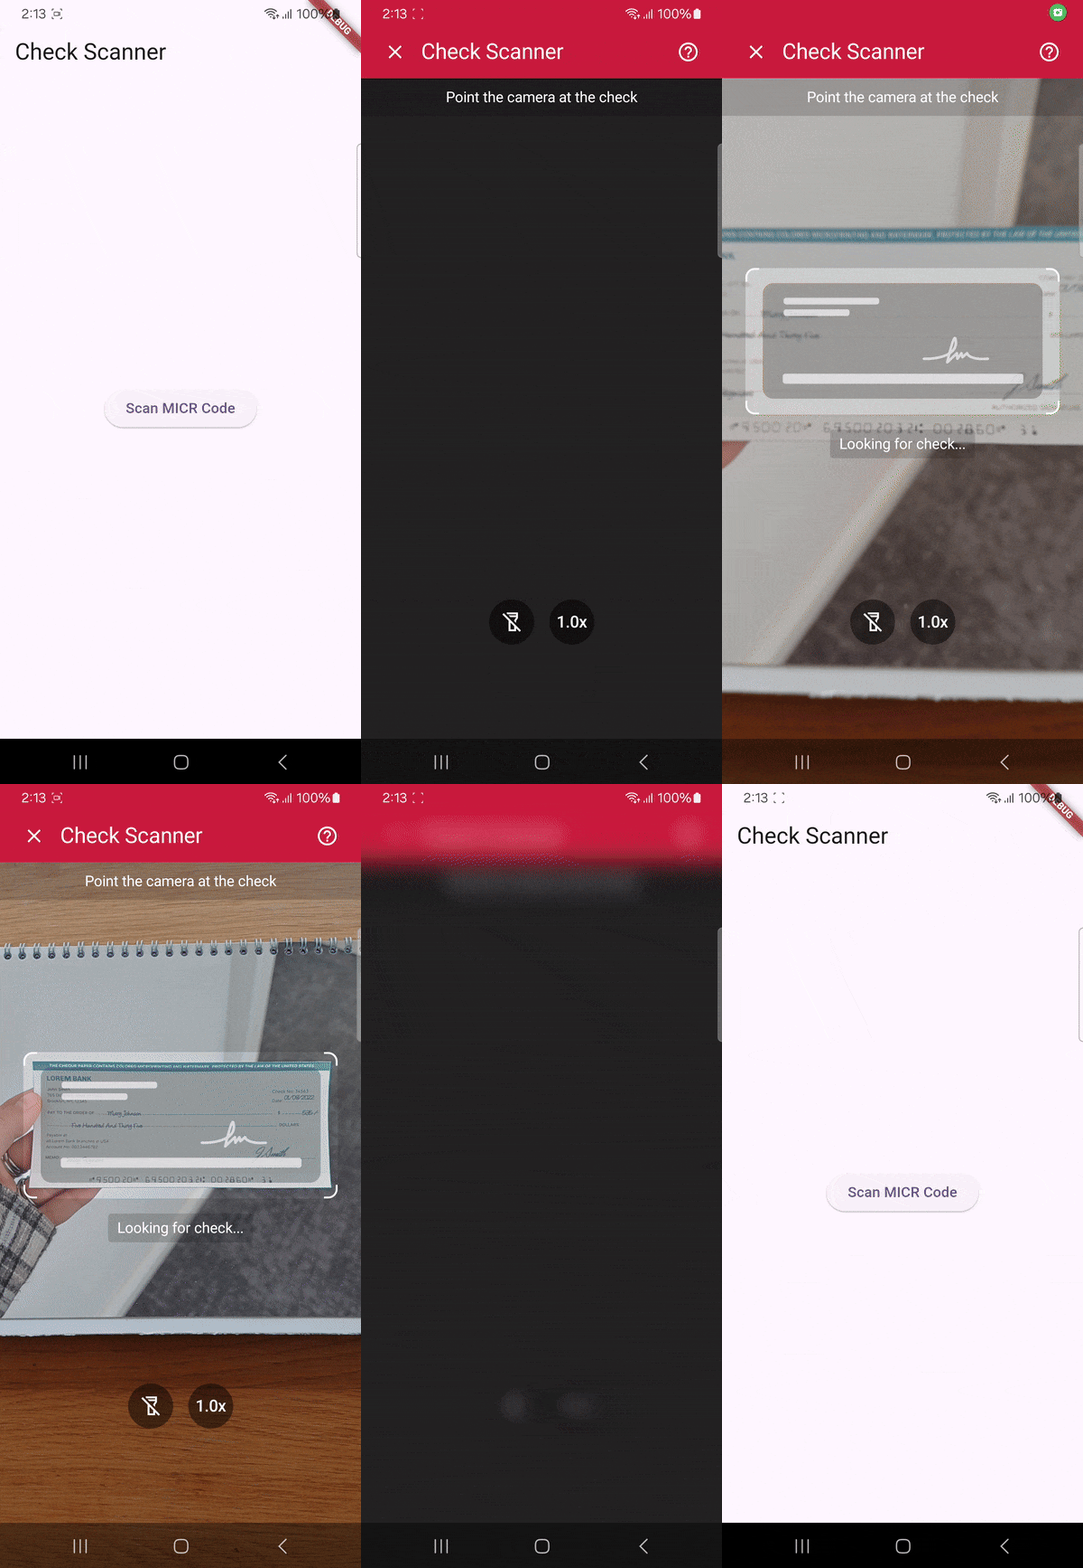
In this tutorial, we’ll use Flutter to build a cross-platform app for Android and iOS that extracts the routing number, account number, and check number from the MICR (magnetic ink character recognition) line on paper checks.
To implement the scanning functionalities, we’ll use the Scanbot Check Scanner SDK.

Building our app involves the following steps:
- Preparing the project
- Initializing the SDK
- Setting up the main widget
- Implementing the check scanning feature
Prerequisites
- Flutter SDK: Ensure you have the latest version installed.
- Development tools:
- For Android: Android Studio with the Android SDK.
- For iOS: macOS with the latest Xcode and CocoaPods installed.
- Optional: Visual Studio Code with the Flutter and Dart extensions.
Step 1: Prepare the project
Open your terminal and execute:
flutter create check_scanner_app
cd check_scanner_app
Then open pubspec.yaml and add the scanbot_sdk dependency.
dependencies:
  flutter:
    sdk: flutter
  scanbot_sdk: ^7.1.0
Fetch the package.
flutter pub get💡 We use SDK version 7.1.0 in this tutorial. You can find the latest version in the changelog.
We need to access the device camera to scan machine-readable zones, so open android/app/src/main/AndroidManifest.xml and add the necessary permissions for Android:
<uses-permission android:name="android.permission.CAMERA" />
<uses-feature android:name="android.hardware.camera" />
For iOS, open ios/Runner/Info.plist and add:
<key>NSCameraUsageDescription</key>
<string>Grant camera access to start scanning.</string>
Step 2: Initialize the SDK
Before we can use the Scanbot SDK, we need to initialize it. Make sure to call the initialization after entering the main widget creation. This ensures the SDK is correctly initialized.
In lib/main.dart, import the Scanbot SDK package:
import 'package:scanbot_sdk/scanbot_sdk.dart';
import 'package:scanbot_sdk/scanbot_sdk_ui_v2.dart';
Within your main widget, initialize the Scanbot SDK. This is typically done in the initState method of your main widget’s state class:
class _MyHomePageState extends State<MyHomePage> {
  @override
  void initState() {
    super.initState();
    _initScanbotSdk();
  }

  Future<void> _initScanbotSdk() async {
    var config = ScanbotSdkConfig(
      licenseKey: "",
      loggingEnabled: true,
    );

    try {
      await ScanbotSdk.initScanbotSdk(config);
      print('Scanbot SDK initialized successfully');
    } catch (e) {
      print('Error initializing Scanbot SDK: $e');
    }
  }
  //...
💡 Without a license key, our SDK only runs for 60 seconds per session. This is more than enough for the purposes of our tutorial, but if you like, you can generate a license key using your app identifier.
Step 3: Set up the main widget
Next, we’ll create a simple user interface that includes a button to initiate the scanning process. Still in lib/main.dart, and in your main widget’s state class, define a widget with a button labeled “Scan MICR Code”:
class _MyHomePageState extends State<MyHomePage> {
  // ... (existing code)

  @override
  Widget build(BuildContext context) {
    return Scaffold(
      appBar: AppBar(
        title: Text('Check Scanner'),
      ),
      body: Center(
        child: ElevatedButton(
          onPressed: _startCheckScanner,
          child: Text('Scan MICR Code'),
        ),
      ),
    );
  }

  Future<void> _startCheckScanner() async {
    // To be implemented in the next step
  }
}
Next, we’ll connect the button with our RTU UI’s scanning screen.
Step 4: Implement the check scanning feature
Within the _startCheckScanner method, configure and launch the scanning UI. This involves creating an CheckScannerScreenConfiguration and starting the scanner:
Future<void> _startCheckScanner() async {
  try {
    final licenseInfo = await ScanbotSdk.getLicenseStatus();
    if (!licenseInfo.isLicenseValid) {
      return;
    }

    final configuration = CheckScannerScreenConfiguration();
    final result = await ScanbotSdkUiV2.startCheckScanner(configuration);

    if (result.status == OperationStatus.OK && result.data?.check != null) {}
  } catch (e) {
    print('Error: $e');
  }
}
Now we’ll need to process the scan result. In this example, we’ll look for the Indian check format (INDCheck). For the full list of supported check formats, please refer to the SDK’s API documentation.
Once we have the check information, we can extract the specific data we need. In this example, we’ll extract the routing number, account number, and check number and display them to the user.
Future<void> _startCheckScanner() async {
    try {
      final licenseInfo = await ScanbotSdk.getLicenseStatus();
      if (!licenseInfo.isLicenseValid) {
        return;
      }

      final configuration = CheckScannerScreenConfiguration();
      final result = await ScanbotSdkUiV2.startCheckScanner(configuration);

if (result.status == OperationStatus.OK && result.data?.check != null) {
        final checkDocument = result.data?.check;
        if (checkDocument!.type.name == 'INDCheck') {
          final check = INDCheck(checkDocument);
          if (Navigator.of(context).mounted) {
            showDialog(
              context: context,
              builder: (BuildContext context) {
                return AlertDialog(
                  title: const Text("Check data:"),
                  content: Text(
                    "Routing number: ${check.sortNumber?.value?.text ?? 'N/A'}\n"
                    "Account number: ${check.accountNumber.value?.text ?? 'N/A'}\n"
                    "Check number: ${check.serialNumber.value?.text ?? 'N/A'}",
                  ),
                  actions: <Widget>[
                    TextButton(
                      child: const Text("OK"),
                      onPressed: () {
                        Navigator.of(context).pop();
                      },
                    ),
                  ],
                );
              },
            );
          }
        }
      }
    } catch (e) {
      print('Error: $e');
    }
  }
In this tutorial, we use a default configuration object. For more information on how to customize the scanning UI, please refer to the SDK’s RTU UI documentation.
Now build and run the app and scan the MICR line on a check …

… to test your scanner!

Conclusion
And that’s it! You’ve successfully built a cross-platform check scanner app with Flutter 🎉
If this tutorial has piqued your interest in integrating scanning functionalities into your Flutter app, make sure to take a look at the SDK’s other neat features in the documentation – or run our example project for a more hands-on experience.
Should you have questions about this tutorial or run into any issues, we’re happy to help! Just shoot us an email via tutorial-support@scanbot.io.
Happy scanning! 🤳


