In this tutorial, we’ll build a cross-platform barcode scanning app for Android and iOS using Ionic Capacitor and the capacitor-barcode-scanner plugin.
This open-source plugin by the Ionic team uses OutSystems barcode libs for Android and iOS to recognize and extract data from several 1D and 2D barcode types.
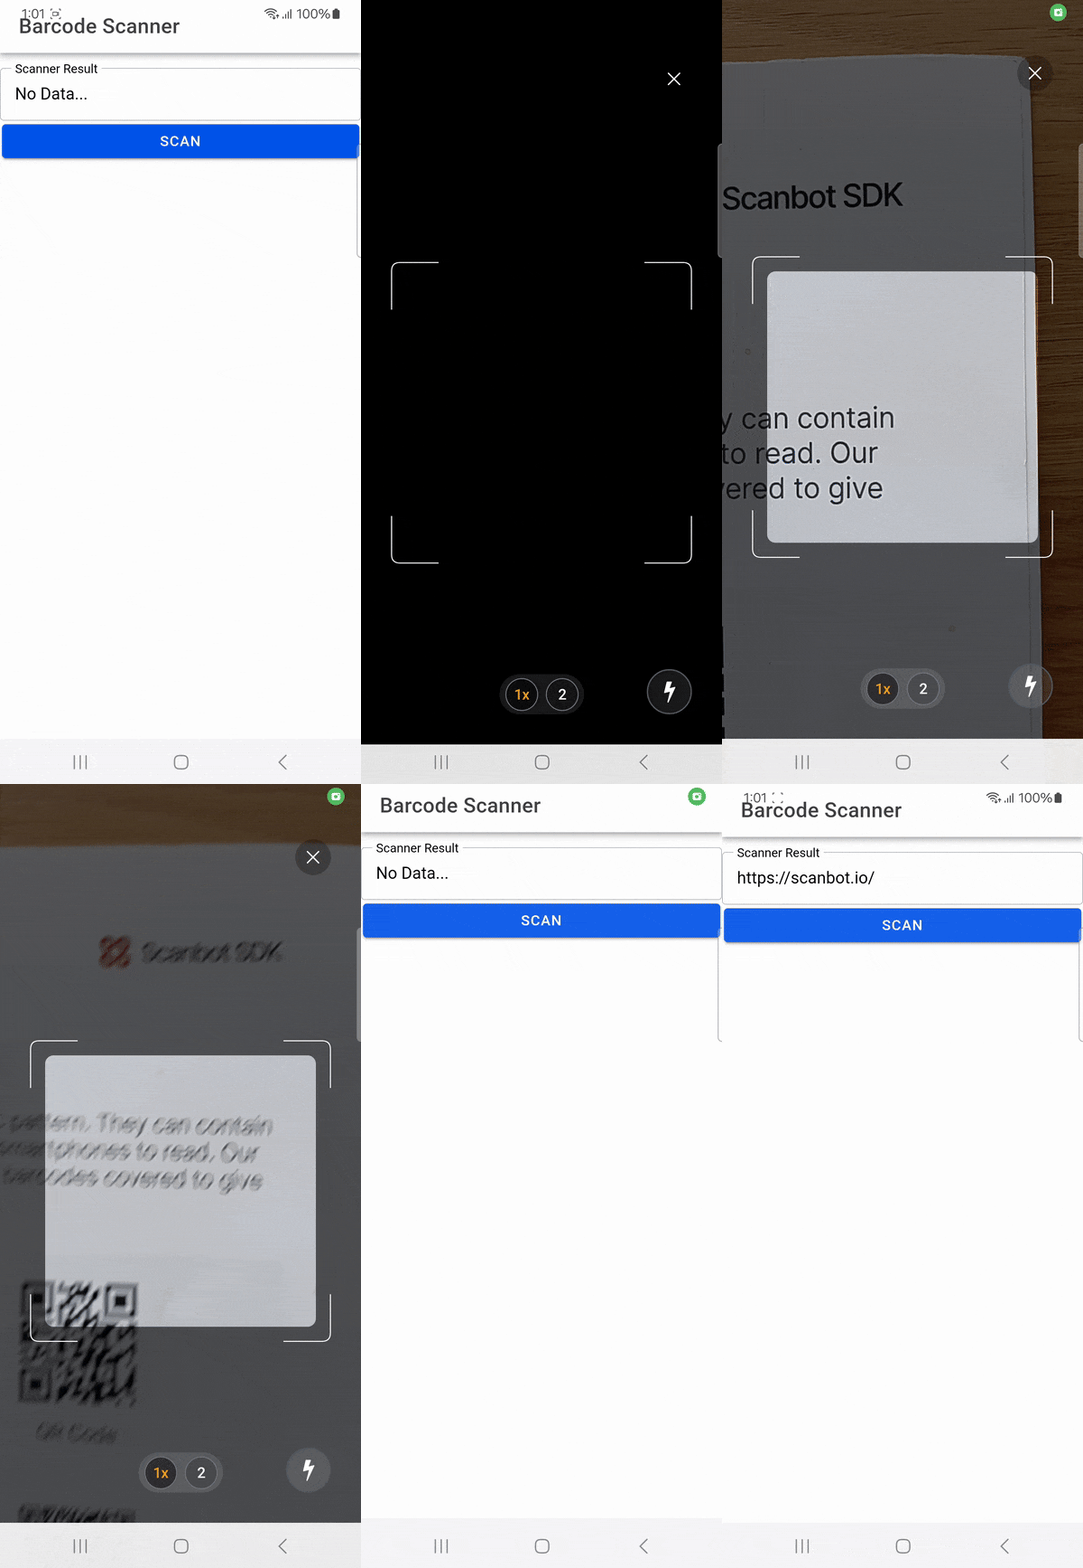
To create our app, we’ll follow these steps:
- Creating a new Ionic React project
- Installing the barcode scanner plugin and configuring the project
- Implementing the scanner logic
- Updating the main app
- Building and syncing the project
Prerequisites
Before we start, make sure you have the following tools installed and configured:
- Node.js: Version 20 or higher.
- pnpm: We’ll use pnpm for package management. While npm or yarn may work, using pnpm is recommended to ensure correct dependency resolution and avoid potential issues. If you don’t have it, install it globally with
npm install -g pnpm. - Ionic CLI: Install it globally with
npm install -g @ionic/cli. - Native development tools:
- For Android: Android Studio, JDK, and the Android SDK. Ensure
adbis in your system’s PATH and your device has USB Debugging enabled. - For iOS: A Mac with the latest version of Xcode, Xcode Command Line Tools, and CocoaPods. For testing, you’ll need a physical iOS device, as the camera does not work in the simulator.
- For Android: Android Studio, JDK, and the Android SDK. Ensure
Step 1: Create a new Ionic React project
First, let’s create a blank Ionic React application. This command sets up a new project with all the necessary boilerplate and installs the initial dependencies.
ionic start my-scanner-app blank --type react --capacitorThe --capacitor flag automatically initializes Capacitor in the project.
Navigate into the project directory.
cd my-scanner-appThen add Android and iOS as platforms.
npm i @capacitor/android @capacitor/iosAnd run the following commands to create the native Android and iOS projects:
npx cap add android
npx cap add ios
Finally, install the Ionic React framework, Ionic React’s router integration, and the standard React Router library.
pnpm add @ionic/react @ionic/react-router react-router-domStep 2: Install the barcode scanner plugin and configure the project
Next, we need to install the capacitor-barcode-scanner plugin. This package provides the native code and the web-based API to access the device’s camera for scanning.
pnpm add @capacitor/barcode-scannerTo access the camera, our app needs to request permission from the user. We must declare this requirement in the native configuration files for both Android and iOS.
For Android:
Open android/app/src/main/AndroidManifest.xml and add the following line inside the <manifest> tag:
<uses-permission android:name="android.permission.CAMERA" />For iOS:
Open ios/App/App/Info.plist and add the following key-value pair inside the root <dict> tag. This string will be shown to the user when the app first requests camera access.
<key>NSCameraUsageDescription</key>
<string>Grant camera access to scan barcodes.</string>
Next, open your main application src/main.tsx (in some cases, this file is named as src/index.tsx). You’ll need to import Ionic’s core stylesheets. These CSS files provide the foundational styles, CSS variables, and utility classes that Ionic’s Web Components rely on. Without them, your components won’t render correctly.
import '@ionic/react/css/core.css';
import '@ionic/react/css/normalize.css';
import '@ionic/react/css/structure.css';
import '@ionic/react/css/typography.css';
import '@ionic/react/css/padding.css';
import '@ionic/react/css/float-elements.css';
import '@ionic/react/css/text-alignment.css';
import '@ionic/react/css/text-transformation.css';
import '@ionic/react/css/flex-utils.css';
import '@ionic/react/css/display.css';
Step 3: Implement the scanner logic
Now, you need to write the code to trigger the scanner and display the result. We’ll modify the default Home.tsx page component.
Replace the contents of src/pages/Home.tsx with the following code:
import { IonButton, IonContent, IonHeader, IonInput, IonPage, IonTitle, IonToolbar } from '@ionic/react';
import './Home.css';
import { useState } from 'react';
import { CapacitorBarcodeScanner, CapacitorBarcodeScannerTypeHint } from '@capacitor/barcode-scanner';

const Home: React.FC = () => {
  const [scannerResult, setScannerResult] = useState<string>('No Data...');

  const scanBarcode = async () => {
    try {
      // scans with the native UI and returns a result object
      const result = await CapacitorBarcodeScanner.scanBarcode({
        hint: CapacitorBarcodeScannerTypeHint.ALL // allow all common types
      });

      // result.ScanResult holds the scanned string when successful
      if (result && result.ScanResult) {
        setScannerResult(result.ScanResult);
      } else {
        // user cancelled or no content
        setScannerResult('No Data...');
      }
    } catch (err) {
      console.error('Error scanning barcode:', err);
      setScannerResult('Error scanning');
    }
  };

  return (
    <IonPage>
      <IonHeader>
        <IonToolbar>
          <IonTitle>Barcode Scanner</IonTitle>
        </IonToolbar>
      </IonHeader>
      <IonContent fullscreen>
        <IonInput
          value={scannerResult}
          label="Scanner Result"
          labelPlacement="floating"
          readonly={true}
          fill="outline"
          placeholder="No Data..."
        />
        <IonButton expand="block" onClick={scanBarcode}>Scan</IonButton>
      </IonContent>
    </IonPage>
  );
};

export default Home;
The code creates a mobile app page with a button to scan barcodes and a text field to display the result. It uses the useState hook to create a state variable called scannerResult that holds the text from the barcode scan. When its value is updated, the IonInput field automatically shows the new text.
In summary, the scanBarcode function uses the following logic:
- It calls
CapacitorBarcodeScanner.scanBarcode(), which opens the device’s native camera UI to look for a barcode. - It waits for the scanner to finish – either by successfully reading a code or by the user canceling.
- If a code is scanned, it updates the
scannerResultstate with the barcode’s data. If not, it resets the state to “No Data…”.
We also need to add a small CSS tweak to ensure our app’s background is transparent when the scanner is active. Add this to src/pages/Home.css:
body.scanner-active {
  background-color: transparent;
}
Step 4: Update the main app
With the Home page created, you need to update the App file, to redirect the user to the correct page.
Replace the contents of src/App.tsx with the following code:
import { Redirect, Route } from 'react-router-dom';
import { IonApp, IonRouterOutlet, setupIonicReact } from '@ionic/react';
import { IonReactRouter } from '@ionic/react-router';
import Home from './pages/Home';

/* Core CSS required for Ionic components to work properly */
import '@ionic/react/css/core.css';

/* Basic CSS for apps built with Ionic */
import '@ionic/react/css/normalize.css';
import '@ionic/react/css/structure.css';
import '@ionic/react/css/typography.css';

/* Optional CSS utils that can be commented out */
import '@ionic/react/css/padding.css';
import '@ionic/react/css/float-elements.css';
import '@ionic/react/css/text-alignment.css';
import '@ionic/react/css/text-transformation.css';
import '@ionic/react/css/flex-utils.css';
import '@ionic/react/css/display.css';

/* Theme variables */
import './theme/variables.css';

setupIonicReact();

const App: React.FC = () => (
  <IonApp>
    <IonReactRouter>
      <IonRouterOutlet>
        <Route exact path="/home">
          <Home />
        </Route>
        <Route exact path="/">
          <Redirect to="/home" />
        </Route>
      </IonRouterOutlet>
    </IonReactRouter>
  </IonApp>
);

export default App;
It’s necessary to call setupIonicReact() once before your app renders to initialize the core Ionic React configurations and ensure the framework works correctly.
Step 5: Build and sync the project
Before running the app on a device, you need to build the web assets and sync them with your native projects.
Run these commands to build and sync the native projects:
npm run build
npx cap sync
To run the app on Android and iOS, use the following commands:
For Android:
npx cap run androidFor iOS:
To run the app on a real iOS device, you need to adjust the “Provisioning” and “Signing” settings. Open ios/App/App.xcworkspace with Xcode, adjust the settings, and run the project from Xcode or with this command:
npx cap run ios
Conclusion
This concludes our tutorial on how to set up a simple barcode scanning app using the capacitor-barcode-scanner plugin.
Using open-source libraries like these can be great for prototyping and personal projects. However, this approach is rarely viable for developing business solutions, since the work involved in maintaining an app without dedicated support is unpredictable.
We developed the Scanbot Capacitor Barcode Scanner SDK to help enterprises overcome the hurdles presented by community-driven scanning software. Our goal was to provide a developer-friendly solution for a wide range of platforms that consistently delivers high-quality results – even in challenging circumstances.
In the following tutorial, we’ll show you how to set up a powerful cross-platform barcode scanner using Capacitor, Ionic, and the Scanbot SDK.
Building an Ionic Capacitor barcode scanner app with the Scanbot SDK
To set up our app, we’ll follow these steps:
- Preparing the project
- Installing the SDK
- Initializing the SDK
- Implementing the scanning modules
Thanks to the SDK’s Ready-to-Use UI Components, we’ll have an intuitive user interface out of the box.
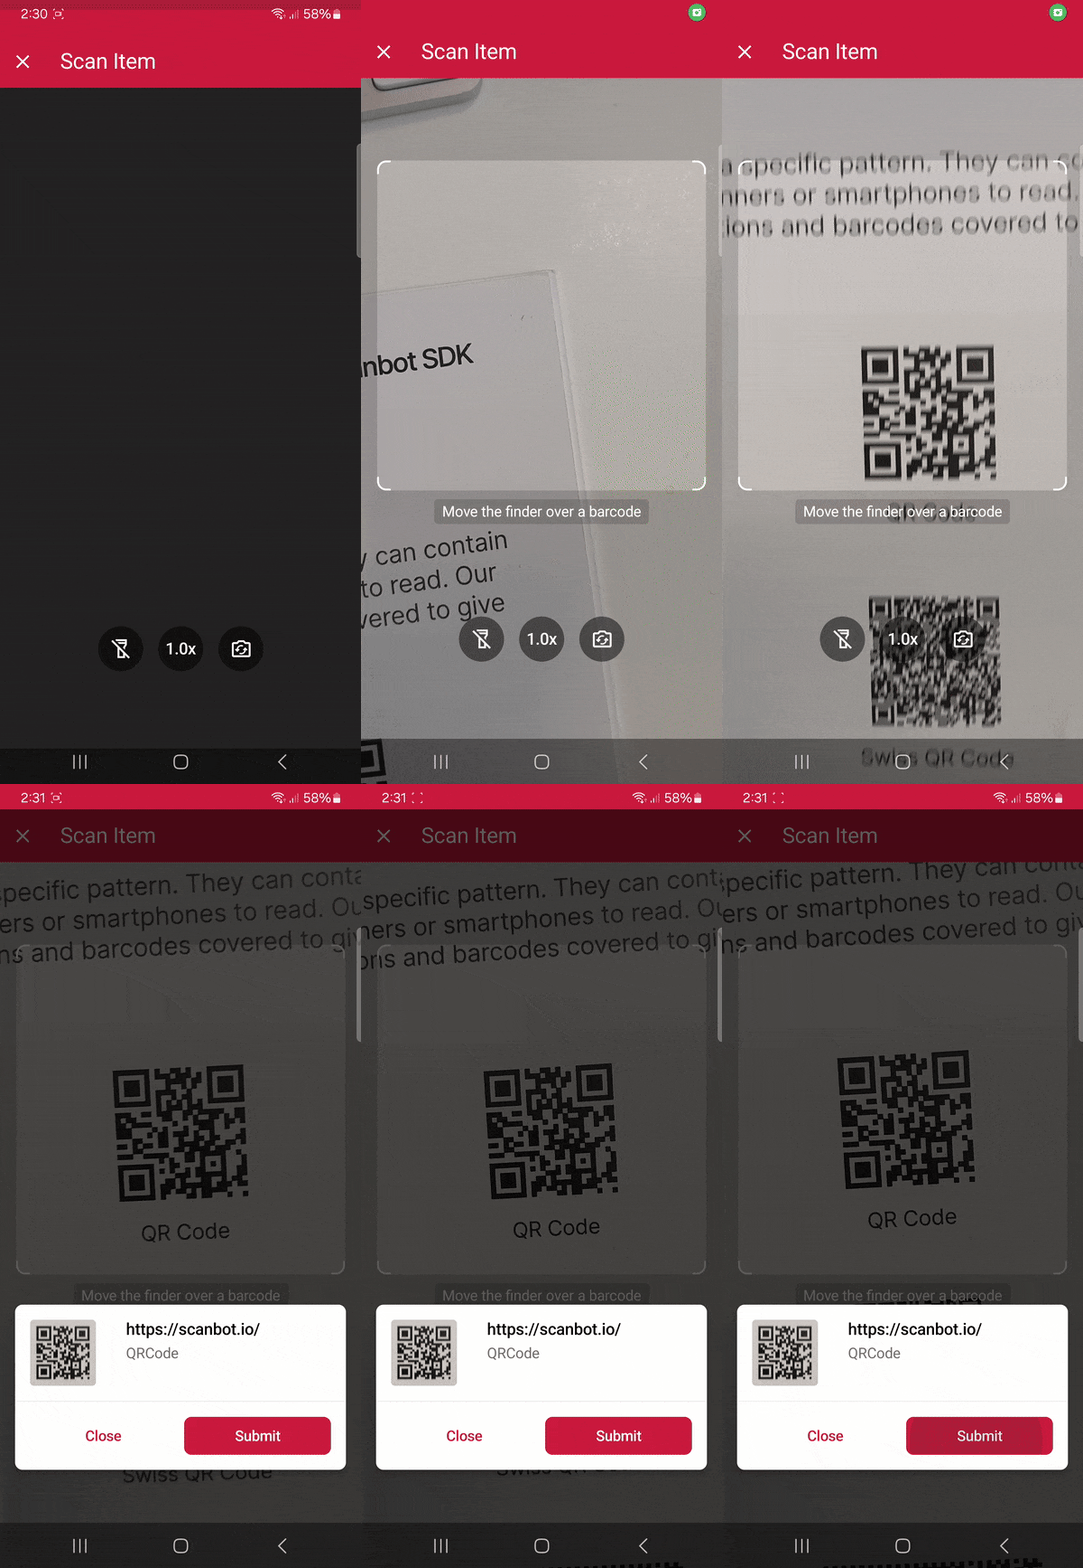
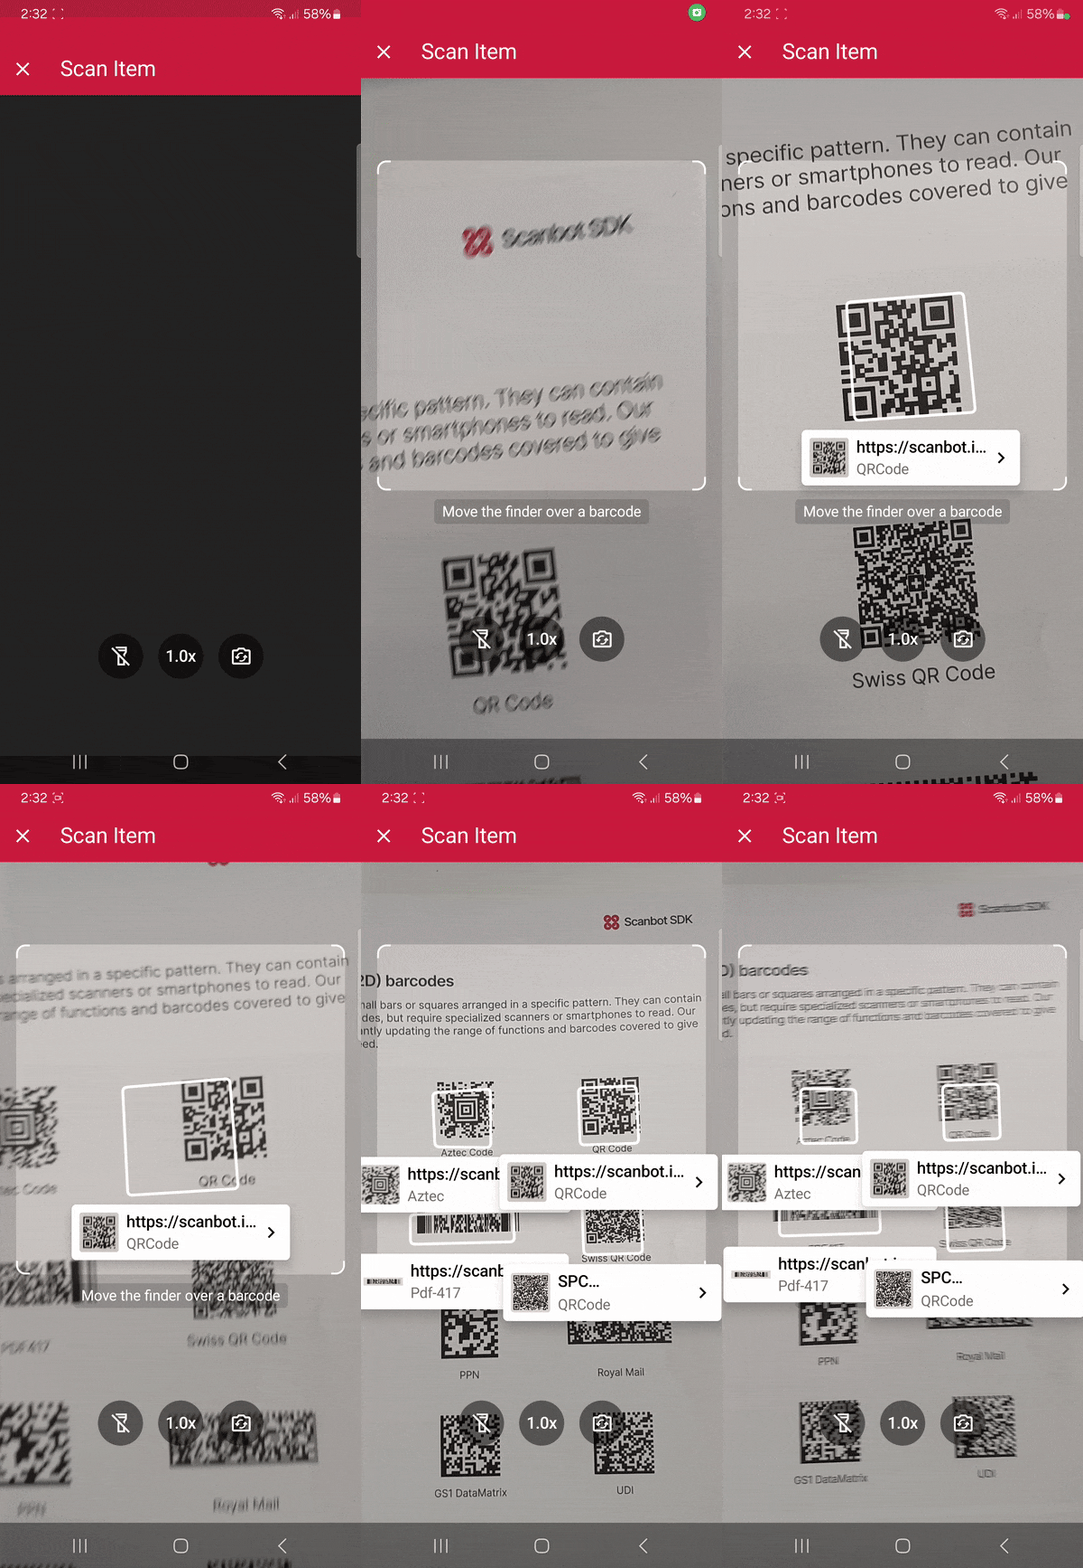
Developing Capacitor applications can be done via CLI or using the VS Code extension. In this tutorial we will use CLI commands. However, feel free to follow along using whatever option suits you best.
Capacitor can be used with different frameworks. In this tutorial, we will use Capacitor with Ionic and Angular. Again, these choices depend on your needs and prior knowledge.
Since we’ll use Ionic in this tutorial, you also need to install the Ionic CLI if you haven’t already:
npm install -g @ionic/cliStep 1: Prepare the project
To start creating your Capacitor app with Ionic using the CLI, run the following command in the terminal, which will create a blank project with some recommended Capacitor dependencies:
ionic start CapacitorTutorial blank --capacitor --type angular-standalone --package-id io.scanbot.tutorial.capacitor⚠️ When using your own license, make sure that the package-id is the same as the application/bundle ID associated with it.
Generate the native projects
Now, let’s add the Android and iOS platforms to our project.
Navigate into the project directory:
cd CapacitorTutorialAdd Android and iOS as platforms:
npm i @capacitor/android @capacitor/iosRun the following commands to create the native Android and iOS projects:
npx cap add android
npx cap add ios
Step 2: Install the SDK
To install the Scanbot Capacitor Barcode Scanner SDK, run:
npm i capacitor-plugin-scanbot-barcode-scanner-sdk💡 This will install the latest Scanbot SDK version. You can find more information about each version in our changelog.
Now that the npm package has been installed, we need to make some changes to the native projects.
Android
For Android, we need to add the camera permission and feature in android/app/src/main/AndroidManifest.xml:
<uses-permission android:name="android.permission.CAMERA" />
<uses-feature android:name="android.hardware.camera" />
iOS
For iOS, we need to include a description for the camera permission in ios/App/App/Info.plist anywhere inside the <dict> element:
<key>NSCameraUsageDescription</key>
<string>Camera permission is needed to scan barcodes</string>
Now that the project is set up, we can start integrating the barcode scanning functionalities.
Step 3: Initialize the SDK
Before using any feature of the Capacitor Barcode Scanner SDK, we need to initialize it. Ideally, initialization should be done once, as soon as the app is fully launched.
In this tutorial, we’re going to initialize the SDK inside the ngOnInit callback in the src/app/app.component.ts file and make sure that we import the ScanbotBarcodeSDK. Your app.component.ts should then look like this:
import { Component, OnInit } from '@angular/core';
import { IonApp, IonRouterOutlet } from '@ionic/angular/standalone';

import { ScanbotBarcodeSDK } from 'capacitor-plugin-scanbot-barcode-scanner-sdk';

@Component({
  selector: 'app-root',
  templateUrl: 'app.component.html',
  standalone: true,
  imports: [IonApp, IonRouterOutlet],
})
export class AppComponent implements OnInit {
  constructor() { }

  ngOnInit(): void {
    ScanbotBarcodeSDK.initializeSdk({
      licenseKey: ""
    }).then(result => console.log(result))
      .catch(err => console.log(err));
  }
}
💡 Without a license key, our SDK only runs for 60 seconds per session. This is more than enough for the purposes of our tutorial, but if you like, you can generate a license key using the application/bundle ID.
Step 4: Implement the scanning modes
The SDK’s RTU UI components make it easy to deploy different scanning modes in your app. Let’s start with the simplest use case: single-barcode scanning.
In your project folder, go to src/app/home/home.page.ts, add the necessary imports, and create a method that will start the single-barcode scanning use case. The result should look something like this:
import { Component } from '@angular/core';
import { IonHeader, IonToolbar, IonTitle, IonContent, IonButton } from '@ionic/angular/standalone';
import { ScanbotBarcodeSDK } from 'capacitor-plugin-scanbot-barcode-scanner-sdk';
import { startBarcodeScanner, BarcodeScannerConfiguration, SingleScanningMode } from 'capacitor-plugin-scanbot-barcode-scanner-sdk/ui_v2';

@Component({
  selector: 'app-home',
  templateUrl: 'home.page.html',
  styleUrls: ['home.page.scss'],
  standalone: true,
  imports: [IonHeader, IonToolbar, IonTitle, IonContent, IonButton],
})
export class HomePage {
  constructor() {}

  async startSingleBarcodeScan() {
    try {
        /** Check license status and return early if the license is not valid */
        if (!(await ScanbotBarcodeSDK.getLicenseInfo()).data?.isLicenseValid) {
            return;
        }
        /**
         * Instantiate a configuration object of BarcodeScannerConfiguration and
         * start the barcode scanner with the configuration
         */
        const config = new BarcodeScannerConfiguration();
        /** Initialize the use case for single scanning */
        config.useCase = new SingleScanningMode();
        /** Start the BarcodeScanner */
        const result = await startBarcodeScanner(config);
        /** Handle the result if there are scanned barcodes */
        if (result.data && result.data?.items.length > 0) {
            alert(
                'Barcode Scanning successfully! \n' +
                `Value: ${result.data.items[0].text} \n` +
                `Type: ${result.data.items[0].type}`
            );
        }
    } catch (e: any) {
        console.error("An error has occurred while running Barcode Scanner", e.message);
    }
  }
}
Next, go to src/app/home/home.page.html and add a button that calls our startSingleBarcodeScan method when clicked. Your home.page.html should look something like this:
<ion-header [translucent]="true">
  <ion-toolbar>
    <ion-title>
      Capacitor Tutorial
    </ion-title>
  </ion-toolbar>
</ion-header>

<ion-content [fullscreen]="true">
  <ion-header collapse="condense">
    <ion-toolbar>
      <ion-title size="large">Capacitor Tutorial</ion-title>
    </ion-toolbar>
  </ion-header>

  <div id="container">
    <ion-button (click)="startSingleBarcodeScan()">Start single barcode scanning</ion-button>
  </div>
</ion-content>
We can add our multi-scanning and AR overlay use cases in a similar manner.
Just add MultipleScanningMode to the import:
import { startBarcodeScanner, BarcodeScannerConfiguration, SingleScanningMode, MultipleScanningMode } from 'capacitor-plugin-scanbot-barcode-scanner-sdk/ui_v2';And create two more methods:
async startMultiBarcodeScan() {
  try {
    /** Check license status and return early if the license is not valid */
    if (!(await ScanbotBarcodeSDK.getLicenseInfo()).data?.isLicenseValid) {
      return;
    }
    /**
     * Instantiate a configuration object of BarcodeScannerConfiguration and
     * start the barcode scanner with the configuration
     */
    const config = new BarcodeScannerConfiguration();
    /** Initialize the use case for multi-scanning */
    config.useCase = new MultipleScanningMode();
    /** Start the BarcodeScanner */
    const result = await startBarcodeScanner(config);
    /** Handle the result */
    if (result.data && result.data?.items.length > 0) {
      alert(
        'Barcode Scanning successfully! \n' +
        `${result.data.items.map(barcode =>
          `Barcode value: ${barcode.text} and type: ${barcode.type}`
        ).join("\n")}`);
    }
  } catch (e: any) {
    console.error("An error has occurred while running Barcode Scanner", e.message);
  }
}

async startAROverlayBarcodeScan() {
  try {
    /** Check license status and return early if the license is not valid */
    if (!(await ScanbotBarcodeSDK.getLicenseInfo()).data?.isLicenseValid) {
      return;
    }
    /**
     * Instantiate a configuration object of BarcodeScannerConfiguration and
     * start the barcode scanner with the configuration
     */
    const config = new BarcodeScannerConfiguration();
    /** Initialize the use case for multi-scanning */
    config.useCase = new MultipleScanningMode();
    /** Configure AR Overlay. */
    config.useCase.arOverlay.visible = true;
    config.useCase.arOverlay.automaticSelectionEnabled = false;
    /** Start the BarcodeScanner */
    const result = await startBarcodeScanner(config);
    /** Handle the result */
    if (result.data && result.data?.items.length > 0) {
      alert(
        'Barcode Scanning successfully! \n' +
        `${result.data.items.map(barcode =>
          `Barcode value: ${barcode.text} and type: ${barcode.type}`
        ).join("\n")}`);
    }
  } catch (e: any) {
    console.error("An error has occurred while running Barcode Scanner", e.message);
  }
}
Next, go back to src/app/home/home.page.html and add buttons for the multi-scanning and AR overlay use cases:
<ion-button (click)="startMultiBarcodeScan()">Start multi-barcode scanning</ion-button>
<ion-button (click)="startAROverlayBarcodeScan()">Start AR Overlay barcode scanning</ion-button>
We’re now ready to build and run the app!
In the terminal, run these commands to build and sync the native projects:
npm run build
npx cap sync
To run the app on Android and iOS, use the following commands:
For Android:
npx cap run androidFor iOS:
To run the app on a real iOS device, you need to adjust the Provisioning and Signing settings. Open ios/App/App.xcworkspace with Xcode, manage the signing and provisioning settings, and run the project from Xcode or with this command:
npx cap run iosNow you can go ahead and scan 1D and 2D barcodes – one after the other, many at the same time, and even with an AR overlay that lets you preview their values!

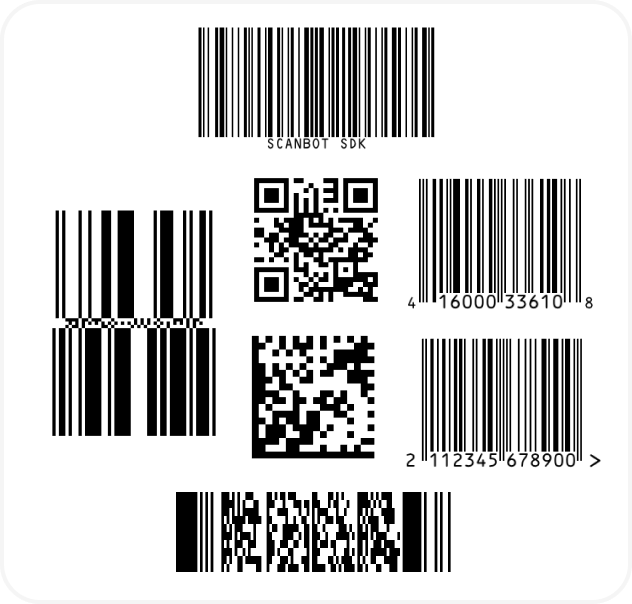
And if you’re in need of some sample barcodes for testing purposes, we’ve got you covered:
Conclusion
If this tutorial has piqued your interest in integrating barcode scanning functionalities into your Ionic Capacitor app, make sure to take a look at the other neat features in the SDK’s documentation.
Furthermore, you can take a look at and run our example project.
Should you have questions about this tutorial or ran into any issues, we’re happy to help! Just shoot us an email via tutorial-support@scanbot.io.
Happy scanning! 🤳

