Barcode scanning is a core feature of modern mobile applications, streamlining workflows in industries like retail, logistics, and healthcare. In this guide, we’ll walk you through building a high-performance barcode scanner in a React Native app using the Scanbot Barcode Scanner SDK and the Expo framework.
Along the way, we’ll cover best practices to ensure fast and reliable scanning, helping you create an efficient and seamless experience for your users.
Setting up a React Native Barcode Scanner with the Scanbot SDK is straightforward. All we need are the following steps:
- Prepare the project
- Install the SDK
- Initialize the SDK
- Implement the scanning modes
- Build the app and scan some barcodes!
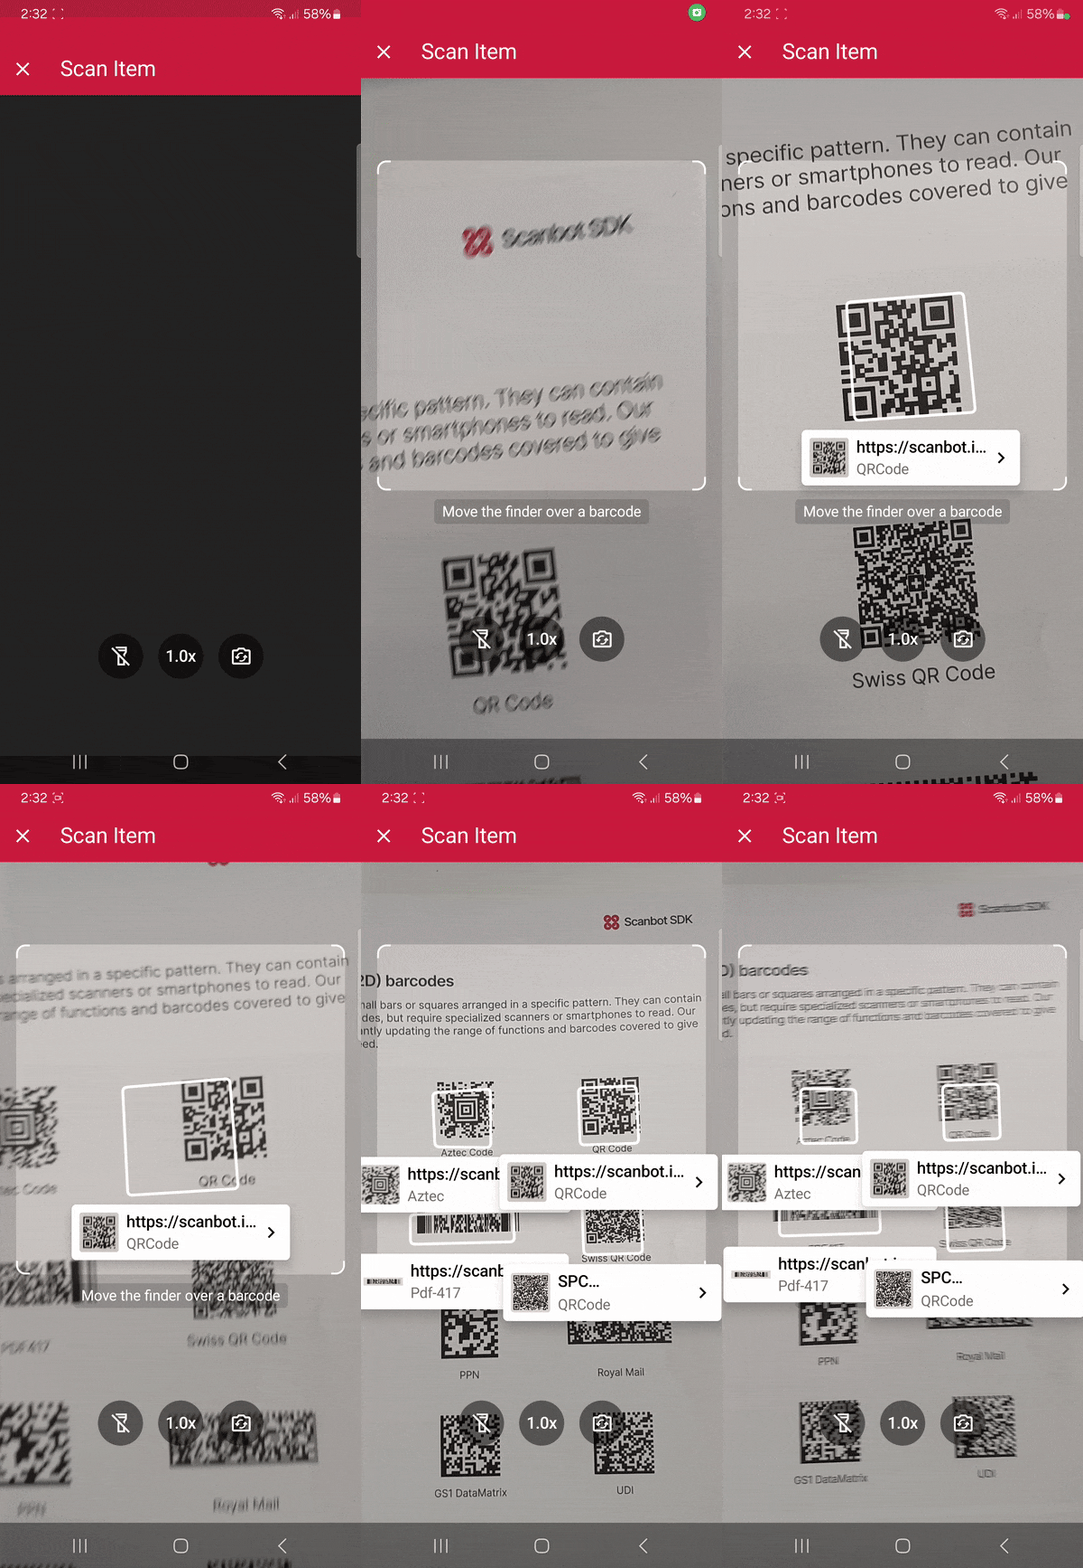
Thanks to our SDK’s Ready-to-Use UI Components, you can even use an AR overlay to display multiple barcodes’ contents right in the viewfinder.
Requirements
Before starting app development with React Native, you need to set up your local development environment. A real device is needed to get the full benefits from using our SDK. The steps for preparing your local environment for development can be found in the Expo documentation.
💡 Starting with React Native version 0.75, it’s recommended to use frameworks such as Expo to develop React Native applications. We’ll use Expo in this tutorial as well.
Of course, you can also integrate our SDK without a framework. For further information, please refer to the official React Native documentation.
1. Preparing the project
First, let’s create our Expo app using the Expo CLI, which will walk us through the setup process. To create an Expo app, run the following command in the terminal:
npx create-expo-app@latestLet’s open the project with your favorite code editor and prepare it to install the Scanbot SDK.
Remove boilerplate code
The Expo CLI has generated some screens to ensure the app isn’t empty. We can remove the generated code quickly by running the following command:
npm run reset-projectNow the app directory only contains an index file, which is our only screen, and a _layout.tsx file.
⚠️ Npm is the default package manager in this project, so we’ll be using it for this tutorial. Feel free to set up the project with other package managers supported by Expo.
Generate the native projects
To install expo-dev-client, we need to run the following command:
npx expo install expo-dev-clientAfter that, we generate our iOS and Android projects with:
npx expo prebuild⚠️ If you are using a React Native Barcode Scanner SDK trial license, make sure that the Android applicationId and iOS bundle identifier are the same.
2. Installing the SDK
Let’s install and configure the React Native Barcode Scanner SDK.
First we need to run:
npx expo install react-native-scanbot-barcode-scanner-sdkNow that the npm package has been installed, all that’s left is to make the necessary native changes to the projects.
You can use our config plugin or manually configure the native projects. We’ll showcase both so you can pick the method you prefer.
Method A: Expo config plugin
To utilize the plugin, add the following to your app.json file:
"plugins": [
  "expo-router",
  [
    "react-native-scanbot-barcode-scanner-sdk",
    {
      "iOSCameraUsageDescription": "Camera permission is needed to scan barcodes",
      "androidCameraPermission": true,
      "androidCameraFeature": true,
      "mavenURLs": true
    }
  ]
],
Then run:
npx expo prebuildNow we’re all set. You can skip the Android and iOS native changes when using this plugin.
Method B: Manual configuration
Alternatively, you can also apply the changes to the native projects manually.
Android
For Android, we first need to add the camera permissions in android/app/src/main/AndroidManifest.xml.
<uses-permission android:name="android.permission.CAMERA" />
<uses-feature android:name="android.hardware.camera" />
For development builds, we also need to add our Maven package URLs in android/build.gradle.
allprojects {
    repositories {
        ... other maven rpositories
      maven { url "https://nexus.scanbot.io/nexus/content/repositories/releases/" }
      maven { url "https://nexus.scanbot.io/nexus/content/repositories/snapshots/" }
    }
}
💡 For more information about individual releases, please refer to our changelog.
iOS
For iOS, we need to include a description for the camera permission in ios/{projectName}/Info.plist anywhere inside the element:
<key>NSCameraUsageDescription</key>
<string>Camera permission is needed to scan barcodes</string>
Now that the project is set up, we can start integrating the barcode scanning functionalities.
3. Initializing the SDK
Before using any feature of the React Native Barcode Scanner SDK, we need to initialize it. Ideally, initialization should be done as soon as the app is launched.
There are many ways to initialize the SDK that depend on your use case. In our example, we’re going to initialize the SDK inside a useEffect in our _layout.tsx file.
ScanbotBarcodeSDK
  .initializeSdk({ licenseKey: "" })
  .then(result => console.log(result))
  .catch(err => console.log(err));
So the _layout.tsx would look like this:
import { Stack } from "expo-router";
import { useEffect } from "react";
import ScanbotBarcodeSDK from "react-native-scanbot-barcode-scanner-sdk"

export default function RootLayout() {

useEffect(() => {
  ScanbotBarcodeSDK
    .initializeSdk({ licenseKey: "" })
    .then(result => console.log(result))
    .catch(err => console.log(err));
}, []);

  return (
    <Stack>
      <Stack.Screen name="index" />
    </Stack>
  );
}
💡 Without a license key, our SDK only runs for 60 seconds per session. This is more than enough for the purposes of our tutorial, but if you like, you can generate a license key using the bundle and application identifiers.
4. Implementing the scanning modes
Our RTU UI components make it easy to deploy our Barcode Scanner SDK’s different scanning modes in your app. Let’s start with the simplest use case: single-barcode scanning.
In app/index.tsx, we’re going to add a button that will start the scanning process. After we ran the reset project script, the index.tsx should only contain a single view with a text component. Let’s replace the Text component with a button component like this:
<Button title={"Start single barcode scanning"} onPress={onSingleBarcodeScan} />Now we need to define onBarcodeScannerPress, which will start the single-barcode scanning mode:
const onSingleBarcodeScan = useCallback(async () => {
  try {
    /** Check license status and return early if the license is not valid */
    if (!(await ScanbotBarcodeSDK.getLicenseInfo()).data?.isLicenseValid) {
      return;
    }
    /**
     * Instantiate a configuration object of BarcodeScannerConfiguration and
     * start the barcode scanner with the configuration
     */
    const config = new BarcodeScannerConfiguration();
    /** Initialize the use case for single scanning */
    config.useCase = new SingleScanningMode();
    /** Start the BarcodeScanner */
    const result = await startBarcodeScanner(config);
    /** Handle the result if result status is OK */
    if (result.status === 'OK' && result.data) {
      Alert.alert(
        "Barcode Scanning successfully!",
        `${result.data.items.map(barcode =>
          `Barcode value: ${barcode.text} and type: ${barcode.type}`
        ).join("\n")}`);
    } else {
      console.log("The user has canceled the Barcode Scanning")
    }
  } catch (e: any) {
    console.log("An error has occurred while running Barcode Scanner", e.message);
  }
}, []);
Our final screen should look like this:
import {Alert, Button, View} from "react-native";
import {useCallback} from "react";
import {
  BarcodeScannerConfiguration,
  SingleScanningMode,
  startBarcodeScanner
} from "react-native-scanbot-barcode-scanner-sdk/ui_v2";
import ScanbotBarcodeSDK from "react-native-scanbot-barcode-scanner-sdk";

export default function Index() {

  const onSingleBarcodeScan = useCallback(async () => {
    try {
      /** Check license status and return early if the license is not valid */
      if (!(await ScanbotBarcodeSDK.getLicenseInfo()).data?.isLicenseValid) {
        return;
      }
      /**
       * Instantiate a configuration object of BarcodeScannerConfiguration and
       * start the barcode scanner with the configuration
       */
      const config = new BarcodeScannerConfiguration();
      /** Initialize the use case for single scanning */
      config.useCase = new SingleScanningMode();
      /** Start the BarcodeScanner */
      const result = await startBarcodeScanner(config);
      /** Handle the result if result status is OK */
      if (result.status === 'OK' && result.data) {
        Alert.alert(
          "Barcode Scanning successfully!",
          `${result.data.items.map(barcode =>
            `Barcode value: ${barcode.text} and type: ${barcode.type}`
          ).join("\n")}`);
      } else {
        console.log("The user has canceled the Barcode Scanning")
      }
    } catch (e: any) {
      console.log("An error has occurred while running Barcode Scanner", e.message);
    }
  }, []);

  return (
    <View
      style={{
        flex: 1,
        justifyContent: "center",
        alignItems: "center",
      }}
    >
      <Button title={"Start single barcode scanning"} onPress={onSingleBarcodeScan}/>
    </View>
  );
}
Now we’re ready to start building our app and scan some barcodes. Let’s also add the multi-barcode scanning and AR overlay modes in the same way:
const onMultiBarcodeScan = useCallback(async () => {
  try {
    /** Check license status and return early if the license is not valid */
    if (!(await ScanbotBarcodeSDK.getLicenseInfo()).data?.isLicenseValid) {
      return;
    }
    /**
     * Instantiate a configuration object of BarcodeScannerConfiguration and
     * start the barcode scanner with the configuration
     */
    const config = new BarcodeScannerConfiguration();
    /** Initialize the use case for multi-scanning */
    config.useCase = new MultipleScanningMode();
    /** Start the BarcodeScanner */
    const result = await startBarcodeScanner(config);
    /** Handle the result if result status is OK */
    if (result.status === 'OK' && result.data) {
      Alert.alert(
        "Barcode Scanning successfully!",
        `${result.data.items.map(barcode =>
          `Barcode value: ${barcode.text} and type: ${barcode.type}`
        ).join("\n")}`);
    } else {
      console.log("The user has canceled the Barcode Scanning")
    }
  } catch (e: any) {
    console.log("An error has occurred while running Barcode Scanner", e.message);
  }
}, []);

const onAROverlayBarcodeScan = useCallback(async () => {
  try {
    /** Check license status and return early if the license is not valid */
    if (!(await ScanbotBarcodeSDK.getLicenseInfo()).data?.isLicenseValid) {
      return;
    }
    /**
     * Instantiate a configuration object of BarcodeScannerConfiguration and
     * start the barcode scanner with the configuration
     */
    const config = new BarcodeScannerConfiguration();
    /** Initialize the use case for multi-scanning */
    config.useCase = new MultipleScanningMode();
    /** Configure AR Overlay. */
    config.useCase.arOverlay.visible = true;
    config.useCase.arOverlay.automaticSelectionEnabled = false;
    /** Start the BarcodeScanner */
    const result = await startBarcodeScanner(config);
    /** Handle the result if result status is OK */
    if (result.status === 'OK' && result.data) {
      Alert.alert(
        "Barcode Scanning successfully!",
        `${result.data.items.map(barcode =>
          `Barcode value: ${barcode.text} and type: ${barcode.type}`
        ).join("\n")}`);
    } else {
      console.log("The user has canceled the Barcode Scanning")
    }
  } catch (e: any) {
    console.log("An error has occurred while running Barcode Scanner", e.message);
  }
}, []);
Finally, we need to add the buttons to start the scanning modes:
  <Button title={"Start multi-barcode scanning"} onPress={onMultiBarcodeScan}/>
  <Button title={"Start AR Overlay barcode scanning"} onPress={onAROverlayBarcodeScan}/>
5. Building the app and scanning some barcodes
We’re all done setting up our app.
To run the app on your Android or iOS device, use the following commands:
For Android:
npx expo run:android --deviceFor iOS:
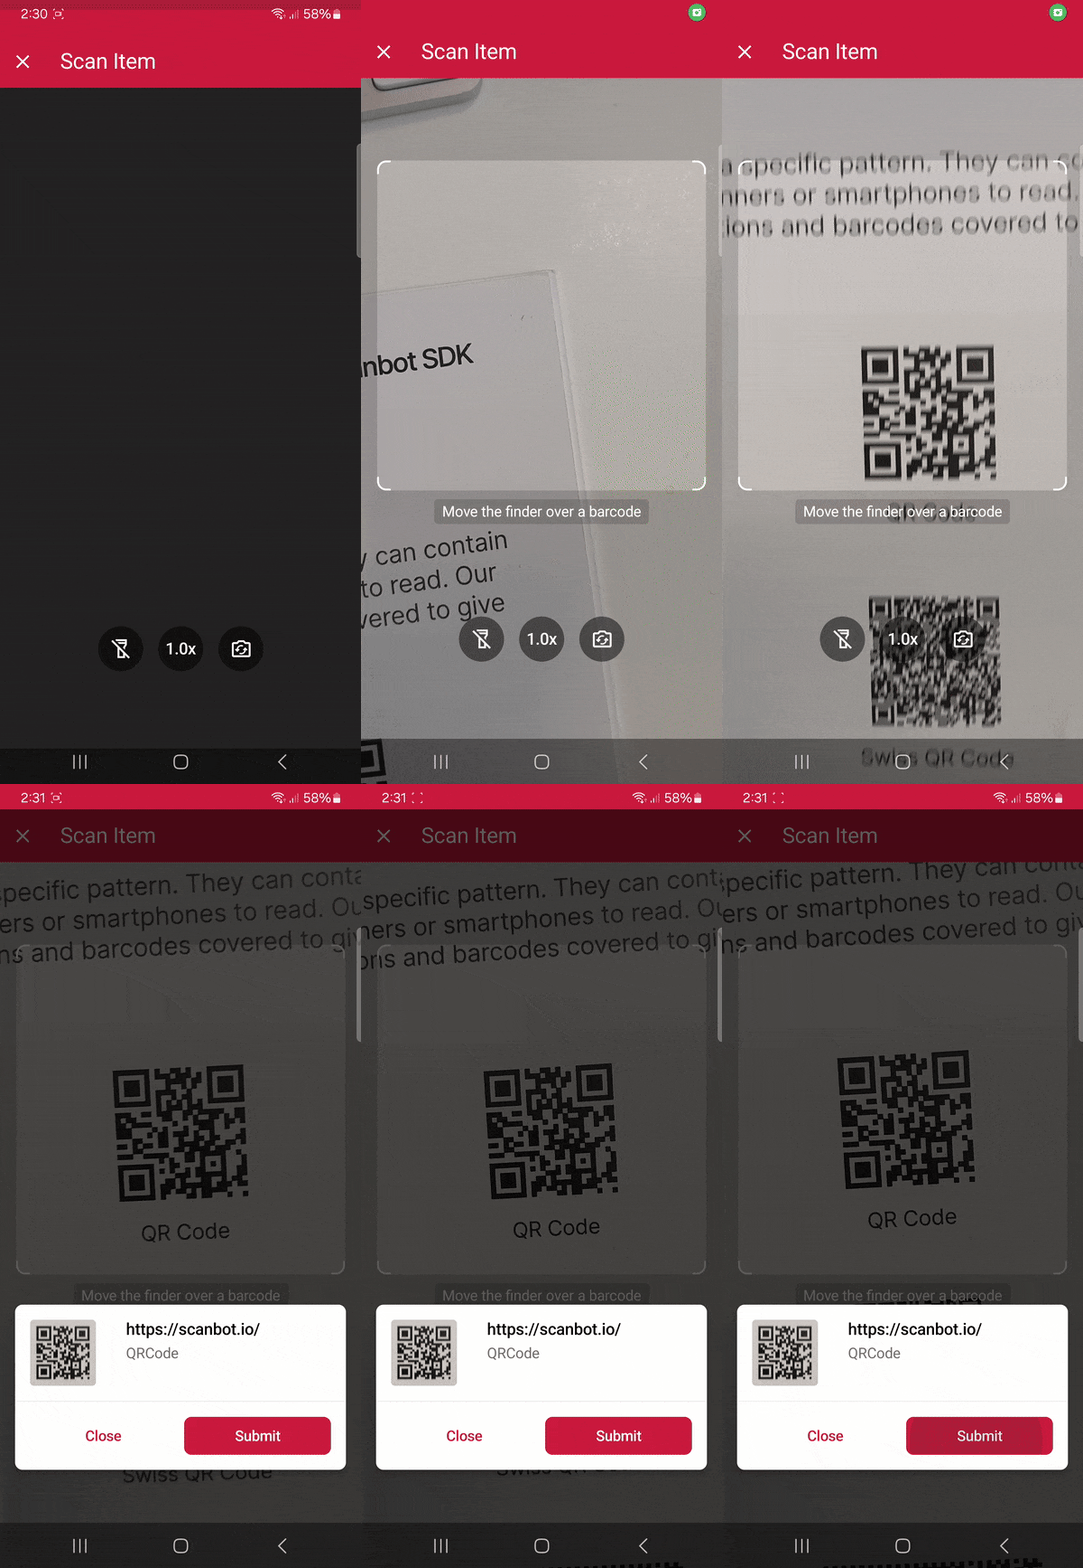
npx expo run:ios --deviceNow you can go ahead and scan 1D and 2D barcodes – one at a time, several at once, or with a real-time preview of their values via the AR overlay!

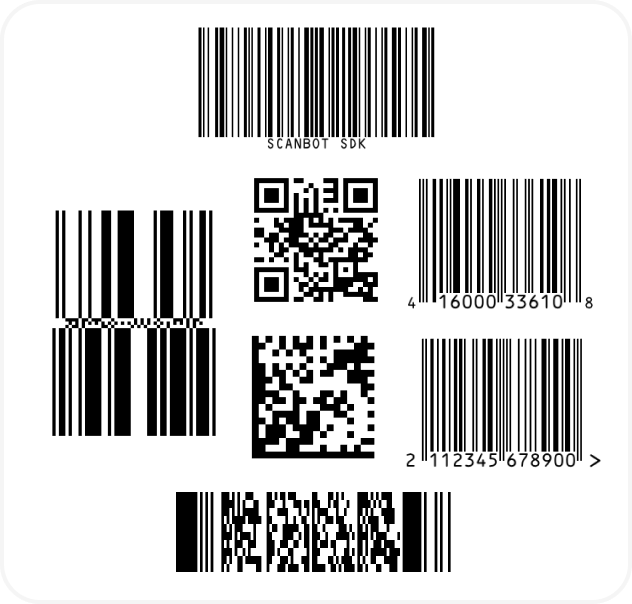
And if you’re in need of some sample barcodes for testing purposes, we’ve got you covered:
Building a state-of-the-art barcode scanner app in React Native
When choosing a barcode scanning solution, the key factors are speed, accuracy, intuitiveness, and ease of integration. This ensures the scanner performs optimally in real-world conditions, provides users with a seamless experience, and makes customization simple.
Let’s explore the main considerations when evaluating a barcode scanning solution for your application.
Speed and accuracy
A top-tier scanner must prioritize speed and accuracy. Scanning should be fast and responsive, with minimal delay – ideally no more than 1 second even in worst-case conditions. Accuracy is equally essential, as users expect a smooth experience without rescans or misreads.
The barcode scanner must be able to deal with real-world working conditions to meet your app’s requirements. This includes handling different barcode formats, compensating for lighting conditions, and ensuring a seamless user experience no matter the environment.
To confirm this, you can test the scanner’s performance when barcodes are scanned in various orientations, including upside-down or sideways. Pay attention to how the camera view adjusts, and whether turning on the flash improves visibility and performance.
Additionally, test the scanner at different distances to see if the camera can effectively maintain focus. Check its performance when working with digital or optical zoom and the various kinds of cameras a modern smart device has to offer. If necessary, refer to the device’s camera usage description.
Finally, assess how the barcode scanner functions in very bright and dark environments and evaluate how QR codes and other barcodes are scanned, to determine if the camera preview needs to be adjusted.
Intuitiveness and easy integration
Another key aspect is intuitiveness and ease of integration. A seamless and straightforward process of implementing and using a solution without unnecessary complexity is what you – and your user base – are looking for. When developers and users can easily understand and operate the system, the entire experience becomes smoother and more efficient.
A barcode scanner SDK should be well-documented and highly customizable, enabling you to tailor the solution to your app’s unique requirements without complications. Whether you need to fine-tune the functionality or align the UI with your branding: The solution should make it easy both to get started and to adapt it later, as your app’s user base grows or needs change.
The Scanbot SDK’s Ready-to-Use UI Components provide a fully integrated, out-of-the-box scanning experience. This accelerates development and ensures that the scanning solution is polished and easy to use from the moment it is implemented.
One stand-out performance and usability feature you should look for is AR functionality. The Scanbot Barcode Scanner SDK’s AR Overlay enhances the UX by displaying real-time visual cues and guiding users through the scanning process.
Displaying such an extra layer of information in the live view is useful for various scanning usage examples. The SDK’s Multi Scanning feature, for instance, allows users to scan multiple barcodes in one go and highlights the scanned codes.
Cross-device functionality
Another crucial aspect is that a mobile barcode scanner should reliably work across a wide range of devices, from low-end to high-end models, on both iOS and Android platforms.
This ensures consistent performance and usability no matter the device’s hardware or screen size. In particular, it’s essential to ensure full compatibility with the various camera types modern devices offer, and proper use of permissions to prevent issues during usage.
Data security
To ensure complete data security, a barcode scanner solution should work 100% offline, without any server connections or usage tracking. This way, no sensitive information is ever transmitted or stored externally.
The Scanbot Barcode Scanner SDK addresses this by providing a fully offline solution. This ensures that all data remains secure on the device, rather than being processed on third-party servers
Conclusion
Flexibility, intuitiveness, customizability, and ease of use are essential to delivering a high-quality solution. Implementing a top-tier barcode scanner in React Native requires testing the candidates on key aspects such as speed, accuracy, and ease of integration.
By following the setup above and testing instructions for the Scanbot React Native Barcode Scanner SDK, you can create a seamless and efficient barcode scanning experience. Thanks to the SDK’s manifold customization options, you can tailor it to the unique needs of your application, whether it is a small project or a large enterprise application.
If this tutorial has piqued your interest in integrating barcode scanning functionalities into your React Native app and you are ready to dive deeper, look into our SDK’s documentation or check our example project on GitHub.
If you have questions about this tutorial or encounter any issues, we’re happy to help! Just email us at tutorial-support@scanbot.io.
