In this tutorial, you’ll learn how to create a barcode reader app for Windows in Visual Studio using the WPF (Windows Presentation Foundation) UI framework, .NET 9, and the Scanbot Windows Barcode Scanner SDK.
To achieve this, we’ll follow these steps:
- Preparing the project
- Installing the SDK
- Configuring the camera permissions
- Initializing the SDK
- Implementing the scanning screen
Let’s get started!
Step 1: Prepare the project
In Visual Studio, open the dialog for creating a new project and search for the WPF Application C# template.

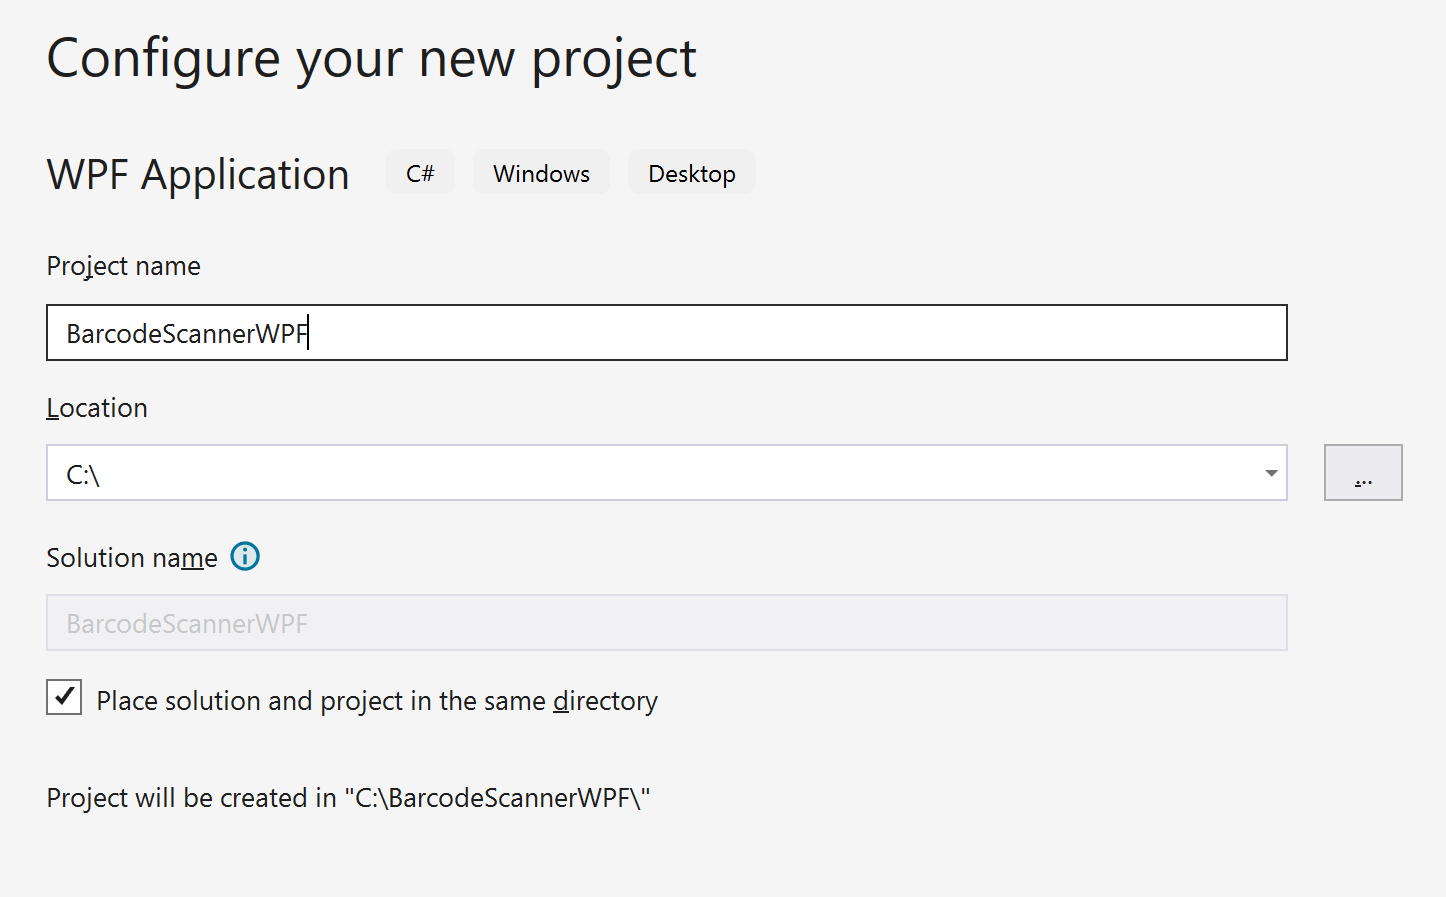
Name your project, e.g., “BarcodeScannerWPF”, and place it in any location that works for you. For simplicity, you can keep the solution and project in the same folder.
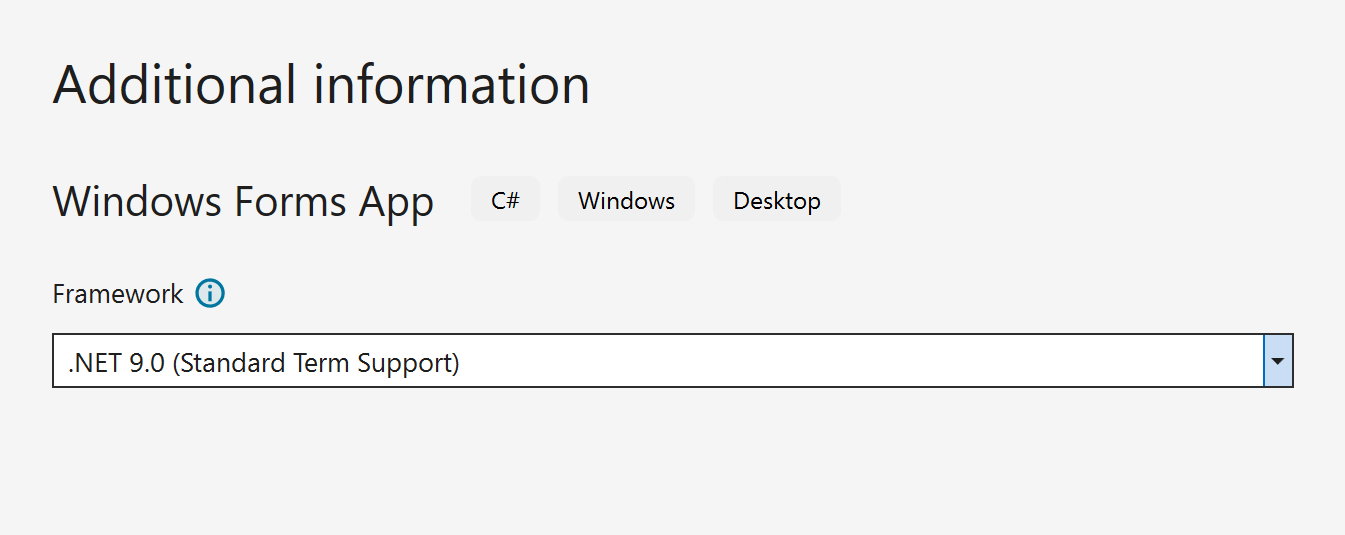
We’ll use .NET 9.0, which also allows your WPF project to make use of some new opt-in experimental features such as dark mode. Our SDK is also compatible with .NET 8.0.
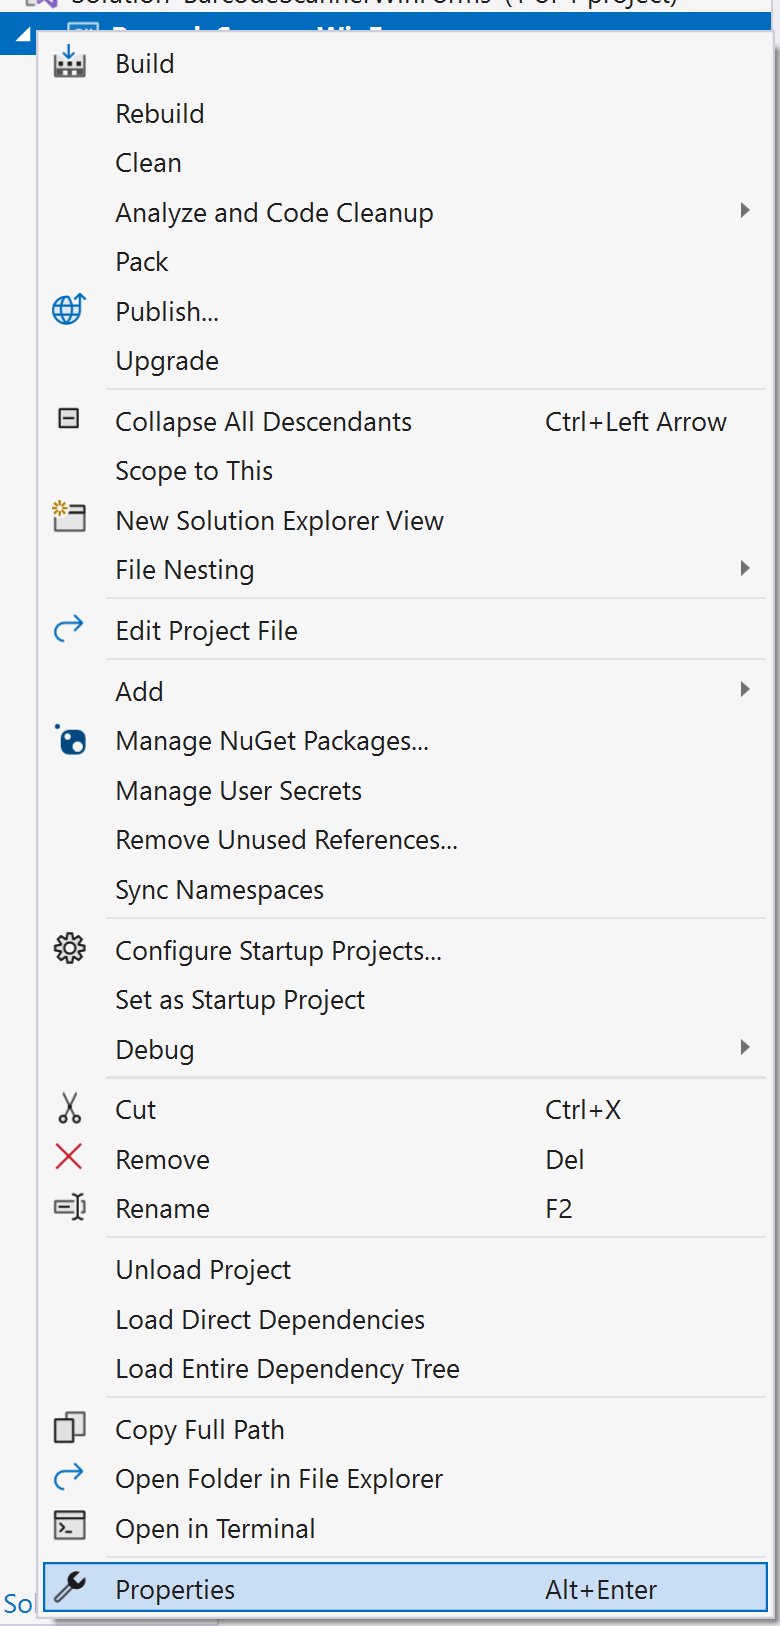
Once the project is created, we need to update the target OS version for the SDK to work. Right-click on the BarcodeScannerWPF project in the Solution Explorer and then click on Properties.
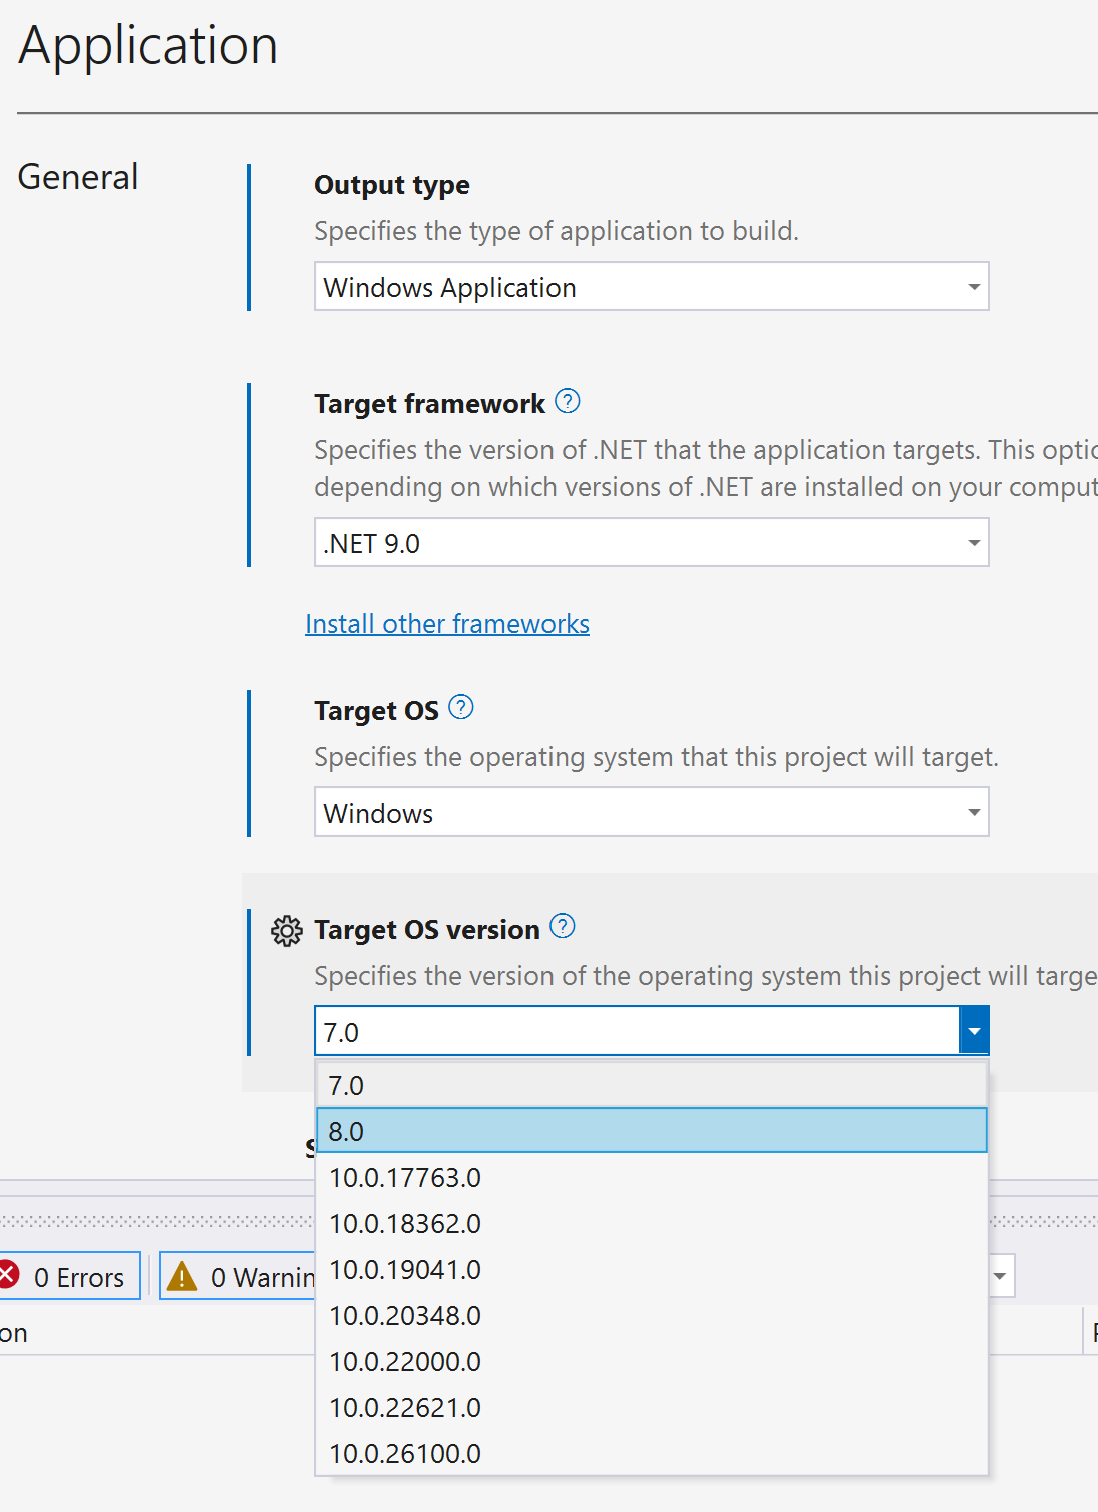
In the General section, change Target OS version to 8.0.
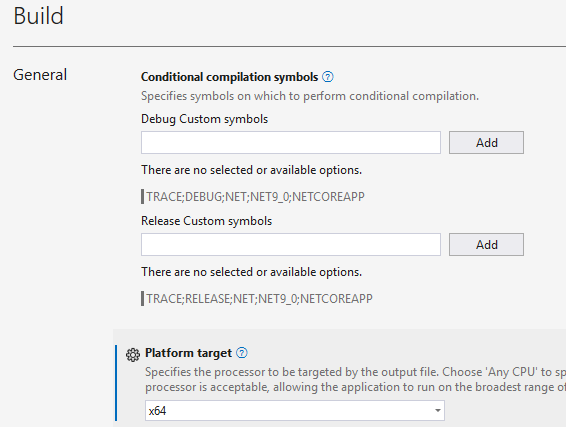
Then navigate to the Build section and set the Platform target to x64.
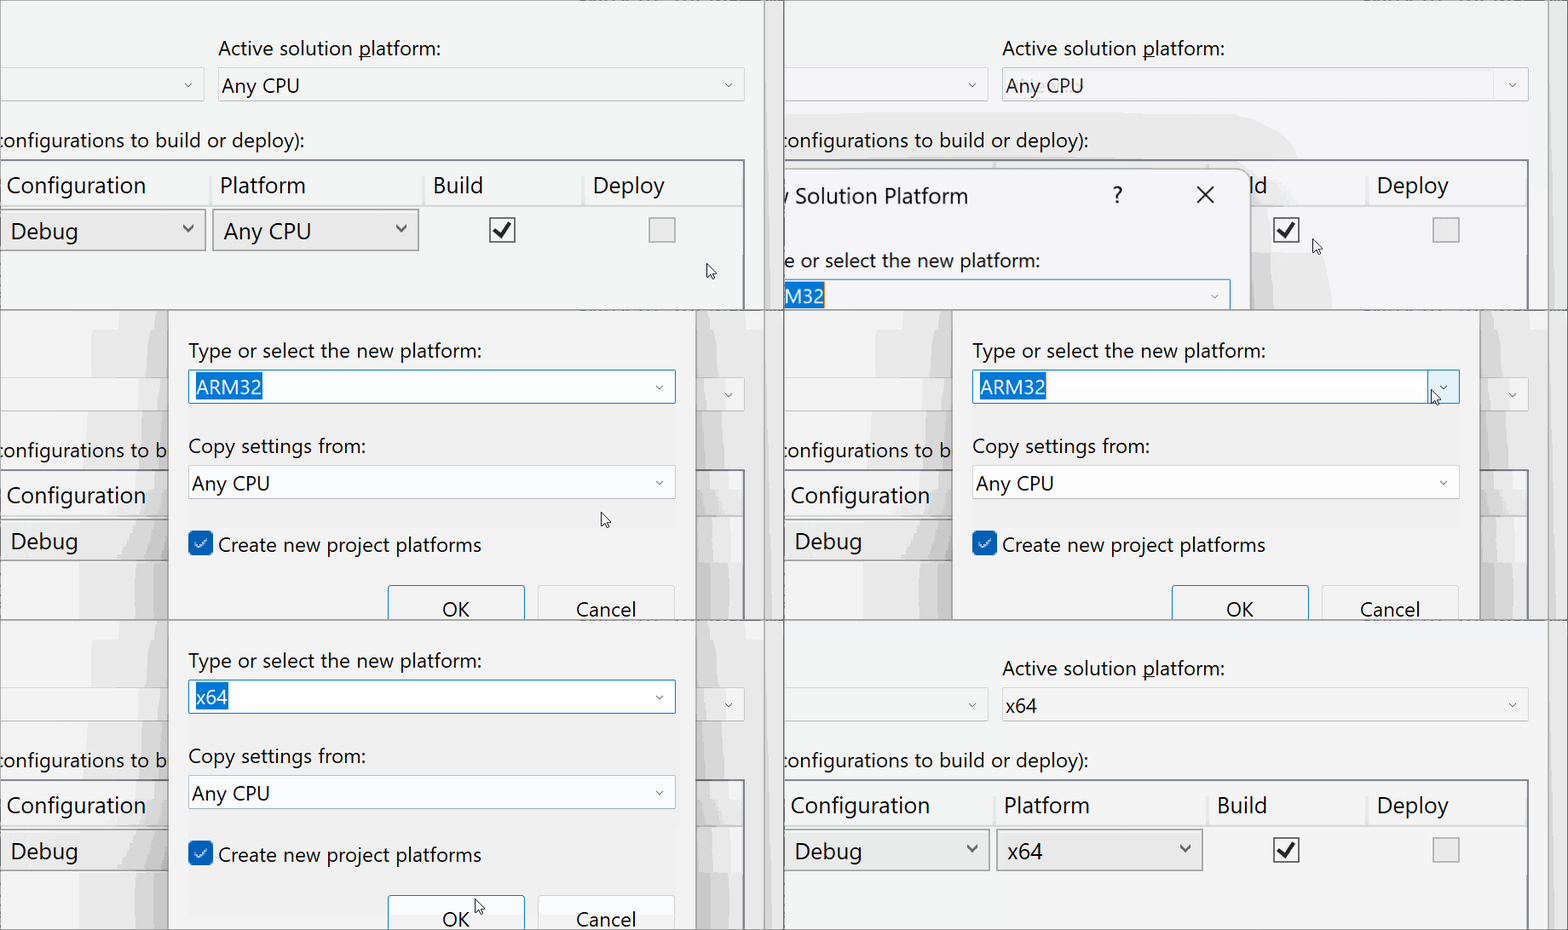
Now that the OS version and platform target are set, we need to update the solution to use x64 via the Configuration Manager.

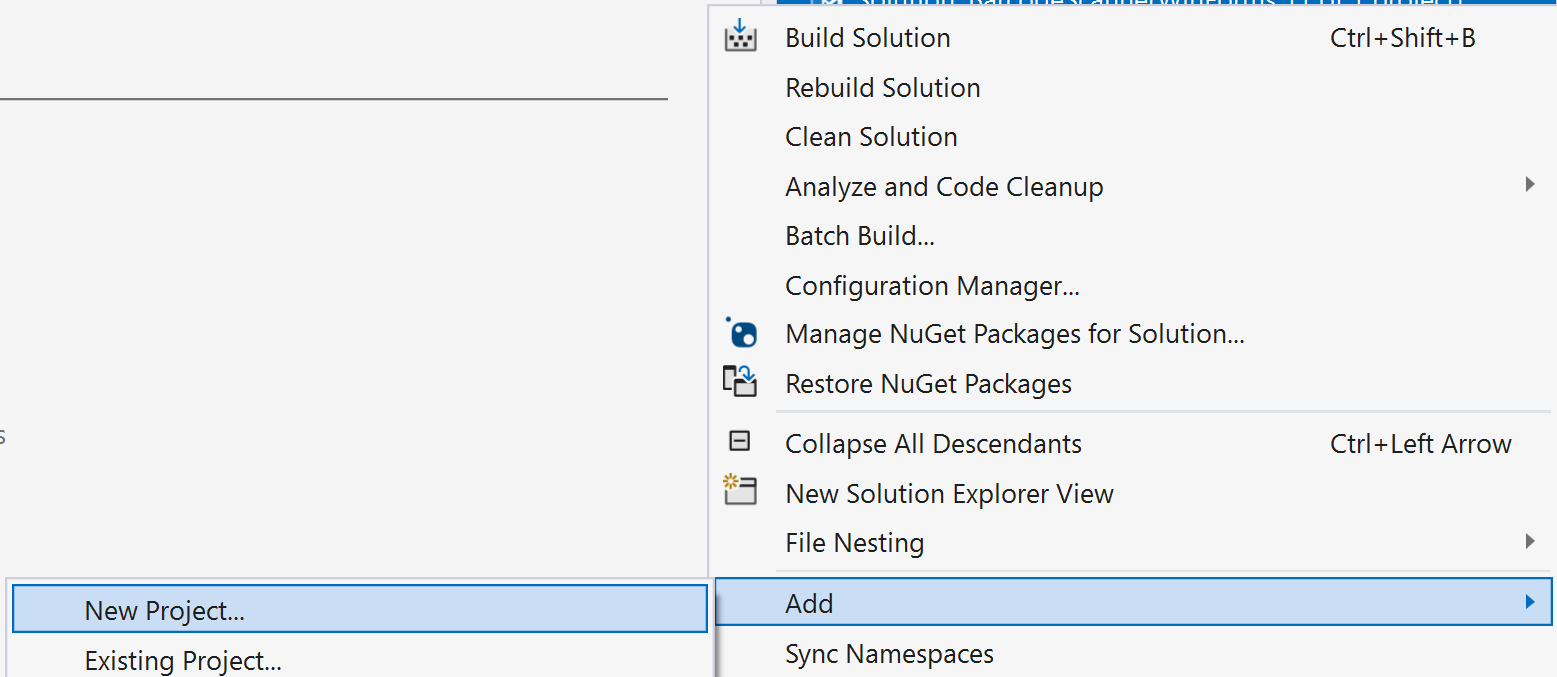
Now we can add a WAP project. Right-click on the solution, then on Add, and New Project.
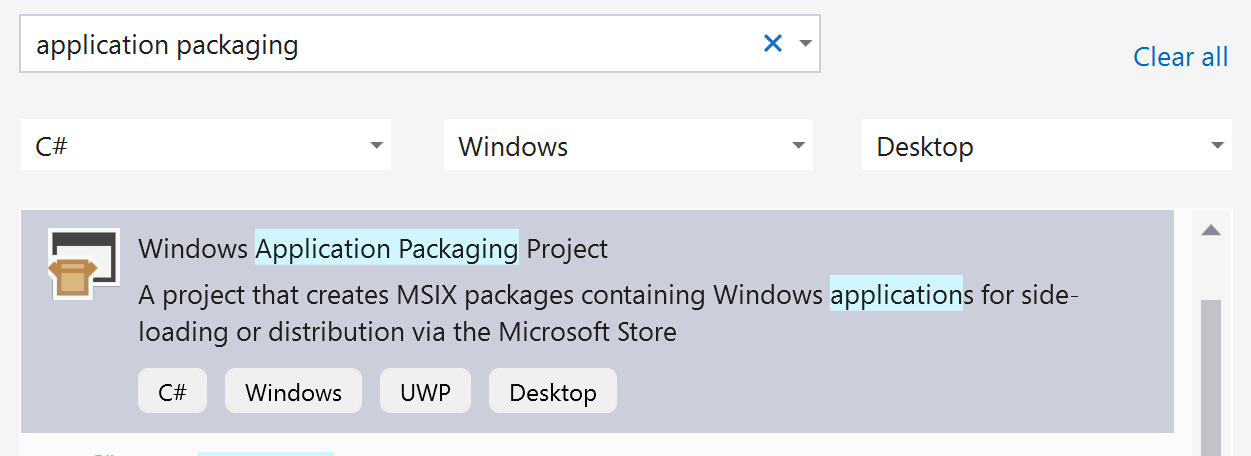
Search for the Windows Application Packaging Project C# template.
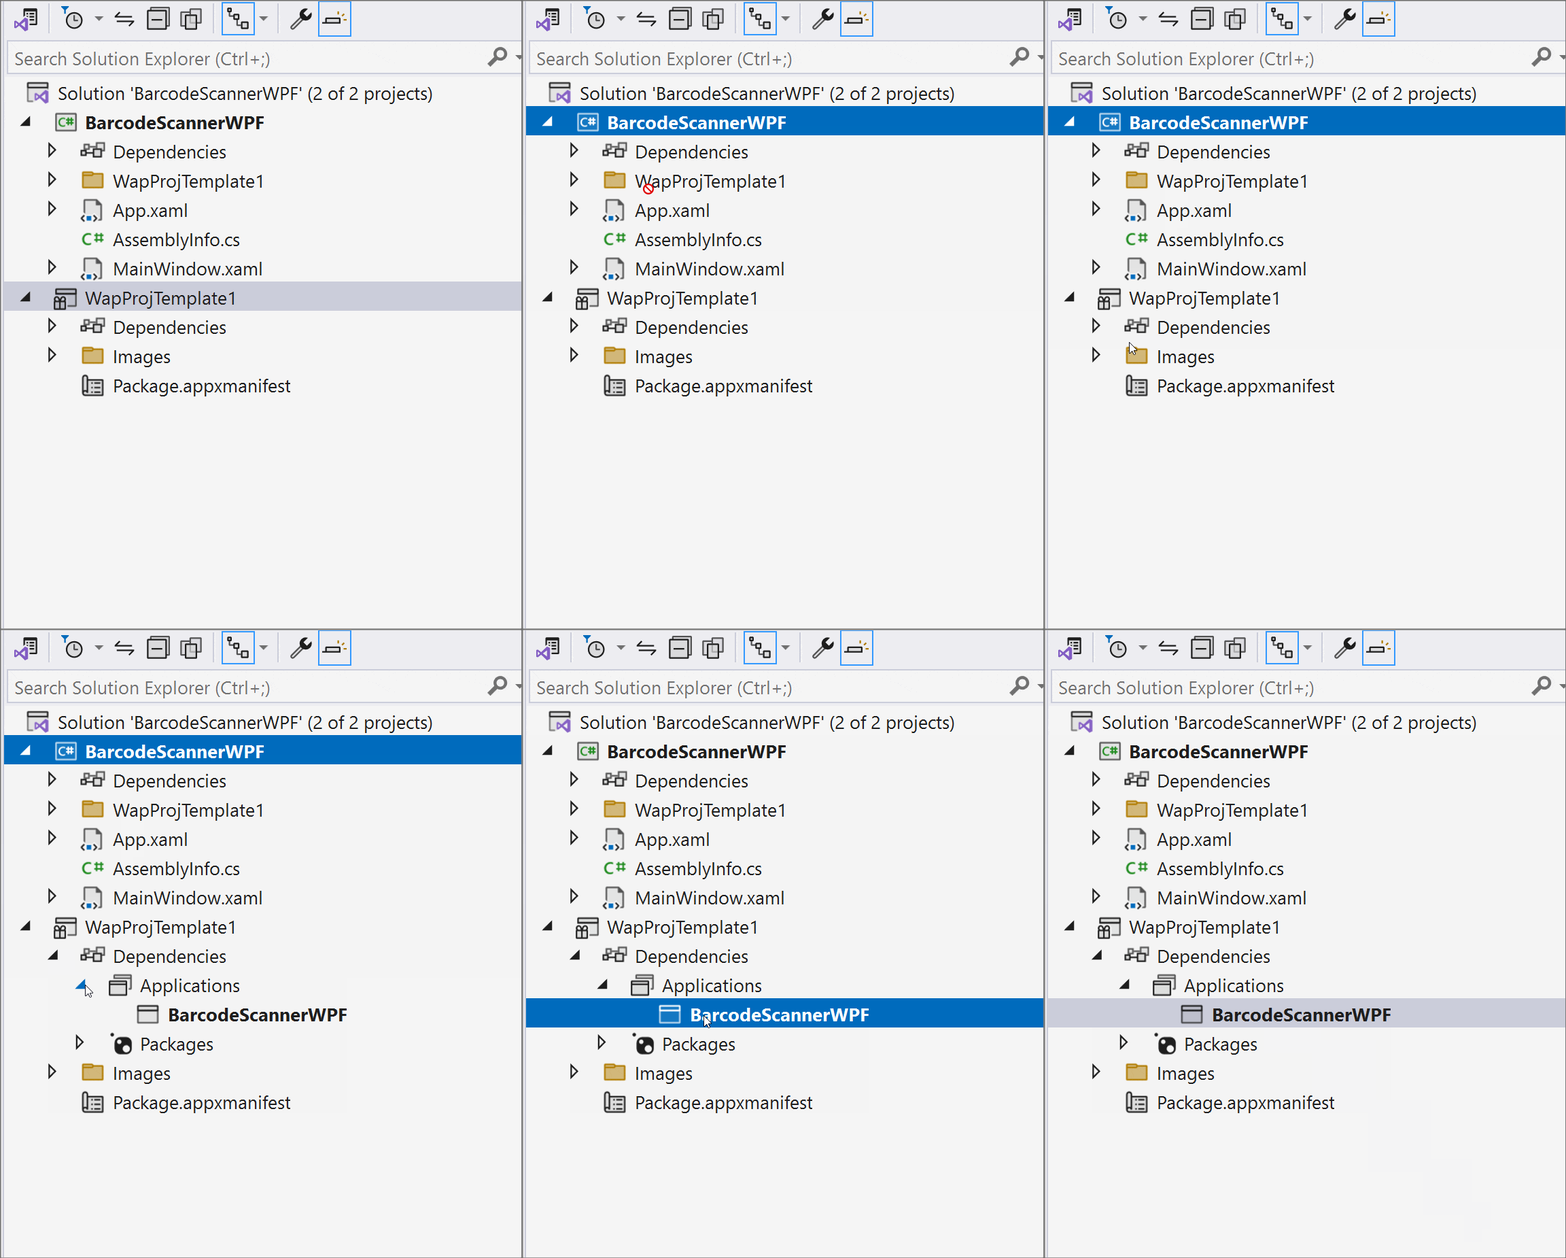
We have to link our WPF project to the WAP project. To do that, just drag the WPF project into the WAP project’s Dependencies.
Now we need to set the WAP project as the startup project. This ensures that the packaged version of the WPF app is launched and not the regular version. If you launch the WPF app without the WAP project, our SDK will not initialize because the license check will fail.
Right-click on your WAP project and then on Set as Startup Project.

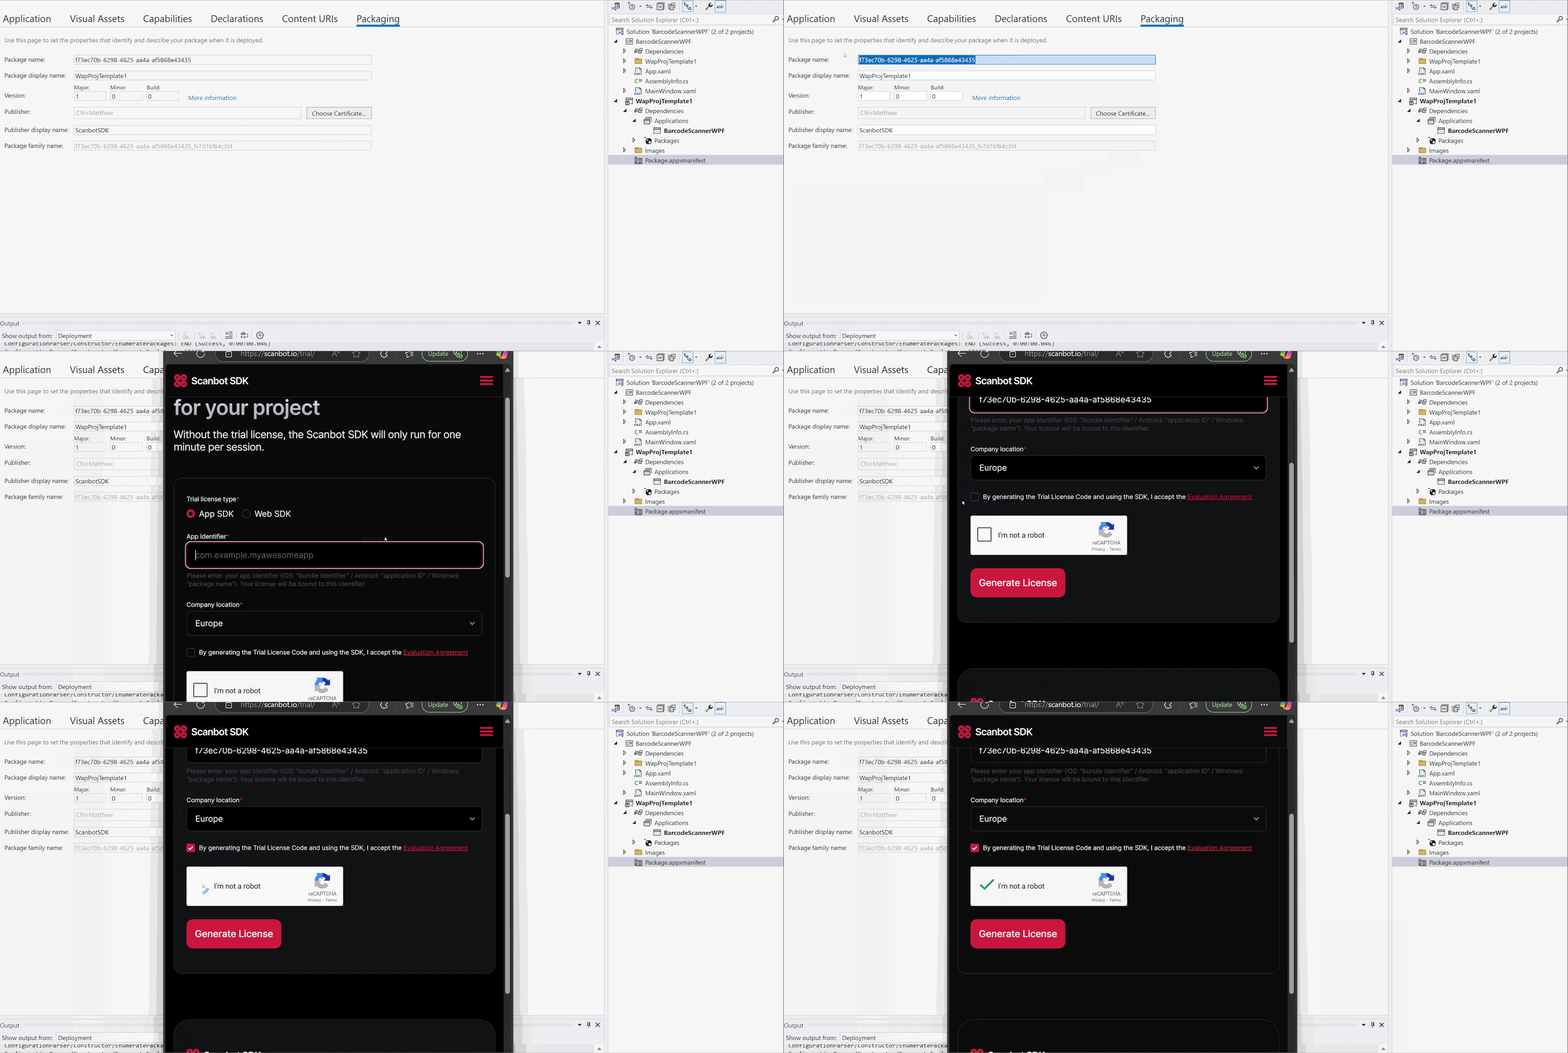
Once everything is set up and linked correctly, open Package.appxmanifest and copy the package name. Use that to generate a free trial license key for the SDK and copy it somewhere where you can access it later – we’ll need it again in step 4.
With all of that done, we’re finally ready to install the Windows Barcode Scanner SDK.
Step 2: Install the SDK
Right-click on your WPF project and then on Manage NuGet Packages.

In the Browse tab, search for the Scanbot SDK (e.g., with “scanbot windows”) and you should find the Scanbot.BarcodeSDK.Windows package.

Click Install to add the package to your project.
Step 3: Configure the camera permissions
Open Package.appxmanifest and navigate to the Capabilities tab.

You can turn off Internet (Client), since the Scanbot SDK doesn’t need it – it works entirely offline.
What we do need is access to the camera, so make sure to enable the Webcam capability.
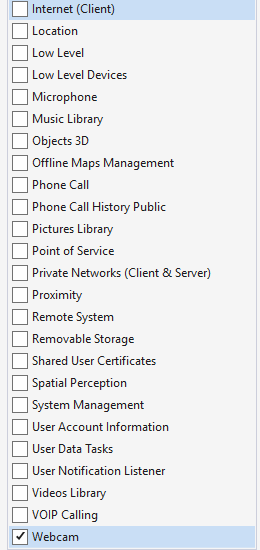
Save the file to apply the changes.
Step 4: Initialize the SDK
First, we’ll turn our attention to App.xaml.cs.
At the top of the file, add the following namespaces:
using ScanbotSDK.Barcode;
using ScanbotSDK.Common;
Then add the following inside the scope of the App class:
private const string LICENSE_KEY = ""; // TODO Insert your trial license key hereReplace "" with the license key you generated earlier.
Below, add the following:
public App()
{
   this.Startup += App_Startup;
}
private void App_Startup(object sender, StartupEventArgs e)
{
    MediaFoundation.Init();
    BarcodeSDK.Initialize(LICENSE_KEY);
}
In the first line, we make use of a lightweight wrapper around Media Foundation, and this has to be initialized to capture camera frames correctly.
Then the BarcodeSDK.Initialize method will verify your license and enable the SDK to work within your application.
Step 5: Implement the scanning screen
Open MainWindow.xaml and look for the <Grid></Grid> section. Replace it with the following code:
<StackPanel xmlns:barcode="clr-namespace:ScanbotSDK.Common.UI.WPF;assembly=ScanbotSDK.Barcode.WPF">
        <barcode:CameraPreview x:Name="cameraPreview"
                       ImageCaptured="cameraPreview_ImageCaptured"
                       VerticalAlignment="Top" />
    </StackPanel>
Now we’ll need to go to the code-behind to add the logic for scanning barcodes from the frames generated by the CameraPreview component. Open MainWindow.xaml.cs and replace the MainWindow constructor with this:
private BarcodeRecognizer recognizer = new BarcodeRecognizer(new BarcodeScannerConfiguration
{
    // Customize the barcode scanner here
});
public MainWindow()
{
    InitializeComponent();
    Loaded += MainWindow_Loaded;
}
Below that, add the definition of MainWindow_Loaded.
private void MainWindow_Loaded(object sender, RoutedEventArgs e)
{
    Loaded -= MainWindow_Loaded;
    var devices = MediaFoundation.GetVideoCaptureDevices();

    if (devices.Length > 0)
    {
      cameraPreview.CameraSymbolicLink = devices[0].SymbolicLink;
      cameraPreview.Start();
    }
}
This sets up the first detected device for capturing and previewing with our SDK.
To scan barcodes from the camera output, we then need to add the following method:
private async void cameraPreview_ImageCaptured(IPlatformImage bitmap)
{
    using var token = cameraPreview.PauseCapturing();

    var result = await recognizer.RecognizeAsync(bitmap);

    if (result.Barcodes.Length == 0)
    {
        return;
    }

    var barcodeText = string.Join(", ", result.Barcodes.Select(b => $"{b.Format} {b.Text}"));
    MessageBox.Show(barcodeText, "Barcodes detected");
}
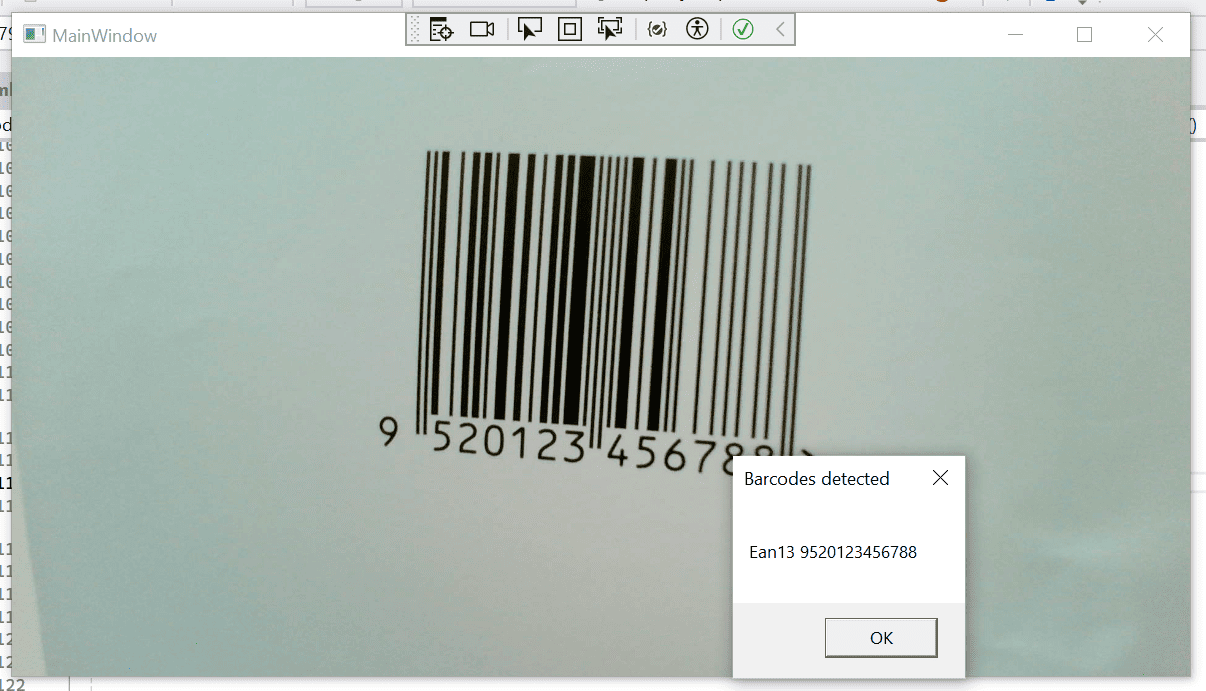
Once you launch the application, if you point your camera at a barcode, a message box will appear with the value.
Run the app to try it yourself!

Optional: Add barcode scanning from an image
If you need to read barcodes from images instead of a live camera feed, the Scanbot SDK has got you covered. All we need to do is add a button to MainWindow.xaml inside of the StackPanel, just above our CameraPreview component.
<StackPanel xmlns:barcode="clr-namespace:ScanbotSDK.Common.UI.WPF;assembly=ScanbotSDK.Barcode.WPF">
        <Button x:Name="scanButton" Click="scanButton_Click" Content="Scan from File" />
        <barcode:CameraPreview x:Name="cameraPreview"
                       VerticalAlignment="Top" />
</StackPanel>
Then go back to MainWindow.xaml.cs and add the following:
private async void scanButton_Click(object sender, EventArgs e)
{
    var dialog = new OpenFileDialog
    {
        Title = "Select an image file",
        Filter = "Image Files|*.bmp;*.jpg;*.jpeg;*.png;*.gif"
    };

    dialog.ShowDialog(this);

    if (string.IsNullOrWhiteSpace(dialog.FileName))
    {
        return;
    }

    var recognizer = new BarcodeRecognizer(new BarcodeScannerConfiguration
    {
        Live = false,
        // Uncomment to set predefined types
        // AcceptedBarcodeFormats = BarcodeFormats.Twod
        // Uncomment to set explicit types
        // AcceptedBarcodeFormats = [ BarcodeFormat.QrCode, BarcodeFormat.MicroQrCode, BarcodeFormat.Aztec ]
    });

    var image = new BitmapImage(new Uri(dialog.FileName));
    var barcodeResult = await recognizer.RecognizeAsync(image);
    var barcodeText = string.Join(", ", barcodeResult.Barcodes.Select(b => $"{b.Format} {b.Text}"));

    MessageBox.Show(this, barcodeText, "Barcodes detected", MessageBoxButton.OK);
}
Conclusion
🎉 Congratulations! You can now use your WPF app to read barcodes from a camera stream and still images.
If this tutorial has piqued your interest in integrating barcode scanning functionalities into your Windows apps, make sure to take a look at the SDK’s other neat features in our documentation.
Should you have questions about this tutorial or run into any issues, we’re happy to help! Just shoot us an email via tutorial-support@scanbot.io.
